
If you want to test an electrical circuit, one of the most useful skills is learning how to measure current safely. Many beginners can measure voltage, but current feels more confusing because the meter must be used in a different way. The good news is that the process is simple once you understand the basics.
This guide will show you how to measure amps with multimeter in a clear, step-by-step way. You will learn what amps mean, how to set the meter, where to place the probes, and how to avoid common mistakes that can damage your multimeter or your circuit.
Whether you are checking a small battery-powered device or a household circuit, the main idea is the same: current must flow through the meter, not across it. That one detail matters a lot, and it is the part many beginners miss.
What amps really measure in a circuit
Amps, or amperes, measure electrical current. Current is the flow of electric charge through a wire or component. If voltage is the pressure, current is the amount of flow. A higher amp reading means more current is moving through the circuit.
This matters because many electrical problems are caused by too much current, too little current, or a device drawing more current than expected. If you know how to measure amps with multimeter, you can check if a motor is overloaded, if a battery-powered device is draining too fast, or if a circuit is working normally.
Current is measured in series, not in parallel. That is the biggest rule to remember. If you connect the meter the wrong way, you may blow the meter fuse or create a short circuit.
Why current measurement is different from voltage measurement
When you measure voltage, the meter reads the electrical difference between two points. The circuit stays connected. When you measure current, the meter becomes part of the circuit path. The current must pass through the meter for the reading to appear.
This is why current measurement needs more care. The setup is different, and the risk is higher if you choose the wrong meter setting or jack.
What you need before you start
Before you measure current, make sure you have the right tools and a safe setup. You do not need expensive equipment, but you do need a multimeter with current measurement function.
- A digital multimeter with amp measurement
- Test leads in good condition
- The circuit or device you want to test
- Access to the power source
- If possible, the device manual or expected current rating
It also helps to know whether the current is AC or DC. Batteries use DC. Wall power is usually AC. Many multimeters measure both, but the setting must match the type of current.
For safety guidance on electrical work and current limits, a helpful reference is the OSHA electrical safety page.
Check your multimeter jacks first
Most multimeters have a common black jack marked COM. The red lead can go into different jacks depending on what you are measuring. One jack is often for volts, ohms, and continuity. Another jack is for current, sometimes marked mA, µA, or 10A.
This is one of the most important beginner details. If you leave the red probe in the voltage jack and try to measure current, the meter will not work correctly. In some cases, you may get no reading at all. In worse cases, you can damage the meter.
How to measure amps with multimeter step by step
The process is easy once you break it into small steps. Take your time and do not rush. The basic goal is to place the meter in series so the current flows through it.
1. Turn off the power
Always start with the power off if you are working on a circuit you can disconnect. This makes the setup safer and easier to manage. If you are testing a battery-powered device, remove the battery or open the circuit first.
Never try to connect a multimeter into a live circuit while changing the lead positions. That is a common mistake and can create a short.
2. Move the red lead to the correct current jack
Plug the black lead into COM. Then place the red lead into the current jack. If you expect the current to be small, use the mA or µA jack if your meter has one. If you are not sure, start with the highest current jack, often marked 10A.
This is a practical habit: start high, then move lower if needed. It protects the meter fuse when you do not yet know the current level.
3. Select the right mode
Turn the dial to current measurement. Choose DC A for batteries and electronics. Choose AC A for wall-powered AC circuits if your multimeter supports it.
If your meter is not auto-ranging, choose a range higher than the current you expect. For example, if you think the device draws about 0.2 amps, start at 10A or 2A depending on your meter. You can move to a lower range later for a more precise reading.
4. Open the circuit
You must create a break in the circuit so the meter can be inserted in line. Think of it like a bridge. The current should leave the power source, pass through the meter, then continue to the load.
For example, if you are testing a small DC device powered by a battery, disconnect one wire from the battery terminal. That gap is where the meter will go.
5. Connect the meter in series
Attach one probe to the side of the circuit coming from the power source and the other probe to the side going to the load. The current now flows through the meter.
If you connect the meter the wrong way, many digital multimeters will still show a reading with a minus sign. That usually means the probes are reversed, not that the circuit is broken. Reverse the probes if you want a positive reading.
6. Read the display
Once the meter is connected properly, turn the power back on. Watch the display and wait a second or two for the reading to settle. Note the number and the unit. It may show amps, milliamps, or microamps.
Example: 0.24 A means 240 milliamps. 35 mA means 0.035 amps. Always check the unit carefully. Beginners often think a small current is larger than it really is because they miss the milliamp symbol.
7. Turn off power and disconnect safely
After you finish, turn off the power before removing the meter. Then return the red lead to the voltage jack if you want to use the meter for other tests. This small habit prevents mistakes later.
How to measure amps on different types of circuits
Not every circuit is the same. A battery toy, a car accessory, and a wall-powered appliance all need slightly different handling. The basic idea stays the same, but the setup changes.
Credit: kaiweets.com
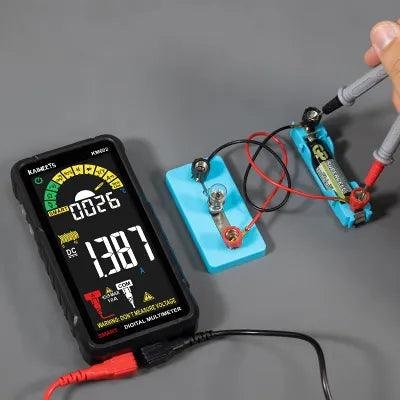
Measuring DC current
DC current is the easiest and safest place to start. You will usually work with batteries, adapters, LED strips, Arduino boards, motors, or small electronics. Open one wire, insert the meter in series, and read the current.
One useful tip: if the device has a startup surge, the current may be higher for a short time when it turns on. A motor, pump, or electronic board may draw more current at startup than during normal running. If you only check the steady state, you may miss that surge.
Measuring AC current
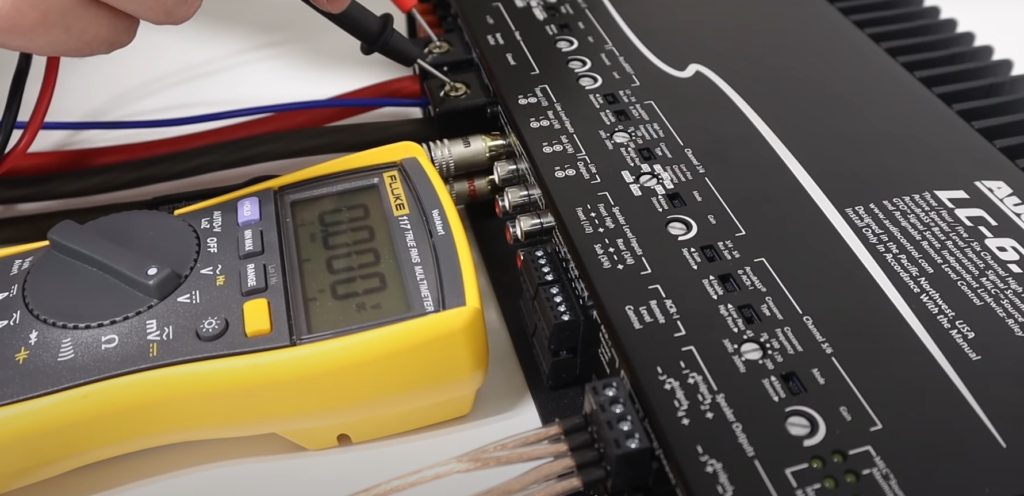
AC current measurement is more advanced because it may involve mains power. Only do this if you understand the circuit and your meter is rated for it. The meter must be designed for AC current, and the probes should be in good condition.
In many cases, a clamp meter is safer for AC current because it measures around the wire without opening the circuit. But if you use a standard multimeter, the series connection still applies. Be careful and stay within the meter’s rating.
A simple comparison of current ranges
| Current range | What it usually means | Typical examples |
|---|---|---|
| µA | Very tiny current | Sensors, low-power electronics |
| mA | Small current | LED circuits, small boards |
| A | Larger current | Motors, chargers, higher-load devices |
Common mistakes that can damage your meter
Many people think current measurement is hard. In reality, most problems come from just a few mistakes. If you avoid these, the process becomes much safer and easier.
Credit: electrouniversity.com
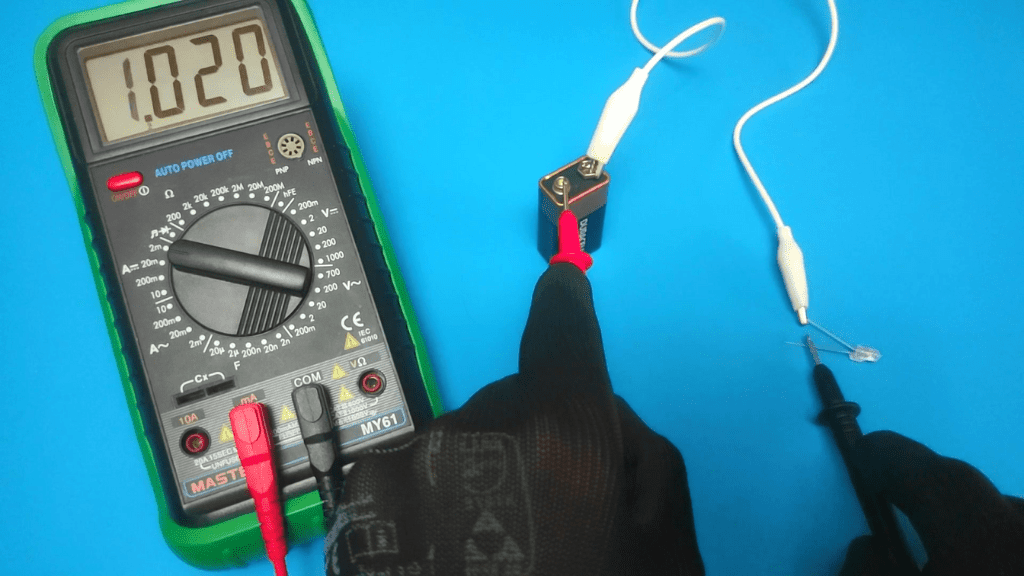
Using the voltage jack by accident
This is the most common mistake. If the red probe stays in the voltage jack, the meter is not ready to measure amps. Move it to the current jack before testing.
Measuring current in parallel
Never place the probes across a battery or power source the way you would for voltage. That creates a short circuit because the meter has very low resistance in current mode. The result can be a blown fuse, damaged meter, or damaged circuit.
This is a non-obvious point many beginners miss: in current mode, the multimeter is almost like a wire. It is built to let current pass through it, not block it.
Forgetting that the meter has a fuse
Most current ranges are protected by an internal fuse. If you push too much current through the wrong jack, the fuse may blow. The meter may still work for voltage tests, so the damage is not always obvious right away.
If current readings stop working after a mistake, check the fuse before assuming the meter is broken.
Choosing a range that is too low
If your meter is manual range and you pick a low range, the display may show overload or an error. Start high if you are unsure. Then step down for a better reading.
Testing a live circuit without preparation
Do not move leads around while power is on. Plan the connection first, then apply power only after the meter is safely in place.
How to get a more accurate reading
Accuracy is not only about the meter. It also depends on how you use it. A few simple habits can make your reading much more useful.
- Use the lowest safe current range for better resolution.
- Keep the probe tips and wire connections tight.
- Wait for the reading to settle before writing it down.
- Measure twice if the value looks unusual.
- Check whether the current changes during startup and normal running.
Another detail beginners often miss is meter burden. Every multimeter adds a small resistance in the current path. On sensitive circuits, this can slightly lower the current you are trying to measure. For most simple tests it is fine, but on low-voltage or low-current circuits, the meter itself can affect the result.
When a clamp meter may be better
If you need to measure higher AC current often, a clamp meter is often easier and safer. It clamps around a wire, so you do not have to open the circuit. For house wiring, motors, and larger loads, that can save time and reduce risk.
Still, for many small electronics jobs, a regular multimeter is enough and more precise at low currents.
Practical examples you can follow
Examples make the process easier to remember. Here are a few simple cases where current measurement is useful.
Checking a battery-powered fan
Suppose a small DC fan is not spinning properly. You want to know whether it is drawing too much current. Disconnect one battery wire, place the meter in series, and power the fan. If the current is much higher than expected, the motor may be stuck or worn out.
Testing an LED strip
An LED strip should draw a known amount of current based on its length. If it draws far more, there may be a wiring problem or short. If it draws far less, part of the strip may not be working.
Measuring a phone charger output
A charger may supply different current depending on the device connected to it. If you test a charger, make sure you understand the output type and use the correct setup. A wrong connection can lead to a misleading reading or a damaged meter.
These examples show why knowing how to measure amps with multimeter is useful. It helps you find real problems instead of guessing.
Safety tips you should not ignore
Safety matters more than speed. Even though a multimeter seems small and simple, current measurement can be risky if you rush.
- Always know whether the circuit is AC or DC.
- Start with the highest current jack if the current is unknown.
- Never measure current across a power source.
- Do not exceed the meter’s current rating.
- Stop if the meter, probes, or wires feel hot.
One practical rule is this: if you are not sure the circuit is safe for direct current measurement, stop and check the meter manual first. A few extra minutes can save the meter and protect you.
Credit: electronicshacks.com
Final thoughts on measuring current the right way
Learning how to measure current is one of the most useful skills in basic electronics and electrical troubleshooting. Once you understand that the meter must go in series, the process becomes much less confusing. The steps are simple, but the setup must be correct.
If you remember only three things, keep these in mind: choose the right jack, select the correct current mode, and never place the meter across a power source like you would for voltage. That alone will help you avoid the most common mistakes.
With a little practice, current measurement becomes quick and natural. You will be able to check devices, compare readings, and spot problems with much more confidence.
Frequently asked questions
1. Can I measure amps with any multimeter?
No. You need a multimeter that has a current measurement function and the correct current jack. Some very basic meters may only measure voltage, resistance, and continuity.
2. Why does my multimeter show a negative current value?
A negative reading usually means the probes are reversed. The meter is still measuring current, but the direction of flow is opposite to the probe placement. Swap the probes if you want a positive number.
3. Can I measure current by touching the probes across a battery?
No. That is dangerous and can create a short circuit. To measure amps, you must open the circuit and connect the meter in series so the current passes through it.
4. What is the difference between mA and A on a multimeter?
mA means milliamps, which is one-thousandth of an amp. A means amps. A reading of 500 mA equals 0.5 A. Always check the unit on the display carefully.
5. What should I do if my multimeter shows no current reading?
Check that the red lead is in the correct current jack, the meter is set to the right mode, and the circuit is opened correctly. Also check the fuse inside the meter, because a blown fuse can stop current readings from working.
