
A wire stripper is one of the most useful tools in any electrical toolbox. It helps you remove the plastic coating from wires without damaging the metal inside. When you do it right, your wiring becomes cleaner, safer, and easier to connect.
Many beginners think wire stripping is simple. In one way, it is. But small mistakes can cause weak connections, broken wire strands, or even safety risks. That is why learning how to use wire stripper the right way matters more than people expect.
This guide explains how to use wire stripper safely and easily for neat electrical work. You will learn how to choose the right tool, strip wires step by step, avoid common errors, and get better results every time.
Know Your Wire Stripper Before You Start
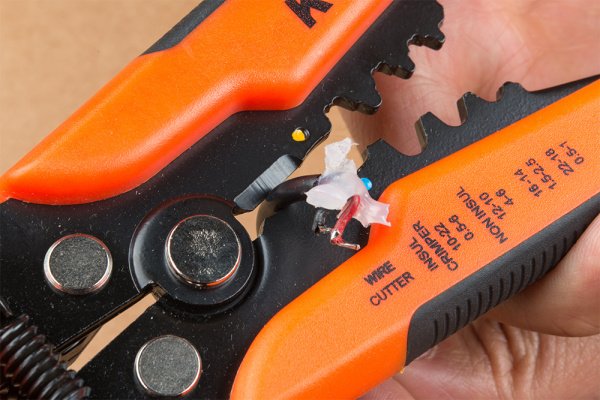
Before you learn the steps, it helps to understand the tool itself. A wire stripper is designed to cut and remove insulation from electrical wire. Most hand models have several holes, each marked for a wire size. Some tools also include cutters and crimpers.
The most important thing to know is this: a wire stripper should cut only the outer insulation, not the metal conductor inside. If you cut into the wire, the connection becomes weaker. That can lead to heat, loose contacts, or failure later.
Wire strippers come in different styles, and each one works a little differently. The three most common types are:
- Manual wire strippers – simple and low-cost, good for small home jobs
- Self-adjusting wire strippers – faster and easier for repeated stripping
- Automatic or professional strippers – used for larger jobs or frequent electrical work
If you only do basic home wiring, a manual or self-adjusting tool is usually enough. For example, if you are connecting a light fixture, replacing an outlet, or working on a small repair, a hand wire stripper works well.
One detail beginners often miss is that the right wire size setting matters more than force. If the opening is too small, you will nick the wire. If it is too large, you may not cut the insulation fully. The tool should match the wire gauge.
Gather the Right Tools and Check Safety First
Good wiring starts with preparation. Do not rush into stripping wires without checking the work area and the tool. A few small habits can prevent accidents and bad connections.
Before you begin, prepare these items:
- Wire stripper
- Electrical wire
- Wire cutters, if needed
- Electrical tape or connectors
- Voltage tester
- Safety glasses
Always make sure the power is off before touching any wire in a live electrical system. If you are not sure whether a wire is live, test it with a voltage tester. Never trust a switch alone. Power can still be present even when a device looks off.
It is also smart to work in a dry, well-lit area. Wet hands, clutter, and poor light increase the chance of mistakes. Keep your tool dry and clean, and do not use a damaged wire stripper with loose jaws or dull cutting edges.
For more general electrical safety guidance, the Occupational Safety and Health Administration offers useful information on working safely around electrical hazards.
A second detail many beginners miss is that damaged wire insulation is a warning sign. If the insulation is brittle, cracked, or melting, stripping alone will not fix the problem. In that case, the wire may need replacement instead of repair.
How to Use Wire Stripper Step by Step
Now let’s go through the process in a simple way. These steps work for most common electrical wires used in home projects and basic repairs.
1. Identify the wire gauge
Every wire has a gauge number, such as 14, 12, or 10. Smaller numbers mean thicker wire. Your wire stripper should have size marks that match the gauge. Choosing the correct slot is the first step to a clean strip.
If you are not sure of the gauge, check the wire jacket or the project instructions. Using the wrong size is one of the most common beginner mistakes.
2. Set the wire in the correct slot
Open the wire stripper and place the wire into the slot that matches its size. The hole should cut through the insulation, but not bite into the copper or aluminum strands inside.
Do not use extra pressure at this stage. The goal is a snug fit, not a tight squeeze. If the wire feels forced, try a different slot.
3. Position the strip length
Decide how much insulation you need to remove. For many electrical connections, about 1/2 inch to 3/4 inch is enough, but always follow the device instructions when available. Some connectors need a longer exposed end, while others need less.
You can estimate the length with the marking on the tool if it has one, or use the connector as a guide. Stripping too much wire leaves exposed metal that can create a short circuit. Stripping too little makes it hard to connect properly.
4. Squeeze the handles firmly
Once the wire is in place, close the handles with steady pressure. The blade should cut the insulation all the way around the wire. You do not need to crush the tool. A clean cut is better than a hard one.
If the insulation does not release, gently rotate the tool around the wire or try again with a slightly stronger squeeze. Do not twist too hard, because that can damage the conductor.
5. Pull off the insulation
After the insulation is cut, pull it off the wire. Many wire strippers will remove it in one smooth motion when you pull the tool away. If it stays in place, make another light cut and remove it carefully.
The exposed wire should look clean and even. The metal should not be deeply scored, bent, or flattened.
6. Inspect the stripped wire
Look closely at the exposed end. The conductor should be smooth, with no large nicks or broken strands. If it is a solid wire, it should stay straight. If it is stranded wire, the strands should remain together.
If you see damaged strands, cut the end off and strip it again. This is better than using a weakened wire connection.
Common Mistakes That Damage Wires
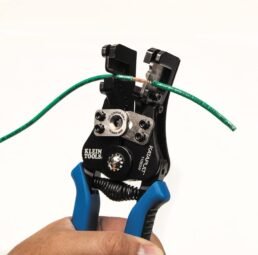
Good technique is often about avoiding simple errors. Most bad strips happen because of speed, wrong size choice, or too much force. If you know the usual mistakes, you can avoid them early.
Credit: handytooladviser.com
Using the wrong slot
One of the biggest errors is placing the wire in a slot that does not match its gauge. This can cut into the wire or fail to strip the insulation properly. Always check the markings before squeezing.
Squeezing too hard
More pressure does not mean better results. In fact, too much force can leave deep marks on the conductor. Those marks weaken the wire and may create a hot spot under load.
Twisting the wire during stripping
Some people twist the wire to help remove the insulation. That can work in a pinch, but it may damage strands, especially on stranded wire. A straight pull is safer and cleaner.
Stripping too much wire
Too much exposed conductor is a common safety problem. If bare wire sticks out beyond the connector, it can touch another terminal or metal surface. This creates a risk of short circuits or shocks.
Leaving tiny cuts in the conductor
Small nicks may not look serious, but they matter. Even a shallow cut can reduce wire strength. Over time, vibration or repeated bending can cause the wire to fail at that point.
How to Strip Different Wire Types
Not all wires behave the same. The best method depends on whether the wire is solid, stranded, thin, or insulated with a tougher coating. This is another area where beginners often learn by mistake.
Solid wire
Solid wire has one thick conductor inside. It is common in household circuits. When stripping it, use the proper slot and avoid bending the wire too much after stripping. Solid wire can snap if it is bent back and forth too often.
Stranded wire
Stranded wire has many small strands twisted together. It is flexible and used in cords and some devices. Be careful not to cut into the strands. After stripping, keep the strands together so they fit cleanly into connectors.
Thicker wire
Thicker wire needs a larger opening and sometimes a stronger stripper. If the wire is very thick, a standard hand tool may struggle. Never force the tool beyond its limit. Use a stripper rated for the correct size.
Fine wire
Small or delicate wire needs a light touch. A gentle squeeze is often enough. If the wire is very thin, test the tool on a scrap piece first. This helps you confirm the right pressure before working on the real connection.
A helpful rule is this: the softer the wire, the lighter your grip should be. That small adjustment can protect the conductor and improve the final connection.
How to Get a Cleaner Strip Every Time
Once you know the basic steps, the next goal is consistency. Clean strips are easier to connect, easier to inspect, and more reliable over time. Small habits can make a big difference.
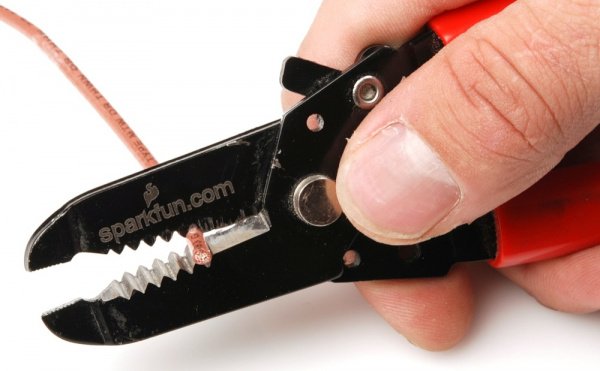
First, keep the wire stripper sharp and clean. Resin, dirt, and metal shavings can affect the cut. Wipe the tool after use and store it in a dry place.
Second, use a firm but controlled motion. Jerky movement often causes rough cuts. A calm hand gives a cleaner result.
Third, practice on scrap wire before working on the final piece. This is especially useful if you are new or if you are using a new tool. A few practice strips can save a finished job from damage.
Fourth, match the strip length to the connector. For example, screw terminals usually need enough bare wire to wrap securely, while push-in connectors may need a shorter, exact length. If the strip length is wrong, even a perfect cut can still cause a poor connection.
One useful trick is to strip a little less than you think you need, then check the fit. You can always strip a bit more if required. It is much harder to fix wire that has already been cut too short.
Credit: learn.sparkfun.com
Safety Habits That Protect You and the Wiring
Learning how to use wire stripper safely is not just about the tool. It is also about your habits before, during, and after the job. Safe wiring is built on simple, repeated actions.
- Always turn off power before touching conductors
- Use a voltage tester before working
- Wear safety glasses to protect your eyes from small wire pieces
- Keep fingers away from cutting edges
- Do not use the tool on live wires unless you are trained and the task allows it
- Replace damaged tools instead of forcing them to work
Another smart habit is to keep the stripped wire away from other conductors until it is connected. Bare ends can touch nearby metal and create a short circuit very quickly.
If you are working on a larger project, label wires as you go. This reduces confusion later, especially in switch boxes, outlets, or control panels where several wires look alike.
When a Wire Stripper Is Not the Right Tool
Wire strippers are excellent for standard stripping jobs, but they are not perfect for everything. Knowing their limits can prevent damage and frustration.
If the insulation is extremely thick, melted, or hardened by age, a regular wire stripper may not cut it cleanly. In that case, a different tool or method may be needed. If the wire is part of a sealed assembly or appliance cord, do not cut blindly. Some parts are not meant to be repaired in the usual way.
Also avoid using wire strippers as pliers, cutters for hard material, or pry tools. That can bend the jaws and make future stripping less accurate. Tools work best when used for their intended purpose.
If you often work on electronics, vehicle wiring, or fine signal cables, you may need a precision stripper designed for smaller wires. A general-purpose tool is fine for many home jobs, but specialized work often needs a more exact tool.
Choosing the Best Wire Stripper for Easy Work
If you do electrical work more than once in a while, picking the right tool matters. A good wire stripper should feel comfortable, cut cleanly, and match the wire sizes you use most often.
Here is a simple comparison of what to look for:
| Feature | Why it matters | Best for |
|---|---|---|
| Size markings | Helps you choose the correct wire gauge | Beginners and home users |
| Sharp cutting edges | Gives a clean strip with less effort | Any regular wiring task |
| Comfort grip | Reduces hand strain during longer work | Frequent users |
| Self-adjusting jaws | Speeds up repeated work | Fast repairs and larger jobs |
| Built-in cutter | Lets you trim wire ends without another tool | Simple wiring kits |
A strong choice is usually a tool that matches the kinds of wires you use most often. Do not buy based only on price. A cheap tool that cuts badly will slow you down and may damage your work.
Final Checks Before You Connect the Wire
Before you make the final connection, inspect the stripped end one more time. This final check is simple, but it can prevent many problems later.
Ask yourself these questions:
- Is the wire the correct length for the connector?
- Are the strands clean and undamaged?
- Did I remove all insulation from the contact area?
- Is the wire still straight and solid?
- Is the work area safe before power returns?
If the answer is no to any of these, fix the wire before moving forward. It takes only a few extra seconds, and it can save you from loose connections or electrical faults later.
Also remember that a good wire strip is not just about appearance. It should support a strong electrical connection. That is the real goal when learning how to use wire stripper correctly.
Credit: learn.sparkfun.com
Simple Habits That Make You Better Fast
The easiest way to improve is to slow down and repeat the right steps. Most people get better after only a few practice strips. The tool becomes easier to control, and your eye gets better at judging strip length.
Here are a few habits that help:
- Practice on scrap wire first
- Use the correct gauge slot every time
- Keep your cuts light and controlled
- Inspect the conductor after each strip
- Store the tool safely after use
Over time, you will notice that the work becomes faster without becoming rough. That is the best sign that your technique is improving.
FAQs
1. What is the easiest way to learn how to use wire stripper?
The easiest way is to practice on scrap wire first. Choose the correct gauge slot, squeeze gently, and check the exposed conductor. A few practice tries will help you build confidence quickly.
2. Can I use a wire stripper on any type of wire?
No, not always. Wire strippers work well for many standard electrical wires, but very thick, very thin, hardened, or special-purpose wires may need a different tool. Always match the stripper to the wire size.
3. How much insulation should I remove?
It depends on the connector or device. Many common jobs need about 1/2 inch to 3/4 inch, but you should follow the instructions for the exact connection. Strip only as much as you need.
4. What happens if I nick the wire while stripping?
If the conductor is cut or deeply marked, it can become weaker and fail later. For important electrical work, it is better to cut the damaged end off and strip a fresh section.
5. Is a self-adjusting wire stripper better than a manual one?
It depends on your needs. A self-adjusting stripper is faster and easier for repeated work, while a manual stripper is simple, reliable, and often enough for home repairs. Both can work well when used correctly.
