
A dead battery can stop your day fast. Your car will not start. Your remote will not work. Your flashlight goes dark. The good news is that you do not always need a new battery right away. Often, you only need a quick check with a multimeter to see if the battery still has usable power.
If you want to test battery multimeter readings the right way, the process is simple. You only need a multimeter, a few minutes, and a little care. Once you learn the basic steps, you can check many battery types at home and avoid guessing.
In this guide, you will learn how to check battery voltage, what the numbers mean, and how to spot weak batteries before they cause trouble. You will also see common mistakes people make, so your reading is more accurate and useful.
What a Multimeter Can Tell You About a Battery
A multimeter measures voltage. In simple words, it tells you how much electrical pressure the battery has left. That is the first and easiest sign of battery health. For most normal batteries, voltage gives a very good quick answer.
But voltage is not the whole story. A battery can show a fair voltage with no load and still fail when you try to use it. This is one reason beginners sometimes think a battery is fine when it is not. A better test often means checking the battery more than one way.
For example, a car battery may show around 12.6 volts when resting. That sounds good. But if the voltage drops sharply when you try to start the engine, the battery may be weak. The same idea applies to many other batteries. Resting voltage is useful, but real performance matters too.
What You Need Before You Start
You do not need much equipment. A basic digital multimeter is enough for most battery checks. Analog meters can work too, but digital meters are easier to read for beginners.
- Digital multimeter
- The battery you want to test
- Clean cloth to wipe battery terminals if needed
- Safety gloves if you are testing a car battery or a larger battery
If the battery is in a device, remove the device cover or battery compartment safely. If it is a car battery, turn off the engine and all electrical accessories first. Safety matters, even for a simple test.
Choose the right multimeter setting
Set the meter to DC voltage. This is usually marked with a V and a straight line with a dashed line under it. Do not use AC voltage for normal batteries. Most batteries in homes and vehicles give direct current, not alternating current.
If your multimeter has range settings, choose one above the battery voltage. For example, use a 20V DC setting for a 12V battery. If you are testing a small 1.5V battery, a lower range may be better if your meter has one.
How to Test a Battery with a Multimeter
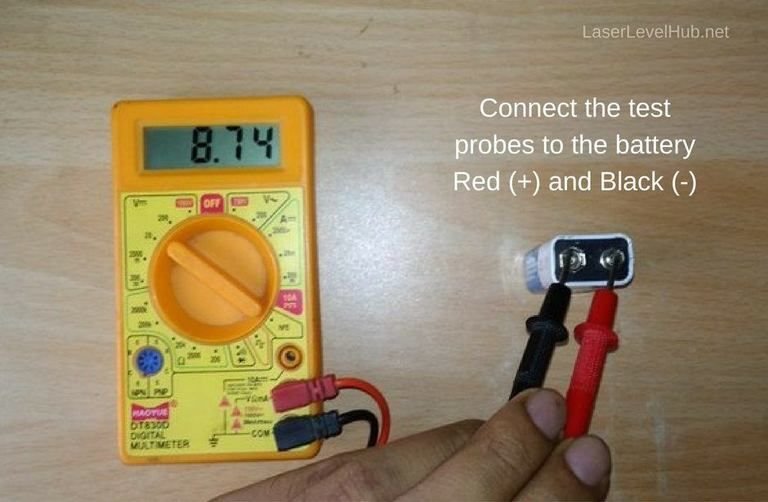
The basic test is very easy. You measure the battery’s voltage by touching the meter probes to the battery terminals. Red goes to positive. Black goes to negative. The number on the screen tells you the battery’s current voltage.
- Turn the multimeter on and set it to DC voltage.
- Insert the probes into the correct ports. Usually, the black probe goes into COM and the red probe goes into the port marked V.
- Touch the black probe to the negative battery terminal.
- Touch the red probe to the positive battery terminal.
- Read the voltage on the screen.
- Compare the reading with the normal voltage for that battery type.
If the reading shows a negative sign, do not panic. It usually means the probes are reversed. Swap them and check again.
How to read the number correctly
The number matters, but only if you compare it to the battery type. A 1.5V AA battery is very different from a 12V car battery. A lithium battery is different from an alkaline battery. A good reading for one type may be poor for another.
For the best result, test the battery when it is at rest. In other words, do not test it immediately after use or charging. Let it sit for a while first if possible. This gives a more honest reading.
Normal Voltage Ranges for Common Batteries
Here is a simple guide to help you understand what the reading means. These are general values, so always check the battery label or device manual when possible.
| Battery Type | Good Resting Voltage | Possible Weak Battery | Likely Bad Battery |
|---|---|---|---|
| AA / AAA alkaline | 1.5V to 1.6V | 1.2V to 1.4V | Below 1.2V |
| 9V alkaline | 9.4V to 9.6V | 8.5V to 9.3V | Below 8.5V |
| Car battery | 12.6V to 12.8V | 12.2V to 12.5V | Below 12.2V |
| Lithium-ion cell | Depends on model | Near low-voltage limit | Below safe limit |
| Rechargeable AA NiMH | 1.2V to 1.4V | Near 1.1V | Below 1.0V |
One important detail many beginners miss: not every “full” battery shows the same voltage. Some rechargeable batteries are designed to have a lower normal voltage than alkaline batteries. So do not compare different battery chemistries as if they were the same.
Credit: laserlevelhub.net
How to Test a Car Battery More Accurately
A car battery deserves a little more attention because it can look fine at rest and still fail under pressure. If you only check resting voltage, you may miss the real problem. This is one of the most common mistakes people make when they test battery multimeter readings on vehicles.
Start with the engine off. Measure the battery at the terminals. A healthy battery often reads around 12.6 volts or a little higher. If it is much lower, the battery may be weak or discharged.
Then, if you can do it safely, test the battery while someone starts the engine. Watch the meter during cranking. A strong battery usually should not drop too far. If voltage falls a lot during startup, the battery may not have enough power left, even if the resting reading looked okay.
Two numbers that matter for car batteries
Resting voltage shows the battery’s standing charge. Cranking voltage shows how well it handles a heavy load. Both matter. A battery that passes one test but fails the other is often near the end of its life.
Also remember that a bad alternator or dirty terminals can cause charging problems that look like battery failure. So a weak reading does not always mean the battery alone is the problem. Sometimes the charging system is part of the issue.
How to Check Small Household Batteries
Small batteries are easy to test, but you still need to handle them carefully. Hold the probes firmly on the correct ends. For AA, AAA, C, and D batteries, the flat end is usually negative and the raised nub is positive.
A fresh alkaline AA battery often shows about 1.5 to 1.6 volts. If it is down near 1.2 volts, it may still power a low-drain item for a short time, but it is getting weak. A flashlight may still work, while a high-drain device may fail quickly.
This is another useful insight: low-drain and high-drain devices do not treat the same battery the same way. A battery that looks “okay” on a meter may still be poor for a toy, camera, or gaming controller because those devices need more current.
Testing 9V batteries
For a 9V battery, place the red probe on the smaller positive terminal and the black probe on the larger negative terminal. These batteries often fool people because they can show a decent voltage but still have very little usable power left. If the voltage is below about 8.5V, it is usually time to replace it.
Common Mistakes When You Test a Battery with a Multimeter
Even though the process is simple, a few small errors can give wrong results. These mistakes are easy to avoid once you know them.
- Using the wrong mode — AC voltage will not give a correct battery reading.
- Mixing up polarity — red should go to positive, black to negative.
- Testing right after charging — the reading may be higher than normal for a short time.
- Testing dirty terminals — corrosion can block good contact and give a false reading.
- Ignoring battery type — different batteries have different normal voltages.
Here is a non-obvious point many people overlook: poor probe contact can look like a dead battery. If the probe tips are not touching clean metal, your meter may show a strange or unstable result. Wipe the terminals first if they look dusty or corroded.
Why temperature matters
Cold batteries often read lower and perform worse. Heat can also change readings and damage battery life over time. If a battery seems weak in winter, it may recover a little when warmed to room temperature. This does not mean the battery is healthy, but it can affect the test.
How to Tell If the Battery Is Weak, Dead, or Just Discharged
People often use the words “dead” and “weak” the same way, but they do not always mean the same thing.
Discharged means the battery has low power but may still be rechargeable or usable after charging. Weak means it has some power left but not enough for normal use. Dead usually means it cannot hold a useful charge anymore.
A single voltage reading gives you a strong clue, but not always the full answer. For example, a rechargeable battery with low voltage may just need charging. A non-rechargeable battery with low voltage is usually ready to replace.
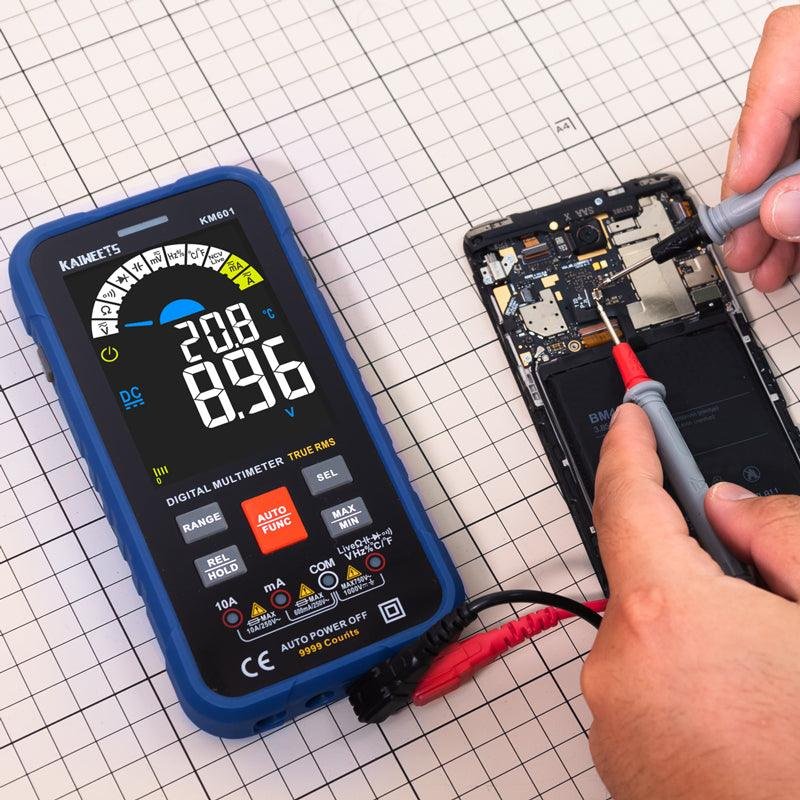
If the battery voltage looks fine but the device still fails, try another test. Check it under load, inspect the contacts, or test another battery of the same type for comparison. This helps you avoid replacing batteries that are not actually the problem.
Credit: kaiweets.com
How to Improve Test Accuracy
Small details can make your result better and more reliable. These habits take only a few seconds, but they can save you from bad decisions.
Test in a calm state
Let the battery rest before testing. If it was just used or just charged, wait a little. A resting battery gives a more honest voltage reading.
Clean the terminals first
Use a dry cloth to remove dust or light corrosion. For car batteries, a proper terminal cleaning can make a big difference. Good metal contact is important for accurate numbers.
Use the right range on the multimeter
If your multimeter has multiple ranges, choose one that fits the battery. A bad range may still show a reading, but it may not be as clear or as stable as it should be.
Compare with another battery
If you have a known-good battery of the same type, compare the readings. This helps especially with small household batteries, where a tiny difference can still matter in real use.
When the Voltage Looks Fine but the Battery Still Fails
This is where many people get stuck. The meter says the battery is okay, but the device will not work. That can happen for several reasons.
The battery may have high internal resistance, which means it cannot deliver enough current even though voltage looks normal. It may also be old and unable to handle a heavy load. Or the device may have a different problem, such as bad contacts, wiring issues, or a failed switch.
For lead-acid batteries, a load test is often more useful than voltage alone. For rechargeable cells, capacity testing can matter more than resting voltage. The meter is still a great first step, but not always the final answer.
If you want a strong general reference for battery care and safety, the Battery University site offers detailed technical information in simple terms.
Safety Tips You Should Not Ignore
Most battery tests are safe, but some batteries can be dangerous if handled badly. Never short the probes across a battery for too long. That can create heat and damage the battery or the meter.
Be extra careful with large batteries, swollen lithium batteries, and leaking batteries. If you see swelling, leakage, smell, or heat, stop testing and follow proper disposal rules. Do not keep probing a battery that looks damaged.
For car batteries, avoid loose metal jewelry, and do not let the probe tips touch each other while they are on the battery. One short mistake can cause a spark.
A Simple Way to Remember the Process
If you want an easy memory guide, keep it this way: set, touch, read, compare.
- Set the meter to DC voltage.
- Touch the probes to the correct terminals.
- Read the number on the screen.
- Compare it to the normal range for that battery.
That four-step pattern works for most batteries. The details change a little depending on the type, but the main process stays the same.
Credit: jdpower.com
Conclusion
Learning how to test battery multimeter readings is one of the easiest ways to avoid guesswork. In a few minutes, you can tell if a battery is healthy, weak, discharged, or likely dead. You can also spot problems before they waste your time or money.
The key is to use the right setting, check the correct terminals, and compare the result to the right voltage range. If you want better accuracy, test the battery at rest, clean the contacts, and remember that voltage alone does not always show full battery health.
Once you know these simple steps, battery testing becomes a quick habit. It helps with car batteries, household batteries, and rechargeable cells. And it can save you from replacing something that still has life left.
FAQs
1. Can I test any battery with a multimeter?
You can test most common batteries with a multimeter, including AA, AAA, 9V, car batteries, and many rechargeable batteries. Just make sure you use the correct voltage mode and compare the reading with the right battery type.
2. What setting should I use on my multimeter?
Use DC voltage for normal batteries. This is the most important setting. If you use AC voltage by mistake, the reading will not help you judge battery health correctly.
3. Why does my battery show good voltage but still not work?
The battery may have weak current delivery even if the voltage looks fine. Dirty terminals, a bad device, or high internal resistance can also cause this problem. In many cases, you need a load test or a second check.
4. What is a good voltage for a AA battery?
A fresh alkaline AA battery often shows about 1.5 to 1.6 volts. If it drops near 1.2 volts, it is usually getting weak. Rechargeable AA batteries have different normal values, so do not compare them to alkaline cells.
5. Is it safe to test a car battery with a multimeter?
Yes, it is usually safe if you are careful. Turn off the engine first, avoid shorting the terminals, and keep the probe tips steady. If the battery looks damaged, swollen, or leaking, stop and handle it with care.
