
Ground problems can hide in plain sight. A light may flicker, a tool may hum, or a breaker may trip for no clear reason. A multimeter can help, but ground testing is not one single test. A live outlet voltage check and a de-energized continuity check are different procedures with different risks.
To test ground with a multimeter safely, first decide what you are checking. Use voltage mode only when you are qualified to work around energized parts and your meter and leads are rated for the circuit. Use continuity or resistance mode only after the circuit is fully de-energized and verified dead.
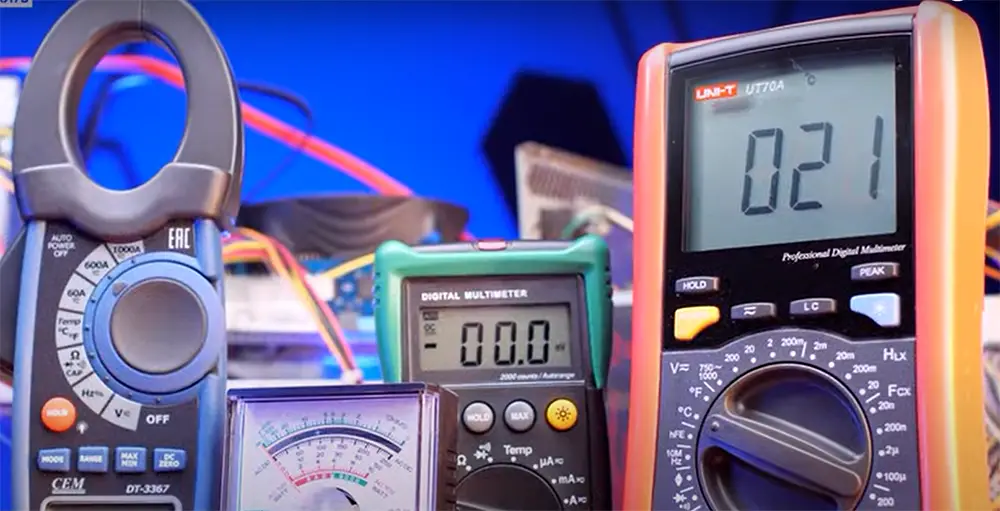
This guide separates those methods so you do not mix live-voltage testing with continuity testing. You will learn how to compare outlet readings, how to check ground continuity, what readings mean, and when to stop and call a qualified electrician. If you need a meter suited to professional electrical troubleshooting, see our guide to the best multimeters for electricians, including CAT ratings, True RMS, LoZ, and clamp-meter options.
If your ground check is part of a wider electrical diagnosis, you may also want to test a motor with a multimeter, test a car battery with a multimeter, or check a regular battery with a multimeter.
What a good ground actually does
Ground is a safety path. It gives stray electricity a safe route back when something goes wrong. In homes, cars, and machines, ground helps reduce shock risk and protects equipment. A good ground should have a low-resistance path and should be connected where it belongs.
Many beginners think ground means “zero volts” in every situation. That is only partly true. In real life, a ground point can still show small voltage differences because of load, wiring length, or poor connections. What matters is not just one reading, but whether the ground is solid and consistent.
Another point people miss is that a ground can look fine at one end and still fail under load. That means a quick visual check is not enough. A multimeter test helps reveal hidden problems that you cannot see by looking at wires alone.
What you need before you start
Before you test, gather a few basic items:
- A digital multimeter
- Test leads in good condition
- Access to a known good ground point
- Safety gloves if needed
- Optional: outlet tester or circuit map for reference
If you are testing household wiring, make sure you understand the circuit first. If you are not sure which wires are live, stop and get help from a qualified electrician. OSHA notes that people working near exposed energized parts need training to identify live parts, determine nominal voltage, and understand clearance distances. For safety background, review the OSHA electrical safety page and OSHA 1910.332 training requirements.
If your ground check is part of a wider electrical diagnosis, you may also want to test a motor with a multimeter, test a car battery with a multimeter, or check a regular battery with a multimeter.
Set up the multimeter the right way
Good results start with the right settings. A multimeter can test voltage, resistance, and continuity, but those modes are not interchangeable. For ground testing, choose the mode based on whether the circuit is energized or de-energized.
Use continuity or resistance mode only with power off and verified dead. Use voltage mode only for a live comparison, and only with a meter and test leads rated for that electrical environment. Fluke safety guidance also recommends choosing a test tool rated for the highest category and voltage it could be used on.
Choose the correct mode
Continuity mode is best when you want to know if two points are connected with low resistance. The meter usually beeps if the path is good. Follow the meter maker instructions, such as Fluke's continuity testing guide, and do this only on a de-energized circuit.
Resistance mode is useful when you want a numeric reading. A good ground path should usually show very low resistance, often close to zero on short runs.
AC voltage mode is useful for outlet testing. You compare ground to hot, neutral, or another reference point. For live outlet checks, use the correct meter category rating, keep fingers behind the probe guards, and stop if the outlet, panel, or wiring is damaged.
Check your meter first
Before testing the ground, test your meter on a known good source. This simple step saves time and avoids false blame. A weak battery, damaged lead, or wrong setting can create confusing results.
Touch the meter probes together in continuity mode. You should hear a beep or see a very low reading. If not, check the battery, leads, and dial position before you go further. For energized testing, inspect the meter category marking, lead rating, probe guards, case, display, and fuses before use; Fluke's electrical measurement safety guidance explains why category rating and safe work practices matter.
If your ground check is part of a wider electrical diagnosis, you may also want to test a motor with a multimeter, test a car battery with a multimeter, or check a regular battery with a multimeter.
How to test ground with multimeter at an outlet
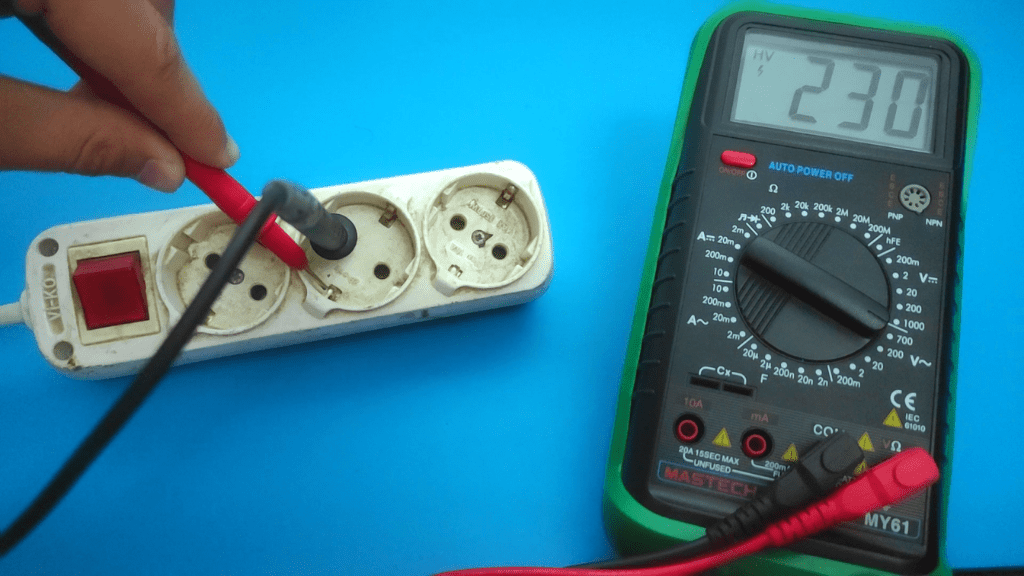
This is one of the most common ground checks, but it is a live-voltage test. The goal is to compare the ground slot with the hot and neutral slots in the receptacle. It can suggest whether the outlet ground is connected, but it does not certify the whole grounding system.
Use this method only if you are competent around energized receptacles and have a properly rated meter and leads. Use steady hands, keep fingers behind the probe guards, and do not let the metal tips touch each other inside the outlet. Stop if the outlet is cracked, loose, wet, burnt, sparking, or unfamiliar.
Step 1: Identify the outlet slots
In a standard outlet, the shorter slot is hot, the longer slot is neutral, and the round hole is ground. In older outlets, wiring may be different, so do not assume the outlet is correct just because it looks normal.
Step 2: Test hot to ground
Set the multimeter to AC voltage. Place one probe in the hot slot and the other in the ground slot. Compare the result with the expected local line voltage for that receptacle, such as about 120V on many North American branch circuits or about 230V in many other regions. If you do not know the local system voltage, stop and confirm it before testing.
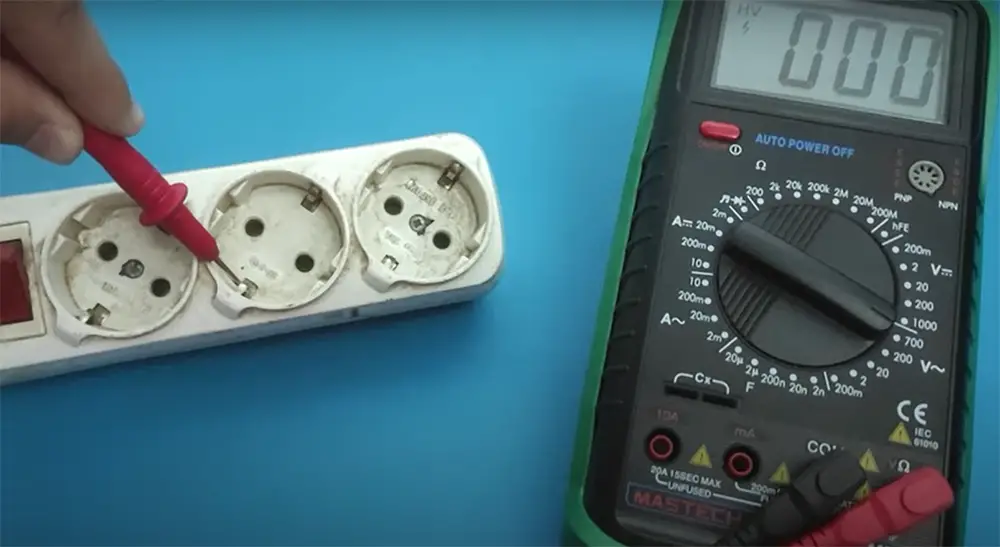
If the reading is much lower than expected, the outlet may have a bad ground, a loose connection, or another wiring issue. If you get zero or a strange value, stop and inspect further.
Step 3: Test neutral to ground
Now place one probe in the neutral slot and the other in the ground slot. The reading should be very low, often near 0V. Small differences can happen, especially if a load is running on the circuit.
A higher reading here can mean a bad neutral connection, a ground fault, or voltage drop caused by load. This is one of the most useful checks because it often reveals hidden wiring problems.
Step 4: Compare the results
A healthy outlet usually shows:
- Hot to ground: normal line voltage
- Neutral to ground: near zero volts
If hot to ground is normal but neutral to ground is high, the problem may be on the neutral side. If hot to ground is low, the ground path may be missing or weak.
Common mistake to avoid
Do not assume the round hole means a real ground is present. Some outlets are incorrectly wired, and some older systems have no true ground at all. The outlet shape alone is not proof.
If your ground check is part of a wider electrical diagnosis, you may also want to test a motor with a multimeter, test a car battery with a multimeter, or check a regular battery with a multimeter.
How to test ground continuity with a multimeter
Continuity testing is one of the cleanest ways to check a ground wire or ground path after power is off. It tells you whether a low-resistance path exists from one point to another. This is helpful for unplugged extension cords, de-energized appliances, metal enclosures, and wiring runs that have been verified dead.
Credit: electrouniversity.com
Step 1: Turn power off
Always switch off the circuit and verify it is dead before testing continuity. Continuity and resistance modes are not meant for live power. Testing a live circuit in these modes can damage the meter and create unsafe results.
Step 2: Set the meter to continuity
Most meters use a sound-wave or diode symbol for continuity. When you touch the probes together, the meter should beep. That confirms the mode is active.
Step 3: Place one probe on the ground point
Put one probe on the ground wire, ground terminal, or metal chassis point you want to test. Place the other probe on a known good ground, such as a verified ground bus or grounded metal point.
Step 4: Read the result
If the meter beeps or shows a very low resistance value, the path is likely connected. If there is no beep and the reading stays open or very high, the ground path may be broken, loose, or corroded.
Be careful, though. Continuity only tells you that a path exists. It does not always tell you that the path is strong enough under real load. A corroded wire may still beep, but still fail to protect properly.
Step 5: Wiggle test if needed
If the reading changes when you gently move the wire, plug, or terminal, that is a clue. Loose connections often behave this way. This is a simple but powerful trick that many beginners skip.
If your ground check is part of a wider electrical diagnosis, you may also want to test a motor with a multimeter, test a car battery with a multimeter, or check a regular battery with a multimeter.
How to test a ground wire directly
Sometimes you need to test the wire itself, not just the outlet or device. This is common when you suspect a broken earth wire, a loose terminal, or corrosion inside a junction point.
First, make sure power is off and verify the circuit is dead. Then disconnect the wire if needed so you are not measuring through other circuit parts. Use continuity or resistance mode and check between the ground wire and the known ground reference.
If the wire is long, do not expect a perfect zero reading. A longer wire will show a small amount of resistance. What matters is that the reading is low and stable. A sudden jump, open reading, or unstable result can signal a problem.
One useful detail many people miss is that paint, rust, and oxidized metal can block a proper ground contact. You may think the wire is fine when the real problem is the metal surface itself. Clean contact points matter a lot.
If your ground check is part of a wider electrical diagnosis, you may also want to test a motor with a multimeter, test a car battery with a multimeter, or check a regular battery with a multimeter.
How to test ground on a car or machine
Ground testing is not only for home wiring. It is also very important in cars, trucks, appliances, and industrial equipment. In these systems, a weak ground can cause lights to dim, sensors to fail, or motors to run badly.
For a vehicle, test between the battery negative terminal and the body ground, engine block, or a component ground point. With the meter on DC voltage, place one probe on battery negative and the other on the test point. Under load, the reading should be very low.
If you see a noticeable voltage drop, the ground path may be weak. This can happen because of rust, loose bolts, broken straps, or dirty contact surfaces.
Use voltage drop to find hidden faults
Voltage drop testing is one of the smartest ways to find ground issues. A path may look fine in continuity mode but fail when current flows. Voltage drop shows how much energy is lost across the ground path during use.
For example, if a car light works weakly and the ground seems suspect, check voltage between the light housing ground and battery negative while the light is on. A higher-than-expected reading means the ground path is not healthy.
If your ground check is part of a wider electrical diagnosis, you may also want to test a motor with a multimeter, test a car battery with a multimeter, or check a regular battery with a multimeter.
What the readings mean
Reading values can be confusing at first. Here is a simple way to think about them. Use the table below as a quick reference for common ground test results.
| Test type | Good result | Possible problem |
|---|---|---|
| Hot to ground voltage | Normal line voltage | Low or zero voltage may mean no ground path or wiring issue |
| Neutral to ground voltage | Near 0V | Higher voltage may mean loose neutral, load issue, or poor ground |
| Continuity test | Beep or very low resistance | No beep or high resistance means open or damaged ground path |
| Voltage drop on ground | Very low under load | Noticeable voltage drop means weak connection or corrosion |
Do not treat one number as the full story. Always compare readings in context. A ground test is more useful when you check more than one point and more than one condition.
Credit: electronicshacks.com
Two non-obvious things beginners often miss
First, a ground can pass a simple continuity test and still be bad under real use. This is why voltage drop testing matters.
Second, a reading near zero is not always perfect proof. In some circuits, other connected paths can hide the real fault. That is why comparing readings at different points is more reliable than checking only one spot.
If your ground check is part of a wider electrical diagnosis, you may also want to test a motor with a multimeter, test a car battery with a multimeter, or check a regular battery with a multimeter.
Common mistakes when testing ground
Even with a good multimeter, small mistakes can lead to wrong conclusions. These are the most common ones to avoid:
- Testing continuity on a live circuit
- Using the wrong meter mode
- Trusting a visual check without measuring
- Touching probe tips together and causing a short
- Forgetting that corrosion can block a ground connection
- Ignoring voltage drop when continuity looks fine
Another common mistake is using a poor reference point. If your “known good ground” is not actually good, the whole test becomes unreliable. Always verify your reference first.
If your ground check is part of a wider electrical diagnosis, you may also want to test a motor with a multimeter, test a car battery with a multimeter, or check a regular battery with a multimeter.
How to fix a bad ground after testing
If your multimeter shows a bad ground, the next step is to locate the weak point. Start with the obvious places: loose screws, broken wires, rust, dirt, burnt terminals, and damaged insulation.
For household wiring, the fix may involve tightening connections, replacing a damaged outlet, or repairing a ground wire. For vehicles, it may mean cleaning the battery terminal, replacing a ground strap, or sanding away corrosion at the contact point.
Do not over-tighten fragile terminals. Also, do not just twist wires together and hope for the best. A proper repair should be secure, clean, and suitable for the equipment.
When to stop and call a pro
Call a licensed electrician or qualified technician if:
- You find exposed live wires or cannot verify the circuit is de-energized
- The breaker trips during testing
- The wiring layout, panel, grounding electrode, or bonding path is unknown
- You see burn marks, melting, smoke damage, water damage, buzzing, or arcing
- Your readings do not match a known good circuit and you are not sure why
- You are not fully sure how to make the repair safely
Testing is useful, but safety comes first. If the issue is beyond basic troubleshooting, professional help is the best choice.
If your ground check is part of a wider electrical diagnosis, you may also want to test a motor with a multimeter, test a car battery with a multimeter, or check a regular battery with a multimeter.
Simple testing workflow you can follow every time
If you want a repeatable method, use this order:
- Decide first: live voltage comparison or de-energized continuity/resistance test.
- Turn power off and verify dead before any continuity or resistance test.
- Inspect the wire, terminal, or outlet visually.
- Test your multimeter on a known good point.
- Check continuity of the ground path.
- Measure voltage hot to ground and neutral to ground only if you are qualified to test that live circuit safely.
- Compare the results with a known good circuit.
- Check for loose, rusty, or damaged contact points.
This flow works well because it starts simple and moves toward deeper checks only when needed. That saves time and reduces errors.
Credit: electronicshacks.com
If your ground check is part of a wider electrical diagnosis, you may also want to test a motor with a multimeter, test a car battery with a multimeter, or check a regular battery with a multimeter.
Final thoughts
Learning How to Test Ground With Multimeter is one of the most useful skills for basic electrical troubleshooting. It helps you find weak connections, avoid guesswork, and understand whether a safety path is really there.
The main idea is simple: use the right meter mode, test with care, and compare more than one reading. A good ground should be stable, low in resistance, and behave as expected under load. When something does not match that pattern, you have a clue worth following.
Take your time, use safe habits, and do not rely on appearance alone. A few careful tests can save a lot of frustration later.
If your ground check is part of a wider electrical diagnosis, you may also want to test a motor with a multimeter, test a car battery with a multimeter, or check a regular battery with a multimeter.
FAQs
1. Can I test ground with a multimeter without turning power off?
Only for voltage testing, and only if you are qualified to work around that energized circuit with a properly rated meter and leads. For continuity and resistance tests, power must be off and verified dead. Testing continuity on a live circuit can damage the meter and is unsafe.
2. What is a good ground reading on a multimeter?
It depends on the test. In continuity mode, you want a beep or very low resistance. In voltage tests, neutral to ground should be very close to 0V, while hot to ground should show normal line voltage.
3. Why does my ground show voltage?
A small voltage on ground can happen because of load, long wiring runs, loose connections, or poor neutral wiring. A higher reading is a warning sign and should be checked further.
4. Is continuity enough to prove the ground is good?
No. Continuity only shows that a path exists. It does not prove the path is strong enough under load. For a better check, use both continuity and voltage drop testing.
5. What if my outlet has a round ground hole but no real ground?
That can happen in older or incorrectly wired systems. The shape of the outlet does not guarantee a working ground. A multimeter can reveal warning signs, but a simple outlet test does not certify the full grounding and bonding system. Call a qualified electrician if the result is unclear.
