
If you want to join metal sheets, leather, plastic, or even thin wood without screws, a rivet gun is one of the most useful tools you can own. It makes a strong, clean, and permanent hold. The good news is that learning how to use a rivet gun is not hard once you understand the parts, the steps, and the small details that matter.
Many beginners think riveting is only for professionals. That is not true. With the right rivet size, a steady hand, and a little practice, you can make neat joints at home or in a workshop. The key is not force. The key is preparation.
In this guide, you will learn the full process in simple steps. You will also see common mistakes, useful tips, and the best way to choose the right rivet for your job.
What a rivet gun does and when to use it
A rivet gun pulls the end of a blind rivet until the rivet body expands and locks two materials together. After that, the mandrel snaps off. This creates a strong bond that does not loosen easily with vibration.
People use rivet guns in car repair, HVAC work, metal fabrications, crafts, trailer repair, and home projects. They are especially useful when you cannot reach the back side of the material. That is what makes blind rivets so practical.
Before you start, it helps to know that a rivet is not the same as a screw. A screw can be removed later. A rivet is meant to stay in place. That is why correct sizing is so important.
| Tool or part | What it does | Why it matters |
|---|---|---|
| Rivet gun | Pulls the mandrel | Creates the clamping force |
| Blind rivet | Fastens the materials | Locks from one side only |
| Drill | Makes the hole | Hole size affects rivet strength |
| Safety glasses | Protects your eyes | Mandrels can fly off |
| Marker and ruler | Helps with layout | Keeps holes aligned |
Choose the right rivet and rivet gun first
Before learning the tool, choose the right fastener. This step saves time and prevents weak joints. A common beginner mistake is using any rivet that “looks close enough.” That often leads to poor grip or damage to the material.
Match the rivet to the material thickness
Every rivet has a grip range. This is the thickness of material it can hold properly. If the grip range is too small, the rivet may not clamp tightly. If it is too large, the rivet may not set at all.
Check the thickness of both pieces you want to join. Then compare that number with the rivet’s grip range on the package.
Pick the correct rivet diameter
Common rivet sizes are 3/32 inch, 1/8 inch, 5/32 inch, and 3/16 inch. Smaller rivets work well for light jobs. Larger rivets offer more strength for heavier materials.
If you are unsure, do not guess. Use the size recommended for your project or test a sample joint first.
Choose a hand, pneumatic, or battery rivet gun
A hand rivet gun is best for beginners and small jobs. It is cheap, simple, and easy to carry. A pneumatic rivet gun uses air power and is better for repeated work. A battery rivet gun is useful when you want speed without an air compressor.
For most home users, a hand tool is enough. It also helps you learn the feel of a proper set.
Gather what you need before you begin
Having everything ready makes the job smoother. Here is a simple set of tools and supplies:
- Rivet gun
- Blind rivets of the correct size
- Drill and drill bits
- Marker or scribe
- Ruler or measuring tape
- Clamps
- Safety glasses
- Work gloves, if needed
- File or deburring tool
If you are working with metal, a deburring tool is more useful than many beginners expect. A rough hole can stop the rivet from seating properly. It can also create a weak or uneven joint.
For more technical guidance on fasteners and installation practices, you can also check a trusted industry source like British Steel.
How to use a rivet gun step by step
Now let’s walk through the process in a clear order. If you follow these steps, you will avoid the most common beginner errors.
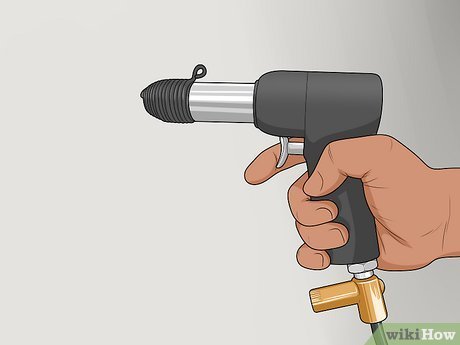
Credit: wikihow.com
1. Mark the exact spot for the hole
Start by marking where the rivet will go. Measure carefully and keep both pieces aligned. If the holes are off, the joint may twist or leave a gap.
For better accuracy, clamp the materials together before marking. That helps prevent movement while you drill.
2. Drill the hole
Use the drill bit size recommended for your rivet. The hole should be slightly larger than the rivet body, but not too large. If the hole is oversized, the rivet will not hold well.
Drill straight and steady. Let the bit do the work. If you push too hard, the bit may wander or damage the edge of the hole.
3. Clean and deburr the hole
After drilling, remove sharp edges and metal chips. A burr can stop the rivet from sitting flat. It can also scratch your hands or damage the rivet body.
This step is often skipped by beginners. That is a mistake. A clean hole gives a cleaner and stronger result.
4. Insert the rivet into the hole
Place the rivet into the drilled hole. The head of the rivet should rest on the front side of the material. The long mandrel should stick out toward you.
If the rivet falls through the hole easily, the hole may be too large. If it will not fit, the hole is too small or has burrs still attached.
5. Load the rivet into the gun
Open the rivet gun handles and place the mandrel into the correct nosepiece. The rivet body stays in the hole while the mandrel goes into the tool.
Make sure the mandrel is seated fully. If it is not, the tool may slip or fail to pull the rivet properly.
6. Hold the gun straight
Keep the rivet gun aligned with the rivet. The tool should be straight, not tilted. Straight alignment helps the rivet set evenly and reduces the chance of bending the mandrel.
This is one of the most important habits when learning how to use a rivet gun. A crooked angle can cause a weak joint even if everything else is correct.
7. Squeeze the handles until the rivet sets
Apply steady pressure to the handles. The gun will pull the mandrel, and the rivet body will expand behind the material. You may feel resistance increase as the rivet sets.
Keep squeezing until the mandrel snaps off. That snap means the rivet has reached its proper setting point.
8. Remove the broken mandrel
After the rivet sets, the broken mandrel will usually stay in the gun or fall out. Remove it before placing the next rivet. Many guns have a mandrel catcher or storage area for spent pieces.
Do not leave broken mandrels scattered around the workspace. They are sharp and easy to step on.
9. Check the finished rivet
A properly set rivet should sit flat against the material. The joint should feel tight, with no wobble or gap. If the rivet head is loose or the material shifts, the set may have failed.
When that happens, drill out the rivet and install a new one. Do not try to reuse a failed rivet.
What a good rivet should look and feel like
A clean rivet job is easy to spot once you know what to look for. The head sits flush, the material is tight, and the surface looks neat. On the back side, the expanded section should be formed evenly.
There are two beginner-friendly signs of a good set:
- The rivet does not spin or move in the hole.
- The materials are pulled together without visible gaps.
One detail many beginners miss is sound. A properly set rivet often feels firm and gives a crisp snap when it finishes. A weak set may feel soft or incomplete. That small difference can save you from a bad joint.
Common mistakes when using a rivet gun
Even simple tools can fail if used the wrong way. These are the mistakes that cause most problems.

Credit: hunker.com
Using the wrong hole size
If the hole is too large, the rivet body cannot grip the material. If it is too small, you may damage the rivet while forcing it in. Hole size should match the rivet size closely.
Choosing the wrong grip range
A rivet may fit through the hole but still be the wrong length for the job. This is a very common beginner error. Always check the thickness of the materials before buying rivets.
Holding the gun at an angle
An angled pull can bend the mandrel or form a poor rivet head. Keep the tool as straight as possible during the pull.
Skipping surface cleanup
Paint, rust, chips, and burrs can all affect the final result. The joint may still hold, but it will not be as neat or reliable.
Stopping too early
If you stop squeezing before the mandrel snaps, the rivet may not be fully set. This can leave a loose joint that fails under stress.
Practical tips that make the job easier
These small tips can improve your results fast.
- Clamp the parts before drilling so they do not shift.
- Use a center punch on metal to help the drill bit start cleanly.
- Practice on scrap material before working on the final piece.
- Keep extra rivets nearby so you do not pause in the middle of the job.
- Wear eye protection every time, even for small tasks.
Here is a second useful insight: if you are joining thin sheet metal, do not assume tighter is always better. Over-pulling can distort soft material and create a dimple around the rivet. A properly sized rivet gives enough clamp without crushing the surface.
Another beginner tip is to test one rivet before doing a whole row. A single test hole can tell you if the size, grip range, and gun setting are correct. That one minute can save a lot of rework.
How to remove a bad rivet
Sometimes a rivet is set wrong. Maybe the hole was oversized, the material shifted, or the rivet size was incorrect. The best fix is to remove it and start over.
Drill out the center
Use a drill bit close to the rivet’s body size. Drill slowly into the center of the rivet head until the head loosens. Then push the remaining body through the hole.
Work carefully to avoid enlarging the hole
The main risk is damaging the hole so much that the next rivet will not hold. Use light pressure and stop as soon as the rivet releases.
If the hole has become too large, you may need a bigger rivet or a backup plate, depending on the project.
When a rivet gun is the right tool and when it is not
A rivet gun is great when you need a strong permanent fastener and only one side is available. It is also useful when vibration might loosen a screw over time.
But it is not the best choice for every job. If you need to take the joint apart later, use bolts or screws instead. If the materials are too thick or the load is extreme, another fastener may be better.
Good uses
- Joining sheet metal
- Repairing gutters or panels
- Attaching brackets
- Auto body work
- Light fabrication projects
Less suitable uses
- Joints that must be removed often
- Very thick materials outside the grip range
- Projects that need adjustable tension
Simple maintenance for your rivet gun
A rivet gun does not need much care, but a little maintenance keeps it working well. Wipe off dust and metal bits after use. Check the nosepiece for wear. Empty the mandrel catcher if your tool has one.
If the handles feel stiff, inspect the moving parts and follow the maker’s instructions. Do not force a damaged tool. That can make the problem worse.
Storing the gun in a dry place also matters. Moisture can damage metal parts over time, especially if you use the tool in a garage or workshop.
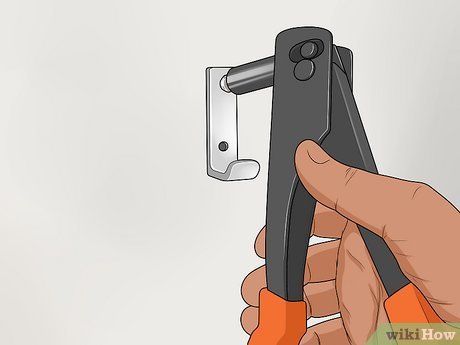
Credit: wikihow.com
Final thoughts
Learning how to use a rivet gun is mostly about clean prep, correct sizing, and steady pressure. Once you understand those three things, the process becomes simple. Mark carefully, drill the right hole, insert the rivet, keep the gun straight, and squeeze until it sets.
If you take your time on the first few tries, the tool will feel much easier very quickly. Start with scrap material, check each rivet after setting it, and remember that a neat rivet job begins before the gun ever touches the material.
FAQs
1. What size rivet should I use for beginners?
Start with the size recommended for your project or the rivet package. For light home jobs, 1/8 inch rivets are common. The best choice depends on the material thickness and the hole size.
2. Can I use a rivet gun on plastic?
Yes, in some cases. Use care because plastic can crack if the rivet is too tight or the hole is too small. Test on scrap first and avoid over-tightening.
3. Why does my rivet spin in the hole?
A spinning rivet usually means the hole is too large, the grip range is wrong, or the rivet did not set properly. In most cases, the rivet must be removed and replaced with the correct size.
4. Do I need special safety gear when using a rivet gun?
Yes. Safety glasses are important because broken mandrels can fly off. Gloves can also help when handling sharp metal edges, but keep them snug so they do not get caught in the tool.
5. Can a rivet gun be used for heavy-duty work?
Yes, if you use the right type of rivet and gun for the job. Heavy-duty work may need a larger rivet, a stronger tool, or a pneumatic model. Always check the load and grip requirements first.
