
If you want clean, strong welds with a neat finish, a TIG welder is one of the best tools you can learn. It gives you a lot of control, but that control also means the first few sessions can feel slow and awkward. That is normal.
This guide explains how to use a TIG welder in a simple way, step by step. You will learn what the machine does, how to set it up, how to hold the torch, how to make the arc, and how to form a good bead without getting lost in too many technical words.
By the end, you will understand the basic process, the most common mistakes, and the small habits that make a big difference. If you are a beginner, this is the kind of knowledge that helps you move from “I know the machine” to “I can actually weld with it.”
Understand what a TIG welder actually does
TIG means Tungsten Inert Gas. The process uses a tungsten electrode to create the arc. The tungsten does not melt into the weld like a filler rod does. That is one reason TIG welding can look so clean and precise.
During welding, an inert shielding gas, usually argon, protects the hot metal from air. Without that protection, the weld can become weak, dirty, or full of holes. The torch, gas, filler rod, and foot pedal or hand control all work together.
For beginners, the biggest idea to understand is this: TIG welding gives you separate control over heat, filler, and torch movement. That is powerful, but it also means your hands need to work together calmly.
Why beginners often like TIG
TIG is popular because it can produce very neat welds on steel, stainless steel, and aluminum. It is a good choice when appearance matters, when the metal is thin, or when you need a precise weld.
At the same time, TIG is less forgiving than MIG or stick welding. The metal must be clean. Your setup must be right. Your hand movement must stay steady. That is why learning the basics well is so important.
Get the right equipment ready before you start
Before you strike an arc, make sure your workspace and tools are ready. A bad setup often causes problems that beginners blame on their own skill. Sometimes the issue is not your hand. It is the machine, gas flow, or dirty metal.
Here are the main things you need for a basic TIG setup:
- TIG welder with the correct power source
- TIG torch
- Argon gas cylinder with regulator and hose
- Tungsten electrode
- Filler rod, if your weld needs one
- Ground clamp
- Welding gloves, jacket, helmet, and safety glasses
- Wire brush and cleaner for the base metal
Many beginners focus only on the machine and ignore the torch and gas setup. That is a mistake. In TIG welding, small setup problems can ruin the arc and make the bead look messy.
Choose the right tungsten
The tungsten is the sharp metal rod in the torch. It carries the current and helps start the arc. Different metals and settings may need different tungsten types and sizes. For beginners, the exact choice depends on your machine and project, but one rule stays the same: the tungsten must be clean and properly shaped.
If the tungsten is dirty, dipped into the weld pool, or ground badly, the arc can wander. A stable tungsten gives you a stable arc. That is one of the simplest signs of good setup.
Prepare the work area
Set your work on a stable metal surface. Remove paint, rust, oil, and dirt from the joint area. TIG welding works best on clean metal. This is not a small detail. It is a major part of the process.
Also make sure you have good ventilation. Welding creates fumes, and you should not breathe them in. Keep flammable materials away, and arrange your cables so they do not pull or twist while you work.
Set the machine correctly for your metal
Machine settings can feel confusing at first, but you only need to understand a few main controls. The right settings depend on the metal thickness, type of metal, and whether you are using AC or DC current.
As a beginner, focus on getting the basics right instead of chasing perfect settings. A simple, stable setup is better than a complicated one you do not understand.
| Setting | What it affects | Beginner tip |
|---|---|---|
| Amperage | Heat level | Start lower and adjust slowly |
| Gas flow | Shielding protection | Use enough argon to cover the weld, but not too much |
| Polarity / AC-DC mode | How current behaves | Use the correct mode for the metal you are welding |
| Post-flow | Protects the tungsten after welding | Do not stop gas too early |
| Pre-flow | Gas starts before the arc | Helpful for cleaner starts |
One beginner mistake is using too much amperage because they want faster melting. That often leads to a bigger puddle, more distortion, and a weaker-looking weld. Another mistake is not giving the tungsten enough protection after the arc stops. The tip can oxidize and become contaminated.
Know when to use AC and when to use DC
In simple terms, DC is commonly used for steel and stainless steel. AC is often used for aluminum because it helps clean the oxide layer on the surface.
If you are unsure, check your machine manual and the metal type. The Lincoln Electric TIG welding guide is a useful high-authority reference if you want to understand the process more deeply.
Set up the tungsten, gas, and filler rod the right way
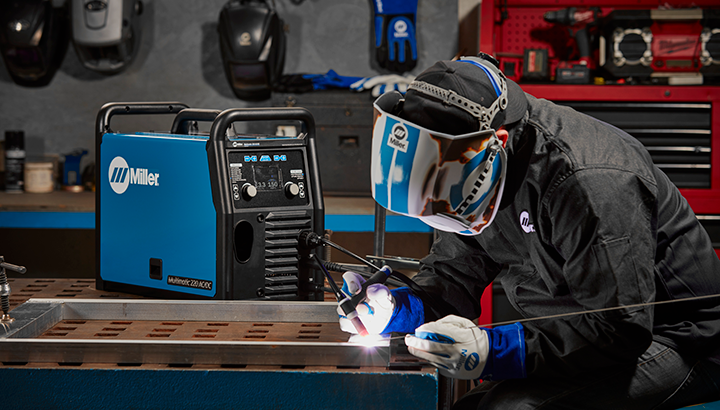
Once the machine is ready, prepare the torch. This is where many beginners rush. Slow setup gives you a smoother start.
Credit: millerwelds.com
Prepare the tungsten
Remove the tungsten and inspect it. If it is rounded, dirty, or damaged, regrind or replace it as needed. A sharp and even point helps create a focused arc on steel and stainless steel. For aluminum, the shape may differ based on the process and machine.
Use a clean grinder wheel if possible. Do not grind contaminated tungsten on the same wheel you use for other metals unless you know the wheel is dedicated to welding work.
Set the gas flow
Argon flow should be enough to protect the weld area and tungsten. Too little gas gives you a dirty weld. Too much gas can create turbulence and also weaken the shield.
Beginners sometimes think more gas is always better. That is not true. The goal is steady coverage, not maximum flow.
Choose and position the filler rod
Not every TIG weld needs filler rod, but many do. Pick a filler rod that matches your base metal and joint type. Keep the rod clean and dry. If it touches the tungsten, stop and clean up before continuing.
Here is a simple habit that helps a lot: place the filler rod where you can reach it easily without crossing your hands too much. The less awkward your body position, the easier it is to keep the weld steady.
Learn the correct body position and torch angle
Good TIG welding starts with a stable body. If your arm is floating in the air, your hand will shake more. If you brace yourself well, your movement becomes smoother.
How to stand or sit
Work in a position that lets you see the joint clearly. Sit if the project allows it. Rest your forearms or wrists when possible. Keep your shoulders relaxed. Tension in your body often turns into a shaky torch hand.
A simple beginner trick is to lock your elbows lightly against your body or against a support surface. This reduces movement and helps you hold a steady arc length.
Keep the torch angle small
Do not point the torch too steeply. A small angle works better because it helps shield the puddle and keeps the arc focused. If the angle is too large, the gas coverage can suffer and the weld can become dirty.
Try to keep the torch moving in a calm, controlled line. Sudden wrist movements usually make the bead uneven.
Control arc length
Arc length means the distance between the tungsten tip and the workpiece. Shorter is usually better in TIG welding. A long arc can make the weld wider, hotter, and less protected.
This is one of the most important beginner lessons: small changes in distance make big changes in weld quality. Keep the tungsten close without touching the puddle.
Start the arc without contaminating the tungsten
Now you are ready to begin welding. Different machines start differently, but the main idea is the same. You want a clean arc start without dipping the tungsten into the weld pool.
Use the machine’s start method
Some TIG machines use high-frequency start. Others use lift arc or scratch start. Follow your machine’s design and instructions. High-frequency start is usually cleaner because the tungsten does not need to touch the workpiece.
If you are using scratch start, be extra careful. Think of it like striking a match gently, not scraping hard. The goal is to create an arc, not damage the tungsten.
Form the first puddle
After the arc starts, hold the torch steady for a moment and let a small puddle form. Do not add filler too quickly. If you rush, the puddle can get too large or unstable.
Watch the metal, not just the arc. The puddle is what you are actually controlling. Once you can clearly see the puddle, you are in a better position to add filler at the right time.
Add filler metal with control
Feeding filler rod is often the hardest part for new welders. Your torch hand, filler hand, and eyes all need to work together. At first, this may feel strange. That is normal.
Dip the rod at the edge of the puddle
Do not stab the rod into the center of the arc. Bring it to the front edge of the weld pool, add a small amount, and pull it back out. Then repeat as you move forward.
If you dip too much filler at once, the puddle can cool too fast or grow uneven. Small, steady additions are easier to control and usually create a cleaner bead.
Keep the filler rod clean
If the filler rod touches the tungsten or gets dirty, stop and clean it. A contaminated filler rod can introduce impurities into the weld. Beginners often ignore this until they see strange black spots or a brittle-looking bead.
Another useful habit is to keep the rod covered or stored properly so it stays clean before use.
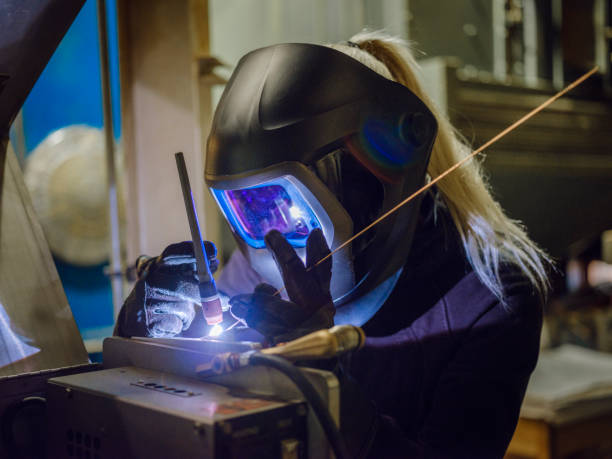
Move along the joint at a steady pace
Once the puddle and filler rhythm feels okay, move along the joint. The trick is not to move too fast or too slow. Too fast can leave weak fusion. Too slow can create too much heat and distortion.
Credit: istockphoto.com
Watch the size of the puddle
The puddle should stay about the same size as you travel. If it starts growing, your heat may be too high or your travel speed too slow. If it becomes too small or stops flowing, you may need a little more heat or a slower hand movement.
Use the shape of the bead as feedback
A good bead is usually even, consistent, and smooth. If the bead has tall ripples, the filler and travel rhythm may be uneven. If it looks wide and flat with poor buildup, you may be moving too slowly or using too much heat.
Learn to read the weld as you go. This is one of the hidden skills beginners often miss. The weld itself tells you what to change next.
Finish the weld properly
Do not snap the arc off suddenly. Ease out of the puddle, stop adding filler, and let the post-flow gas continue to protect the tungsten and cooling weld. If your machine has a downslope or crater fill feature, use it to reduce cracks at the end of the bead.
A poor stop can ruin an otherwise good weld. Many beginners focus on the middle of the weld and forget the end. The finish matters just as much.
Match your technique to the metal
Different metals behave differently. If you understand that, you will make better choices with your torch angle, heat, and filler movement.
Steel
Steel is often the easiest metal for beginners to practice on. It is more forgiving than aluminum and usually gives clear visual feedback. Keep the metal clean, set the correct current, and move in a steady line.
Stainless steel
Stainless steel needs clean preparation and controlled heat. Too much heat can discolor the metal and weaken corrosion resistance near the weld. Keep your puddle small and your travel speed steady.
Aluminum
Aluminum is more difficult because it forms an oxide layer that must be handled correctly. It also pulls heat away in a different way. Beginners should expect aluminum TIG to feel harder at first. Clean the material well and use the correct AC settings.
One non-obvious point many beginners miss is that different metals do not just need different settings. They also ask for different pacing. Aluminum often rewards quick, confident movement once the puddle is established, while stainless often benefits from tighter heat control.
Fix the most common beginner mistakes
Every beginner makes mistakes. That is part of learning how to use a TIG welder. The goal is not perfection on day one. The goal is to notice problems quickly and correct them.
- Touching the tungsten to the puddle: This contaminates the tungsten and weakens the arc.
- Using dirty metal: Paint, oil, rust, and oxidation make the weld unstable.
- Holding too long in one spot: This adds too much heat and can burn through thin metal.
- Moving too fast: The weld may not fuse properly.
- Using too much filler: The bead becomes heavy and uneven.
- Ignoring gas coverage: Poor shielding creates a dirty weld and weakens the finish.
There is also a less obvious mistake: many beginners change too many settings at once. If the weld looks bad, adjust one thing at a time. That makes it much easier to understand what actually caused the problem.
Practice in a smart order
You do not need to start with a perfect project. In fact, you should not. Start with simple practice pieces and build up gradually.
- Practice striking and holding a stable arc.
- Practice keeping a short arc length without touching the tungsten.
- Practice making a small puddle without filler rod.
- Practice adding filler in small, even dips.
- Practice straight beads on flat steel.
- Move to corners, joints, and different metals after that.
This order matters because each step builds one skill at a time. If you try to learn everything at once, the process becomes frustrating fast. Separate the skills first, then combine them later.
How to judge your progress
Look for simple signs of improvement. Is the arc steadier? Is the bead more even? Are you dipping the filler with less hesitation? Are you contaminating the tungsten less often?
Progress in TIG welding is often slow but very visible. Small gains add up. A beginner who can hold a steady arc and control the puddle is already doing well.
Stay safe while learning
Safety should never be an afterthought. TIG welding creates intense light, heat, and fumes. Protecting yourself makes practice possible over the long term.
- Wear a proper welding helmet with the right shade.
- Use welding gloves and non-synthetic clothing.
- Keep skin covered to protect against UV light.
- Use ventilation to reduce fume exposure.
- Keep gas cylinders secured upright.
- Let hot metal cool before touching it.
Another safety point many beginners miss is that the weld area can stay hot long after the arc stops. Mark hot parts clearly if you are working around others, and do not assume a piece is safe just because it no longer glows.
Credit: primeweld.com
Bring it all together
Learning how to use a TIG welder takes patience, but the process becomes much easier once you break it into clear parts. First, prepare the machine and materials. Then set up the tungsten, gas, and filler rod. After that, focus on body position, arc control, puddle size, and steady movement.
The biggest beginner advantage is not speed. It is awareness. If you can watch the puddle, keep your tungsten clean, use the right amount of heat, and stay calm, your welds will improve faster than you expect. TIG rewards careful work, and that makes it a great skill to build.
Practice on scrap metal, change one thing at a time, and pay attention to what the weld tells you. That is how a beginner starts turning good information into real welding skill.
FAQs
1. What is the easiest metal for a beginner TIG welder?
Steel is usually the easiest metal to start with. It is more forgiving than aluminum and gives clear feedback when your heat, arc length, or filler timing needs improvement.
2. Do I always need filler rod when TIG welding?
No. Some joints can be welded without filler rod, especially during practice or on certain thin materials. But many real welds do need filler to build strength and shape the joint properly.
3. Why does my tungsten keep getting dirty?
This usually happens when the tungsten touches the weld puddle, the metal is dirty, or the gas coverage is poor. Check your arc length, clean the base metal, and make sure your argon flow is correct.
4. How far should the tungsten be from the metal?
Keep it very close, but do not touch the puddle. A short arc length helps create a more stable and focused weld. The exact distance depends on your setup, but close control is always better than a long gap.
5. Can I learn TIG welding at home as a beginner?
Yes, as long as you follow safety rules, use proper ventilation, and practice on scrap metal. Home practice is a good way to build control before moving to more important projects.
