
If you work around home wiring, outlets, switches, or light fixtures, one small tool can save you from a big mistake: a non-contact voltage tester. It is simple, fast, and very useful. But it is only safe when you use it the right way. Many people point it at a wire and trust the result too much. That can lead to shock, confusion, or a false sense of safety.
This guide explains how to use a non contact voltage tester safely and effectively in real situations. You will learn how the tool works, how to check it before use, how to test correctly, and where people often go wrong. You will also see practical tips that help you read the tool with more confidence. If you do electrical work at home, this is one of those tools you should understand before you rely on it.
For the best results, always remember one simple rule: a non-contact tester is a first check, not the final answer. Used well, it helps you stay safer. Used carelessly, it can mislead you. The difference is in the method.
What a non-contact voltage tester actually does
A non-contact voltage tester detects the electric field around a live wire or terminal. It does not need bare metal contact. You simply bring the tip near a wire, outlet slot, or device opening, and the tester signals whether voltage is present. Most models use a light, sound, or vibration.
This makes it useful for quick checks. You can test a light switch, outlet, cord, ceiling box, or breaker area without touching exposed conductors. That said, the tester is sensitive to many factors, so it should not be treated like a perfect truth machine.
One important thing beginners often miss is that a non-contact tester can detect voltage presence but not always how dangerous the circuit is. It may react to induced voltage, nearby wires, or poor grounding conditions. It may also fail to detect very low voltage in some situations. That is why a second check is often smart.
Where it helps most
Non-contact testers are especially useful for:
- Checking if an outlet slot is live
- Testing switches before removing covers
- Finding which cable in a bundle is energized
- Confirming a breaker may be feeding a circuit
- Doing a fast pre-check before using a multimeter
They are not meant to replace full electrical testing when accuracy matters. For deeper testing, a multimeter or two-pole voltage tester is better.
Choose the right tester before you start
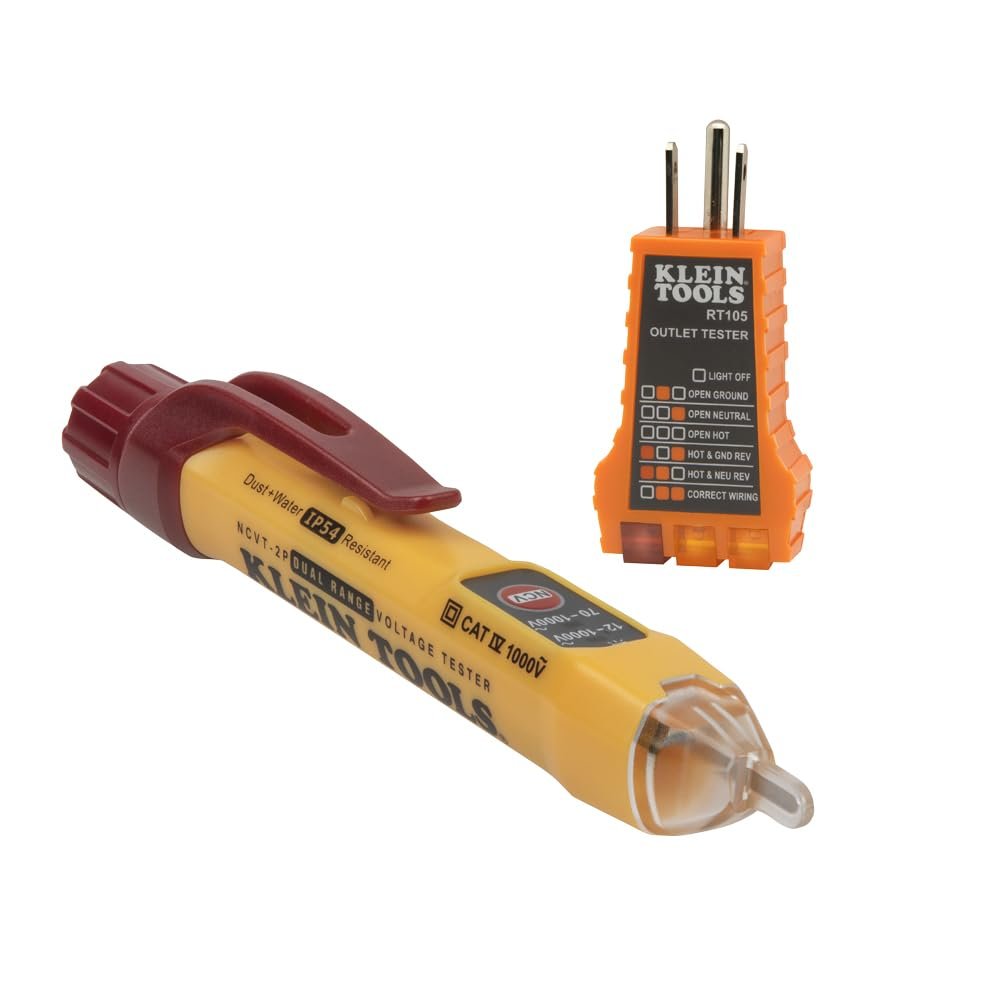
Not all testers are the same. Some are basic. Some have adjustable sensitivity. Some include flashlight, audible alerts, or auto power-off. The best one for you depends on your work.
For home use, a model with a clear light and sound alert is often enough. If you work near different voltages or in crowded electrical spaces, adjustable sensitivity becomes more useful. This lets you reduce false alarms when wires are close together.
Look for a tester with a known safety rating and a clear voltage range. For electrical safety guidance and general tool standards, the OSHA electrical safety page is a useful reference.
| Feature | Why it matters | Good for |
|---|---|---|
| Adjustable sensitivity | Helps reduce false readings | Mixed wiring spaces |
| Light and sound alerts | Makes results easy to notice | Fast home checks |
| Wide voltage range | Improves usefulness across tasks | General electrical work |
| Auto shutoff | Saves battery life | Occasional users |
Another detail many beginners miss: battery strength matters more than people think. A weak battery can make a tester less reliable. If the alert seems dim, delayed, or inconsistent, change the battery before you trust it.
Check the tester before every use
Before you test any wire, verify that the tester itself works. This is a simple habit, but it is one of the most important safety steps. A broken tester can give you a false “dead” result, and that is dangerous.
Use a live source you already know is energized, such as an outlet that is clearly working. Hold the tester near the hot slot or a known live conductor. It should signal right away. Then test the wire or circuit you are actually checking.
After your main test, check the tester on the live source again. This confirms it stayed functional during the job. This “test before and after” habit is a smart practice because it catches failures from dead batteries or tool problems.
What to do if the tester does not respond
If the tester does not react on a known live source:
- Replace the battery.
- Check the sensitivity setting, if your model has one.
- Try a different known live source.
- Inspect the tester for damage.
- Do not use it until it works correctly.
Never assume a silent tester means a circuit is safe. That is one of the most common and costly mistakes.
How to use a non contact voltage tester on outlets and switches
This is the most common home use. It is also where the tool is very helpful when used with care. Start by standing on a dry floor and keeping your hands dry. Remove distractions. Good lighting helps a lot.
For an outlet, bring the tip close to each slot. The tester should react near the hot side if voltage is present. On a switch, place the tester near the terminal area only if the cover is removed and the circuit is being tested carefully. For a standard switch faceplate check, you can often test around the switch body or exposed wire openings if safe access is available.
Move slowly. Do not wave the tester around quickly. A slow approach gives a more reliable result. If the tester beeps only when it is very close, that may still be normal. If it reacts from a distance that seems strange, reduce sensitivity or check for nearby energized wires.

Credit: megadepot.com
Best practice for outlet testing
- Stand in a stable position.
- Hold the tester near the outlet slot.
- Check both slots one by one.
- Compare the result with a known live outlet first, if needed.
- If the result seems odd, confirm with a second test tool.
One non-obvious insight: in older homes, outlet boxes may contain shared or loosely arranged wires. A tester can react to wires inside the wall even if the slot you are pointing at is not the actual source. So if the reading seems confusing, do not rush to conclusions.
How to use it on wires, cords, and fixtures
Testing loose wires or fixture leads requires more care than checking an outlet. The wire may be close to other wires, metal parts, or cable bundles that create confusing signals. Keep the tester close to the wire you want to check, but avoid touching the conductor.
For a cord, test the hot conductor area near the plug or along the cable if the outer jacket is removed at a safe point. For a light fixture, check the fixture leads only after power is supposed to be off and the box is open with proper caution. If the tester still shows voltage when you expect the circuit to be dead, stop and investigate before touching anything.
Remember that some cables carry induced voltage from nearby lines. This can trick a non-contact tester into signaling live voltage when the wire is not actually supplying usable power. If this happens, a multimeter or two-pole tester can help confirm the truth.
How to reduce false readings on wires
- Use lower sensitivity when possible.
- Test one conductor at a time.
- Separate the wire from nearby cables if safe to do so.
- Keep the tip aligned with the conductor, not the whole bundle.
- Repeat the test from a slightly different angle.
A small angle change can make a big difference. That is because the tester responds to the electric field, not just the bare wire itself.
How to use it safely before working on a circuit
Many people use a non-contact tester as a safety check before opening a box or removing a switch plate. This is a good habit, but it should be part of a wider safety routine.
First, turn off the breaker if the task calls for it. Then test the circuit with the non-contact tester. After that, confirm with a second tool if the work is important or the setup is old and uncertain. Only then should you touch conductors. If you are unsure, stop and ask a licensed electrician.
This layered method is safer than depending on one device alone. It is also one of the best answers to the question of how to use a non contact voltage tester properly. The tool is valuable, but it works best as part of a process, not as a shortcut.
Safety habits that matter every time
- Keep hands dry.
- Stand on a dry floor.
- Do not test in wet areas.
- Do not hold the tester near your face.
- Do not use the tool if the case is cracked or damaged.
One overlooked point: your body position matters. If you are reaching awkwardly, you may touch metal parts without meaning to. Set up so you can work calmly and steadily.
Common mistakes people make
Most bad readings happen because of user error, not because the tool is useless. A lot of beginners make the same mistakes again and again. If you avoid them, your results will improve quickly.
Credit: amazon.com
1. Trusting the first beep too fast
A quick beep does not always mean the wire is dangerous in the way you think. It could be induced voltage, a nearby live line, or a sensitive setting. Always confirm when the result matters.
2. Not testing the tester first
If the battery is weak or the device is faulty, you may get a false “safe” reading. This is one of the most serious mistakes because it feels reassuring when it should not.
3. Using it near multiple wires without focus
A bundle of cables can confuse the sensor. You may think you found the hot conductor, when in fact the tester reacted to a nearby wire inside the same box.
4. Ignoring sensitivity settings
High sensitivity is useful in some cases, but it can also create false alarms. Beginners often leave the tester on the highest setting and then wonder why it seems unreliable.
5. Treating it as a final proof of de-energized wiring
This is the biggest misunderstanding. A non-contact tester is excellent for a quick check, but it should not be the only proof before direct contact work. For that, use proper verification tools.
How to read the signals correctly
Different models use different signals, but the idea is similar. A light may turn on, a beep may sound, or both may happen. Some models give stronger alerts the closer you get to voltage. Others only give a simple yes/no answer.
If the signal becomes stronger as you move closer, that often means you are getting closer to the source. If the signal is weak, intermittent, or only appears in one position, repeat the test from another angle. Consistency is what you want.
When you get an unexpected result, do not force a conclusion. Ask yourself a few questions:
- Is the battery strong?
- Is the sensitivity setting correct?
- Am I near more than one wire?
- Is there metal nearby affecting the test?
- Should I confirm with a second tool?
These small checks can save a lot of confusion. They also help you build confidence over time.
When you should use another tool instead
A non-contact voltage tester is useful, but it is not always the right tool. If you need exact voltage numbers, you need a multimeter. If you need more reliable confirmation that a circuit is off before work, a two-pole tester is often better.
Use another tool when:
- You need exact voltage values
- You are diagnosing electrical faults
- The circuit behaves strangely
- You are dealing with old wiring
- Your first test result does not make sense
Non-contact testers are best for speed and convenience. They are not the final word in electrical diagnosis.
Practical examples that make the method clearer
Example 1: You want to change a light switch. First, turn off the breaker. Then use the tester on the switch area and on a known live outlet to verify the tool works. If the switch area is quiet but the known live outlet still triggers the tester, that is a good sign. If the switch area still reacts, stop and verify further before touching the wires.
Example 2: You want to check why an outlet stopped working. Use the tester on the outlet slots. If neither slot reacts and other outlets on the same wall do react, the problem may be upstream or at the breaker. If the tester reacts only in one position, try again slowly and from both slots. A loose internal wire can give confusing behavior.
Example 3: You are tracing a cable in a crowded box. Move the tester slowly near each cable one by one. If two nearby cables both react, reduce sensitivity. That often makes the source easier to identify.
These examples show a simple truth: the tester works better when you control the test area and move carefully. Rushing gives worse results.
Maintenance tips for reliable performance
Keep the tester clean and dry. Wipe the tip if it picks up dust or grime. Store it in a safe place where it will not crack or bend. Check the battery from time to time, even if the tester still turns on.
If the body gets damaged, replace the tool. Electrical safety is not a place to save a few dollars. A damaged tester can produce poor results or fail at the wrong moment.
Also, read the manual for your exact model. Small differences matter. Some models beep differently, some have auto-ranging, and some require a special button press before use. A minute with the manual can prevent a mistake later.
Credit: reddit.com
Final thoughts for safer home electrical work
Learning how to use a non contact voltage tester is not hard, but using it well takes discipline. Test the tester before you trust it. Move slowly. Watch for false signals. Use the right sensitivity. And do not let a quick beep replace careful thinking.
The best users are not the ones who test fastest. They are the ones who test in a smart, repeatable way. If you build that habit, the tool becomes a real safety aid instead of just a gadget in your toolbox.
FAQs
1. Can a non-contact voltage tester tell me if power is completely off?
It can help you check, but it should not be your only proof. A tester may miss some conditions or react to nearby voltage. For important work, confirm with a second testing method.
2. Why does my tester beep near a wire that should be dead?
This can happen because of induced voltage, nearby live wires, high sensitivity, or a weak battery. Reduce sensitivity and test again from a slightly different position.
3. Do I need to touch the wire for the tester to work?
No. A non-contact voltage tester is designed to detect the electric field without direct metal contact. Keep the tip close to the wire or slot, but do not touch exposed conductors.
4. How often should I test the tester itself?
Check it before every job and again after the job if the work matters. This simple habit helps confirm the tool is working during the full test process.
5. Is a non-contact voltage tester safe for beginners?
Yes, it is beginner-friendly when used correctly. The key is to understand its limits. Use it as a first check, not as the only safety step before electrical work.
