
If you need to join metal sheets, leather, fabric, plastic, or thin parts and you do not have a rivet gun, do not stop the job. There are several simple ways to set a rivet with basic tools you may already have at home. The trick is to use steady support, the right force, and the correct type of rivet for the material.
This guide shows how to install rivets without a rivet gun in practical ways that actually work. You will learn hand methods, safe hammering techniques, smart tool choices, and the common mistakes that can ruin the joint. Whether you are fixing a bag, a metal bracket, or a small DIY project, you can still get a strong result.
Not every rivet behaves the same way. Some are easy to set by hand. Others need more force or a different fastener. That is why the best method depends on the rivet type, the thickness of the material, and how strong the joint needs to be.
What you need before you start
Before you begin, gather the right supplies. A clean setup makes the job much easier and reduces the risk of bent rivets or loose joints.
- Rivets that match your material thickness
- A hammer, preferably a small ball-peen hammer
- Heavy backing support, such as an anvil, steel block, or vise
- Center punch or nail set
- Drill and drill bits, if you still need to make the hole
- Pliers or clamps to hold the parts together
- Safety glasses
If you are working on soft material like leather or fabric, you may also want a scrap piece of wood to support the back side. For metal, a hard surface is much better. Soft backing absorbs force, which makes it harder to form the rivet properly.
Know which rivet you have
The method you use depends on the rivet type. A solid rivet is different from a pop rivet. A tubular or semi-tubular rivet is different again. Many people search for how to install rivets without a rivet gun and then discover the real issue is that they are using a rivet that normally needs special tools.
| Rivet type | Can you install it without a rivet gun? | Best hand method |
|---|---|---|
| Solid rivet | Yes | Hammer and backing block |
| Semi-tubular rivet | Yes, often | Hammer and punch or setter |
| Blind pop rivet | Sometimes, with special hand method | Bolt, washer, and nut trick or hand pull method |
| Decorative rivet | Yes | Hammer and setting tool |
If you are not sure, check the rivet packaging or measure the shaft. Using the wrong method is one of the biggest beginner mistakes.
The easiest hand method for solid rivets
For solid rivets, the classic hand method works well. You place the rivet in the hole, support the factory head on a hard surface, and flatten the tail side with a hammer. This forms a second head that locks the parts together.
This is the simplest answer if you want how to install rivets without a rivet gun for small metal projects. It takes patience, but the method is reliable when done correctly.
Step 1: Make the hole the right size
The hole should be just large enough for the rivet to slide through without much force. If the hole is too wide, the rivet will wobble and may not hold well. If it is too tight, the rivet can bend as you push it in.
As a general rule, the hole should match the rivet shank closely. For a beginner, it is better to test on scrap material first. A clean hole gives a much cleaner set.
Step 2: Put the rivet through the parts
Slide the rivet through both pieces you want to join. Make sure the head sits flat on the front side. If the parts move around, clamp them together before you continue.
This is one of those small details beginners often miss: if the parts are not tight before setting, the rivet may clamp them in a shifted position. Once the rivet is formed, that mistake is hard to fix.
Step 3: Support the factory head
Set the factory head against a hard backing block. A steel anvil works best, but a thick steel plate or vise jaw can also work. The hard support absorbs the hammer force and helps the rivet mushroom properly.
If the support is soft or springy, the rivet will absorb too much shock and may bend instead of forming a smooth head.
Step 4: Form the tail with light hammer blows
Use a hammer to strike the tail end of the rivet. Start with light taps to spread the metal. Then use firmer blows to shape it into a rounded head. Do not hit too hard at first, or the rivet may bend sideways.
Try to keep your strikes centered. A tilted strike can make the rivet mushroom unevenly. A small ball-peen hammer is useful because the round face helps shape the metal more naturally.
Step 5: Check the finished joint
The finished tail should look rounded and smooth, not cracked or split. The parts should feel tight with no movement. If the rivet is loose, it was probably too short, the hole was too large, or the backing support was weak.
When done right, a hand-set solid rivet can be very strong. It is a simple method, but it rewards care.
How to install pop rivets without a rivet gun
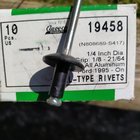
Blind rivets, also called pop rivets, are normally set with a rivet gun that pulls the mandrel. But if you do not have one, there are a few workable alternatives for light-duty jobs.
These methods are not as clean or fast as a proper gun. Still, for an emergency fix or a small project, they can help.
Credit: reddit.com
Method 1: Bolt, washer, and nut trick
This method uses a bolt that fits through the rivet body, plus washers and a nut. It gives you a way to pull the mandrel side by hand.
- Insert the pop rivet into the hole.
- Place a washer over the rivet mandrel side.
- Thread a nut onto a bolt that matches the mandrel as closely as possible.
- Use the bolt and nut to pull against the rivet body.
- Turn the nut slowly until the rivet begins to compress.
This method works best on small pop rivets and soft materials. It can be slow, and not every rivet will set fully. Still, it is a useful backup if you only need a few fasteners.
Method 2: Pliers and controlled pressure
For very small pop rivets, some people use strong locking pliers to grip the mandrel and pull it while supporting the rivet body. This is not ideal for every job, but it can work in a pinch.
The key is to pull straight and steadily. If you yank sideways, the rivet body may twist or the mandrel may snap too early.
Method 3: Replace the rivet with a better hand-friendly fastener
Sometimes the smarter move is not to force a pop rivet by hand at all. If the job is low stress, a machine screw with a lock nut, Chicago screw, or bolt may be a better choice. That is especially true if you need to remove the joint later.
This is a non-obvious but important insight: the best answer to how to install rivets without a rivet gun is sometimes to choose a different fastener entirely. The goal is a strong joint, not just using a rivet for the sake of it.
Using a hammer and punch for semi-tubular rivets
Semi-tubular rivets are easier to form than solid rivets because the end is already hollow or partly hollow. That means less force is needed to flare the tail.
This makes them a good option for hand installation on leather, light metal, and some craft work.
How to do it
- Place the rivet through the aligned holes.
- Support the head on a hard surface.
- Use a punch, nail set, or narrow metal tool to flare the hollow end.
- Tap slowly around the edge until the tail spreads evenly.
- Check that the rivet sits tight and centered.
These rivets do not need the same heavy deformation as solid rivets. That makes them easier to install with simple tools, but they still need careful support.
Important tip for better results
Do not strike the hollow end with one hard blow. Spread the force in small steps. This helps keep the metal from splitting or flattening too much on one side.
If you are working on leather, place a scrap piece of wood under the project so the material is not crushed. If you are working on metal, use a steel block or anvil for better shaping.
Simple alternative tools that can help
You do not need a full workshop to install rivets by hand. A few cheap tools can make the work much easier and cleaner.
- Ball-peen hammer: Good for shaping the rivet tail
- Vise: Holds the parts steady and acts as backing support
- Center punch: Helps start holes in the right place
- Setter or punch: Helps form small rivets more evenly
- Locking pliers: Useful for clamping and some pop rivet tricks
If you want a deeper look at correct rivet size, hole fit, and general fastening standards, a useful reference is the Britannica overview of rivets. It is not a step-by-step guide, but it helps explain how rivets work.
Another helpful detail beginners miss is that the backing surface matters as much as the hammer. A good hammer on a weak surface still gives a weak result. A solid backing surface often improves the joint more than people expect.
How to make the rivet joint stronger
When installing rivets by hand, your biggest goal is not just to “finish” the job. It is to create a tight, lasting joint. A few small habits make a big difference.

Credit: reddit.com
Choose the right rivet length
If the rivet is too short, it will not have enough material to form a proper second head. If it is too long, the tail may bend instead of setting cleanly. The ideal rivet length depends on the total thickness of the materials plus the amount needed for forming.
A good beginner rule is this: the shank should extend enough past the material to form a small mushroom head, but not so much that it flops over. If you are unsure, test first on scrap.
Clamp the materials before you set the rivet
Materials that shift during installation can create gaps. Gaps weaken the joint and make the rivet sit poorly. Clamp the pieces tightly before you hammer.
Work from the center outward when using multiple rivets
If you are setting several rivets in one part, start in the middle and move outward. This helps control movement and keeps the parts aligned. Many beginners start at one end and then discover the material has shifted by the time they reach the other side.
Use the least force that still forms the head
More force is not always better. Too much force can flatten the rivet, crack thin material, or deform the joint. Controlled force gives a cleaner result.
Common mistakes to avoid
Most hand-set rivet problems come from a few simple errors. If you avoid these, your results will improve fast.
- Using the wrong rivet type: Some rivets are not practical without special tools.
- Drilling oversized holes: Loose holes create weak joints.
- Skipping backing support: The rivet needs a hard surface to form well.
- Hitting too hard too soon: This bends the rivet instead of shaping it.
- Not clamping the work: The parts can shift and stay misaligned.
- Using damaged rivets: Bent or scratched rivets are harder to set cleanly.
One subtle mistake is ignoring material softness. Thin aluminum, soft leather, and plastic-like materials need a gentler touch than steel. The same strike that works on one project may destroy another.
When you should not use a hand method
Hand methods are useful, but they are not right for every job. If the joint must carry heavy load, vibration, or outdoor stress, using the proper setting tool is usually safer. The same is true if you need many rivets. A hand method can become slow and inconsistent on larger jobs.
You should also avoid hand-setting if the rivet is a structural part of a safety-critical item. In that case, the right tool and correct fastener matter too much to guess.
Good uses for hand installation
- Small repairs
- Light brackets
- Leather crafts
- Decorative fasteners
- Low-stress DIY projects
Not ideal for hand installation
- High-vibration machinery
- Load-bearing metal structures
- Large sheet metal assemblies
- Jobs where every rivet must be identical
Here is a practical way to think about it: if the rivet is holding something where failure would be expensive, dangerous, or annoying to repair, use the correct installation tool. If it is a small home repair, a hand method may be enough.
A quick method that often works for small DIY repairs
If you want a simple routine you can remember, use this:
- Pick a rivet that fits the material thickness.
- Make a clean hole.
- Clamp the parts together.
- Place the rivet through the hole.
- Support the head on a steel block or vise.
- Shape the tail slowly with a hammer or punch.
- Check for movement and tighten again if needed.
This short process works for many small jobs because it keeps the main goal in view: a tight joint, not just a fast finish. If you are learning how to install rivets without a rivet gun, repeat this on scrap material first. A few practice tries can save your real project.

Credit: reddit.com
Final thoughts
You do not always need a rivet gun to finish a rivet job. With the right rivet type, a hard backing surface, and patient hammer work, you can install many rivets by hand. For solid rivets and semi-tubular rivets, the process is often simple once you understand the basics.
The most important part is matching the method to the rivet. That single choice decides whether the job becomes easy or frustrating. Start small, practice on scrap, and do not rush the forming step. A careful hand method can give you a neat and strong result.
FAQs
1. Can you install rivets without a rivet gun?
Yes, you can install some rivets without a rivet gun. Solid rivets and semi-tubular rivets are the easiest to set by hand with a hammer, punch, and hard backing support. Blind pop rivets are harder, but small ones can sometimes be installed with simple hand tricks.
2. What is the easiest rivet to install by hand?
Semi-tubular rivets are usually the easiest to install by hand because they need less force to flare the end. Solid rivets can also work well, but they take more hammering and better support.
3. Can I use a regular hammer instead of a rivet gun?
Yes, for solid rivets and some tubular rivets, a regular hammer can work. A ball-peen hammer is often better because the rounded end helps shape the rivet tail more cleanly.
4. How do I know if the rivet hole is the right size?
The rivet should fit through the hole without much force, but it should not wobble loosely. If the hole is too large, the joint may be weak. If it is too tight, the rivet may bend during installation.
5. What should I do if the rivet bends instead of setting?
If the rivet bends, stop and check your setup. The hole may be too tight, the backing surface may be too soft, or your hammer strike may be off-center. Replace the bent rivet and try again with better support and lighter initial taps.
