
If you want clean cuts in metal without grinding for a long time, learning how to use a plasma cutter is a smart skill. A plasma cutter is fast, accurate, and very useful for home shops, repair work, and fabrication. But it only works well when you use the right setup, the right technique, and the right safety habits.
Many beginners think plasma cutting is difficult. It is not. The real challenge is control. If you move too slowly, you widen the cut. If you move too fast, you leave metal uncut. If your air is dirty or your settings are wrong, the cut edge becomes rough. The good news is that these problems are easy to avoid once you understand the process.
This guide explains the full process in simple steps. You will learn how to prepare your workspace, set up the machine, cut safely, and make accurate cuts on different types of metal. You will also see common mistakes, useful tips, and a few details that beginners often miss.
What a plasma cutter actually does
A plasma cutter uses compressed air and electricity to create a very hot stream of ionized gas, called plasma. That stream melts metal and blows the melted material away. This is what creates the cut.
The process is simple in idea, but it is powerful. A plasma cutter can cut steel, stainless steel, aluminum, and other conductive metals. It is often faster than a grinder or cutting torch for thin and medium metal. It also leaves a narrower cut, which helps when you need accuracy.
One important point many beginners miss is that plasma cutting depends on air quality as much as power. Moisture, oil, or dirt in the air line can damage cut quality and shorten consumable life. That is why setup matters so much.
Before you start: tools, gear, and workspace
Before you learn the steps, get the basics ready. Good preparation makes cutting safer and much easier.
What you need
- A plasma cutter with the correct consumables installed
- An air compressor that meets the cutter’s pressure and airflow needs
- Clean, dry compressed air
- Work clamps and a solid metal work surface
- Safety glasses and a face shield or cutting helmet
- Gloves, long sleeves, and non-synthetic clothing
- Hearing protection
- A brush or grinder for cleaning the metal surface
- Optional: straightedge, clamp guide, or cutting template
Set up a safe space
Plasma cutting creates bright light, hot sparks, and sharp metal pieces. Work in a space with good airflow and no flammable items nearby. Remove paper, fuel cans, rags, and solvents from the area. If people are nearby, use a welding curtain or barrier to protect them from the light.
Also, place the machine on a stable surface. Do not let the torch cable twist hard or drag across sharp edges. Keep the work area dry. Water and electricity do not mix well.
Step 1: Check the metal you want to cut
Start by identifying the material and thickness. Plasma cutters work only on conductive metals, so they will not cut wood, plastic, or stone. They work best on clean steel and stainless steel, but they can also cut aluminum and copper in many cases.
Thickness matters because every cutter has a limit. If the machine is rated for 1/2 inch steel, that does not mean it will cut that thickness at top quality all day long. In real use, a machine often gives its cleanest cuts on thinner metal and becomes less neat near its maximum rating.
Check the metal surface too. Rust, paint, oil, and heavy scale can interfere with the arc. You do not always need a perfect shiny surface, but cleaning the cut line helps a lot. A wire brush or grinder works well.
Beginner mistake to avoid
Do not assume all steel cuts the same. Thick rusty plate and thin clean sheet behave very differently. The cut speed, amperage, and edge finish will change with the material.
Step 2: Connect and test the air supply
Air supply is one of the most important parts of plasma cutting. If the air is weak or dirty, the cut suffers immediately. Your machine manual should show the needed pressure and flow. Follow that first.
Connect the compressor and the plasma cutter with the proper hose and fittings. Then check the pressure while the system is running. Some machines need a certain pressure at the cutter, not only at the compressor tank. This is a small detail, but it makes a big difference.
Drain water from the compressor tank before use. If your shop has a filter or dryer, use it. Clean air protects the torch and improves arc stability. If you cut often, this is one of the best ways to save money on consumables.
For general safety information on metal cutting and workshop hazards, the OSHA website is a useful authority.
Step 3: Install the consumables correctly
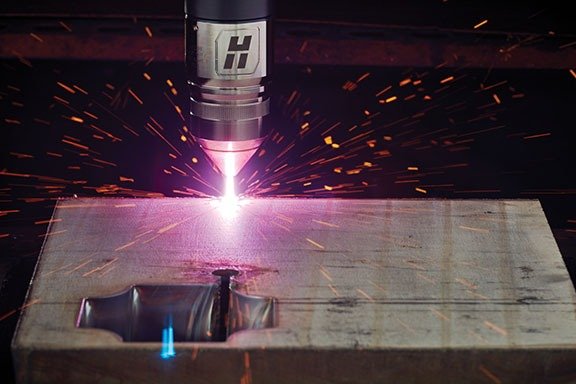
Consumables are the small parts inside the torch that wear out over time. These often include the electrode, nozzle, swirl ring, and shield. If they are worn or installed badly, the cut quality drops fast.
Before starting, inspect the parts. Replace anything that looks burnt, cracked, or deeply worn. Install them exactly as the manufacturer shows. Even a small mistake here can cause a weak arc or strange cutting behavior.
One detail beginners often miss is that the nozzle hole size affects cut precision. A worn nozzle can make the arc wider and the edge rougher. If your cuts suddenly look worse even though your settings are right, check the consumables first.
Credit: espritautomation.com
Quick consumable check
- Electrode tip should not look deeply pitted
- Nozzle opening should be round and clean
- Shield should fit properly and not be damaged
- Parts should be tightened to the maker’s instructions
Step 4: Set the machine controls
Now set the amperage, pressure, and cutting mode. Many machines have a simple dial or digital settings. The best choice depends on metal thickness and the type of cut you want.
For thin sheet metal, use lower amperage to avoid extra heat and wide edges. For thicker metal, use higher amperage to keep the arc strong. Higher power is not always better, though. Too much amperage on thin metal can warp the workpiece and leave a rough kerf.
If your machine has a drag-cut feature, be sure it is enabled only when needed. Some torches are made to touch the plate directly. Others need a small gap. Read the manual carefully. This is another common point people miss when learning how to use a plasma cutter.
Simple starting guide for amperage
| Metal thickness | Suggested starting range | What to watch for |
|---|---|---|
| Thin sheet metal | Lower amperage | Reduce burn-through and warping |
| Medium plate | Mid-range amperage | Keep a steady cut speed |
| Thicker plate | Higher amperage | Watch for slower travel and more sparks below |
This table is only a starting point. Always check your machine manual and test on scrap metal before cutting the final piece.
Step 5: Mark the cut line clearly
Accuracy starts before the torch turns on. Mark the cut line with a soapstone, marker, or scribe. If you need a straight cut, use a ruler or metal guide. If you need a shape, make sure your marks are easy to see under bright light.
For best results, mark slightly outside the final size. Plasma cutting removes a thin strip of metal called the kerf. If you cut exactly on your line, the final piece may end up too small. This is a detail beginners often overlook.
If you are making repeat cuts, create a simple template or stop block. This saves time and improves consistency.
Step 6: Position the torch the right way
Hold the torch at the angle recommended by the manufacturer. Many cuts start with the torch nearly vertical. If you tilt it too much, the cut edge can become angled or uneven.
Keep the tip at the correct distance from the metal. Some torches use a drag shield, so the tip can rest on the surface. Others require a small gap. The gap controls arc focus and cut quality, so do not guess.
Place the ground clamp on clean, bare metal close to the cutting area. A weak ground connection can cause arc problems. If the metal is painted or rusty, clean a small spot first.
Tip that improves cut quality fast
Think about torch movement before you start. Your first motion should be smooth and controlled. Many bad cuts happen because the user starts too fast or jerks the torch when the arc begins.
Step 7: Start the arc
Turn on the machine and follow the trigger method your torch uses. Some torches use a pilot arc and then transfer to the workpiece. Others require a different start method. The torch manual matters here.
Once the arc starts, wait a moment for it to fully transfer and stabilize. Then begin moving along the cut line. Do not rush the first second. A stable start leads to a cleaner edge.
You will know the cut is going well when the sparks exit mostly below the workpiece and the torch sound stays steady. If the sound changes sharply or sparks blow back toward the torch, stop and check your travel speed, distance, or air pressure.
Step 8: Move at the correct speed
Travel speed is one of the biggest factors in cut quality. Move too slowly, and the cut becomes wide with more slag. Move too fast, and the arc may not cut all the way through.
The best speed creates a steady, even stream of sparks below the work. The torch should not bounce or drag hard unless your model is designed for that. Keep your hand relaxed but steady.
A useful beginner trick is to practice on scrap metal of the same thickness. Make short cuts at different speeds. Then look at the edge. A good cut usually has less dross and a more even edge angle.
Signs your speed is right
- The cut passes through cleanly
- Sparks come out mostly under the plate
- The arc sound stays stable
- The edge looks fairly straight without heavy buildup
Signs your speed is too slow
- Edge becomes very rough or wide
- More molten metal sticks to the bottom
- Metal may warp from extra heat
Signs your speed is too fast
- Cut does not go through fully
- Arc seems to trail behind the torch
- Edge has uncut spots or heavy angle
Step 9: Handle corners, curves, and holes with care
Straight cuts are simple. Curves and holes need a little more control.
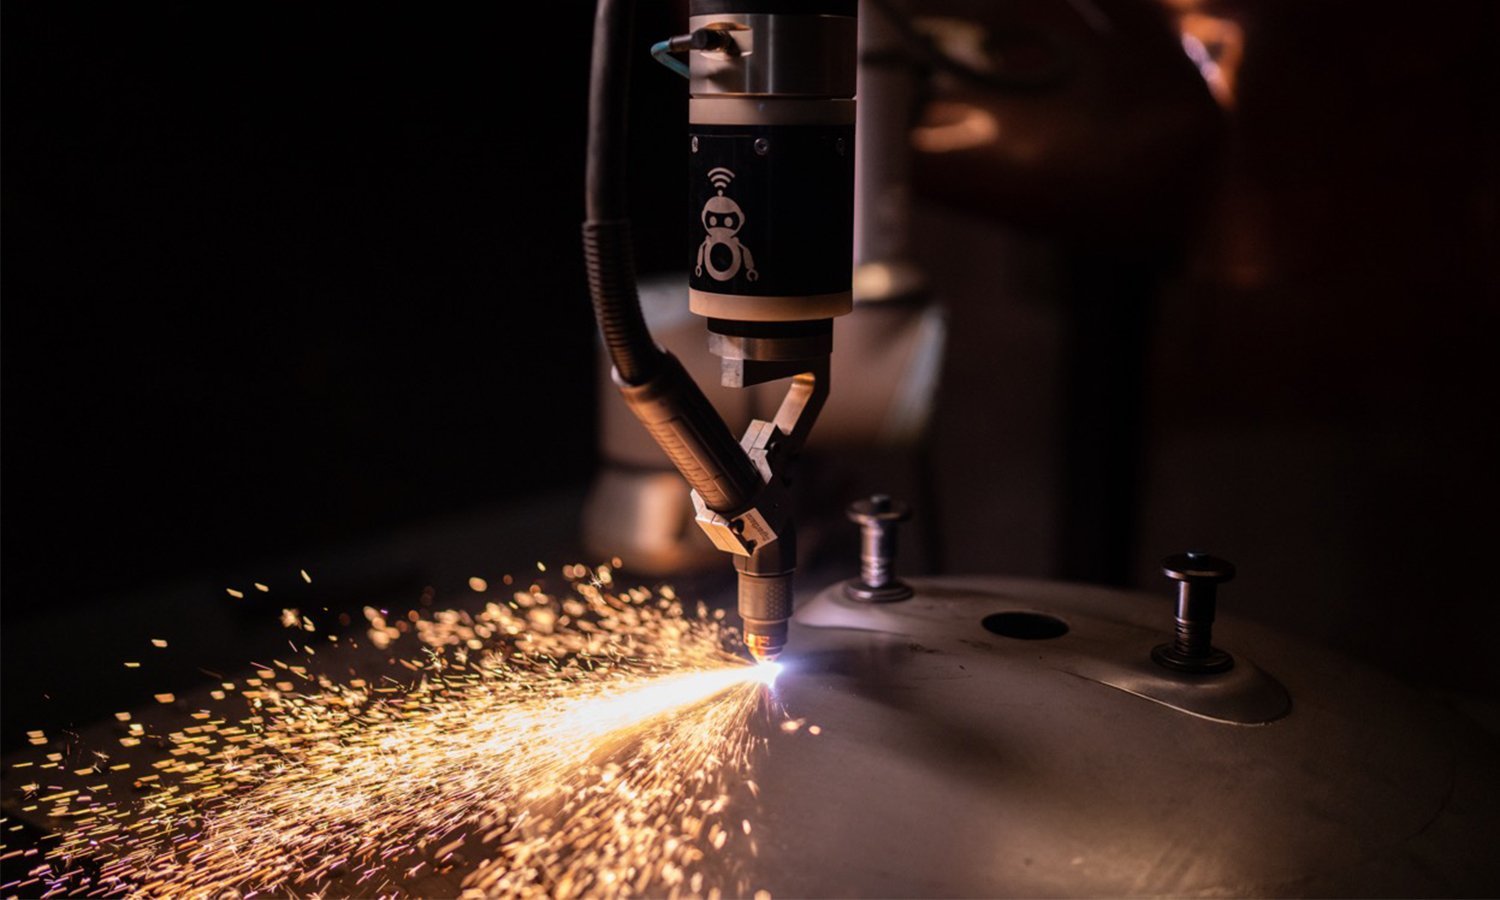
For curves, slow down slightly and guide the torch with both eyes on the line and the arc. Do not twist your wrist too fast. Let the machine do the work. Sharp turns are easier if you make a series of short, controlled motions instead of one hard turn.
For holes, start with a piercing method if your machine supports it. Hold the torch a little higher at first, then let the arc break through. Once the pierce is complete, lower the torch to the correct cutting height and move carefully. This helps prevent molten metal from blowing back into the tip.
One non-obvious point: when cutting holes in thin metal, the inside edge can melt faster than you expect. If the hole size matters, cut slightly smaller than needed and finish with a file or step drill if necessary.
Credit: blog.hirebotics.com
Step 10: Finish the cut and inspect the edge
When you reach the end of the cut, keep the torch moving until the arc is fully off the metal. Then release the trigger and let the torch cool for a moment. Do not touch the cut edge right away. It will be very hot.
Look at the cut face and the bottom edge. A good cut usually has light dross that brushes off easily. Heavy slag, a beveled cut, or an uncut bridge means something needs adjustment. The cause is usually travel speed, amperage, air pressure, or worn consumables.
If the cut is not perfect, do not assume the machine is bad. In many cases, a small change fixes the problem right away.
How to get better accuracy with practice
Accuracy comes from repeatable habits. Keep the torch steady, use guides when needed, and test on scrap before the final cut. A short practice session can save a lot of material.
Another useful habit is to cut from the same body position each time. Stand comfortably, keep both feet stable, and move the torch with your whole arm when possible. This gives better control than using only your wrist.
Also pay attention to the cut line before you start. Good alignment at the start is easier than trying to correct a wandering cut halfway through. Small setup changes make a big difference.
Practical accuracy tips
- Clamp a straightedge for long straight cuts
- Use scrap pieces to test settings first
- Replace worn consumables before they damage cut quality
- Keep the torch angle consistent from start to finish
- Clean the metal where the ground clamp connects
Common mistakes beginners make
Most plasma cutting problems come from a few simple mistakes. If you know them early, you can avoid a lot of frustration.
- Using dirty air – moisture and oil hurt cut quality and damage parts
- Ignoring worn consumables – old tips make the arc unstable
- Moving too fast or too slow – both lead to poor edges
- Forgetting ground connection quality – weak grounding causes arc issues
- Cutting without testing first – scrap testing saves time and metal
- Holding the torch at the wrong angle – this reduces accuracy and can widen the kerf
Two mistakes deserve extra attention. First, many beginners think more power always solves cutting problems. It does not. Sometimes better air, cleaner metal, or a fresh nozzle solves the issue. Second, some people skip the test cut because they want to save time. That often costs more time later when the final piece is ruined.
Safety rules you should never skip
Plasma cutting is safer than some older metal-cutting methods, but it is still serious work. Use full eye protection, gloves, long sleeves, and proper shoes. The arc is bright enough to injure your eyes, and the sparks can burn skin fast.
Keep your body away from the cutting path. Never cut near fuel, gas cylinders, or unknown containers. If a part may have held flammable material, do not cut it until it has been properly cleaned and confirmed safe.
Make sure the workpiece is supported well. If the metal falls or shifts during the cut, you can lose control of the torch. Hot offcuts can also drop onto your feet or legs.
Finally, let hot metal cool before touching it. Fresh cuts can look harmless, but they can cause serious burns. Use pliers or tongs if needed.

Credit: squickmons.com
When to stop and check the setup again
Do not keep cutting if the machine starts acting strangely. Stop and inspect the setup if you see weak arc starts, strange noise, heavy spatter, or poor penetration. These are signs that something is wrong.
Check the air pressure, consumables, ground clamp, and torch angle first. Most problems are simple. If the machine still does not cut well, consult the manual before continuing. This protects both your work and your equipment.
As you gain experience, you will learn to read the cut by sound, spark pattern, and edge shape. That skill is one of the biggest benefits of practice.
Conclusion
Learning how to use a plasma cutter is mainly about good setup, steady movement, and safe habits. Once you understand the material, air supply, consumables, and torch control, the process becomes much easier. The machine does the cutting, but your preparation decides the quality.
Start with scrap metal, keep your air clean, replace worn parts early, and move at a controlled speed. With those habits, you can make clean, accurate cuts and avoid the most common beginner problems. The more consistent your setup becomes, the more reliable your results will be.
FAQs
1. How do I use a plasma cutter for the first time?
Start by setting up clean, dry air, installing fresh consumables, and testing on scrap metal. Mark your cut line, place the ground clamp on bare metal, hold the torch at the correct angle, and move slowly at first. Practice on scrap before cutting your final piece.
2. What metals can a plasma cutter cut?
A plasma cutter can cut conductive metals such as mild steel, stainless steel, aluminum, and some copper alloys. It will not cut wood, plastic, or stone. The cut quality depends on thickness, machine power, and setup.
3. Do I need compressed air for a plasma cutter?
Yes. Most plasma cutters need clean, dry compressed air to work properly. Dirty or wet air can damage the torch, reduce cut quality, and wear out consumables faster. Always check the air pressure requirements in the manual.
4. Why is my plasma cutter leaving rough edges?
Rough edges usually come from wrong travel speed, worn consumables, poor air quality, or incorrect amperage. Try cleaning the metal, checking the nozzle and electrode, and making a test cut on scrap. Small changes often fix the problem.
5. Is plasma cutting safe for beginners?
Yes, if you use the right safety gear and follow the machine instructions. Wear eye protection, gloves, long sleeves, and hearing protection. Keep flammable items away and work in a clear, stable space. Safe habits matter as much as the machine itself.
