
If you need to change a bit on a Makita demolition hammer, the job should be quick. But these tools are powerful, and the bit holder can be tight, dirty, or worn. That is why many users feel stuck the first time they try. The good news is that how to remove bit from Makita demolition hammer is usually simple when you follow the right steps and do not force anything.
The safest method depends on the chuck type, the condition of the tool, and whether the bit is hot, dirty, or jammed. If you rush, you can damage the bit, the holder, or even your hands. If you use the right method, the bit should come out with little effort. In this guide, you will learn how to do it safely, what to check before and after, and what to do if the bit is stuck.
This article is written for real workshop use. You will find clear steps, common mistakes, and a few small details that many beginners miss. Those details matter, because a stuck bit is often caused by simple problems like dust, poor grease, or a worn locking sleeve.
Know your Makita hammer before you touch the bit
Before you try to remove the bit, you need to know which holding system your Makita demolition hammer uses. Most models use an SDS-style chuck or a similar quick-change system. These are made to hold the bit firmly while still allowing fast removal. If you treat every model the same, you may pull the wrong part or miss the release step.
Check the model label on the tool body or user manual. If you are not sure about your exact model, you can find the official manual on the Makita website or through the product page. A good place to start is Makita’s official site.
One small but important detail: some users call every heavy Makita hammer a “demolition hammer,” but the bit system can still differ between rotary hammers, combination hammers, and demolition hammers. The removal process is close in many cases, but the lock mechanism may not be exactly the same.
What you should check first
- Power source: Is it corded, battery-powered, or pneumatic?
- Chuck type: SDS-Plus, SDS-Max, or another locking system?
- Bit condition: Is it bent, hot, rusty, or full of dust?
- Tool condition: Is the sleeve dirty, damaged, or jammed?
These checks take less than a minute, but they can save you from pulling too hard or breaking the lock parts. A bit that will not release is often not “stuck forever.” It is often just blocked by debris or pressure on the sleeve.
Prepare the tool the safe way
Safety comes first. A demolition hammer has enough force to injure hands or startle you if it moves unexpectedly. Never try to remove the bit while the tool is plugged in or connected to power. Even if the trigger is off, that is not safe enough.
For corded tools, unplug the power cord. For battery models, remove the battery pack. For air tools, disconnect the air supply and bleed any remaining pressure if needed. This simple step removes the chance of accidental start-up.
Then place the tool on a stable bench or floor. Do not hold a heavy hammer in the air while trying to release the bit. If the tool shifts, you may lose control of the sleeve or pinch your fingers. Stability matters more than speed here.
Basic safety gear that helps
- Gloves: Choose snug gloves that improve grip without getting caught in the chuck.
- Safety glasses: Dust or small metal flakes can come loose when the bit is removed.
- Closed shoes: A heavy tool or bit can fall.
Do not use very loose gloves. They can catch on moving parts or the bit shank. This is a common beginner mistake, especially when the chuck is dirty and people think they need extra force. Clean hands plus a firm grip is often better than bulky gloves.
The normal way to remove a bit from a Makita demolition hammer
Most of the time, the bit comes out by pulling back the chuck sleeve and sliding the bit out. The exact motion is easy, but it must be done in the correct order. If you skip the release motion, the bit may feel locked in place.
- Make sure the tool is fully disconnected from power.
- Hold the hammer securely on a flat surface.
- Find the chuck sleeve or locking collar near the front of the tool.
- Pull the sleeve back toward the tool body, or follow the direction shown in the manual.
- While holding the sleeve back, pull the bit straight out.
- Release the sleeve slowly after the bit is removed.
The movement should be straight and controlled. Do not twist the bit hard unless your manual specifically says to do so. On many Makita hammer systems, twisting too much is not helpful and can make the bit bind more tightly.
If the bit does not move after the sleeve is pulled back, stop and check for dirt, damage, or a second locking stage. Some users miss the fact that the sleeve must be pulled fully back before the bit can clear the internal balls or locking pins.

Credit: reddit.com
If the bit seems tight but not stuck
Sometimes the bit is not truly jammed. It is simply under pressure from dust, heat, or a slightly worn shank. In that case, keep the sleeve pulled back and wiggle the bit gently in a straight line. Small side motion is fine, but do not bend the bit.
Try a few short movements instead of one hard pull. A controlled rhythm often works better than force. This is one of those non-obvious points beginners miss: a bit that is “almost free” can lock again if the sleeve is released too soon. Keep steady pressure until the shank is clear.
What to do if the bit is stuck
A stuck bit can happen for several reasons. Dust from concrete is fine and gritty. It can pack into the chuck and act like glue. A dry shank can also cause friction. In some cases, the bit is slightly mushroomed at the end, especially if it has been used heavily or hit hard material for a long time.
Before you use force, work through the simple fixes below. Most stuck bits can be removed without damage if you stay patient.
Clean around the chuck first
Use a brush or compressed air to remove dust from the front of the tool. Focus on the area around the sleeve and the bit entry point. If the chuck is clogged, the internal parts may not release fully.
If you use compressed air, keep the pressure moderate and wear eye protection. Blow dust away from your face, not toward it. Also make sure the tool is disconnected first. Dust can hide grit inside the chuck, and that grit is often the real reason the bit feels locked.
Apply a small amount of lubricant if needed
If the manual allows it, use a small amount of proper lubricant on the shank area. Do not flood the chuck with oil. Too much oil can trap more dirt and cause future sticking. A light application is enough to help the shank slide free.
After applying lubricant, wait a short time and try again. Move the sleeve back, then pull the bit straight out. If it still does not release, do not keep yanking harder and harder. That can bend internal parts.
Check for visible damage
Look closely at the bit shank. If it has deep scratches, mushrooming, or a bent end, it may be jammed because the locking balls cannot pass over it. In that case, you may need to replace the bit after removal. A damaged shank is often a sign that the bit was struck outside its normal range or has simply reached the end of its life.
| Symptom | Likely cause | Best next step |
|---|---|---|
| Bit moves a little, then stops | Dirt or dry shank | Clean and apply light lubricant |
| Sleeve will not pull back fully | Dust buildup or worn chuck | Clean the front assembly and inspect for damage |
| Bit is extremely hard to move | Mushroomed or bent shank | Stop forcing it and inspect the bit carefully |
| Bit releases but will not come out | Internal binding or debris | Wiggle gently while keeping the sleeve back |
Common mistakes that can make the problem worse
Many bit removal problems are caused by good intentions but poor technique. If you know the common mistakes, you can avoid damage and save time.
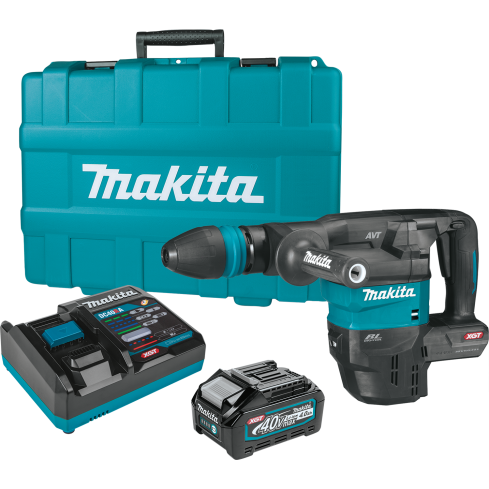
Credit: americatools.com
Pulling without releasing the sleeve
This is the biggest mistake. The bit holder is designed to lock the shank in place. If you pull before releasing, you are fighting the locking mechanism. That can scratch the shank or stress the chuck parts.
Using pliers on the bit
Pliers may seem like a quick fix, but they often damage the shank and make the problem worse. If the bit is already stuck, squeezing it with pliers can deform it more. Then the next removal becomes even harder.
Forcing the bit at an angle
Pulling sideways can bend the internal locking parts. Always try to remove the bit straight out. A small wiggle is fine, but the main force should stay in line with the chuck.
Ignoring heat
After heavy work, the bit and chuck can be hot. Heat expands metal and can make the fit tighter. Let the tool cool before trying again. This is a small step, but it often solves the issue without any extra effort.
How to keep the bit holder working smoothly
Removing a bit safely is one thing. Keeping the tool ready for the next job is even better. Good maintenance reduces stuck bits and extends the life of the chuck. This is a point many users miss: the front of the hammer is not just a grip point. It is a precision locking area that needs cleaning and occasional care.
Clean after dusty jobs
Concrete, masonry, and stone dust can collect in the chuck very quickly. After a project, wipe the front of the tool and clear the sleeve area. If your work involves a lot of dust, do this every time you change bits.
Use the right shank type
Do not force the wrong bit type into the chuck. An SDS-Plus bit will not fit like an SDS-Max bit, and a poor fit can damage both the bit and the holder. Always match the bit shank to the tool specification.
Inspect the bit before reusing it
If a bit was hard to remove, inspect it before putting it back. Look for wear, cracks, and a rounded or mushroomed shank. A damaged bit may still fit, but it can jam again and create more wear on the chuck.
When the chuck needs repair or replacement
Sometimes the problem is not the bit at all. If the sleeve does not move smoothly, or if bits keep sticking, the chuck assembly may be worn. This is more common on tools that see heavy demolition work or poor cleaning habits.
Signs of a worn chuck include loose bit fit, sticky sleeve movement, or visible damage around the front end. If the locking balls or internal springs are worn, the tool may not hold or release bits properly. In that case, repair or replacement is safer than repeated forcing.
If your Makita hammer is still under warranty, avoid opening parts you are not trained to service. Check the manual and contact an authorized service center if needed. For serious issues, professional service is better than guessing.
Good signs that service is needed
- The sleeve sticks even when clean.
- Bits wobble more than normal.
- The tool does not lock bits securely.
- The bit releases only with unusual force.
If you see one or more of these signs often, do not wait until the tool fails on the job. A worn chuck can become a safety risk and can also damage expensive bits.
A simple routine for safe bit removal
If you want a fast memory aid, use this short routine every time. It keeps the process safe and helps prevent damage.
- Disconnect power fully.
- Let the tool cool if it has been used hard.
- Clean the front area.
- Pull the sleeve back fully.
- Remove the bit straight out.
- Inspect the bit and chuck before the next use.
This routine may seem basic, but most removal problems start when one of these steps is skipped. The extra 20 seconds is worth it.
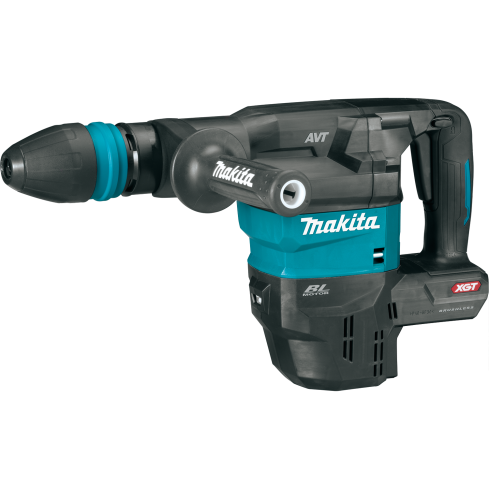
Credit: americatools.com
Final thoughts
Learning how to remove bit from Makita demolition hammer safely is mostly about control, patience, and knowing the locking system. Do not rush. Disconnect the tool, release the sleeve fully, and pull the bit straight out. If the bit is stuck, clean the chuck, check the shank, and avoid heavy force.
The best results come from small habits: keep the tool clean, use the correct bit type, and inspect worn parts early. That way, bit changes stay easy, your tool lasts longer, and your hands stay safe.
FAQs
1. Why won’t the bit come out of my Makita demolition hammer?
The most common reasons are dust buildup, a dry or damaged shank, a sleeve that is not fully released, or wear in the chuck. Clean the front area first and try again with the sleeve pulled back completely.
2. Can I use pliers to remove a stuck bit?
You can try only if the tool is fully disconnected and the bit is clearly free to move, but pliers are not a good first choice. They can damage the shank and make the problem worse. Cleaning and gentle wiggling are safer.
3. Do I need to lubricate the bit before removing it?
Usually no. But if the shank is dry and the manual allows it, a very small amount of proper lubricant can help. Do not use too much, because excess oil can attract dust.
4. What if the sleeve on my Makita hammer does not move?
That usually means dirt, wear, or internal damage. First, clean around the chuck and make sure the tool is disconnected. If the sleeve still sticks after cleaning, the chuck may need service.
5. How do I know if the bit or chuck is damaged?
Look for bent, mushroomed, or deeply scratched shanks, loose fit, or a sleeve that feels rough or sticky. If the same problem keeps happening, the chuck or the bit may need replacement.
