
If your car clicks, cranks slowly, or does nothing when you turn the key, the starter is one of the first parts to check. The good news is that you do not always need a shop visit to get useful answers. With a simple multimeter and a few careful tests, you can find out whether the starter is getting power, whether the solenoid is working, and whether the starter motor itself may be failing.
This guide explains how to test a starter with a multimeter in a clear, step-by-step way. You will learn what to measure, where to place the probes, and how to read the results without guessing. You will also see the common mistakes that lead people to replace a good starter when the real problem is the battery, cables, relay, or ignition switch.
Before you begin, remember one important point: a starter test is not only about the starter. A weak battery or bad connection can create the same symptoms. That is why the best test looks at the whole starting circuit, not just one part.
What you should check before blaming the starter
A starter can fail, but it is not the most common reason for a no-start problem. Many starting issues come from low battery voltage, loose terminals, corroded cables, or a faulty relay. If you test only the starter and ignore the rest, you may waste time and money.
Start with the basics:
- The battery should be fully charged.
- The battery terminals should be clean and tight.
- The engine ground connection should be secure.
- The starter fuse and relay should not be damaged.
- The car should be in park or neutral with the parking brake set.
If the battery is weak, recharge or replace it before testing the starter. A starter needs high current. A battery can show a “good enough” voltage at rest and still fail under load. That is one of the biggest beginner mistakes.
Tools you need
- Digital multimeter
- Safety gloves and eye protection
- Wrench or socket set
- Vehicle owner’s manual or wiring diagram, if available
- Helper to turn the key while you test
If you want a quick reference on safe multimeter use, the Fluke multimeter guide is a reliable resource.
How the starter circuit works
Understanding the circuit makes the test much easier. When you turn the key or press the start button, the ignition switch sends a signal to the starter relay or solenoid. That signal lets battery power flow to the starter motor. The starter then spins the engine so it can begin running on its own.
There are two main sides to test:
- The control side — the small signal that tells the starter to engage
- The power side — the heavy battery current that spins the starter motor
This matters because a starter can fail in different ways. The solenoid may not click. The motor may click but not spin. Or the starter may spin slowly because of poor voltage supply. A multimeter helps you separate these problems.
Set the multimeter correctly
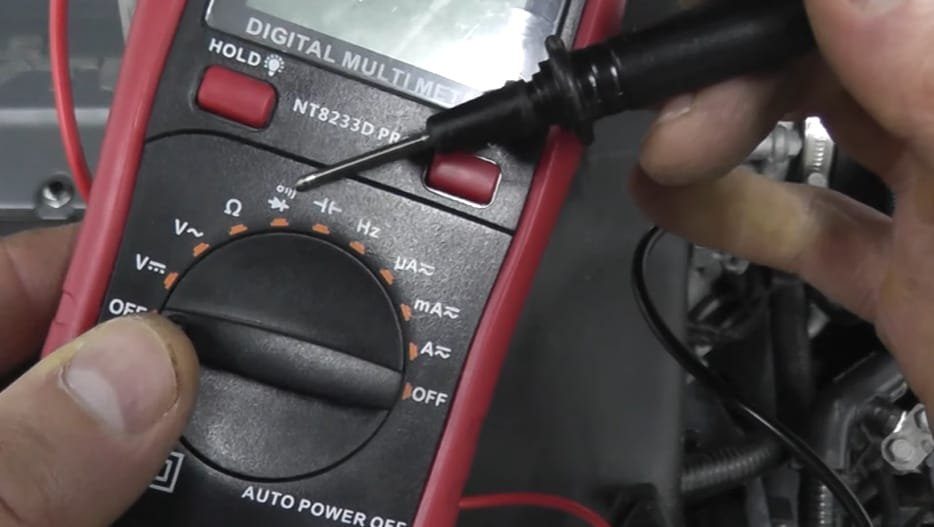
Before testing, set your multimeter to the right mode. For most starter checks, you will use DC volts. If your meter has manual range selection, choose a range above 12 volts, such as 20V DC. If it is auto-ranging, just select DC voltage.
Know these basic readings:
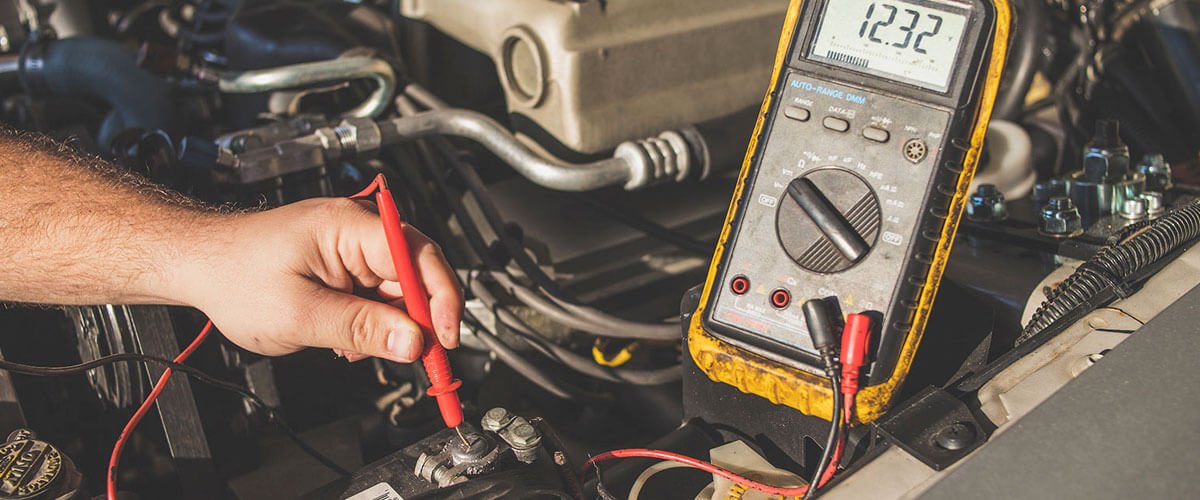
- A fully charged 12-volt battery usually reads about 12.6 volts at rest.
- While cranking, battery voltage should usually stay above 9.6 volts.
- Voltage lower than that during cranking can point to a weak battery, bad cables, or a failing starter.
One non-obvious detail many beginners miss is that voltage drop tells you more than voltage alone. A battery can look fine on a quick test, but a corroded cable can still starve the starter of power. Later in this guide, you will see how to check for that.
Test the battery first
Do not skip this step. A starter test is only useful if the battery is healthy enough to support the test.
Step 1: Check battery voltage at rest
- Turn the ignition off.
- Set the multimeter to DC volts.
- Touch the red probe to the battery positive terminal.
- Touch the black probe to the battery negative terminal.
- Read the voltage.
A healthy battery should usually show around 12.4 to 12.7 volts. If it is below 12.2 volts, charge it before moving on. If it is much lower, the starter may not get enough power to turn the engine, which can give a false result.
Step 2: Check voltage while cranking
- Keep the probes on the battery terminals.
- Ask a helper to turn the key to the start position for a few seconds.
- Watch the voltage while the engine tries to crank.
If the battery drops below about 9.6 volts during cranking, the battery may be weak or the starter may be drawing too much current. This is a key clue. A starter can appear bad when the real problem is low battery power.
Test for power at the starter
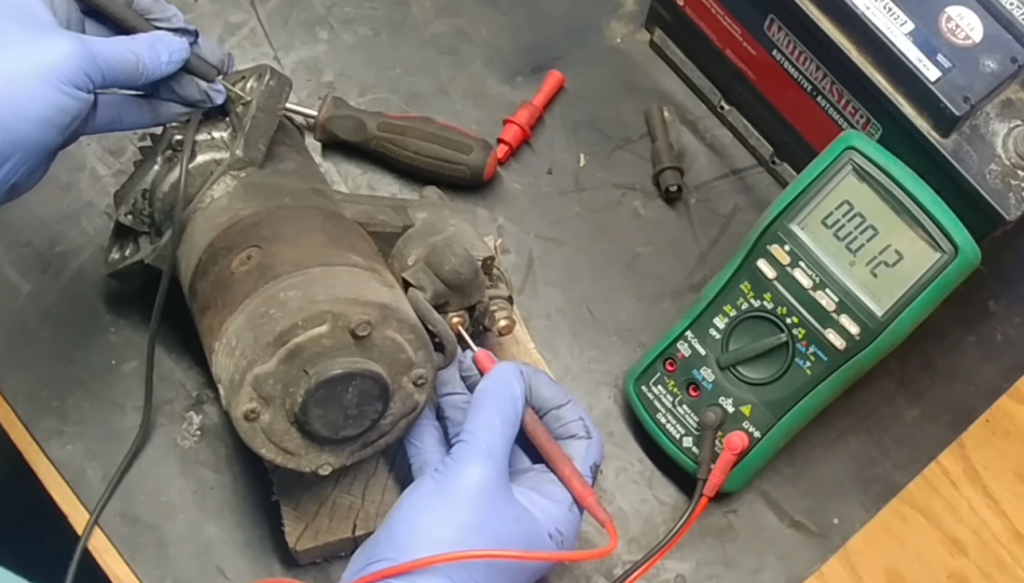
Now you can move closer to the starter itself. Most starters have a large battery cable and a smaller control wire at the solenoid.
Credit: electronicshacks.com
Step 1: Find the starter terminals
Locate the starter under the vehicle or near the engine block. The large terminal is the main battery feed. The smaller terminal is usually the trigger wire from the ignition circuit or relay.
If access is tight, use a jack and stands safely, or inspect from the top if the vehicle layout allows it. Never work under a car that is only supported by a jack.
Step 2: Check constant battery power
- Set the meter to DC volts.
- Place the black probe on a good engine ground or the starter housing.
- Place the red probe on the large battery terminal at the starter.
- Read the voltage.
You should see battery voltage all the time, even when the key is off. If you do not, there is a problem in the main power cable, fuse link, or connection from the battery.
This is another common beginner mistake: people blame the starter, but the starter never received proper battery power in the first place.
Step 3: Check the trigger signal
- Keep the black probe on ground.
- Place the red probe on the small solenoid wire.
- Have a helper turn the key to the start position.
- Watch for voltage.
When the key is turned to start, the small wire should receive battery voltage. If it does not, the issue may be in the ignition switch, relay, neutral safety switch, clutch switch, or related wiring.
If the small wire gets voltage but the starter does nothing, the solenoid or starter motor may be bad.
Perform a voltage drop test on the starter circuit
This is one of the most useful tests when you want a real answer. A voltage drop test checks how much power is lost in the cables and connections while the starter is working. This is often more helpful than just checking voltage at rest.
Why voltage drop matters
Electric current meets resistance in dirty terminals, weak cables, and loose grounds. Even a small amount of resistance can cause a large problem when the starter needs high current. The battery may be strong, but the starter still struggles because too much voltage disappears along the way.
Positive cable voltage drop
- Set the multimeter to DC volts.
- Place the red probe on the battery positive terminal.
- Place the black probe on the large starter terminal.
- Have a helper crank the engine.
- Read the voltage drop.
In general, a reading above about 0.5 volts on the positive side can point to resistance in the cable, connection, or fuse link. Lower is better.
Ground side voltage drop
- Place the red probe on the starter housing or a clean starter ground point.
- Place the black probe on the battery negative terminal.
- Crank the engine again.
- Read the voltage drop.
If the ground side shows too much drop, the engine ground strap or battery negative cable may be bad. Many people overlook the ground side, but it is just as important as the positive cable. A weak ground can cause slow cranking, clicking, and heat in the cable.
| Test area | What you measure | What a problem may mean |
|---|---|---|
| Battery at rest | About 12.4 to 12.7 volts | Low charge or weak battery |
| Battery while cranking | Usually above 9.6 volts | Weak battery or high starter draw |
| Starter positive cable drop | Low voltage loss | Bad cable, fuse link, or connection |
| Starter ground drop | Low voltage loss | Poor ground strap or corrosion |
| Solenoid trigger wire | Battery voltage during start | Ignition, relay, or switch problem |
How to tell if the starter is bad
After you complete the basic tests, look at the pattern of results. The starter is more likely bad if these things happen:
- The battery is healthy and fully charged.
- The starter receives full battery power.
- The solenoid trigger wire gets voltage when the key is turned.
- The cables and grounds show low voltage drop.
- The starter still only clicks, spins weakly, or does nothing.
That combination often points to an internal starter fault. Common internal problems include worn brushes, a bad solenoid, burned contacts, or a damaged armature.
Another useful clue is heat. If the starter gets very hot after a few attempts and still fails, it may be drawing too much current or locking up internally. Still, do not assume too fast. Repeat the test after the battery is fully charged, because low battery power can also cause extra heat.
Credit: toolsweek.com
Signs that point away from the starter
Sometimes the starter is fine. The real issue may be elsewhere if you see any of the following:
- No voltage at the solenoid trigger wire
- Large voltage drop in the positive cable
- Large voltage drop on the ground side
- Battery voltage falling too low during cranking
- Starter works after tapping lightly, but only for a short time
Tapping a starter is not a repair. It only tells you the starter may have worn internal parts. It can help you confirm a fault, but it should not replace proper testing.
Common mistakes when testing a starter
Many starter tests go wrong because of simple errors, not because the multimeter is hard to use.
1. Testing with a weak battery
A weak battery can make a good starter look bad. Always charge or verify the battery first.
2. Using a poor ground point
If your meter ground is on painted metal, rust, or a loose bolt, your readings may be misleading. Use clean metal or the battery negative terminal when possible.
3. Checking only static voltage
Static voltage is useful, but it does not show what happens under load. A starter problem often appears only when the engine is cranking.
4. Ignoring cable corrosion
Battery terminals can look okay on the outside and still have hidden corrosion inside the cable ends. Feel for heat after cranking. Hot cables often mean high resistance.
5. Replacing the starter too early
This is one of the most expensive mistakes. If you have not checked voltage at the starter and the voltage drop across the cables, you do not yet have enough proof.
Practical example of a starter test
Here is a simple example. A car clicks once when the key is turned. The battery reads 12.5 volts at rest. During cranking, it drops to 10.1 volts. The starter has full battery voltage on the large terminal. The trigger wire also gets voltage when the key is turned. The positive and ground voltage drop tests both stay low.
In that case, the starter is a strong suspect because the battery and wiring look good, but the starter still fails to work properly. If the same car had only 8.8 volts during cranking, the battery would be the first problem to solve.
This is why a step-by-step test is better than guessing. It helps you avoid replacing parts that are still good.
When to stop and get professional help
You can do many starter tests at home, but some situations need a professional mechanic:
- The starter is hard to reach safely.
- You do not have a helper to crank the engine.
- The wiring diagram is complex.
- The vehicle has a smart start system or advanced security system.
- The starter and battery both test poorly, and you are not sure which one is causing the issue.
If the vehicle has repeated electrical failures or melted cables, stop testing until the problem is fully understood. A damaged high-current circuit can become unsafe very quickly.
Quick summary of the process
If you want the short version of how to test a starter with a multimeter, follow this order:
- Check battery voltage at rest.
- Check battery voltage while cranking.
- Verify battery power reaches the starter.
- Verify the trigger wire gets voltage when starting.
- Check voltage drop on the positive cable.
- Check voltage drop on the ground side.
- Decide whether the problem is the battery, wiring, relay, or starter.
This order saves time and gives you cleaner results. It also helps you avoid one of the biggest diagnosis traps: blaming the starter before checking the rest of the circuit.
Credit: thetechwiser.com
Final thoughts
Learning how to test a starter with a multimeter is one of the best basic car repair skills you can have. It does not require advanced tools, and it can save you from replacing parts blindly. The key is to test in the right order and read the whole circuit, not just one wire.
When you check battery health, starter power, trigger voltage, and voltage drop, the problem usually becomes clear. Sometimes the starter is the issue. Sometimes the battery or cables are the real cause. Either way, proper testing gives you confidence and a better repair decision.
FAQs
1. Can a starter test good with a multimeter and still be bad?
Yes. A starter can show proper voltage and still fail under load because of worn internal parts. That is why cranking tests and voltage drop tests are important, not just resting voltage checks.
2. What voltage should a starter get when cranking?
The starter should receive close to battery voltage during cranking. Small loss is normal, but large loss often means a wiring, relay, or connection problem.
3. Do I need to remove the starter to test it?
No, not for most basic checks. You can test battery voltage, trigger voltage, and voltage drop while the starter is installed. Removal is usually only needed for bench testing or replacement.
4. What if the starter clicks but does not crank?
A single click with no cranking can mean the solenoid is engaging, but the motor is not turning. This may be caused by a bad starter, weak battery, poor cable connection, or bad ground.
5. Is a voltage drop test better than a simple voltage test?
Yes, in many cases. A voltage drop test shows where power is being lost in the circuit. It helps you find cable and connection problems that a simple voltage reading may miss.
