
If you are new to woodworking or home improvement, a compound miter saw can look a little confusing at first. The name sounds technical, and the machine itself has many parts. But once you understand the basic idea, it becomes one of the most useful power tools in a workshop.
In simple words, a compound miter saw is a cutting tool made for precise angled cuts. It helps you cut wood fast, cleanly, and accurately. People use it for trim, molding, framing, shelves, furniture, and many other projects. If you have ever wanted neat corner joints or perfect bevel cuts, this tool can save a lot of time.
In this guide, you will learn what is a compound miter saw, how it works, what makes it different from other saws, and how to choose and use one safely. You will also learn a few beginner mistakes to avoid, so you can get better results from the start.
What a compound miter saw actually does
A compound miter saw cuts material by lowering a spinning blade down onto the workpiece. The blade is mounted on a hinged arm, so you can bring it down in a controlled motion. This makes straight crosscuts easy. It also makes angled cuts possible.
The word miter means the blade can pivot left or right to cut an angle across the face of the material. The word compound means the saw can also tilt the blade to make a bevel cut. When you combine both movements, you can create more advanced cuts for corners, frames, and trim.
This is why the tool is so popular. It is built for speed and accuracy. Instead of measuring, marking, and cutting by hand each time, you can set the angle once and make repeat cuts with consistent results.
Simple example
Imagine you want to build a picture frame. The four corners must meet at exact angles. A compound miter saw lets you cut each end of the frame piece at the correct angle so the corners fit tightly. The same idea applies to baseboards, door trim, and crown molding.
How the saw is different from a regular miter saw
A regular miter saw can make angled cuts left and right. That is useful, but it has limits. A compound miter saw adds blade tilt, which gives you more cutting options.
This extra tilt is important when you need a bevel cut. A bevel cut is not the same as a miter cut. Many beginners mix them up.
- Miter cut: the blade angle changes across the width of the board.
- Bevel cut: the blade tilts, so the cut edge is sloped.
- Compound cut: both miter and bevel settings are used together.
That is the main difference. A standard miter saw can handle basic angle work. A compound miter saw can handle more complex joints and trim work.
Why this matters for beginners
Many people buy a saw for one project and later discover they need bevel cuts too. If you plan to work on molding, crown trim, or furniture edges, the extra flexibility is worth having. It is often better to buy the more capable tool once than to replace it later.
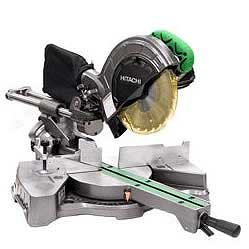
Main parts of a compound miter saw
Understanding the parts makes the tool easier to use safely. The names may sound technical, but the function of each part is simple.
| Part | What it does |
|---|---|
| Blade | Does the cutting. Different blades are used for wood, trim, or other materials. |
| Motor | Powers the blade. |
| Handle | Lets you lower the blade in a controlled way. |
| Miter scale | Shows the angle of left or right cuts. |
| Bevel scale | Shows the blade tilt angle. |
| Fence | Keeps the wood steady and straight during the cut. |
| Base | The flat platform where the material sits. |
| Clamp | Holds the workpiece in place for safety and accuracy. |
| Dust bag or dust port | Collects some sawdust or connects to a vacuum. |
Some saws also have a sliding feature. That means the blade can move forward and backward on rails. A sliding compound miter saw can cut wider boards than a non-sliding version. This is very helpful for larger trim and wider lumber.
Why people use a compound miter saw
This saw is loved because it solves several common cutting problems at once. It is fast, accurate, and repeatable. Those three qualities matter a lot in woodworking.
Credit: uptownfloors.com
1. Clean angled cuts
Corner joints look better when the angles are correct. A compound miter saw makes this much easier than a hand saw or circular saw. The cut is usually cleaner and more exact.
2. Faster project work
Once the saw is set up, you can make the same cut many times. That is useful when cutting multiple pieces of trim or framing lumber. It saves time and reduces measuring errors.
3. Better control
The material stays flat on the base and against the fence. This gives better control than many freehand cutting methods. Beginners often feel more confident because the tool guides the cut for them.
4. Wide project use
You can use it for home repairs, DIY shelves, picture frames, deck parts, molding, and more. It is not just for experts. Many beginners get real value from it right away.
Common projects you can do with it
If you are still wondering whether this tool is useful for you, look at the kinds of projects it can handle.
- Baseboards and trim: Make neat corner joints around rooms.
- Crown molding: Cut angled edges for ceiling trim.
- Picture frames: Create matching 45-degree cuts.
- Furniture builds: Cut legs, rails, and support pieces accurately.
- Deck and outdoor work: Trim boards for clean fitting pieces.
- Framing: Cut lumber to length quickly on job sites or at home.
One useful but often missed point: the saw is not only for “special” angled cuts. Many woodworkers use it every day for simple straight cuts because it is faster and more accurate than other tools for repeated cuts.
How it cuts: miter, bevel, and compound cuts
These three terms are important if you want to use the saw well. Beginners often hear them used together, but they are not the same.
Miter cut
A miter cut changes the angle left or right. If you cut two boards at 45 degrees and join them, they can form a 90-degree corner.
Bevel cut
A bevel cut changes the tilt of the blade. This is useful when you want a sloped edge on the side of a board.
Compound cut
A compound cut uses both settings at the same time. This is common in crown molding and some furniture joints. It sounds advanced, but the saw makes it easier than doing the same cut by hand.
Non-obvious insight: the hardest part of compound cutting is often not the saw itself. It is remembering which direction to angle the board and which direction to tilt the blade. A small mistake in setup can ruin a piece fast. That is why many pros test on scrap wood first.
How to choose the right compound miter saw
Not every saw is the same. If you are buying one, focus on the features that match your projects. A bigger saw is not always better. The best choice is the one that fits the work you plan to do.
Blade size
Common blade sizes are 8.5-inch, 10-inch, and 12-inch. A 10-inch saw is a popular middle choice for many home users. It offers a good balance of capacity, size, and cost.
A 12-inch blade can handle wider cuts, but the saw is often larger and heavier. For small shops or simple trim work, a 10-inch model may be enough.
Sliding or non-sliding
If you only cut narrow boards and trim, a non-sliding saw may be enough. If you need to cut wider boards, a sliding compound miter saw gives you more reach. This is one of the most practical features to consider.
Bevel range
Look at how far the blade can tilt. Many saws bevel one way only, while others bevel both ways. Dual-bevel saws are easier for crown molding and repeated angled work because you do not have to flip the board as often.
Fence and base size
A strong fence helps hold the work square. A larger base can support longer boards better. This makes your cuts safer and more accurate.
Visibility and controls
Good blade visibility helps you line up the cut. Clear angle markings and easy locks make the saw simpler to use. For beginners, this matters more than many buyers think.
Non-obvious insight: many people focus only on motor power, but blade quality can matter just as much. A sharp, high-quality blade often gives a cleaner cut than a more powerful saw with a weak blade. The blade is the part that meets the wood, so it plays a huge role in finish quality.
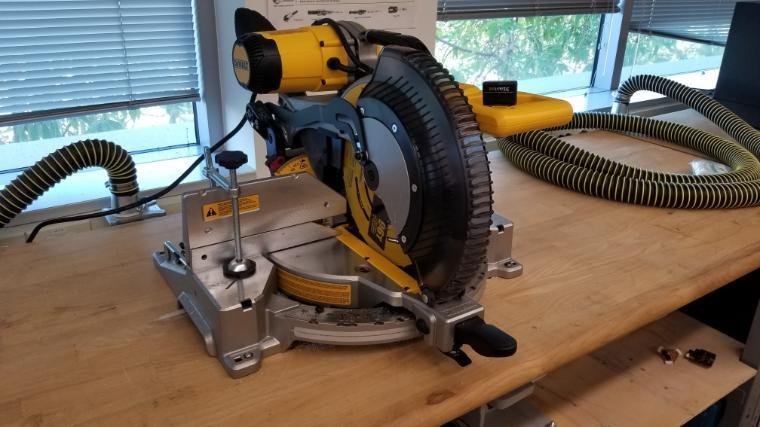
How to use a compound miter saw safely
Safety is not optional with this tool. The blade is fast and sharp, so every cut should be done with care. The good news is that the saw is safe when used correctly.
- Wear safety glasses before turning the saw on.
- Keep your hands away from the blade path.
- Clamp the wood when possible, especially small pieces.
- Let the blade reach full speed before lowering it into the cut.
- Lower the blade slowly and steadily.
- Wait for the blade to stop before lifting the saw back up.
- Keep the work area clean so offcuts and sawdust do not create problems.
For more detailed safety guidance, you can also check the OSHA website for general power tool safety advice.
Credit: scu.edu
Common safety mistakes
One mistake is trying to cut pieces that are too small to hold safely. Another is using a dull blade, which can cause rough cuts and extra force. A third mistake is standing directly in line with the blade when starting the cut. Good body position matters.
Also, never rush the cut. Speed helps productivity, but forcing the blade can reduce accuracy and raise the risk of kickback or binding.
How to get better results on your first cuts
The first few cuts are important. If you set up the saw well, it becomes much easier to trust it later. Small setup habits often create the biggest improvement.
Use scrap wood first
Before cutting your final material, test the angle on scrap pieces. This is one of the best beginner habits. It helps confirm the saw angle and the direction of the cut.
Mark clearly
Use a sharp pencil or marking knife so you can see the line. If your line is fuzzy, the cut may end up off by a little bit, which can matter in trim work.
Hold the board firmly
A loose board can move during the cut. Even a small movement can change the angle or leave a bad edge. Let the fence and clamp do their job.
Use the right blade for the job
A fine-tooth blade is usually better for trim and finish cuts. A rougher blade may be fine for general wood cutting, but it can leave more tear-out on visible surfaces.
Compound miter saw vs other common saws
It helps to compare this tool with other saws so you know when to use it and when another tool may be better.
| Tool | Best for | Main limit |
|---|---|---|
| Compound miter saw | Angled cuts, trim, molding, repeat cuts | Not ideal for long rip cuts |
| Table saw | Rip cuts and long straight cuts | Less convenient for angled trim work |
| Circular saw | Portable rough cutting and large sheets | Less precise for repeat angled cuts |
| Hand saw | Very small jobs or no-power situations | Slower and less consistent |
The key point is this: the compound miter saw is a specialist tool for accurate crosscuts and angles. It is not meant to replace every other saw, but it does its own job very well.
What beginners often get wrong
Many first-time users think the saw alone guarantees a perfect cut. It does not. Setup, measurement, blade choice, and board support all affect the result.
- Confusing miter and bevel angles: These are different settings, and mixing them up causes bad joints.
- Cutting on the wrong side of the mark: Always know which side of the line your blade will remove.
- Ignoring board support: Long pieces need support so they do not sag.
- Using the wrong blade: A blade made for rough cutting may damage finish work.
- Skipping test cuts: This often leads to wasted material.
One more mistake is measuring every piece from the wrong reference point. In trim work, the visible edge and the wall edge are not always the same. Measuring from the wrong side can lead to joints that do not fit. This is a small detail, but it causes many beginner problems.
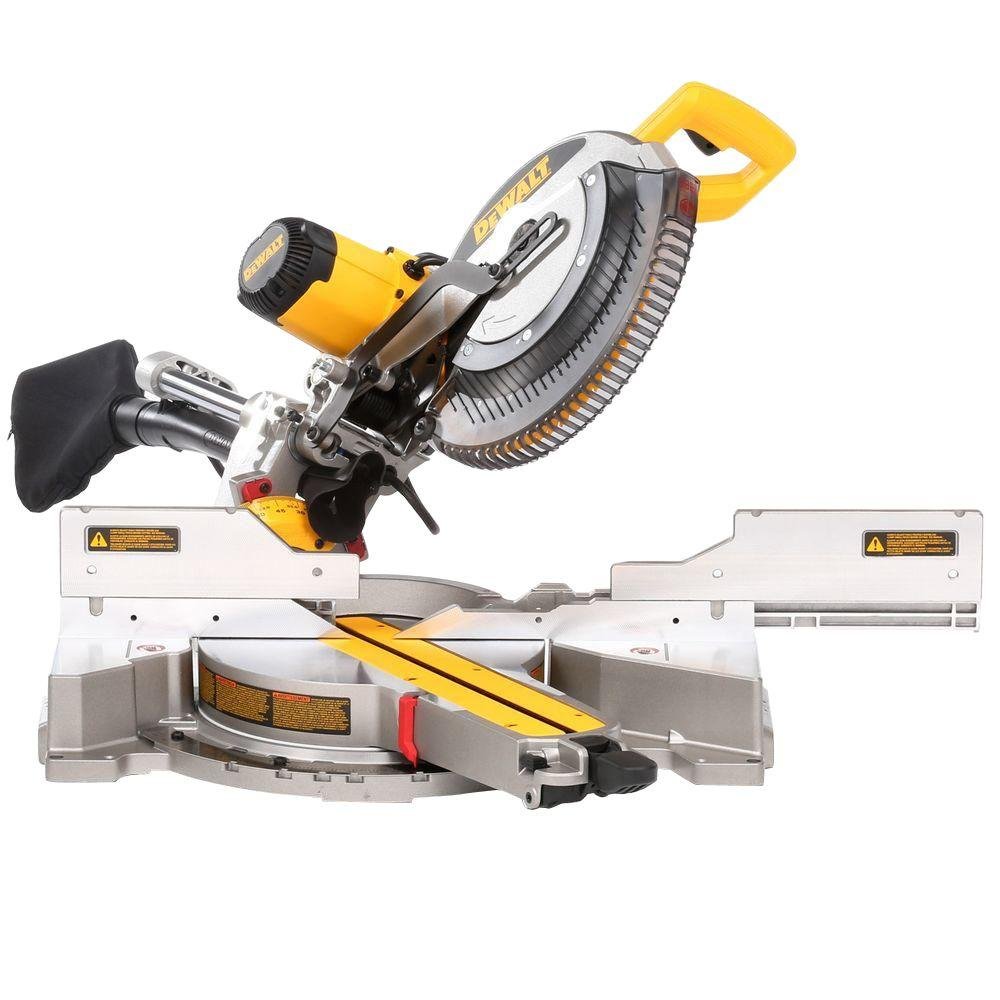
Maintenance that keeps the saw working well
A compound miter saw does not need complicated care, but basic maintenance makes a big difference. A clean, sharp saw cuts better and lasts longer.
Credit: woodworkingadvisor.com
Keep the blade clean
Sawdust and resin can build up on the blade. This can slow the cut and make it rough. Clean the blade according to the maker’s instructions.
Check alignment
Over time, the fence, blade, and angle settings can drift slightly. If cuts stop fitting well, check the saw’s alignment before blaming the material.
Remove dust buildup
Dust inside the saw can affect moving parts. Use a brush or vacuum to keep the tool clean.
Store it properly
Keep the saw dry and covered when not in use. Moisture and rough storage can shorten tool life.
Final thoughts before you buy one
If you were asking what is a compound miter saw, the short answer is simple: it is a power saw made for accurate angled cuts, with both miter and bevel movement. The longer answer is that it is one of the best tools for trim, molding, frames, and many woodworking projects.
For beginners, the biggest advantage is control. The saw helps you make clean cuts with less effort. The biggest challenge is learning the angle settings and cut direction. Once that becomes familiar, the tool becomes easy to trust.
If your projects involve corners, molding, furniture parts, or repeated wood cuts, this saw is worth serious attention. Start with scrap wood, learn the settings slowly, and use a sharp blade. That simple approach will give you better results than rushing into the final piece.
FAQs
1. What is a compound miter saw used for?
A compound miter saw is used for accurate crosscuts, miter cuts, bevel cuts, and compound cuts. It is common in trim work, framing, molding, and furniture projects.
2. Is a compound miter saw good for beginners?
Yes. It is one of the easier power saws for beginners to learn because the material stays in place and the saw helps guide the cut. Basic safety and setup are still very important.
3. What is the difference between a miter saw and a compound miter saw?
A regular miter saw can turn left or right for angled cuts. A compound miter saw can do that and also tilt the blade for bevel cuts.
4. Do I need a sliding compound miter saw?
Not always. If you only cut trim or narrower boards, a non-sliding model may be enough. If you need to cut wider boards, a sliding model gives you more cutting capacity.
5. What blade should I use on a compound miter saw?
For clean finish cuts, use a sharp fine-tooth blade that matches your material. The right blade can improve cut quality more than many beginners expect.
