
If you have ever seen a rough wooden board become smooth in a few seconds, chances are a belt sander was doing the work. This tool looks simple, but it can remove material fast and solve many common workshop jobs. That is why so many beginners ask what is a belt sander used for before they buy one.
A belt sander is not a “do everything” tool. It is a strong, aggressive machine made for speed, shaping, and heavy sanding. Used the right way, it can save hours of hand work. Used the wrong way, it can damage wood very quickly. So the real value is not just knowing the tool name. It is understanding where it helps most and where it should be avoided.
In this guide, you will learn the main uses of a belt sander, the benefits it offers, and a few mistakes many beginners make. You will also see practical tips that help you use it with more control and better results.
Why a belt sander matters in a workshop
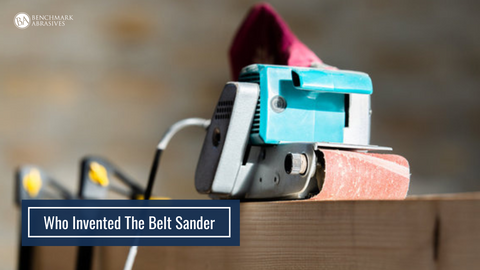
A belt sander uses a continuous loop of sandpaper, called a belt, that moves quickly over a flat surface. That speed gives it strong cutting power. It can remove old finish, level uneven wood, smooth rough edges, and shape material much faster than light sanding tools.
For many jobs, speed is the biggest reason people use one. But speed is only part of the story. A belt sander is also helpful when a surface is too rough for fine finishing tools. Instead of working slowly with sandpaper by hand, you can make a big change in a short time.
This tool is especially useful in woodworking, flooring, furniture repair, and home improvement. It is also one of the best tools for fixing mistakes like uneven boards or bad glue lines. The key is to use it as a rough-shaping tool, not as a final finishing tool.
1. Removing old paint, varnish, and finish
One of the most common answers to what is a belt sander used for is stripping away old surface layers. If a table, door, deck board, or wooden bench has old paint or worn finish, a belt sander can remove it fast.
This is useful when the surface is thick, damaged, or uneven. A random orbit sander may take too long, and hand sanding may be tiring. A belt sander gives stronger cutting action and can bring the wood back to a bare state quickly.
Still, you need to be careful. If you stay in one place too long, the sander can dig into the wood and leave low spots. Light pressure is better than forcing the tool.
Best use cases
- Old furniture that needs refinishing
- Painted wooden doors
- Deck boards with worn coating
- Thick varnish on trim or tabletops
2. Leveling uneven boards and surfaces
A belt sander is very good at making high spots lower. If two boards are not flush, or if one edge stands higher than another, the tool can help create a flatter surface. This makes it useful in woodworking joints, floor repairs, and rough construction jobs.
Beginners often miss this: a belt sander is not only for “smoothing.” Its real strength is leveling. When you need one area to match another, this tool can make the surface even before final sanding begins.
For example, if you glue two boards together and the joint is slightly raised, a belt sander can reduce the step quickly. The same idea works on door edges, shelves, and tabletop repairs.
What to watch for
Use the sander with the grain when possible. Move in steady passes and do not lean hard on the machine. Too much pressure can create dips, especially on soft wood.
3. Shaping wood and edges
Another common use is shaping wood. A belt sander can round sharp edges, smooth a rough cut, and help form curves or bevels. It is often used when a piece does not need perfect finish quality yet, but does need a better shape.
This is one reason carpenters and woodworkers keep one nearby. After cutting, wood often has rough corners or slight errors. The belt sander helps refine the shape fast.
It is also useful for fitting pieces together. If a board is a little too wide or a door edge rubs the frame, the sander can remove just enough material to improve the fit.
Common shaping jobs
- Rounding square corners
- Beveling sharp edges
- Adjusting door and cabinet fits
- Cleaning up rough sawn lumber
4. Smoothing rough lumber
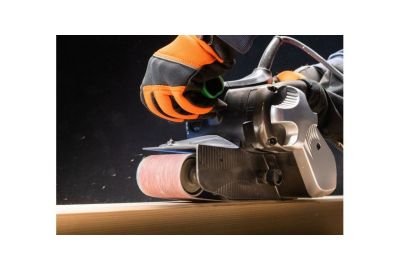
Freshly cut lumber often feels rough, uneven, or splintered. A belt sander is useful for turning that rough surface into something more usable. If you buy wood from a mill, salvage yard, or lumber stack, the boards may need major smoothing before you can finish them.
One helpful insight many beginners miss is that a belt sander is often the first sanding step, not the last. It does the heavy work, then a finer sander or hand sanding makes the surface ready for stain or paint.
This approach saves time. Instead of trying to make rough wood perfect with a soft finishing sander, you start with the machine that is built to remove material faster.
Credit: heamar.co.uk
Why this matters
If the wood is very rough, starting with a finer sander can waste time and wear out sandpaper quickly. A belt sander gets the surface close to level before final smoothing.
5. Repairing damage and removing imperfections
Scratches, glue spills, water marks, burn marks, and small surface dents can often be improved with a belt sander. It is especially helpful when the damage is shallow but spread over a larger area.
For example, if you are restoring a workbench or a used tabletop, a belt sander can help remove marks that would take a long time to fix by hand. It can also clean up dried glue lines after a project is assembled.
One thing to remember is that a belt sander removes a lot of material quickly. That is good for damage repair, but it can be a problem if the mark is only on the surface and you sand too deep.
Good examples
- Dried wood glue on panel edges
- Light scorch marks
- Old water stains in unfinished wood
- Small ridges left after assembly
6. Preparing surfaces for finishing
A belt sander is not usually the final tool for finishing, but it can prepare a surface very well. Before staining, painting, or sealing wood, the surface needs to be flat and free from major imperfections. A belt sander helps create that base.
This is a smart use when the wood is still rough or when an old finish must be removed before applying a new one. After the belt sander does the heavy work, finer sanding creates the smooth feel people want in the final piece.
Here is a simple rule: use the belt sander to remove problems, not to create polish. That small shift in thinking helps beginners get much better results.
Best workflow for finishing
- Use the belt sander to remove rough spots, old finish, or uneven areas.
- Switch to a finer sanding tool for smoother work.
- Wipe away dust before applying stain or paint.
- Check the surface under good light before finishing.
7. Cleaning up construction and renovation work
Belt sanders are also useful on job sites and during home repairs. They can help clean rough edges on framing lumber, smooth patched areas, and correct surfaces that do not line up well after installation.
This use is not always as visible as furniture sanding, but it is very practical. If a project has been cut, nailed, glued, or patched, a belt sander can make the surface easier to work with before the next step.
It is a great tool for renovation tasks where speed matters more than fine detail. That includes old wood repairs, subfloor adjustments, and basic trim correction.
Examples in renovation
- Trimming slightly high floor patches
- Cleaning rough framing edges
- Smoothing repair spots before painting
- Fixing uneven joints in woodwork
Main benefits of using a belt sander
Now that the common uses are clear, it helps to look at the real benefits. The belt sander is popular not because it is fancy, but because it solves hard jobs quickly.
| Benefit | Why it helps |
|---|---|
| Fast material removal | It can save a lot of time on rough surfaces, old finish, and shaping work. |
| Good for heavy-duty jobs | It handles tasks that are too slow for light sanding tools. |
| Useful for leveling | It helps fix high spots and uneven boards. |
| Versatile in many projects | It works for furniture, doors, floors, trim, and repair work. |
| Saves effort | It reduces the need for long hand sanding sessions. |
These benefits explain why a belt sander is often one of the first tools people buy after the basics. It adds speed, control, and flexibility to many jobs.
Credit: benchmarkabrasives.com
Where a belt sander should not be used
To understand what is a belt sander used for, it also helps to know what it is not for. This tool is not ideal for delicate finishing. It is usually too aggressive for thin veneers, soft woods with no practice, or surfaces that need a polished look.
It is also a risky choice on curved details, decorative moldings, and edges you cannot afford to damage. In those cases, hand sanding or a finer machine is safer.
Another common beginner mistake is using a belt sander as if more pressure means better results. In reality, pressure often makes the finish worse. The belt does the cutting. Your job is mainly to guide it.
Better alternatives for some jobs
- Random orbit sander for general finishing
- Detail sander for corners and small spaces
- Hand sanding for delicate edges and final touch-up
How to get better results with a belt sander
If you want cleaner results, a few habits make a big difference. These are simple, but they matter.
Use the right grit
Start with a coarse belt when you need heavy removal, then move to a finer grit only if the job calls for it. Using too fine a belt at the start wastes time.
Keep the sander moving
Do not stop in one place while the belt is running. Slow, even passes help prevent gouges and dips.
Work with the grain
When sanding wood, moving with the grain usually gives better results. Cross-grain sanding can leave marks that show later.
Let the tool do the work
Pressing hard does not make the job better. It can overheat the belt and damage the surface. Light control is better.
Control dust
Belt sanders create a lot of dust. A dust bag or vacuum connection helps keep the work area cleaner and makes it easier to see what you are doing.
For more general safety guidance on sanding and power tool use, a helpful reference is the Occupational Safety and Health Administration.
Two beginner mistakes that are easy to miss
Most people know not to press too hard. But there are two other mistakes that matter just as much.
1. Starting with the wrong grit
Some beginners choose a grit that is too fine for rough work. The result is slow sanding, extra heat, and a worn belt. Start coarse when the surface is rough, then move finer only when needed.
2. Using it as a finishing tool
A belt sander can make wood smooth enough to keep going, but it is rarely the final step. If you stop too early, the surface may still have scratches or uneven spots. Final sanding is still important.
Should you buy one?
If you do regular woodworking, home repair, or furniture restoration, a belt sander can be a smart purchase. It is especially useful if you often work with rough lumber, old finishes, or uneven boards.
If you only sand small projects and finish surfaces carefully, you may not need one right away. In that case, a random orbit sander might be more useful as a first tool. But if your projects involve heavy sanding, a belt sander can become one of the most time-saving tools in your shop.
The best way to think about it is this: a belt sander is a problem solver. It is there for jobs that are too rough, too uneven, or too slow for lighter sanding methods.
Credit: benchmarkabrasives.com
Final thoughts
So, what is a belt sander used for? It is used for fast material removal, leveling uneven surfaces, removing old finish, shaping wood, and preparing rough projects for final sanding. It is strong, quick, and very useful when you need real sanding power.
The main benefit is not just speed. It is the ability to fix problems that would take much longer by hand. Once you understand its strengths, you can use it with more confidence and get cleaner results.
FAQs
What is a belt sander used for in woodworking?
In woodworking, a belt sander is used for removing rough wood, leveling joints, shaping edges, and stripping old finish. It is usually the first sanding tool for heavy work, not the last tool for fine finishing.
Can a belt sander damage wood?
Yes. A belt sander can remove wood very quickly, so it can leave gouges, dips, or burn marks if you stay in one spot or press too hard. Light pressure and steady movement help prevent damage.
Is a belt sander better than a random orbit sander?
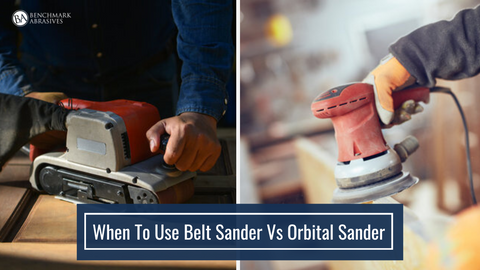
It depends on the job. A belt sander is better for heavy removal and leveling. A random orbit sander is better for smooth finishing. Many workshops use both because they do different work.
What grit belt should I start with?
For rough work, start with a coarse grit such as 40 or 60. For lighter sanding, 80 grit may be enough. If you are unsure, begin with a coarser belt and move finer later if needed.
Can I use a belt sander on painted surfaces?
Yes, you can use it to remove paint from wood, but you must be careful. It works fast and can cut into the wood under the paint if you are not careful. Keep the sander moving and use controlled pressure.
