
A fuse is a small part, but it can stop a whole device from working. When a lamp, appliance, car circuit, or power tool goes dead, the fuse is often the first thing to check. The good news is that you do not need special skills to do it.
If you have a multimeter, you can test a fuse in minutes. This saves time, avoids guesswork, and helps you find the real problem faster. You only need a few basic safety steps and a clear process.
In this guide, you will learn how to test a fuse with a multimeter the right way. You will also learn how to read the meter, spot a bad fuse, and avoid common mistakes that many beginners make.
What you need before you start
Before you test a fuse, gather the right tools and make sure the circuit is safe. This is important because a fuse can look fine on the outside and still be broken inside.
- A multimeter with continuity or resistance mode
- The fuse you want to test
- Safety gloves, if needed
- Good light so you can see the fuse clearly
If the fuse is part of a device, unplug the device first. If it is in a car, turn off the ignition and remove the key. If you are working with any larger electrical system, make sure power is fully off before touching anything.
One small but important point: do not trust your eyes alone. Some fuses look clean even when they are blown. Others may look dark or cracked, but that does not always mean they are bad. A multimeter gives a real answer.
Know the type of fuse you are testing
Fuses come in different shapes and sizes. The most common are glass tube fuses, ceramic fuses, and blade fuses used in cars. The testing method is similar for all of them, but the way you hold them and read them may feel different.
Also, check the fuse rating if you can. The rating tells you how much current the fuse can handle. Replacing a fuse with the wrong rating can cause more problems later. For general electrical safety guidance, you can also review the National Fire Protection Association.
How a fuse works
A fuse is a simple safety part. It has a thin metal strip inside. When too much current flows through it, the strip melts. This breaks the circuit and protects the device from damage, heat, or fire.
That means a blown fuse is not always a failure in the usual sense. In many cases, it is doing its job. If a fuse keeps blowing, the fuse may not be the real problem. The real issue could be a short circuit, overloaded circuit, bad motor, or damaged wire.
This is one of the first things beginners miss. They replace the fuse and feel done. But if the cause is still there, the new fuse will blow again. So, testing a fuse is only part of the job. You should also think about why it failed.
Set your multimeter the right way
To test fuse multimeter readings correctly, start with the right meter setting. Most people use either continuity mode or resistance mode. Continuity mode is the easiest for beginners because it gives a clear yes-or-no result.
Using continuity mode
Continuity mode checks whether electricity can pass through the fuse. If the fuse is good, the meter usually beeps. If the fuse is blown, there is no beep.
This mode is fast and simple. It is often the best choice for a quick fuse check.
Using resistance mode
Resistance mode shows the amount of electrical resistance in ohms. A good fuse should show very low resistance, often close to 0 ohms. A blown fuse usually shows OL, infinite resistance, or no reading.
If your meter does not have a continuity setting, resistance mode works well.
Check the meter leads first
Before testing the fuse, touch the two probe tips together. In continuity mode, the meter should beep. In resistance mode, the reading should be near zero. This simple check tells you the meter is working properly.
If the meter does not respond when the probes touch, the problem may be the meter battery, the leads, or the setting you chose. Do not test the fuse until the meter is confirmed working.
Step-by-step: test fuse multimeter method
Now let’s go through the actual process. Keep the fuse out of power while testing. Never try to test a fuse in a live circuit unless you know exactly what you are doing and the test method requires it.
-
Turn off power to the circuit.
Unplug the device, switch off the breaker, or shut off the car ignition. Safety comes first. A fuse test does not need live power.

Credit: bangingtoolbox.com
-
Remove the fuse if possible.
Testing a fuse out of the circuit gives a cleaner result. If the fuse stays installed, other parts of the circuit can affect the reading and confuse the result.
-
Set the multimeter to continuity or resistance.
Use continuity mode if you want the fastest answer. Use resistance mode if that is what your meter offers.
-
Touch one probe to each end of the fuse.
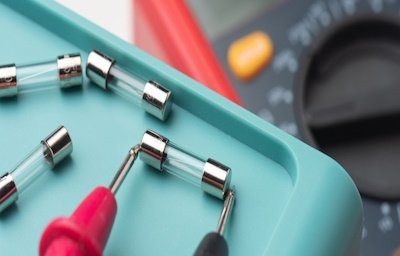
For blade fuses, place one probe on each metal contact. For glass tube fuses, touch the probes to the metal caps on both ends.
-
Read the result.
If the fuse is good, the meter should beep in continuity mode or show a very low resistance value. If the fuse is blown, there will be no beep or the screen will show OL or a very high resistance.
-
Repeat the test if needed.
If the result seems unclear, move the probes again and test a second time. Poor probe contact can cause a false reading.
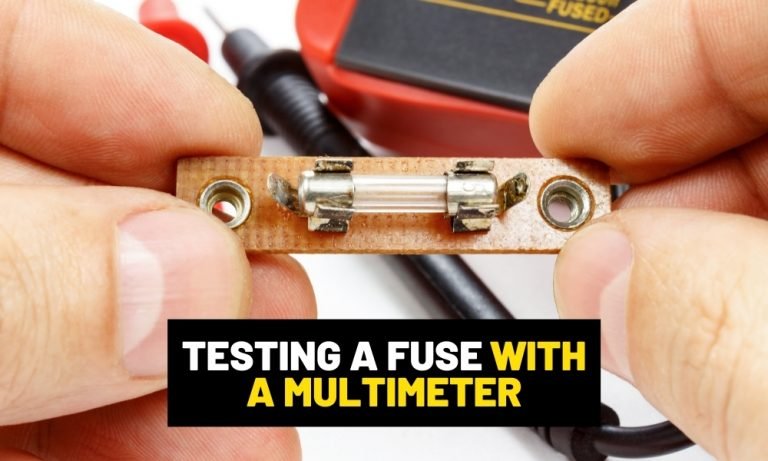
That is the basic process. It is simple, but it works well when done carefully. The key is to make sure the probes touch metal, not plastic or dirt.
How to read the result correctly
Many beginners can follow the steps but still misread the result. The display may look strange if the fuse is partly damaged or if the meter is set wrong.
| Meter result | What it usually means | What to do next |
|---|---|---|
| Beeps in continuity mode | Fuse is likely good | Check the rest of the circuit if the device still does not work |
| No beep in continuity mode | Fuse is likely blown | Replace it with the correct rating |
| 0.0 to 1.0 ohms | Fuse is likely good | Test the circuit if problems continue |
| OL or very high resistance | Fuse is open or blown | Replace the fuse and check the cause |
One useful detail: some meters beep with a little delay. Do not pull the probes away too fast. Hold them steady for a second or two before deciding the fuse is bad.
Another detail beginners often miss is that a fuse can be damaged in a way that looks weak rather than fully open. If the reading jumps around, the metal inside may be cracked or loose. In that case, it is usually safer to replace the fuse.
What to do if the fuse is good but the device still fails
A good fuse does not always mean the circuit is healthy. If the fuse passes the test but the device still does not work, the problem is somewhere else.
Here are the most common causes:
- A broken switch
- Loose wiring
- A bad connector
- A failed motor or component
- Another fuse in a different location
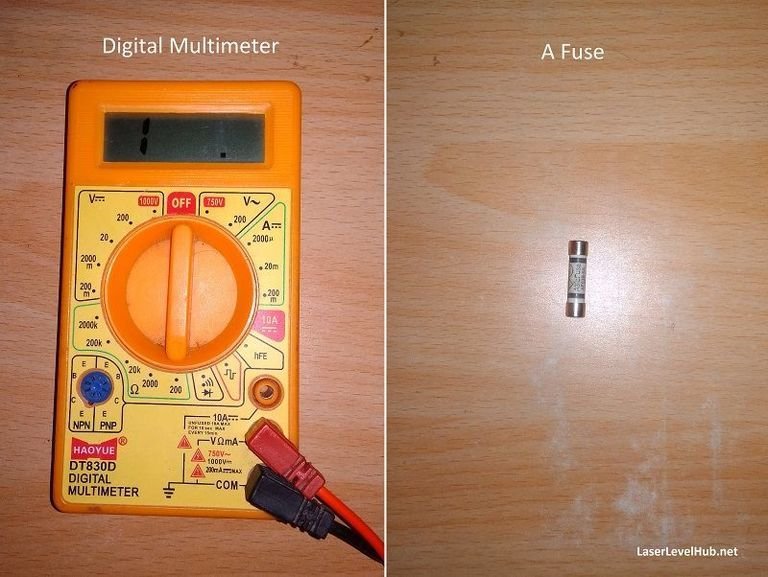
This is a second beginner mistake: testing only one fuse and assuming the whole system is fine. Some devices have more than one fuse. Others have inline fuses hidden inside the wiring. If one fuse is good, keep looking.
If you are testing a car fuse and the fuse is good, check the circuit diagram if you have one. In many cases, the issue is a relay, switch, or wire fault rather than the fuse itself.
Credit: laserlevelhub.net
What to do if the fuse is blown
If your multimeter shows no continuity or very high resistance, the fuse is blown. Replace it with the same type and rating. Never use a fuse with a higher rating just because it “fits.” That can remove protection from the circuit.
Before installing the new fuse, ask why the old one failed. If the new fuse blows right away, there is likely a deeper issue. Common causes include:
- Shorted wiring
- Water damage
- Overloaded circuit
- Bad appliance parts
- Incorrect replacement parts
If the fuse blew after a recent repair or part change, recheck your work. A wire may be pinched, a connector may be loose, or the new part may draw too much current.
Common mistakes when testing a fuse
Even a simple job can go wrong if you rush. These are the errors that cause the most confusion.
Testing without removing power
Always switch off power first. A live circuit can give false readings and can be dangerous. It also makes it harder to know if the fuse itself is the issue.
Using the wrong meter setting
If you leave the meter on voltage mode, you will not get a proper fuse test. Use continuity or resistance mode for this job.
Touching the wrong parts
Make sure the probes touch metal ends, not the plastic body of the fuse. Poor contact can make a good fuse look bad.
Trusting appearance alone
Some blown fuses look perfect. Others look dark but still work. The meter gives the real answer, not the outside surface.
Replacing with the wrong fuse rating
This mistake can be risky. A fuse is designed to protect a circuit at a certain current level. Use the exact rating recommended by the device or vehicle maker.
Extra tips that make testing easier
Once you know the basic method, a few small habits can make the process much better.
Keep spare fuses nearby. If you know the correct size and rating, a replacement is easy to install after the test.
Clean dirty contacts. Corrosion or dirt on fuse ends can make your probe contact weak. A quick clean can help you get a better reading.
Use good lighting. A strong light helps you place the probes in the right spot, especially on small blade fuses.
Test more than once. If the reading changes when you move the probe slightly, the fuse or its contacts may be damaged.
Label removed fuses. If you are testing several fuses, keep them in order. This avoids confusion when you put them back.
Here is one more non-obvious point: in some circuits, a fuse can fail because of age and heat, even if the device did not seem heavily loaded. Heat cycles over time can weaken the metal inside. So if a fuse blows after normal use, age can still be part of the cause.
Quick summary of the process
If you want the shortest version, here it is. Turn off power. Remove the fuse if possible. Set the multimeter to continuity or resistance. Touch one probe to each end of the fuse. A good fuse beeps or shows very low resistance. A blown fuse shows no beep or OL.
That is the core of how to test a fuse with a multimeter. The method is simple, but the details matter. Careful testing gives you a clear answer and helps you avoid unnecessary part replacement.
Credit: tameson.com
FAQs
1. Can I test a fuse without removing it?
Yes, sometimes you can test a fuse while it is still in the circuit. But removing it gives a more accurate result. Other parts of the circuit can affect the reading if the fuse stays installed.
2. What should a good fuse read on a multimeter?
A good fuse should usually beep in continuity mode or show very low resistance, often close to 0 ohms. Exact readings can vary a little by meter, but the result should still show a clear path for electricity.
3. Does a blown fuse always look broken?
No. Some blown fuses look normal from the outside. The metal inside may be open even if the glass or plastic body looks fine. That is why testing with a multimeter is better than visual inspection alone.
4. Can I use any multimeter to test a fuse?
Most digital multimeters can test a fuse if they have continuity or resistance mode. Even a basic meter is enough for this task. You do not need an expensive model for a simple fuse check.
5. What if the fuse keeps blowing after I replace it?
If a new fuse blows again, the fuse is probably not the main problem. There may be a short circuit, bad wiring, overloaded part, or damaged device. Stop replacing fuses blindly and inspect the circuit further.
