
If you want to hold a bolt, clamp a broken part, or turn a stubborn nut, locking pliers can save time and effort. They are strong, simple tools, but they can also damage parts if you use them the wrong way. That is why learning the right method matters.
This guide explains how to use locking pliers in a clear, beginner-friendly way. You will learn how they work, how to adjust them, when to use them, and how to avoid common mistakes. You will also see practical tips that make the tool safer and more useful in real jobs.
Whether you are fixing something at home, working on a car, or handling metal parts in a workshop, this article will help you use locking pliers with more confidence and better control.
What locking pliers do and why they matter
Locking pliers are also called vise-grip pliers. They have a special locking mechanism that lets them clamp onto an object and stay in place without constant hand pressure. This makes them very different from normal pliers. Regular pliers only hold while you squeeze. Locking pliers keep gripping on their own until you release them.
That feature makes them useful in many situations. You can hold a round bolt head, clamp two metal pieces together, turn a stuck fastener, or even use them as a temporary clamp. Many beginners think locking pliers are only for gripping. In reality, they are also a holding and turning tool.
One important point people miss is this: locking pliers are strong, but they are not gentle. They can leave marks, crush soft metal, or round off bolt heads if used carelessly. So the goal is not just to make them tight. The goal is to make them fit correctly and hold with control.
Main parts of locking pliers
Before you learn the steps, it helps to know the basic parts of the tool.
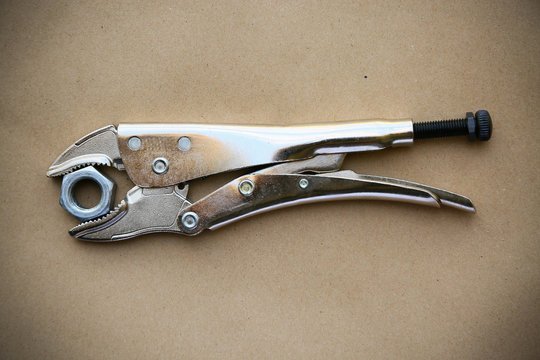
- Jaw — the part that grips the object
- Adjustment screw — sets how wide the jaws open and how tightly they clamp
- Release lever — unlocks the jaws
- Handles — the part you squeeze to lock the tool
Once you understand these parts, the tool becomes much easier to control.
Choose the right locking pliers for the job
Not all locking pliers are the same. Some have straight jaws, some have curved jaws, and some are made for special tasks. If you choose the wrong type, the tool may slip or damage the workpiece.
For general use, curved-jaw locking pliers are a good starting point. They grip round objects and flat surfaces fairly well. Straight-jaw versions are better for flat materials and sharp edges. Needle-nose locking pliers work in tight spaces, while long-jaw types help when you need more reach.
The size also matters. A small pair is easier to control for light tasks, but a larger pair gives more clamping power. Do not assume bigger is always better. If the jaws are too large for the object, they may not hold properly.
When buying or choosing a pair, look for:
- Solid jaw alignment
- Easy but firm adjustment screw
- Smooth release lever
- Comfortable handle shape
- Good grip teeth, without being overly worn
A worn-out tool may still lock, but it may not lock safely or tightly. That is one of the beginner mistakes many people miss.
How to use locking pliers step by step
Now let’s get to the main process. The steps below show how to use locking pliers in a simple and safe way.
1. Open the jaws wide enough
Turn the adjustment screw until the jaws open wider than the object you want to grip. This is the starting point. If the jaws are too tight before you place the tool on the object, you may not be able to fit it on at all.
For example, if you are clamping a bolt head, open the jaws so they can slide over the head without forcing them. If you are holding a pipe, allow enough space for the curved jaws to sit around it.
2. Place the jaws on the object
Set the pliers directly onto the part you want to grip. Try to place the jaws as squarely as possible. Good placement gives better bite and reduces slipping.
If you are gripping a bolt, place the jaws on the flat sides of the head, not the corners. If you clamp a pipe, center the curved jaws around it so the grip is even.
This small step makes a big difference. Many beginners place the tool too close to the edge or at an angle. That often causes the tool to slip when force is applied.
3. Tighten the adjustment screw
Turn the screw slowly until the jaws feel snug on the object. You want a firm hold, but not a crushing one. The right setting is usually one where the tool clamps securely with a strong squeeze of the handles.
Do not over-tighten at this stage. If the jaws are too tight before locking, the tool may be hard to close, and you may damage softer materials. The best result is a grip that feels secure and controlled.
4. Squeeze the handles until the tool locks
Now squeeze the handles together. You should feel the locking action engage. Once it locks, the pliers stay closed without your full hand pressure. The grip should feel solid, not loose or shaky.
If the handles close too easily and the tool does not feel secure, release it and tighten the adjustment screw a little more. If it is extremely hard to close, loosen the screw slightly.
Here is the practical rule: the pliers should lock with firm pressure, but not with a struggle.
5. Test the grip before using force
Before you pull, twist, or hold something important, test the grip gently. Wiggle the tool a little and check for movement. A secure hold should not slip easily.
This is one of the most useful habits you can build. A quick test can prevent damage to the object and protect your hands from sudden slips.
6. Use the tool for the task
Once locked, you can use the pliers in several ways:
- Holding — keep a part steady while you work on it
- Turning — rotate a stuck bolt, nut, or pipe fitting
- Clamping — hold two pieces together while glue, welding, or repair work is done
- Pulling — remove damaged fasteners or small parts
When turning something, use steady pressure instead of sudden force. If the object will not move, stop and reassess. Forcing locking pliers too hard can strip the surface, bend the tool, or break the part.
7. Release the pliers safely
When you are done, press the release lever to unlock the jaws. Open the tool and remove it from the object. If the pliers do not release smoothly, do not yank them. Check the lever and make sure no tension is holding the jaws closed.
After use, close the tool slightly and store it in a dry place. This helps protect the locking mechanism and keeps the jaws in better shape.
How to get a better grip without damaging the part
One of the hardest things for beginners is balancing grip strength with protection. Too loose, and the tool slips. Too tight, and the object gets damaged. The best method depends on the material and shape of the part.
For hard metal parts, you can usually apply more pressure. For soft materials like aluminum, thin tubing, or painted surfaces, use less force. If the surface must stay clean, place a thin layer of cloth, rubber, or a protective pad between the jaws and the object. Just remember that extra padding can reduce grip, so it may require careful adjustment.
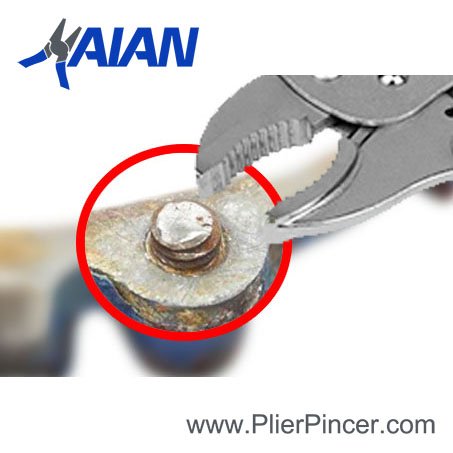
Another useful tip is to use the jaws on flat surfaces whenever possible. Flat contact gives more stability than grabbing corners or rounded edges. If you are trying to turn a bolt, a snug fit on the flats gives better control than a rough bite on the edges.
Beginners often miss this: locking pliers work best when they are used as a precise clamp, not as a brute-force tool. Small improvements in placement and adjustment usually give better results than simply squeezing harder.
Credit: plierpincer.com
Common mistakes to avoid
Learning how to use locking pliers also means knowing what not to do. These are the errors that cause most problems.
Using the wrong jaw shape
Curved jaws are not always the best choice. If the part is flat or narrow, a different jaw style may hold better. The wrong shape can cause slipping or surface damage.
Over-tightening before locking
If you crank the screw too far, the handles may be nearly impossible to close. This can make the tool hard to use and may damage the object.
Gripping on the wrong point
Holding a bolt on the corners instead of the flat sides often rounds it off. Gripping a pipe too close to the end can also make the tool slip.
Using them like a hammer or pry bar
Locking pliers are strong, but they are not designed for every kind of force. Using them to hammer, pry, or twist beyond their limit can bend the tool or ruin the workpiece.
Ignoring worn teeth or damaged jaws
Worn jaws lose holding power. If the teeth are damaged, the tool may slip even when it feels locked. Replace or repair the tool if needed.
Practical examples for beginners
It helps to see the tool in real use. Here are a few simple examples.
Credit: stock.adobe.com
Holding a nut while loosening a bolt
If a nut or bolt spins too freely, locking pliers can hold it steady. Place the jaws on the flat sides, lock them in place, and keep steady pressure while you turn the other side with a wrench.
Removing a stripped screw head
If the screw head is raised enough, locking pliers can grab it and turn it out. Set the jaws tightly around the head and twist slowly. Do not rush. A stripped screw may need patience more than strength.
Clamping two metal pieces together
When you need a temporary clamp, locking pliers are very handy. They can hold parts in position while adhesive dries or while you prepare for welding. Make sure the pressure is even so the pieces stay aligned.
Turning a stuck pipe fitting
Locking pliers can help on small pipe fittings, but be careful. Round parts can slip easily, so get the jaws as centered as possible. If the fitting is delicate, use a proper pipe wrench instead.
| Task | Best jaw position | Main risk |
|---|---|---|
| Holding a bolt | On the flat sides | Rounding the corners |
| Clamping metal sheets | Flat, even contact | Slipping from uneven pressure |
| Turning a pipe | Centered around the curve | Crushing or slipping |
| Holding parts for repair | Where the grip does not block the work | Getting in the way of tools |
Safety tips that make a real difference
Safety with locking pliers is simple, but it should not be ignored. The tool can release suddenly if it is not set correctly. It can also pinch fingers if you hold it carelessly.
Keep fingers away from the jaws when locking and unlocking the tool. Check that the object is stable before applying force. If you are working on a car or machine, make sure the part cannot move unexpectedly.
Wear eye protection when the job involves metal, rust, or broken parts. A small piece of metal can fly off when a stuck part finally moves. This is easy to overlook, but it matters more than many beginners think.
Also, do not use locking pliers on live electrical work unless the tool is rated for that purpose and the situation is completely safe. Metal tools and electricity are a dangerous mix.
For trusted tool safety guidance, you can review basic hand tool recommendations from OSHA.
How to maintain locking pliers
Good maintenance helps the tool work better and last longer. After each use, wipe off dirt, grease, and moisture. This keeps the locking mechanism moving smoothly.
If the adjustment screw feels stiff, add a tiny amount of light oil to the moving parts. Do not over-oil the jaws, because that can make them slippery. Check the teeth regularly. If they are heavily worn, the grip will not be as reliable.
Store locking pliers in a dry tool box or on a rack. Moisture can cause rust, especially on older tools. Rust does more than make the tool look bad. It can affect the lock and reduce grip strength.
One more useful habit: test the release lever before a job starts. If it sticks, clean the mechanism before relying on the tool in the middle of work.
When locking pliers are the right tool, and when they are not
Locking pliers are excellent for strong temporary grip, but they are not always the best choice. Use them when you need a firm hold, controlled pressure, or a quick clamp.
Use a different tool when you need:
- Very delicate grip on soft material
- Large pipe turning power
- High precision holding with no surface marks
- Long-term clamping for woodworking
This is another detail beginners often miss: the best tool is the one that solves the problem with the least damage. Locking pliers are versatile, but they are not universal.

Credit: istockphoto.com
Final advice for beginners
If you are just starting out, remember this simple pattern: fit the jaws, adjust the screw, lock the handles, test the grip, then use the tool with steady pressure. That rhythm will help you avoid most mistakes.
As you practice, you will learn how different surfaces feel through the tool. You will also get better at judging how tight the jaws should be. This comes with experience, but the basic method stays the same.
The more carefully you set the tool, the better it works. That is the real secret behind how to use locking pliers well. They are not hard to use, but they reward patience and good placement.
FAQs
1. What are locking pliers used for?
Locking pliers are used to hold, clamp, turn, or pull objects that need a strong grip. They are helpful for bolts, pipes, metal parts, and temporary clamping jobs.
2. How tight should locking pliers be?
They should be tight enough to hold the object firmly without crushing it. The tool should lock with a strong squeeze, but not so hard that you struggle to close it.
3. Can locking pliers damage a bolt or pipe?
Yes. If you grip too hard or place the jaws in the wrong spot, they can round off bolt heads, crush soft metal, or leave marks on the surface.
4. Are locking pliers the same as vise-grip pliers?
Yes, many people use the name vise-grip for locking pliers. Vise-Grip is also a well-known brand name, but the tool type is the same.
5. How do I release locking pliers after use?
Press the release lever to unlock the jaws, then open the tool and remove it from the object. If it feels stuck, make sure there is no tension holding the jaws closed.
