
A heat gun looks simple, but it can do a lot of serious work. It can strip paint, shrink tubing, soften glue, bend plastic, dry materials, and help with many home repair jobs. The problem is that it gets very hot, very fast. If you use it the wrong way, you can burn a surface, damage a tool, or even start a fire.
If you want to learn how to use heat gun the right way, you need more than basic instructions. You need safe habits, the right settings, and a clear idea of what the tool can and cannot do. Small mistakes matter here. Holding the gun too close, pointing it at the same spot for too long, or working near flammable items can create problems fast.
This guide explains the full process in simple steps. You will learn how to prepare the area, choose the right temperature, use the tool with control, and avoid common mistakes beginners make. By the end, you will know how to handle a heat gun with more confidence and less risk.
What a Heat Gun Actually Does
A heat gun is a handheld tool that blows hot air at a target area. Think of it as a powerful hair dryer, but much hotter and much more useful for repair work. Most models let you control the temperature and airflow. That control is important because different jobs need different heat levels.
For example, paint stripping often needs strong heat. Shrinking electrical tubing needs careful, lower heat. Softening stickers or adhesive usually needs moderate heat. If you try to use one setting for everything, you can easily damage the material you are working on.
One thing many beginners miss is that a heat gun does not just “heat” a surface. It changes how that surface behaves. Paint softens. Plastic bends. Glue loosens. Heat shrink tightens. The real skill is learning when to stop heating before the material goes too far.
Before You Start: Safety Comes First
Before you even plug in the tool, set up the space properly. Most heat gun accidents happen because the work area was not ready.
Clear the area
Remove paper, cloth, solvents, aerosol cans, sawdust, and anything flammable. Heat can spread farther than you think, especially when you are working in a small room, garage, or workshop.
Use the right protective gear
Wear heat-resistant gloves if the project requires close handling. Safety glasses are also smart, especially for paint removal or plastic work, because small pieces can shift or pop loose. If you are working with old paint, make sure the area is well ventilated.
Check the surface and material
Some surfaces cannot handle direct heat. Thin plastic, soft wood, and painted items with unknown coatings may react badly. If you are unsure, test on a hidden spot first. This is a simple step, but it saves a lot of mistakes.
Keep a fire-safe setup
Place the heat gun on a stable, non-flammable surface when not in use. Never leave it resting on plastic, cardboard, fabric, or near cords. The nozzle stays hot long after you switch it off.
Choose the Right Heat Gun for the Job
If you are learning how to use heat gun tools correctly, the tool itself matters. Not all models are the same.
| Feature | Why it matters | What beginners should look for |
|---|---|---|
| Temperature control | Lets you match the heat to the material | At least two heat settings, or better, adjustable control |
| Airflow control | Affects how fast heat reaches the surface | Useful for delicate work |
| Hands-free stand | Helps during long jobs | Helpful, but not required |
| Nozzle attachments | Focus or spread the air | A set with a reflector or concentrator nozzle is useful |
| Overheat protection | Improves safety and tool life | Good for beginners and regular users |
A basic model is fine for simple home tasks. If you plan to do paint stripping, crafts, or electrical work often, spend a little more on a model with better control. The extra control usually gives you better results than raw power alone.
How to Use a Heat Gun Step by Step
Here is the simplest safe method for most beginner projects.
-
Read the manual first.
Different heat guns have different controls, safety features, and cool-down behavior. Never assume the buttons work the same on every model.

Credit: wikihow.com
-
Prepare the workspace.
Clear flammable items, open a window if needed, and place the item on a stable surface. Make sure your power cord will not get in the way.
-
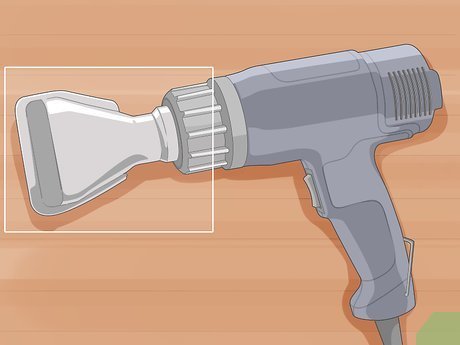
Pick the correct nozzle if needed.
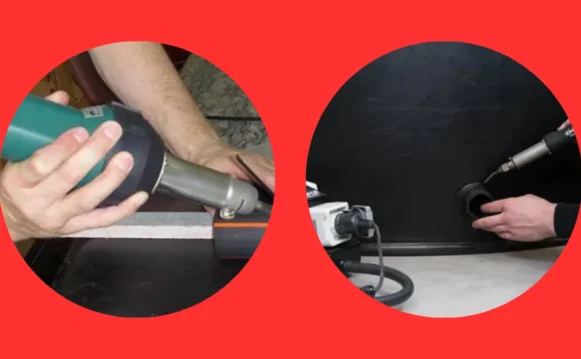
A concentrator nozzle focuses heat into a smaller area. A reflector nozzle can help wrap heat around tubing or curved surfaces. Beginners often skip this, but the right nozzle can make the job cleaner and safer.
-
Start with the lowest useful heat setting.
Do not begin with maximum heat unless the material truly needs it. Lower heat gives you more time to react and reduces the risk of damage.
-
Keep the gun moving.
Move it in slow, steady passes. Do not hold it in one place unless the task specifically requires it and you are watching closely. Staying still is one of the fastest ways to scorch a surface.
-
Watch the material, not the clock.
Some things change in seconds. Others need more time. Look for softening, bubbling, curling, shrinking, or loosening. Those are signs that the heat is working.
-
Stop as soon as the job is done.
Extra heat does not improve most results. It usually causes damage. When the paint lifts, the tube shrinks, or the adhesive loosens, stop heating.
-
Let everything cool naturally.
Do not touch the nozzle or the heated item too soon. Use pliers, gloves, or a safe stand if the material needs to stay in position while cooling.
Best Techniques for Common Beginner Jobs
Knowing the basic tool movement is useful, but the best results come from matching the technique to the task.
Removing paint
Hold the heat gun a few inches from the surface and move it slowly. When the paint starts to blister or soften, use a scraper to lift it away. Work in small sections. If the paint turns dark or smokes, the heat is too high or too close.
A useful tip many beginners miss: old layers of paint may react differently from the top layer. The outer coat can look soft while deeper layers remain stiff. Work patiently and remove one section at a time.
Shrinking heat shrink tubing
Use low to medium heat and keep the gun in motion around the tubing. Rotate the wire if possible so the shrink wraps evenly. Too much heat can make the tubing split or damage the wire insulation underneath.
For electrical work, accuracy matters more than speed. The goal is even shrinkage, not maximum heat.
Softening adhesive or stickers
Warm the adhesive gently until it loosens, then peel it slowly. If you pull too fast, the adhesive may tear and leave residue behind. A small amount of heat can save a lot of scraping later.
Bending plastic
Heat the plastic evenly and test flexibility often. Bend it gradually, not all at once. If the plastic becomes shiny, sticky, or starts to sag too much, it is getting too hot.
Drying damp material
A heat gun can speed up drying, but it should not replace proper drying time for delicate items. Use the lowest setting and keep the tool moving. Do not use high heat on wood, paint, or sealed surfaces unless you know they can handle it.
Common Mistakes Beginners Make
These mistakes are easy to make and also easy to avoid once you know them.
- Holding the heat gun too close. This creates hot spots and surface damage.
- Using the highest setting first. More heat is not always better.
- Working too slowly in one place. Staying in one spot can scorch or melt the material.
- Ignoring airflow direction. Hot air can affect nearby items even if you are not aiming directly at them.
- Forgetting the nozzle stays hot. The metal tip can burn you long after the power is off.
- Using the tool near flammable products. Solvents, fumes, and dust can catch fire quickly.
- Skipping a test spot. A hidden test can prevent permanent damage to a visible area.
Another non-obvious mistake is not planning where the heated material will go after it softens. If you are stripping paint or bending plastic, have your scraper, clamps, or gloves ready before you start. Once the material changes shape, you may only have a few seconds to act.
How to Control Heat for Better Results
The key to safe work is not just the temperature setting. It is the combination of distance, movement, and timing.
Credit: hotairtools.com
Use distance as a control tool
Closer means more heat, but it also means less room for error. If you are unsure, start farther away and move in slowly. This gives you better control and helps prevent sudden damage.
Move at a steady pace
Do not wave the gun wildly. Use smooth, even passes. Think of painting a wall with a brush. You want full coverage, but no one spot should get too much attention.
Watch for material response
Heat should create a clear change. Paint should soften. Tubing should shrink evenly. Adhesive should release. If nothing happens after a reasonable amount of time, stop and check your setting instead of forcing more heat on the surface.
A practical rule for beginners
If you find yourself asking, “Is this hot enough?” the better question is often, “Is the material changing the way I want?” That small shift in thinking helps you work more carefully and avoid overdoing it.
Heat Gun Safety for the Home and Workshop
Heat guns are useful, but they should be treated with respect. Follow these basic habits every time.
- Unplug the tool before changing nozzles or moving it to storage.
- Let it cool fully before packing it away.
- Never point it at skin, clothing, pets, or people.
- Keep fingers away from the nozzle and heated surface.
- Do not use it near fuel, paint thinner, spray cans, or gas fumes.
- Check the cord for damage before each use.
If you are working on old paint, especially in older homes, safety becomes even more important. Some coatings can release harmful dust or fumes when heated. For official safety information on lead-based paint and renovation work, see the U.S. Environmental Protection Agency’s lead safety guidance.
That is one of the biggest beginner mistakes: assuming every painted surface is safe to heat without any extra thought. If the home is older or the material is unknown, take a more careful approach.
When You Should Not Use a Heat Gun
There are times when a heat gun is the wrong tool. Knowing when to stop is part of using it well.
Do not use it on items that can melt easily without warning, such as thin plastic that you cannot replace. Do not use it around sealed containers, pressurized cans, or anything that may explode from heat. Avoid using it on surfaces with unknown coatings if fumes are a concern. And never use it if you cannot keep the area clear of flammable material.
If a job feels risky, use a slower or safer method instead. Sometimes a chemical stripper, hair dryer, heat mat, or simple hand tool is the better choice.
Simple Maintenance That Extends Tool Life
A heat gun does not need much care, but a little maintenance helps it last longer.
- Wipe dust from the intake vents after use.
- Check nozzles for buildup or blockage.
- Store it in a dry place away from heavy tools.
- Do not wrap the cord tightly around the body while it is still warm.
- Inspect for strange smells, sparks, or unusual noise before the next job.
If the gun starts overheating too quickly or feels weak, stop using it and inspect it. Tool problems often begin as small warning signs.
Credit: craftboxgirls.com
Final Tips for Better Control and Safer Work
The best way to get good at a heat gun is to start small. Practice on a low-risk project first. Learn how your tool behaves at each setting. Notice how far you can hold it from a surface and still get the result you want.
Two beginner skills make a big difference here. First, learn to read the material instead of staring at the timer. Second, learn to stop early. People often wait too long because they expect a dramatic change. In most jobs, the right result appears before the damage does.
If you remember only one thing, remember this: a heat gun rewards patience. The more carefully you move, the better the result usually is. That is why learning how to use heat gun tools safely is less about force and more about control.
FAQs
1. What is the safest distance to hold a heat gun from a surface?
For most beginner jobs, start about 2 to 4 inches away. You can move closer if needed, but always watch how the material reacts. The safest distance depends on the heat level and the material.
2. Can I use a heat gun indoors?
Yes, but only in a well-ventilated space with no flammable items nearby. Open windows if needed and never use it in a cramped area without airflow. Indoor use is fine when the workspace is prepared properly.
3. How long can I run a heat gun continuously?
That depends on the model. Some are made for short bursts, while others handle longer use better. Check the manual and avoid overheating the tool. If it feels too hot or starts acting strangely, stop and let it cool.
4. Can a heat gun damage wood?
Yes. Too much heat can darken, dry out, crack, or scorch wood. If you need to work on wood, use lower heat, keep the gun moving, and test a hidden spot first. Patience matters a lot with wood surfaces.
5. Is a heat gun better than a hair dryer for DIY work?
Usually yes, because a heat gun gets much hotter and gives more control over the job. A hair dryer is only useful for very light tasks. For paint removal, heat shrink tubing, or adhesive softening, a real heat gun is the better tool.
