
If you drive an EV, public charging should feel simple, not stressful. But the first time you walk up to a Blink charger, it is normal to pause and ask what to do next. The screen looks different from a gas pump. The cable may be heavy. Payment steps may vary. That is why a clear guide matters.
This article shows how to use Blink charging station in a practical, step-by-step way. You will learn how to check the charger, start a session, stop it safely, and avoid common mistakes. You will also see the small details many beginners miss, like connector type, app setup, and charging speed limits.
By the end, you should feel much more confident using Blink chargers in daily life, on road trips, or during quick top-ups at public stations.
Before you plug in: what to check first
The fastest way to use a Blink charger well is to prepare before you touch the cable. Many charging problems do not come from the station itself. They come from small setup issues. If you check a few things first, the whole process becomes much easier.
Confirm that the charger fits your car
Most EV drivers in North America use J1772 for Level 1 and Level 2 AC charging. Some newer cars can also use Tesla’s NACS setup with an adapter, while DC fast charging may use a different connector. Blink stations may offer different plug types depending on location.
Look at the label on the charger and compare it with your car’s charging port. If you are not sure, check your vehicle manual. A wrong connector is one of the most common beginner problems, and it is easy to avoid.
Know which kind of Blink charger you are using
Not all Blink stations work the same way. The two main types are:
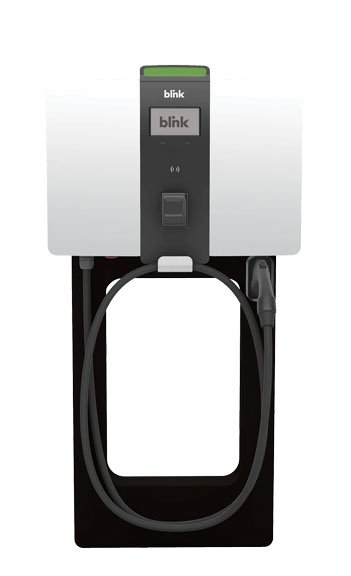
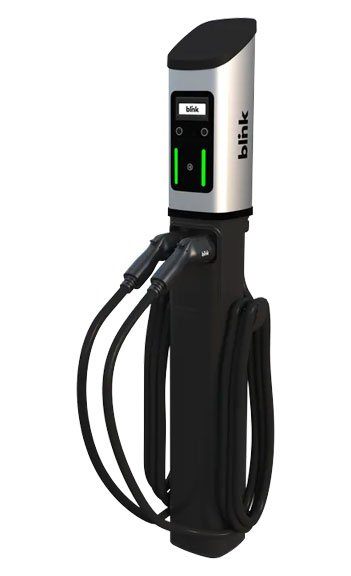
- Level 2 chargers – slower than fast chargers, but good for work, shopping, and overnight parking
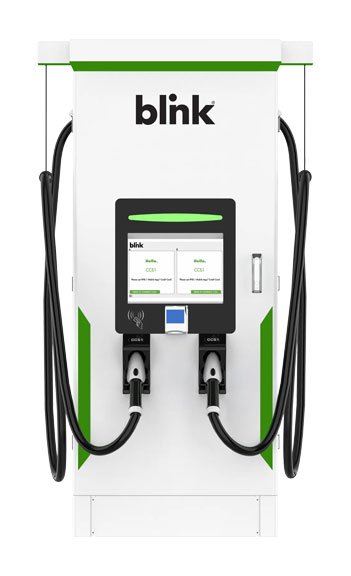
- DC fast chargers – much faster, useful when you need a quick boost during a trip
This matters because the steps may be similar, but charging time is very different. A Level 2 session may take hours. A DC fast charge may take much less time, depending on your battery level and car model.
Check your account and payment method
Some Blink stations let you pay through the app, RFID card, or on-screen payment flow. Others may need account access before the session starts. If you have not set up the Blink Charging app yet, do it before you need the charger in a hurry.
Also make sure your payment method is active. A failed card can stop the session before it begins, even if the station looks ready.
Look at the parking rules
Charging stations are not always the same as ordinary parking spaces. Some sites have time limits, idle fees, or rules for EV-only parking. Read the signs before you leave your car. A charger may be open, but that does not mean you can stay all day after the battery is full.
How to use Blink charging station step by step
The exact screen may change from one station to another, but the basic process stays close to the same. Once you know the pattern, using a Blink charger feels natural.
1. Park close enough to reach the port
Pull into the space so the cable can reach your car’s charging port without strain. Do not park too far away. Stretching the cable too much can make charging awkward and may damage the connector over time.
If the charger is placed on one side of the car, check which side your port is on before fully parking. This small habit saves time and avoids moving the car again.
2. Wake up the charger if needed
Some Blink chargers display a screen or light panel that needs to be active before you start. Touch the screen or press the start prompt if the station asks for it. If the charger appears offline or frozen, do not force anything. Look for another charger nearby or use the support details on the unit.
3. Open the Blink app or use the station method
There are usually a few ways to begin a session. The most common are:
- Using the Blink app
- Scanning a QR code on the station
- Entering the charger number in the app
- Tapping an RFID card, if supported
If the app is required, open it and follow the prompts. If the station asks for a unit number, enter it carefully. One wrong digit can send you to the wrong charger or fail the session.
4. Choose the correct charger in the app
If you are using the app, make sure you select the exact station you are standing at. This sounds obvious, but it is a common beginner mistake, especially in large parking lots with many chargers close together.
Check the location name, charger number, and station type. If the app shows a map, compare it with the real charger in front of you. This is one of those small habits that saves a lot of confusion.
5. Start the charging session
Once payment and station details are correct, tap to begin the session. The charger may first check communication with your car. This can take a few seconds. In some cases, the station will unlock the connector only after the session is active.
Watch the lights on your car and the charger. Most EVs show a clear charging indicator when power flows correctly. If nothing happens, stop and re-check the plug, app selection, and port alignment.
6. Plug the connector into your car
Hold the connector firmly and insert it into the charging port until it clicks or seats fully. Do not twist hard. Do not slam it in. The fit should feel secure, but not forced.
If your car uses an adapter, connect the adapter first if required, then attach the charger. Some adapters fit tightly, and beginners often think something is wrong when the real issue is simply the connection order.
7. Confirm that charging has started
Look for signs that the session is live:
- The app shows charging status
- The car dashboard or light ring indicates charging
- The station screen shows energy flowing
If charging does not begin after a short wait, do not keep disconnecting and reconnecting too quickly. Instead, pause and check the most likely causes: incorrect app selection, loose connection, or a charging port latch issue.
8. Monitor the session if you plan to stay nearby
You do not need to stare at the charger the whole time, but it helps to check the session once in a while, especially the first time you use a new station. Make sure the charging rate looks normal and that no error message appears.
Charging speed often slows as the battery gets fuller. That is normal. Many drivers think the station is broken when the real reason is battery protection. EVs charge fastest at lower battery levels and slow down later to protect battery health.
9. Stop the session the right way
When you are ready to leave, stop the session from the app, charger screen, or your car’s controls, depending on how the station works. Waiting for the session to end properly matters. It prevents payment issues and helps release the connector safely.
After the charger confirms the session has stopped, unplug the cable from the car. If the plug feels stuck, check whether the car has locked the connector. Many vehicles lock the port during charging for safety. Unlock it from the car key, door button, app, or dashboard setting.
10. Return the cable and leave the space clear
After unplugging, place the cable back on the holster or holder. Do not drop it on the ground if the station provides a proper resting spot. Then move your car if the parking rules require it. This is especially important at busy public sites where other EV drivers are waiting.
What to expect during charging
Many first-time users want one simple answer: how long will it take? The honest answer is that it depends on your car, charger type, battery size, and current charge level. Still, you can use general expectations to plan better.
| Charger type | Typical use | General charging speed | Best for |
|---|---|---|---|
| Level 2 AC | Longer stop, parking lot, work, shopping | Moderate | Top-ups and longer stays |
| DC fast charging | Travel stops, quick charging needs | Fast | Road trips and urgent charging |
One important detail beginners often miss is that a charger’s maximum power is not the same as your car’s actual charging speed. Your vehicle decides how much power it can accept. So if a station is rated very high but your car is limited to a lower speed, you will not get the station’s full number.
Another useful point: charging can slow down a lot after about 80%. This is not a defect. It is how most EV batteries protect themselves. If you are in a hurry, charging from 20% to 80% is usually more efficient than waiting for a full charge.
Credit: getvoltedge.com
Common problems and how to fix them
Even when you know how to use Blink charging station units, small issues can still happen. Most are easy to solve without panic.
Credit: getvoltedge.com
The charger will not start
If nothing happens after you begin, check these basics:
- Is the connector fully plugged in?
- Did you choose the correct charger number?
- Is your payment method valid?
- Does your car need to be unlocked to accept charging?
If all of that looks fine, try ending the session and starting again. Sometimes the app and station need a fresh attempt to sync properly.
The connector will not release
This usually means the car still has the port locked. Use your key fob, app, or vehicle controls to unlock it. If your car is already unlocked and the plug still does not release, wait a few seconds and try again. Do not pull too hard.
The app shows an error
App errors often come from signal issues or an incomplete session start. Move one step at a time. Refresh the app, confirm your location, and check whether the station is still active. If your phone has weak data service, the session may need a moment to update.
Charging is much slower than expected
Slow charging is not always a problem. It may happen because:
- Your battery is already fairly full
- Your car limits charging speed
- The station is sharing power with another vehicle
- The outside temperature is very hot or very cold
Battery temperature matters more than many drivers realize. In cold weather, charging can start slowly until the battery warms up. In hot weather, the car may slow charging to protect the pack.
How to get the best charging experience
Once you understand the basics, a few habits can make Blink charging smoother and cheaper.
Charge when the battery is low, not nearly full
Public charging is usually most useful when you arrive with a low battery and leave once you have enough range for your next trip. If you wait until the battery is almost empty, you risk stress. If you charge too high, you may spend more time than needed for a small amount of extra range.
Check station details before driving there
Many Blink chargers are in parking lots, garages, or shared spaces. Availability can change. Use the app or map view to confirm the station is online before you arrive. This is especially helpful if you are on a schedule or in an unfamiliar area.
Keep your charging cable habits clean
Do not let the cable drag across sharp curbs, puddles, or heavy dirt if you can avoid it. Treat the connector with care. Public chargers are built for regular use, but rough handling shortens their life and can create avoidable faults.
Know when not to wait around
If the charger repeatedly fails, do not spend 20 minutes trying the same step over and over. Try one restart, then move to another charger or contact support. Efficient EV drivers learn when to troubleshoot and when to move on.
For general EV charging safety and connector standards, the U.S. Department of Energy’s Alternative Fuels Data Center is a helpful reference.
What beginners usually miss
A few small things can make a big difference the first few times you use a Blink station.
The station can be fine, but your car may still limit the session
Drivers often blame the charger when the car is the one setting the limit. If your EV battery is cold, nearly full, or protected by software settings, the charging speed may stay low even when the station is working perfectly.
Idle time can cost money
Many people think the main cost is only the charging time. But at busy public stations, idle fees or blocking fees may apply after your car is done charging. Always know the station rules before you leave the car parked and unattended for too long.
Port orientation matters more than most people expect
It sounds simple, but the side of the charge port can change your whole parking angle. If you know your car’s port location, you can park faster, avoid cable strain, and reduce stress in crowded lots.
Simple routine you can follow every time
If you want a quick mental process, use this one:
- Check the connector type and parking position.
- Open the app or scan the station code.
- Select the correct charger.
- Start the session.
- Plug in firmly and confirm charging begins.
- Watch for alerts or speed changes.
- Stop the session properly and unplug safely.
After a few uses, this becomes automatic. That is the real goal. Public EV charging should feel like a normal part of driving, not a technical task.
Credit: getvoltedge.com
Final thoughts
Learning how to use Blink charging station equipment is mostly about confidence and a few good habits. Once you know how to check the connector, start the session, and stop it the right way, the process becomes much easier. Most issues are small and fixable. The biggest difference is usually not the charger itself, but how prepared you are before you plug in.
Take your time the first few sessions. Read the screen. Confirm the charger number. Watch for the lock on your car’s port. After that, the whole routine will feel much more natural.
FAQs
1. Do I need the Blink app to use a Blink charging station?
In many cases, yes. Some Blink stations work best through the app, while others may support a card or QR-based start. It is smart to install the app before you need public charging.
2. Can I use a Blink charger with any EV?
Not always. Your car must match the charger connector type. Many EVs use J1772 for Level 2 charging, while some vehicles use adapters or different fast-charging standards.
3. Why did my Blink charging session stop before my battery was full?
This can happen for several reasons, such as a payment issue, station timeout, car settings, or a charger fault. It can also be normal if the battery reached a point where charging slowed and then stopped for protection.
4. How long does it take to charge at a Blink station?
It depends on the charger type and your EV. Level 2 charging is slower and can take hours. DC fast charging is much quicker, but your car’s charging limit still controls the final speed.
5. What should I do if the connector gets stuck in my car?
First, make sure the session has ended and your car is unlocked. Then try the vehicle’s unlock controls again. If it still does not release, wait a few seconds and check your manual before pulling hard.
