
If you want to learn how to use a cordless drill, the good news is that it is much easier than it looks. A cordless drill is one of the most useful tools for home projects, furniture assembly, repairs, and small DIY jobs. With a few simple habits, you can drill holes, drive screws, and work with much more control.
Many beginners think the drill itself does the hard work. In reality, the tool is only useful when you know how to hold it, choose the right bit, set the right speed, and use the correct pressure. Small mistakes can strip screws, damage wood, or make the drill slip. The goal is not just to turn the tool on. The goal is to use it safely and neatly.
This guide breaks the process into clear steps. You will learn what each part does, how to prepare the drill, how to drill holes, how to drive screws, and how to avoid common beginner errors. By the end, you will feel more confident using a cordless drill on real projects.
Know the parts before you start
A cordless drill is simple once you understand its main parts. Most beginner problems happen because people skip this first step. Take a minute to learn the controls before you begin.
Main parts of a cordless drill
- Battery – powers the drill. It usually slides into the bottom or handle.
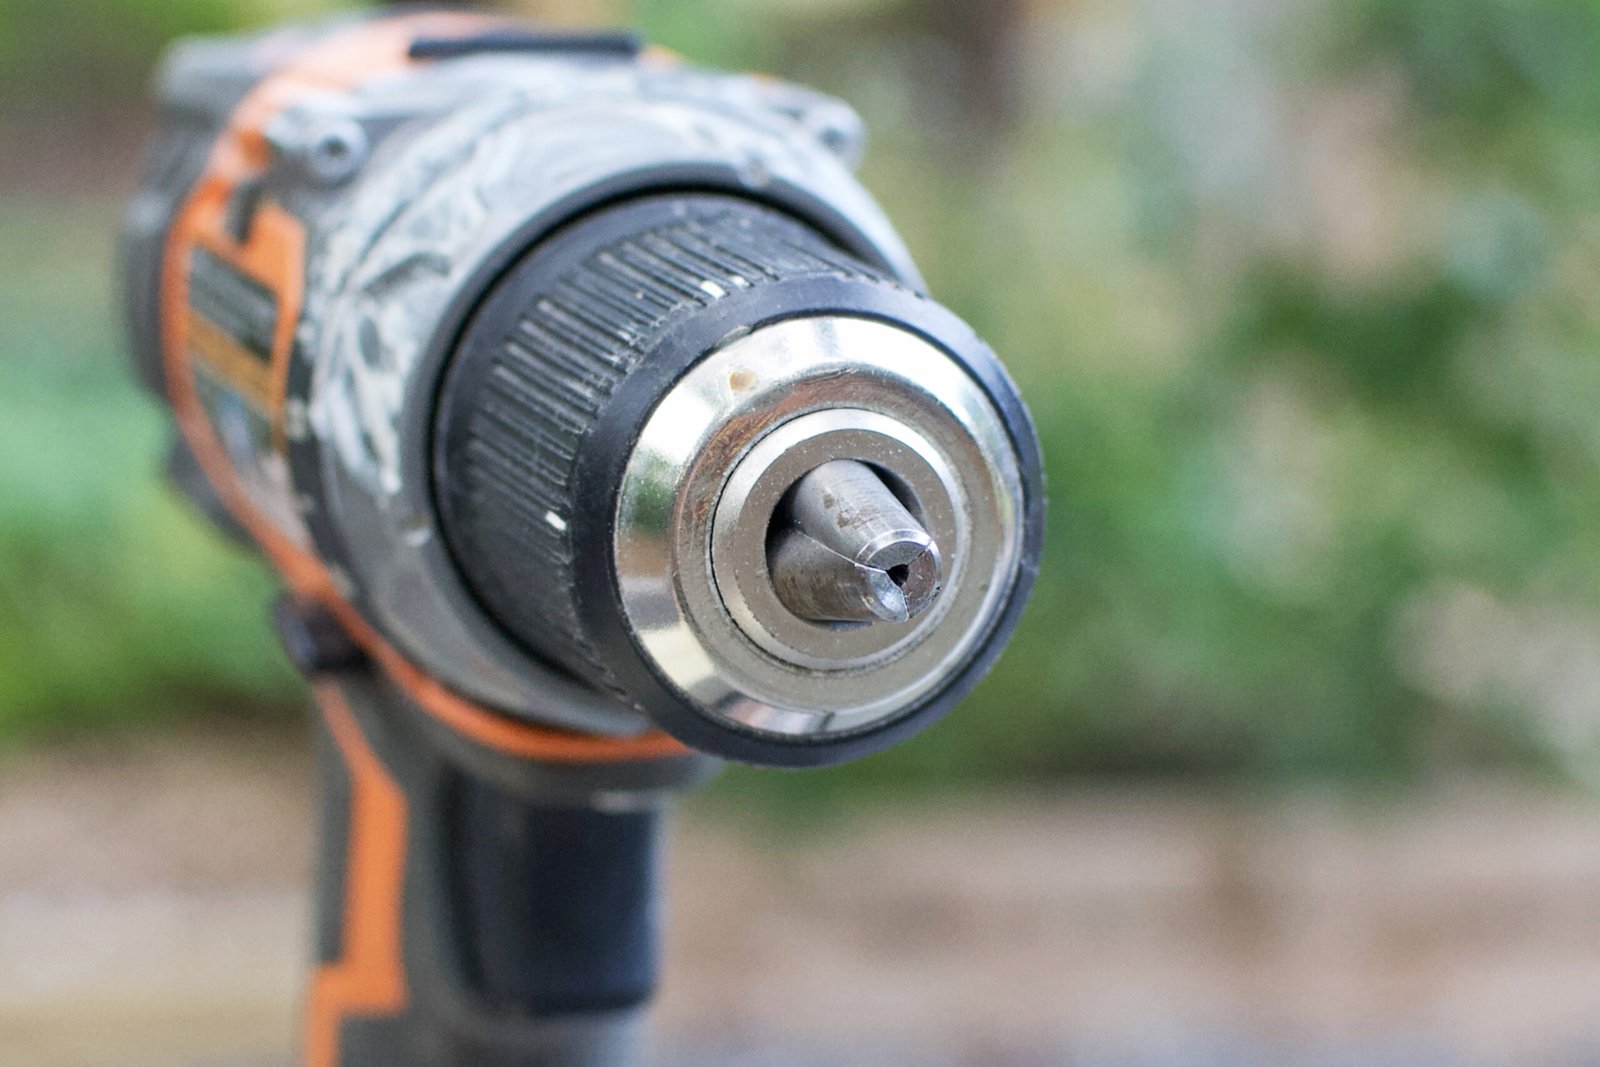
- Chuck – the front part that holds the drill bit or screwdriver bit.
- Trigger – starts the drill and controls speed.
- Forward and reverse switch – changes the direction of rotation.
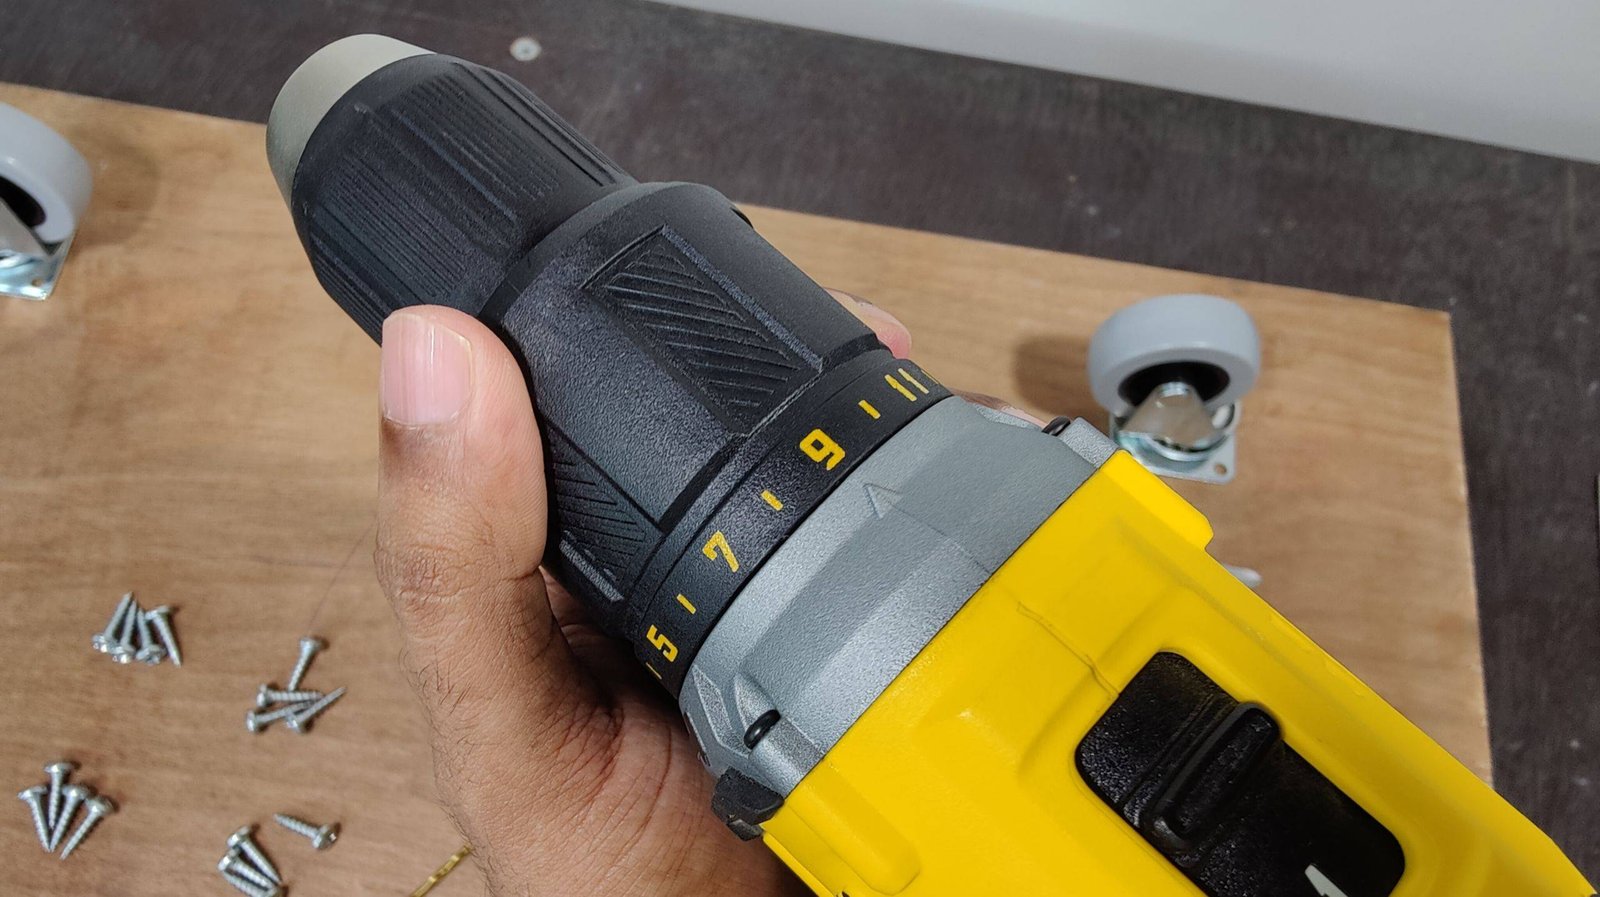
- Clutch ring – helps control how much force the drill uses when driving screws.
- Speed selector – often gives you low or high speed.
- Handle – the main grip area.
- LED light – helps you see the work area.
Most beginner drills also have two important modes: drilling mode and screw-driving mode. Drilling mode uses full power for making holes. Screw-driving mode limits torque, which helps stop screws from going too deep or stripping.
One small detail many beginners miss: the drill is not always best at full power. For many jobs, a slower speed gives better control and cleaner results.
Get the right tools and materials ready
Before you start, prepare everything you need. This saves time and prevents mistakes halfway through the job. A cordless drill works best when the bit, material, and setup all match the task.
Here is a simple setup guide:
| Task | What you need | Helpful note |
|---|---|---|
| Drilling small holes in wood | Wood drill bit, pencil, tape measure | Use low to medium speed for control |
| Driving screws | Screwdriver bit, matching screws, pilot hole if needed | Use clutch settings to avoid overdriving |
| Drilling into metal | Metal drill bit, cutting oil if needed, clamps | Go slowly and apply steady pressure |
| Drilling into masonry | Masonry bit, hammer drill if available, safety gear | Check whether your drill can handle the material |
Also have a few extra items nearby:
- Safety glasses
- Work gloves if needed
- Scrap wood for test drilling
- Clamps to hold the material in place
- A pencil or marker for layout marks
Non-obvious tip: Clamping the workpiece is often more important than drilling faster. If the material moves, your hole may wander, and the bit may catch. This is one of the most common beginner mistakes.
Choose the right drill bit
If you want good results, match the bit to the job. A cordless drill can use many kinds of bits, but each one has a purpose. Using the wrong bit may waste time or damage the surface.
Common bit types
- Twist bits – standard bits for making holes in wood, plastic, and metal.
- Wood bits – often designed to make cleaner holes in wood.
- Masonry bits – used for brick, block, and concrete.
- Screwdriver bits – used to drive screws.
- Spade bits – useful for larger holes in wood.
- Hole saws – used for cutting large round openings.
For beginners, the most useful rule is simple: use a sharp bit, and use the correct type for the material. A dull bit makes drilling harder and less accurate.
If you are unsure about drill-bit sizes or safety standards, a reliable guide from OSHA can help you understand basic tool safety practices.
How to install the bit correctly
- Hold the drill firmly.
- Open the chuck by turning it counterclockwise.
- Insert the bit straight into the center.
- Center the bit so it sits evenly.
- Tighten the chuck by hand until the bit feels secure.
- If your drill has a chuck key or auto-lock system, use it as directed by the manufacturer.
Before you start, give the bit a gentle tug. It should not wobble or slide out. If it does, tighten it again.
Set up the drill for the job
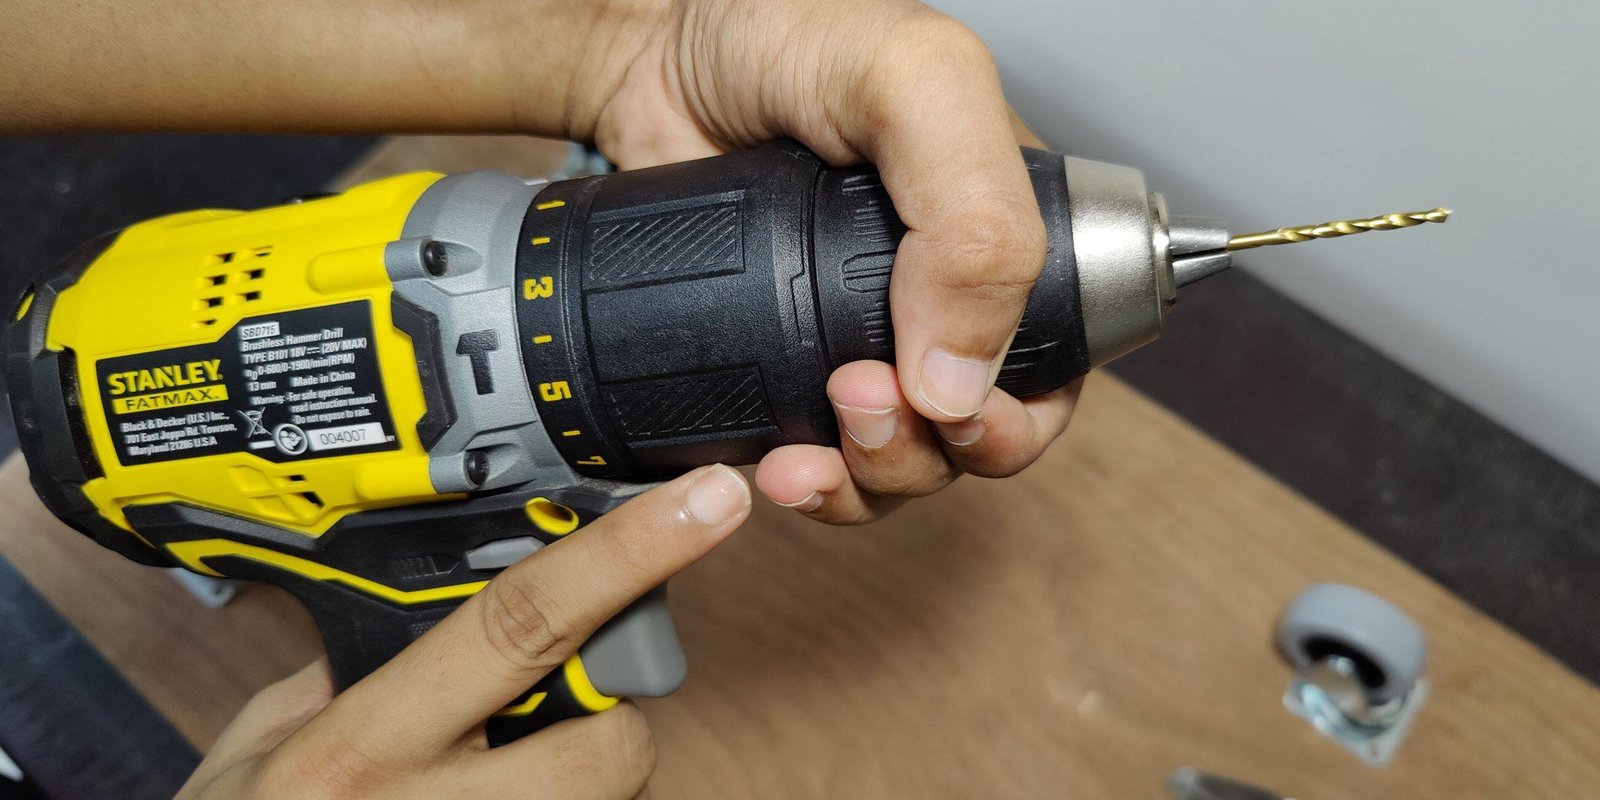
This step is where many beginners gain confidence. A cordless drill has different settings for different jobs. Choosing the right setup gives you more control and better results.
Credit: makeuseof.com
Check the battery
Insert a fully charged battery until it clicks into place. A weak battery can reduce speed and torque, which makes the drill feel less effective. If the battery is low, charge it before beginning a project, especially if you need to make many holes or drive many screws.
Non-obvious tip: A battery that is not fully locked in can cause the drill to cut out suddenly. If the drill stops for no clear reason, check the battery connection first.
Select the right mode
- Drilling mode – for making holes.
- Clutch or screw mode – for driving screws with control.
- Hammer mode – on some drills, for masonry work.
If you are just learning, start with low speed and low force. It is easier to increase power than to fix a damaged screw or a hole that went in the wrong place.
Adjust speed and clutch
Many cordless drills have two speed ranges. Low speed gives better control and more torque. High speed is better for faster drilling in softer materials. For screw-driving, low speed is usually the safer choice.
The clutch helps stop the drill once a screw reaches the right depth. If the clutch setting is too high, the drill may overdrive the screw. If it is too low, the chuck may click too soon and stop driving the screw before it is seated.
How to use a cordless drill for drilling holes
Drilling a hole is one of the most basic tasks, but it still needs care. The right setup helps the bit enter cleanly and stay on target.
Step 1: Mark the spot
Use a pencil or marker to mark where the hole should go. For extra accuracy, you can make a small dent with a nail, awl, or center punch. This gives the drill bit a starting point and helps stop it from sliding.
Step 2: Hold the drill steady
Place one hand on the handle and the other hand on the drill body if the design allows it. Keep your stance balanced. Stand so you can press straight into the surface, not from an angle.
Step 3: Start slowly
Pull the trigger gently. Let the bit make a small starter groove before increasing speed. If you start too fast, the bit may skate across the surface, especially on smooth wood, plastic, or metal.
Step 4: Apply steady pressure
Push just enough to help the bit cut. Do not force it. The bit should do the work. If you push too hard, the drill can overheat, slip, or make a rough hole.
Step 5: Clear the hole if needed
For deeper holes, pull the bit out sometimes to remove dust and chips. This keeps the bit cooler and helps it cut more cleanly. In wood, this also reduces the chance of the bit binding.
Step 6: Stop before the bit exits
If you are drilling all the way through a board, reduce pressure as the bit nears the other side. This helps prevent splintering on the exit side. A scrap piece of wood placed behind the workpiece can also reduce tear-out.
Beginners often miss this: the back side of the hole can be messier than the front side. If appearance matters, support the exit side with scrap wood or drill from both sides when possible.
How to use a cordless drill to drive screws
Driving screws is where a cordless drill becomes a real time-saver. But if you use too much force, you can strip the screw head, snap the screw, or damage the material.
Credit: buildingourrez.com
Step 1: Use the correct driver bit
The bit must fit the screw head well. A poor fit is a fast way to strip the screw. If the bit feels loose or wobbly in the screw head, choose a better match.
Step 2: Make a pilot hole when needed
In hard wood, near the edge of a board, or with long screws, a pilot hole can help the screw go in straighter and with less force. This is a small step, but it often saves the project.
Step 3: Set the clutch lower
Use a lower clutch setting for beginners. This reduces the chance of driving the screw too deep. If the screw stops before it is fully seated, raise the setting slightly and try again.
Step 4: Keep the bit straight
Place the driver bit squarely in the screw head. If the drill leans to one side, the bit may slip out. Keep your wrist firm and your line straight.
Step 5: Stop when the screw is seated
As soon as the screw is flush or slightly below the surface, stop. Do not keep squeezing the trigger after the screw is already tight. That is when stripping starts.
When a screw will not go in smoothly, do not just force it. Stop and check whether the bit is slipping, the pilot hole is too small, or the screw is the wrong type for the material.
How to use a cordless drill safely
Safety matters every time you use power tools. A cordless drill is less dangerous than many heavy tools, but it still can hurt you if you use it carelessly.
Basic safety habits
- Wear safety glasses.
- Keep loose clothing and long hair away from moving parts.
- Hold the material firmly with clamps if possible.
- Remove the battery before changing bits.
- Keep fingers away from the chuck and rotating bit.
- Work in a clean, well-lit area.
Always watch for hidden wires, pipes, or fasteners in walls and furniture. If you are drilling into a wall, take extra care before starting. A simple wall scanner can prevent major damage.
Practical insight: Many beginners think gloves make every tool safer. With rotating tools, loose gloves can sometimes get caught. Use gloves only when they help with the material, and never when they could reduce your control around the moving chuck.
Common mistakes beginners make
Most drill problems come from a few repeat mistakes. If you know these early, you will save time, material, and frustration.
- Using the wrong bit – this can ruin the hole or strip the screw.
- Starting at full speed – this makes the bit slip.
- Not securing the workpiece – movement causes poor accuracy.
- Forcing the drill – pressure should be steady, not aggressive.
- Ignoring the clutch – this often leads to overdriven screws.
- Leaving the battery loose – the drill may stop unexpectedly.
- Using a dull bit – this makes the task harder than it should be.
One important habit is to test on scrap material first. This is especially useful when drilling into an expensive board, a visible wall surface, or a project piece you do not want to damage.
Maintenance that keeps your drill working well
A cordless drill lasts longer when you take basic care of it. Maintenance is simple, but it makes a big difference in performance.
Credit: makeuseof.com
Simple care tips
- Wipe dust and debris from the drill after use.
- Store batteries in a dry place.
- Keep bits organized and sharp.
- Do not leave the battery fully drained for long periods.
- Check the chuck for dirt or damage if the bit slips.
If the chuck becomes hard to tighten, the bit may not hold well. Clean it and check whether the chuck jaws are worn. Also listen for unusual grinding or clicking sounds, which can mean the drill needs service.
Build confidence with simple practice
The best way to learn how to use a cordless drill is to practice on scrap wood before doing real work. Start with small holes. Then try driving short screws. After that, move to a project like putting together furniture or hanging a light shelf.
Here is a simple practice path:
- Insert a wood bit and drill a few holes in scrap wood.
- Change to a driver bit and sink a few screws.
- Test different clutch settings.
- Try making a pilot hole and compare the result.
- Practice stopping at the right depth.
This kind of practice teaches feel, not just theory. You will start to notice how the drill sounds when it works well, how much pressure feels right, and when a bit is becoming dull.
A cordless drill may seem simple, but using it well takes a little attention. Once you learn the controls and build a few good habits, it becomes one of the easiest tools to use. It can save time, improve your results, and make many home tasks much less stressful.
FAQs
1. What is the first thing I should do before using a cordless drill?
Check the battery charge, install the correct bit, and make sure the bit is tightly locked in the chuck. Also confirm that the drill is set to the right mode for drilling or screw-driving.
2. How do I know which speed to use?
Use low speed for more control, especially when driving screws or starting a hole. Use higher speed when drilling in softer materials and when you need faster cutting.
3. Do I always need a pilot hole?
No, but pilot holes help in hard wood, near edges, and with larger screws. They reduce splitting and make screw driving easier.
4. Why does my drill bit keep slipping?
The bit may not be the right size, it may be dull, or the chuck may not be tightened enough. A smooth surface can also make the bit slide at the start, so begin slowly and use a center mark if needed.
5. Can I use the same cordless drill for all materials?
Yes, in many cases, but you must use the correct bit and settings for each material. Wood, metal, and masonry all need different bits, and some hard surfaces may need a more powerful drill.
