
If you want clean edges, flat boards, and a smooth finish fast, learning how to use a belt sander is a valuable skill. A belt sander removes wood quickly, which makes it great for leveling rough surfaces, shaping edges, and preparing material for finer sanding. But because it is powerful, it also demands care. Used the wrong way, it can leave deep marks, rounded edges, or even damage your workpiece.
The good news is that a belt sander is not hard to control once you understand the basics. The key is to let the tool do the work, use the right grit, move with steady pressure, and follow a safe sanding process. When you use it well, the results can look very professional, even if you are still a beginner.
In this guide, you will learn how to use a belt sander safely and effectively, how to avoid common mistakes, and how to get smoother results with less effort. You will also see practical tips that help you save time and improve your finish on wood, doors, tabletops, and other surfaces.
What a belt sander is best used for
A belt sander is a heavy-duty power tool that uses a continuous loop of sandpaper, called a belt, to remove material quickly. It is much faster than a random orbital sander or hand sanding when you need to take off a lot of wood or level a rough surface.
It works best for jobs like these:
- Flattening rough boards
- Removing old finish or paint from wood
- Leveling edges after glue-ups
- Shaping large wooden surfaces
- Cleaning up warped or uneven boards
One important thing beginners often miss is that a belt sander is usually not the final finishing tool. It is a shaping and leveling tool. For a smooth final surface, you usually follow it with a finer sander or hand sanding.
Another detail many people overlook is belt speed and pressure. More pressure does not mean better results. In fact, pressing too hard can create dips, burn marks, and uneven spots very quickly.
Choose the right belt sander and grit
Before you start sanding, make sure your tool and sanding belt match the job. Not every belt sander is the same, and not every grit works for every surface.
Pick the right size
Common belt sander sizes include 3 x 18 inches and 4 x 24 inches. A smaller model is usually easier to control for home projects. A larger one removes material faster, but it can feel harder to manage if you are new to the tool.
Use the right grit for the task
The grit number tells you how coarse or fine the belt is. Lower numbers remove more material. Higher numbers leave a smoother surface.
| Grit | Best use |
|---|---|
| 40–60 | Heavy removal, rough leveling, old finish |
| 80 | General smoothing after rough sanding |
| 100–120 | Light smoothing before final sanding |
| 150+ | Fine sanding, usually after a belt sander |
If you are removing a lot of material, start coarse. If you are only cleaning up a surface, use a less aggressive grit. A common beginner mistake is starting too fine, which wastes time and puts extra pressure on the machine.
Check the belt direction
Many belts have an arrow showing the correct direction of travel. Put the belt on so the arrow matches the sander’s rotation. If the belt runs backward, it may wear out quickly or perform poorly.
Set up your work area before sanding
Good setup matters more than many people think. A clean and stable work area helps you sand more safely and keep better control of the tool.
First, place your wood on a solid surface. If possible, use sawhorses, a workbench, or clamps to hold the piece in place. A moving board can lead to uneven sanding and hand fatigue.
Then clear away anything that might get in the way. Remove loose cords, small tools, and clutter. Belt sanders can throw dust and move quickly across a surface, so you want a clean path.
Dust control is also important. A belt sander creates a lot of fine dust. If your tool has a dust bag or dust port, use it. If you are working indoors, good airflow helps a lot. For additional safety guidance on wood dust and exposure, you can review the OSHA wood dust information.
Wear proper protection before you begin:
- Safety glasses or goggles
- Dust mask or respirator
- Hearing protection
- Close-fitting clothing
Loose sleeves, jewelry, and long cords can become a risk near the moving belt. Keep them away from the tool.
How to use a belt sander safely and effectively
Now let’s get into the process itself. The best results come from a calm, controlled method. Do not rush. Start the sander before it touches the wood, keep it moving, and use light, even pressure.
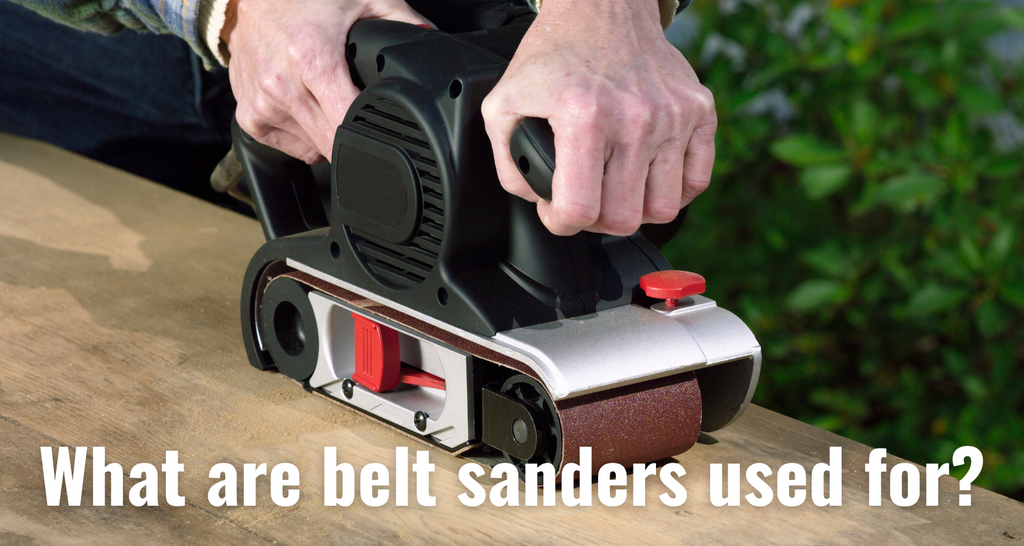
Credit: engineerwarehouse.com
1. Hold the tool firmly with both hands
Most belt sanders are built for two-handed use. One hand should guide the front handle, and the other should control the rear handle or main grip. This gives you better balance and reduces the chance of the sander tipping or digging into the wood.
2. Start on a flat surface
Place the sander flat on the wood before turning it on, or turn it on just before making contact, depending on the model and your comfort level. The belt should be moving before it touches the surface. This helps prevent gouges.
3. Move steadily in the direction of the wood grain
Whenever possible, sand with the grain. This reduces visible scratch marks. If you sand across the grain, deep lines may appear and become difficult to remove later.
Keep the sander moving in long, overlapping passes. Do not stop in one place while the belt is running. That is one of the fastest ways to create dips and burn marks.
4. Use light pressure
Let the weight of the tool do most of the work. Pressing down hard does not make the job cleaner. Instead, it can slow the belt, overheat the wood, and wear out the sandpaper faster.
A good rule is this: if you need to force the sander, the grit may be too fine or the belt may be dull.
5. Work in sections
For larger surfaces, divide the board or panel into sections. Sand one area with controlled passes, then overlap into the next section. This helps you stay even and avoid missing spots.
6. Check your progress often
Stop every so often and look at the surface from different angles. Side lighting can reveal high spots, swirl-like lines, or uneven areas. If you keep sanding without checking, you may remove more material than needed.
One useful habit is to mark the surface lightly with pencil lines before sanding. When the lines disappear evenly, you know the surface is becoming level. This is a simple trick, but many beginners forget it.
How to avoid the most common mistakes
Even with a good tool, a few small mistakes can ruin the finish. If you know what to watch for, you can avoid most problems before they start.
Do not stay in one spot
A belt sander removes wood very fast. If you stop moving, the tool can dig a hollow into the surface. Keep it in motion at all times.
Do not tilt the sander too much
Tilting the sander on its edge can be useful for specific tasks, but doing it by accident can round over corners or create uneven edges. Stay flat unless you need a controlled edge treatment.
Do not skip grit changes
Trying to get a smooth finish with only one coarse belt often leaves deep scratches. A better method is to use the belt sander for rough work, then move to a finer grit or another sander for finishing.
Do not sand too thin
This is a serious beginner mistake. On veneered surfaces, tabletop edges, or old furniture, there may be less material than you think. A belt sander can remove the top layer quickly and expose the base below it. Always check the material thickness before sanding aggressively.
Do not use a worn belt too long
A dull belt makes you work harder and can heat the wood. If the tool stops cutting well, replace the belt. A fresh belt often improves the finish more than people expect.
How to get a smoother, more professional finish
If you want results that look clean and polished, the sanding process should be gradual. A belt sander is only one part of the finish. The last 20% of the job matters a lot.

Credit: vecteezy.com
Use a step-down sanding method
For example, you might start with 60 grit for leveling, move to 80 grit for smoothing, and then finish with 120 or 150 grit using a different sander or hand sanding. This gradual change removes scratch marks more effectively than jumping straight from coarse to fine.
Finish with the grain
Even if you did some rough work in another direction, the last passes should follow the grain. Final sanding marks are much more visible than rough sanding marks, so take your time here.
Blend edges gently
If the surface has sharp edges, make only a light pass. Too much pressure on the edge can round it over too much. Controlled edge blending looks neat and intentional.
Use a straightedge to check flatness
For tabletops, shelves, and panels, lay a straightedge across the surface to see whether it is truly level. Your eyes can miss shallow dips, but a straightedge makes them easier to spot.
This is one of those simple checks that can save a project. Many beginners think the board is flat because it looks flat. In reality, light reflection can hide subtle waves until finishing time.
Safety habits that matter every time
Safety should always come first when using a belt sander. Because the tool is powerful and fast, even a small mistake can lead to injury or damage.
- Disconnect the tool before changing belts
- Keep fingers away from the moving belt
- Wait for the belt to stop before setting the tool down
- Check that the belt is centered and tracking correctly
- Keep both hands on the tool during use
- Do not sand near loose cords or loose clothing
Also pay attention to heat. If a belt or the wood becomes very hot, pause and let it cool. Excess heat can leave burn marks or damage the surface.
Another smart habit is to inspect the belt before every job. Look for tears, wear, or clogged grit. A damaged belt can slip, vibrate, or sand unevenly.
Best use cases for beginners
If you are just learning, start with simple projects. You will build control faster and reduce the risk of damage.
Good beginner projects
- Flattening scrap boards
- Sanding rough lumber before assembly
- Cleaning old paint from a solid wood surface
- Leveling glue squeeze-out after drying
Projects to approach with extra care
- Veneered furniture
- Thin cabinet doors
- Tabletops with decorative edges
- Antique or irreplaceable wood pieces
The more valuable or delicate the surface, the more careful you should be. A belt sander is fast, which is useful, but speed also means less room for error.
After sanding: what to do next
Once the belt sanding is done, do not jump straight to finish if the surface still has coarse marks. Brush off the dust and inspect the wood closely. Run your hand over it gently. If you feel ridges or scratches, go one step finer before finishing.
Vacuum the surface or wipe it with a tack cloth if appropriate for your project. Clean dust helps stain and paint apply more evenly. If you leave dust behind, the finish may look patchy or rough.
If you are staining wood, keep in mind that sanding can affect how the wood absorbs stain. Finer sanding often leads to lighter stain absorption. If the project needs a consistent color, sand all visible areas the same way.
Quick reference for better belt sanding results
Here is a simple guide to keep in mind while working:
| Goal | Best approach |
|---|---|
| Remove material fast | Use coarse grit and light, steady passes |
| Avoid gouges | Keep the tool moving and do not press hard |
| Get a smoother finish | Step down through finer grits |
| Protect the wood | Check thickness and sand carefully near edges |
| Improve safety | Wear eye, ear, and dust protection |
This simple approach works well for most wood projects and helps you avoid the most common beginner problems.
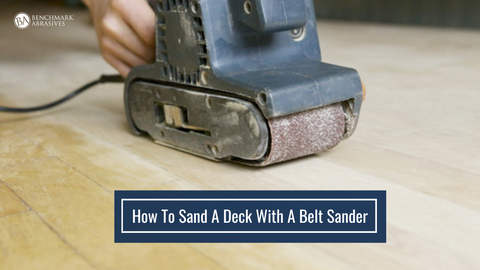
Credit: benchmarkabrasives.com
Final thoughts
Learning how to use a belt sander is really about control. The tool is powerful, but the best results come from patience, the right grit, and steady movement. If you start with a proper setup, use light pressure, and finish with finer sanding, you can create smooth, professional-looking surfaces without much frustration.
The more you use the tool, the better your touch will become. Start with easy projects, check your progress often, and do not try to rush the job. A careful belt sanding process can save time and improve quality at the same time.
FAQs
1. How do I use a belt sander without making gouges?
Keep the sander flat, start the belt moving before it touches the wood, and use light pressure. Do not stop in one place while sanding. Long, steady passes help prevent deep marks.
2. What grit should I start with when using a belt sander?
Start with 40 to 60 grit for heavy removal or rough wood. Use 80 grit for general smoothing. If the surface only needs light sanding, begin with 80 grit instead of a very coarse belt.
3. Can a belt sander be used for final finishing?
Usually no. A belt sander is best for rough sanding, leveling, and shaping. For final finishing, use a finer sander or hand sanding to remove remaining marks.
4. Is a belt sander safe for beginners?
Yes, if you use it carefully. Wear safety gear, hold it with both hands, and avoid pressing too hard. Beginners should practice on scrap wood before working on an important project.
5. Why does my belt sander leave scratches?
Deep scratches can come from a worn belt, a grit that is too coarse, or sanding across the grain. A better sanding sequence and a fresher belt usually improve the finish quickly.
