
If a breaker keeps tripping, or one part of your home has no power, the breaker may be the problem. But a breaker can also trip because of a bad wire, a short circuit, or an overloaded circuit. That is why how to test a breaker with a multimeter is such a useful skill.
You do not need to be an electrician to do a basic test. You do need care, patience, and the right safety steps. A multimeter can tell you if a breaker is sending power, if it is open when it should be closed, and whether the problem is inside the breaker or somewhere else in the circuit.
This guide will show you the process in a simple way. You will learn what to check before testing, how to use the multimeter, how to read the results, and how to avoid common mistakes. If you work slowly and follow each step, you can get a clear answer without guessing.
What you need before testing a breaker
Before you touch the breaker panel, make sure you have the right tools and a safe setup. Good preparation makes the test easier and safer.
- Digital multimeter with AC voltage and continuity settings
- Insulated gloves if available
- Flashlight for better visibility inside the panel
- Screwdriver if the panel cover must be removed
- Access to the breaker panel and the circuit you want to test
A digital multimeter is better than a cheap test light because it gives more exact numbers. That matters when you want to know whether a breaker is truly bad or only seems bad.
One useful fact many beginners miss: a breaker can look fine even when it is defective. The handle position does not always tell the full story. Some breakers fail internally and still stay in the “on” position.
If you want a basic reference for electrical safety, the OSHA electrical safety page is a helpful source. It explains the danger of working near live circuits.
Know what a breaker is supposed to do
A circuit breaker protects your wiring from too much current. When too much current flows, the breaker trips and stops the power. That helps prevent heat damage and fire.
When a breaker works correctly, it should do one of two things:
- Stay closed and send power to the circuit
- Trip when there is an overload, short, or fault
If the breaker does not send power when it should, or if it trips too easily, it may be worn out. But the breaker is not always the real problem. The load, wiring, outlet, or appliance may be causing the issue.
This is why testing matters. You are not just checking whether the breaker flips. You are checking whether the breaker can actually carry and control power the way it should.
Safety steps you should never skip
Working inside a breaker panel can be dangerous. Even if you only plan to test a breaker, you are still near live electricity. Do not rush this part.
Before you open the panel
- Stand on a dry floor.
- Wear dry shoes with rubber soles.
- Keep your hands dry.
- Use one hand when possible near the panel.
- Do not touch bare metal parts you do not need to touch.
Another detail many people miss: the panel cover may expose live bus bars even when the main breaker is off. So turning off the main breaker does not make the inside fully safe.
If you feel unsure, stop and call a licensed electrician. Safety is more important than saving time.
Set up the multimeter the right way
Before testing, make sure the multimeter is ready for AC voltage. Most home breakers carry AC power, not DC power.
How to set the meter
- Insert the black probe into the COM port.
- Insert the red probe into the V port.
- Turn the dial to AC volts, often marked as V~.
- If your meter is not auto-ranging, choose a range higher than the expected voltage, such as 200V or 600V.
For many home circuits in the United States, you will see around 120 volts. For larger appliances, you may see around 240 volts. In other countries, the numbers may be different.
A beginner mistake is testing voltage while the meter is set to resistance or continuity. That will give wrong results and can damage the meter.
How to test a breaker with a multimeter step by step
Now we get to the main process. This is the most direct way to check whether a breaker is supplying power properly.
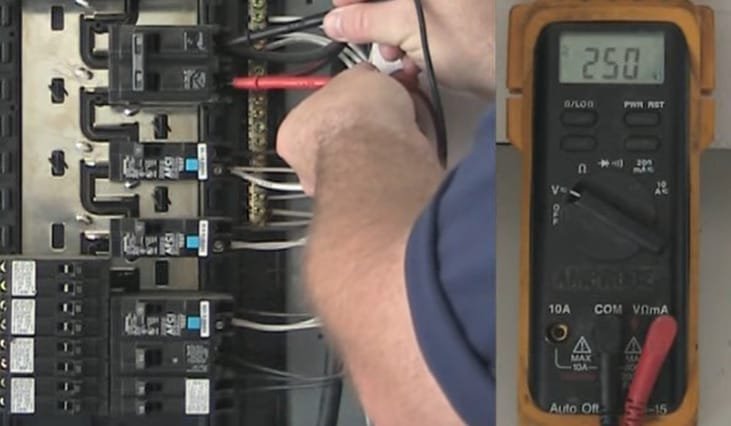
Credit: toolsweek.com
Step 1: Turn off the devices on the circuit
Before testing, turn off lights, unplug appliances, or disconnect anything heavy on that circuit. This lowers the load and makes the test cleaner. It also reduces the chance of a sudden surge when the breaker is reset.
Step 2: Open the breaker panel cover
Remove the cover carefully if needed. Keep your face away from the panel and avoid touching nearby metal parts. Only remove the cover if you are comfortable doing so.
Step 3: Find the breaker you want to test
Look for the breaker connected to the outlet, room, or appliance that is not working. If the panel labels are messy or unclear, take your time. Guessing can lead to testing the wrong breaker.
Step 4: Test the breaker output
Place the black probe on the neutral bar or another safe neutral reference point in the panel. Place the red probe on the breaker terminal screw or the breaker’s output terminal.
If the breaker is on and working, the multimeter should show the expected AC voltage. If it shows 0 volts or a very low reading, the breaker may be off, tripped, or faulty.
What the reading usually means
| Meter reading | Possible meaning | What to check next |
|---|---|---|
| About 120V or 240V | Breaker is likely supplying power | Check the circuit load, wiring, outlet, or appliance |
| 0V | Breaker may be off, tripped, or bad | Reset the breaker and test again |
| Low or unstable voltage | Loose connection or failing breaker | Inspect for damage or call an electrician |
One important insight: a breaker can read voltage at the line side but not at the load side. That means power is reaching the breaker, but not leaving it. This usually points to a bad breaker or a poor internal connection.
Step 5: Check both sides of the breaker if possible
If your panel setup allows safe access, test the line side and the load side. The line side should show power coming in. The load side should show power going out when the breaker is on.
This difference helps you find the exact failure point:
- Line side has voltage, load side has none: possible breaker failure
- Both sides have voltage: breaker is likely working
- No voltage on either side: upstream issue, main disconnect issue, or panel problem
This step is one of the most useful parts of how to test a breaker with a multimeter, because it tells you where power stops.
Step 6: Reset the breaker and test again
If the breaker was tripped, switch it fully to the off position first, then back to on. Many people skip the full off motion. That can leave the breaker partly reset and still not work correctly.
After resetting, measure again. If power returns, the breaker may have only tripped from overload. If it trips again right away, there may be a short circuit or a bad appliance on the circuit.
Step 7: Confirm the result at an outlet or load
If you want extra confidence, test the outlet, switch, or light on the same circuit. If the breaker shows proper voltage but the outlet still has no power, the problem may be in the wiring, not the breaker.
This is a key beginner mistake: people assume a dead outlet always means a bad breaker. In reality, many circuit failures happen downstream from the breaker.
How to test a breaker for continuity
Voltage testing is usually the most useful method, but continuity testing can help in some cases. Continuity checks whether current can pass through the breaker when it is on.
When continuity testing helps
- When a breaker looks damaged
- When you want to check if the internal switch path is open
- When the breaker is removed from the panel for bench testing
Important: continuity testing should only be done on a breaker that is fully disconnected and removed from power. Never test continuity on a live circuit.
How to do the test
- Turn off power to the panel if this can be done safely and by proper procedure.
- Remove the breaker if you are qualified to do so.
- Set the multimeter to continuity or ohms.
- Place one probe on the line terminal and the other on the load terminal.
- With the breaker switched on, the meter should show continuity or very low resistance.
- With the breaker switched off, the meter should show open or no continuity.
If the breaker does not show the expected change, it may be defective. Still, a continuity test alone does not prove the breaker works under load. That is why voltage testing is often more practical in real homes.
Signs that the breaker may be bad
Not every tripping breaker is a failed breaker. But certain signs are strong warning signs.
- The breaker trips even with normal use
- It will not stay reset
- The handle feels loose or weak
- The breaker feels hot to the touch
- You smell burning near the panel
- The breaker shows power on the line side but not on the load side
Heat is a big clue. A breaker should not run very hot during normal use. Slight warmth can happen, but strong heat or discoloration is not normal.
Another detail beginners often miss: repeated tripping can damage a breaker over time. If the breaker has been tripping for months, the internal parts may already be worn out, even if it still works sometimes.
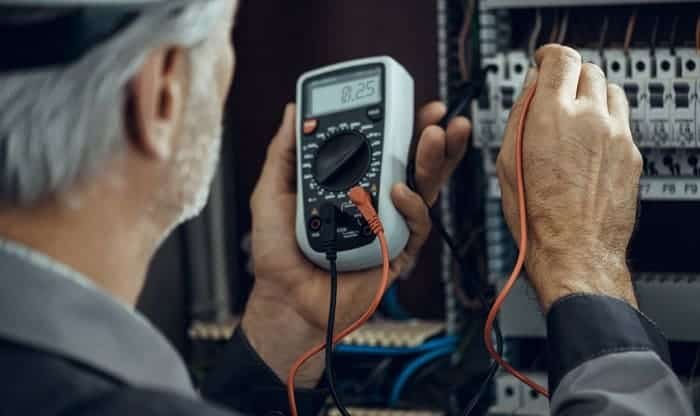
Credit: galvinpower.org
Common mistakes to avoid
Testing a breaker is not hard, but small mistakes can lead to wrong results or unsafe conditions.
1. Using the wrong meter setting
If you use resistance or continuity on a live circuit, you can get bad readings and risk damaging the meter.
2. Testing the wrong point
Checking only the breaker handle does not tell you much. You need to measure the electrical output, not just look at the switch position.
3. Forgetting the neutral reference
Voltage testing depends on a proper reference point. If you do not place the probe in the right location, the reading may not mean what you think it means.
4. Assuming no power means a bad breaker
The problem may be a loose wire, a tripped upstream device, or a faulty outlet. Always test carefully before replacing parts.
5. Working too quickly
Rushing in a breaker panel is dangerous. Slow, steady testing gives better results and keeps you safer.
How to tell if the problem is the breaker or the circuit
This is one of the most important parts of the process. A good test is not just about the breaker itself. It is about understanding where the failure really is.
If the breaker has correct voltage on the input side but no voltage on the output side, the breaker is a strong suspect. If the breaker output is fine, then the problem is likely further down the line.
Here is a simple way to think about it:
- Problem at the breaker: no output voltage, weak output, or breaker will not stay on
- Problem in the circuit: breaker output is fine, but outlet or device still does not work
- Problem from overload: breaker works until too much current is used
Two non-obvious clues can help beginners a lot. First, if multiple outlets in the same room are dead, one breaker may not be the only issue because some circuits are shared through a GFCI outlet. Second, if a breaker trips only when a certain appliance starts, the breaker may be fine and the appliance may be the real cause.
When to replace the breaker
Replace the breaker only if your testing points to a real defect. Do not replace it just because it tripped once.
A breaker is a replacement candidate when:
- It has proper input voltage but no output voltage
- It trips immediately with no known circuit overload
- It shows physical damage, heat marks, or burning smell
- It fails continuity testing when removed and tested properly
Always replace a breaker with the exact type and rating recommended for the panel. Using the wrong breaker is unsafe and can create a fire risk.
What to do after the test
Once you finish testing, put the panel cover back in place securely. Make sure all screws are tightened properly. Then restore power and watch the circuit for normal behavior.
If the breaker keeps tripping, do not keep resetting it again and again. That can hide a serious issue. A repeated trip is a warning, not an inconvenience to ignore.
If you are still unsure after testing, take notes before calling an electrician. Write down:
- Which breaker you tested
- What voltage reading you saw
- Whether the breaker reset or tripped again
- Which outlets or devices stopped working
Clear notes save time and help the electrician find the problem faster.
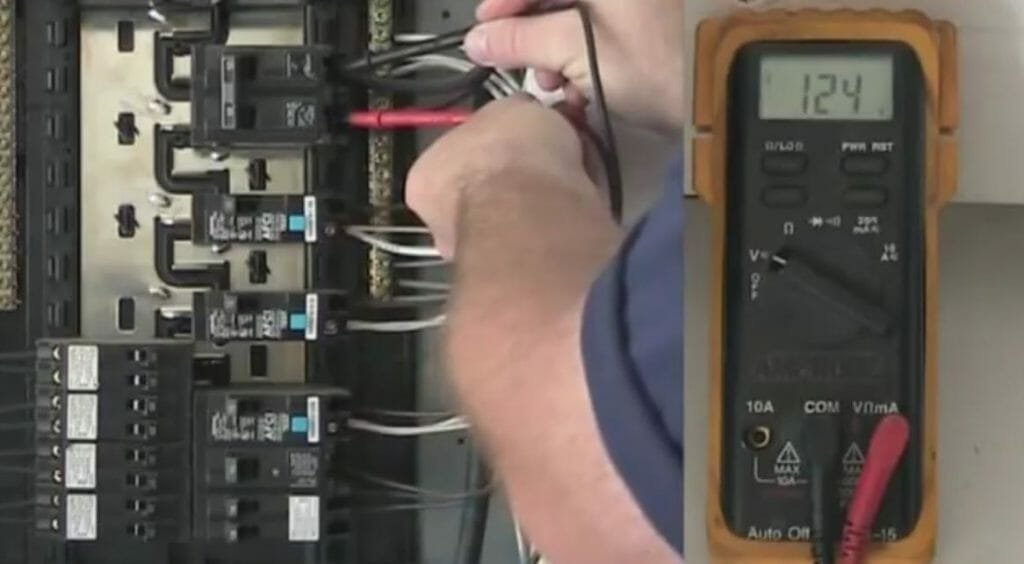
Credit: toolsweek.com
Conclusion
Learning how to test a breaker with a multimeter gives you a simple way to find electrical problems with more confidence. You can check whether the breaker is sending power, whether it has a working internal path, and whether the issue may be somewhere else in the circuit.
The most important points are safety, correct meter setup, and careful reading of the results. Do not guess. Test step by step, and use both voltage and continuity only when appropriate. With the right method, you can avoid wasted time and avoid replacing a breaker that is not actually bad.
If the readings point to a faulty breaker, replace it with the correct type. If the readings point to wiring or load problems, stop and investigate further. Either way, the multimeter helps you move from guessing to knowing.
FAQs
Can I test a breaker without turning off the main power?
Yes, voltage testing is often done with the panel energized, but it is dangerous and should be done with care. If you are not comfortable working near live parts, call an electrician.
What should a good breaker read on a multimeter?
A good breaker should usually show the expected AC voltage on its output side when it is on. In many homes, that is about 120 volts for standard circuits or about 240 volts for larger circuits.
Why does my breaker have voltage but still not work?
If the breaker has voltage on one side but not the other, the breaker may be defective. If the breaker output is fine, the problem may be in the wiring, outlet, or appliance.
Can a breaker be bad even if it does not trip?
Yes. A breaker can fail internally and stop delivering power without visibly tripping. That is why testing with a multimeter is more useful than looking only at the handle position.
Should I replace a breaker that trips once?
Not always. One trip can happen from overload or a temporary fault. If it keeps tripping, runs hot, or fails testing, then replacement may be needed.
