
If you want two wires to stay connected, carry current well, and last for a long time, soldering is one of the best skills you can learn. It is not hard, but it does need care. A good solder joint is clean, shiny, and strong. A bad one can look connected but fail later when the wire moves or heats up.
This guide shows how to solder wires together in a simple way. You will learn what tools you need, how to prepare the wires, how to make the joint, and how to avoid common mistakes. The steps are easy to follow even if you are new to electronics or home repair.
By the end, you will know how to make wire connections that are safer, neater, and more reliable. You will also learn a few small details that many beginners miss, such as why wire preparation matters more than the solder itself.
What you need before you start
Good soldering starts with the right tools. You do not need many items, but the ones you use should be suitable for electrical work. Cheap tools can still work, but poor heat control or dirty tips often cause weak joints.
Here is a simple set of tools and materials:
- Soldering iron with a fine tip
- Solder made for electronics, usually rosin-core solder
- Wire stripper
- Helping hands or clips to hold wires
- Heat-shrink tubing or electrical tape
- Wire cutters
- Wet sponge or brass tip cleaner
- Safety glasses
One small but important detail: use rosin-core solder, not acid-core solder. Acid-core solder is used for plumbing, not electronics. It can slowly damage wires and nearby parts.
For most wire jobs, a soldering iron in the 20 to 40 watt range is enough. If you are working with thicker wires, you may need more heat. A weak iron often causes a common beginner mistake: heating the solder instead of heating the wire.
Safety matters too
Soldering creates heat, fumes, and a risk of burns. Work in a place with fresh air. Keep the iron in its stand when not in use. Never touch the metal tip. If you are using leaded solder, wash your hands after the job.
For extra safety guidance, you can also check general soldering advice from an established source like Adafruit’s soldering resources, which are helpful for beginners working on electronics.
Prepare the wires the right way
Preparation is where many people rush, but this step decides how strong the final connection will be. If the wire ends are messy or oxidized, the solder may not bond well. The joint may look fine at first and fail later.
Start by cutting both wire ends cleanly. Then strip about 1/4 inch to 1/2 inch of insulation from each wire. The exact length depends on wire size and the type of joint you want to make. You need enough bare wire for a solid overlap, but not so much that a lot of metal is left exposed.
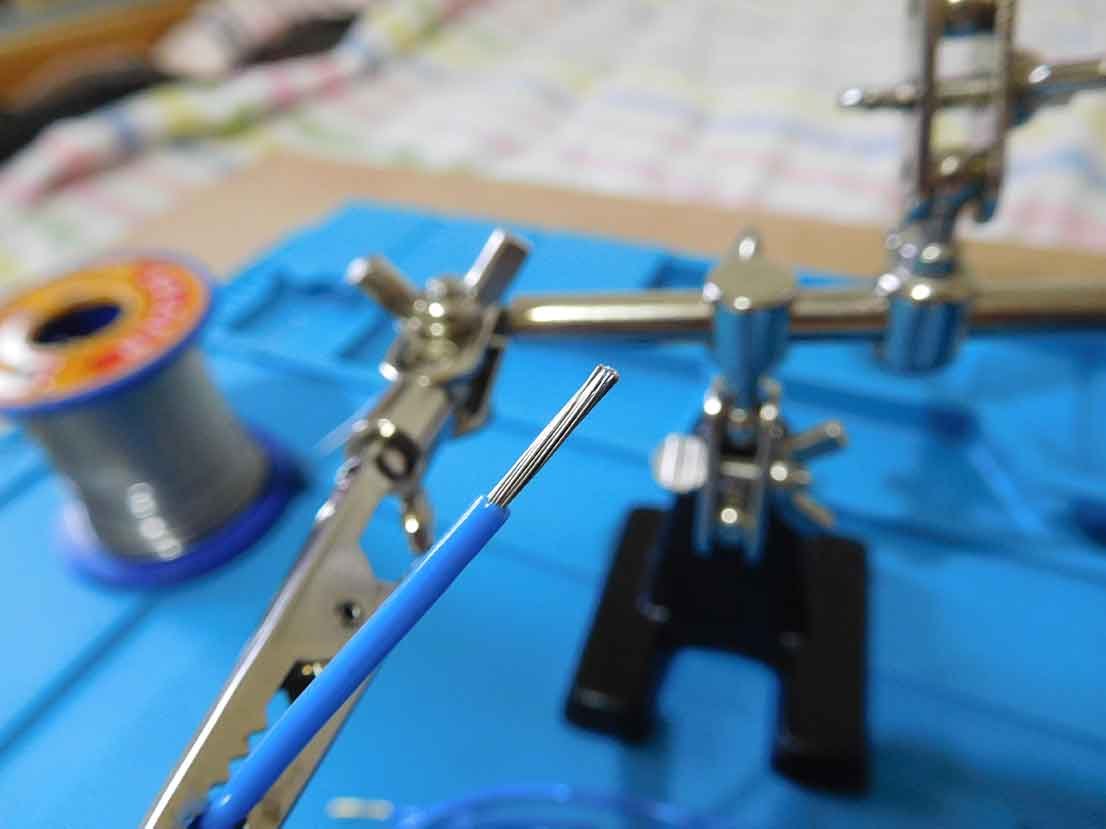
After stripping, twist the wire strands gently with your fingers. This keeps the strands together and makes it easier to heat them evenly. If the wire is old, dirty, or dull, wipe it lightly or trim back to fresh wire if possible.
Before you solder, slide a piece of heat-shrink tubing onto one wire first. Beginners often forget this and then realize they cannot add it after the joint is done. That is one of those small mistakes that wastes time.
Choose the right wire connection style
There are several ways to join wires, but one simple method works well for most basic jobs. Overlap the stripped ends, twist them together, and then solder the joint. This creates good contact and helps the solder flow into the strands.
For a stronger mechanical hold, some people use a Western Union splice, where each wire wraps around the other. That is useful when the connection may be pulled or moved. If you are new, a simple twisted overlap is usually enough for light repairs and electronics.
| Wire job | Best approach | Why it helps |
|---|---|---|
| Small electronics wire | Light overlap and solder | Clean, compact joint |
| Wire that may move | Mechanical twist before soldering | Better strength before solder is added |
| Thicker cable | Tighter splice and more heat | Helps solder flow through the strands |
Heat the wire, not the solder
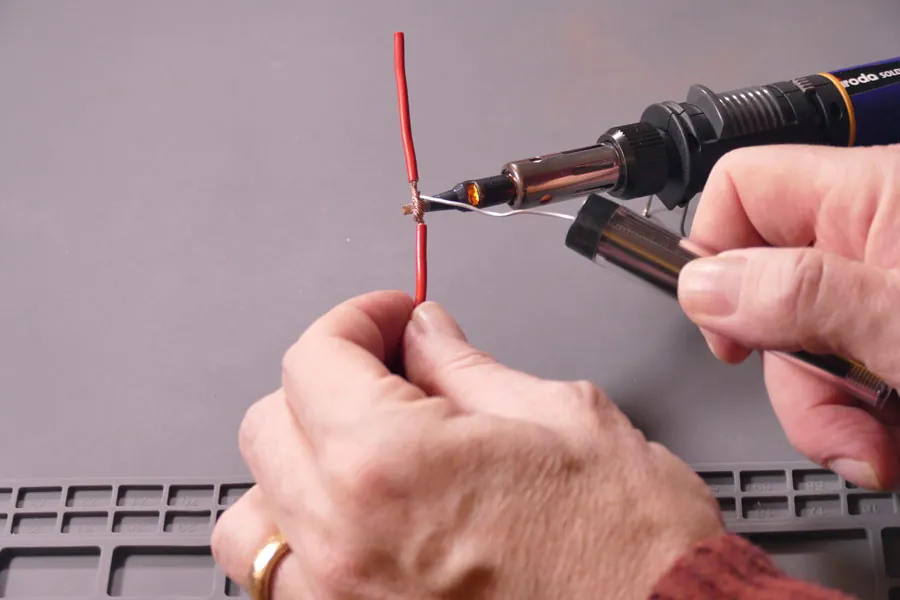
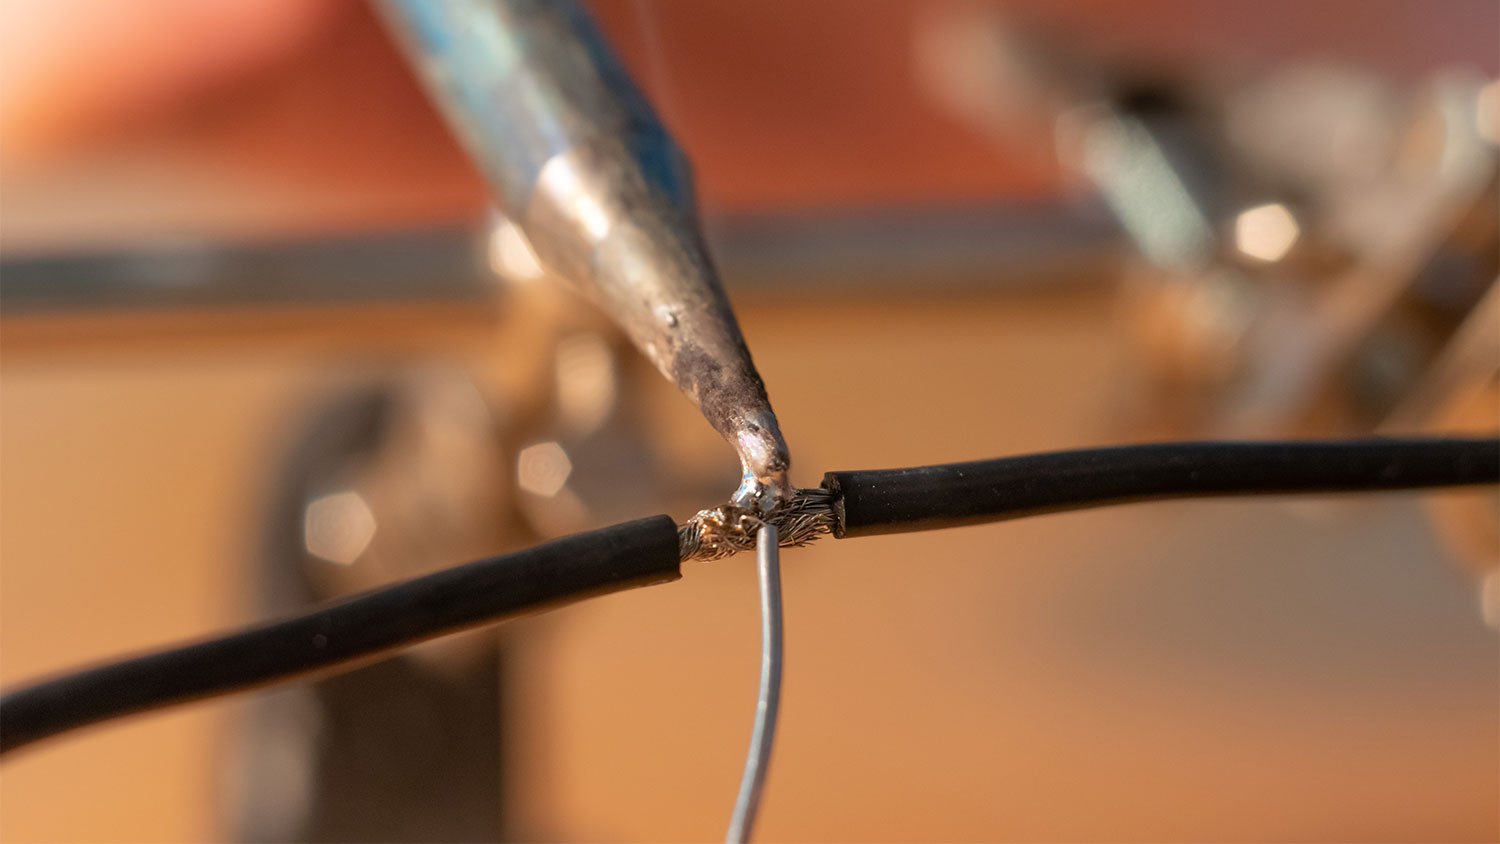
This is one of the most important ideas in soldering. The soldering iron should heat the metal wires first. When the wires get hot enough, the solder melts when it touches the joint. If you melt solder directly on the iron tip and drip it onto the wire, the joint may look covered but not truly bonded.
Place the iron tip against the twisted wire section. Hold it there for a second or two, depending on wire size. Then touch the solder to the wire, not to the iron. If the wire is hot enough, the solder will flow into the strands by itself.
A good joint should have a smooth, slightly shiny surface. It should not look like a blob sitting on top. The solder should appear to have soaked into the wire. That means the metal parts are properly joined.
One detail beginners often miss: too much solder is not better. A large blob can hide a weak connection inside. You want enough solder to cover the strands and make a solid bond, but not so much that the joint becomes bulky and stiff.
Credit: pro-iroda.com
Step-by-step: how to solder wires together
- Strip the wire ends about 1/4 inch to 1/2 inch.
- Twist the bare ends lightly so the strands hold together.
- Slide heat-shrink tubing onto one wire before soldering.
- Overlap the wires and make a small mechanical twist if needed.
- Clamp the wires so they stay still while you work.
- Heat the joint with the soldering iron tip.
- Touch solder to the wire, not directly to the iron tip.
- Let the solder flow into the strands naturally.
- Remove the iron and keep the wires still until the joint cools.
- Cover the joint with heat-shrink tubing or tape after it cools.
That is the basic process, but the quality of the result depends on timing and control. If you move the wire before the solder hardens, the joint can become dull and cracked. That is called a cold solder joint, and it often causes trouble later.
How to know when the joint is good
A good solder joint has a few clear signs. It should be firm, evenly covered, and not flaky. It should also not be burnt or blackened. If the joint is dull, rough, or grainy, it may not have formed correctly.
Try a light tug on the wires after they cool. Do not pull hard. You just want to check that the wires are held together securely. If the joint moves or separates, redo it.
Also look at the insulation near the joint. If it has melted too much, the iron may have stayed in place too long. That is a sign to work faster next time or use a slightly cooler tip if possible.
A simple method that works for most wire splices
For many home and electronics repairs, this simple splice method is enough. It is easy, strong, and neat when done carefully.
Use this approach for small or medium wires
- Strip both wires.
- Lay them in an X shape with the bare parts crossing.
- Wrap each wire end around the other wire once or twice.
- Trim any long loose ends if needed.
- Heat the wrapped section.
- Apply solder until the metal is fully joined.
- Let it cool without moving it.
- Cover the joint with heat-shrink tubing.
This method gives you both mechanical grip and electrical contact. That matters because solder alone should not be the only thing holding the wires together. The wire should already be stable before the solder is added.
Another useful tip: if you are joining stranded wire to stranded wire, keep the strand count balanced. If one side is tightly twisted and the other is loose, the joint may heat unevenly. Even contact helps the solder spread in a cleaner way.
Common mistakes to avoid
Most soldering problems come from a few repeated errors. Once you know them, you can avoid many wasted attempts.
Credit: bestsoldering.com
1. Using too little heat
If the iron is too cool, the solder will not flow properly. It may stick in a ball or coat only part of the joint. The wire may still look connected, but the bond will be weak.
2. Moving the wire too soon
When solder cools, it needs a few seconds to harden. If the wire moves during that time, the surface can become dull and cracked. This is one of the most common reasons a joint fails later.
3. Putting solder on the iron instead of the wire
This often creates a false-looking joint. The solder may stick to the outside, but not fully bond to the metal strands. Always aim to heat the wire first.
4. Using too much solder
More solder does not always mean better strength. Extra solder can make the joint bulky and hard to insulate. It can also hide poor wire contact underneath.
5. Skipping insulation protection
If you do not cover the joint after soldering, the bare metal can short against other wires or surfaces. Heat-shrink tubing is usually the best choice because it looks neat and gives better protection than tape.
A practical rule is simple: if the connection will be touched, bent, or placed in a tight space, make the joint as small and clean as possible.
How to make the joint stronger and safer
Learning how to solder wires together is not only about making electricity flow. It is also about building a connection that can handle daily use. Strength and safety matter just as much as conductivity.
One smart habit is to support the wire before and after the joint. If the cable will experience pulling, use strain relief. That means securing the cable so the soldered section does not carry all the stress.
For example, in a repair inside a device, the wire may need to be tied down, clipped, or routed so it cannot move freely. If the joint moves too much, even a good solder connection can fail over time. That is something beginners often overlook.
Another smart step is to match the wire size with the job. Thin wire is fine for low-power signals, but not for high current. If the wire is too small for the load, it can heat up and become unsafe. Soldering cannot fix a wire that is simply too weak for the task.
When to use heat-shrink tubing instead of tape
Heat-shrink tubing is usually the better option because it forms a tight, clean seal around the joint. It also lasts longer and looks more professional. Electrical tape can work for temporary repairs, but it may loosen over time, especially in warm places.
If you use heat-shrink tubing, choose a size that fits over the soldered joint before shrinking. Then heat it gently with a heat gun or the side of the soldering iron’s heat source, if appropriate, until it grips the wire firmly.
Testing your soldered wires
After the joint cools and is insulated, check it before putting the wire back into service. Testing is quick, and it can save you from a hidden failure later.
First, inspect the joint visually. Look for smooth solder, no exposed strands, and no melted insulation touching the wrong points. Then do a gentle pull test. If the wires stay secure, the connection is likely strong enough for normal use.
If the wire is part of a circuit, test the electrical path with a multimeter if you have one. You are looking for continuity. A good soldered joint should show a solid connection with little or no resistance from the joint itself.
If the circuit does not work after soldering, do not panic. Check the most common issues first: reversed wires, weak solder flow, or damaged insulation causing a short.
Why practice makes a big difference
Soldering looks simple when someone else does it, but the feel comes with practice. The first few joints may be uneven. That is normal. Each wire type behaves a little differently, and different soldering irons heat in different ways.
Practice on spare wire before you work on an important repair. Try joining two small wires, then inspect the result. Make a few joints on purpose, then cut them apart and see how the solder flowed. This helps you learn what a good connection feels like.
Here is one more beginner insight that helps a lot: clean, prepared wire is easier to solder than old, oxidized wire, even if you use the same iron and solder. Good preparation saves time and makes better joints. In other words, the joint quality often starts before the iron is even turned on.
Credit: angi.com
Quick reference for a clean solder joint
When you are in the middle of a project, it helps to remember the main goals. The joint should be mechanically secure, electrically solid, and well insulated. If one of these is missing, the repair is not complete.
- Strip the wire cleanly.
- Twist or overlap the strands before soldering.
- Heat the wire, not the solder first.
- Use only enough solder to wet the joint.
- Do not move the wire while it cools.
- Cover the joint with heat-shrink tubing or tape.
- Test the joint before returning it to use.
Once these steps become natural, soldering feels much easier. You will spend less time fixing mistakes and more time making reliable connections.
FAQs
1. What type of solder is best for wires?
For most electrical work, rosin-core solder is the best choice. It is made for electronics and helps the solder flow better. Avoid acid-core solder because it can damage wires and parts over time.
2. Can I solder wires without a soldering iron?
Not properly. You need a soldering iron to heat the wire and melt the solder correctly. Trying to use another heat source usually gives poor results and can be unsafe.
3. Why does my solder joint look dull instead of shiny?
A dull joint often means the wire moved while the solder cooled, or the wire was not heated enough. This is usually a sign of a cold solder joint. Reheat the joint and let it cool without moving.
4. Is it better to solder or crimp wires?
Both methods can work well. Soldering is great for many electronics and small repairs. Crimping is often better for some high-vibration or production jobs. The best choice depends on the use case, but for simple wire repair, soldering is very common.
5. Do I need heat-shrink tubing after soldering?
It is highly recommended. Heat-shrink tubing protects the joint, reduces the chance of short circuits, and gives a cleaner finish than tape. If the joint will not stay exposed, covering it is a smart habit.
