
If you are new to welding, the first time you look at a MIG welder can feel confusing. There are wires, gas, rollers, polarity settings, and several knobs that seem to do very similar things. The good news is that how to set up a mig welder is much easier once you understand the order of the steps.
A good setup is not just about turning the machine on. It affects arc quality, weld strength, spatter, and how easy the whole process feels. A machine that is set up well will run smoother, start easier, and give you better results with less frustration.
In this guide, you will learn the full setup process in simple language. You will also learn a few beginner mistakes that often cause wire jams, weak welds, and poor arc starts. By the end, you should feel much more confident about preparing your MIG welder for real work.
What to check before you power on the machine
Before you touch any settings, take a slow look at the whole welding area. Many beginners rush straight to the controls and later wonder why the weld is unstable. A few minutes of checking saves a lot of trouble.
First, make sure your work area is dry, clean, and free from flammable items. MIG welding creates sparks and hot metal. Paper, fuel, paint cans, and oily rags should be far away from the weld zone.
Next, confirm that you have the right safety gear. At minimum, use a welding helmet, gloves, long sleeves, and strong shoes. Good ventilation is also important, especially when welding indoors.
You should also check the metal you plan to weld. Remove rust, paint, oil, and heavy dirt from the joint area. MIG welding works best on clean metal. Dirty metal often causes porosity, weak fusion, and excessive spatter.
One beginner detail many people miss is that the thickness of your metal matters before setup even starts. Thin sheet metal and thick steel need very different wire speed and voltage settings. If you ignore this, the machine may seem “wrong” when the real issue is the material choice.
Understand the main parts of a MIG welder
Knowing the parts helps the setup make sense. A MIG welder may look complicated, but the job of each part is simple.
The machine usually has a power source, a wire feeder, a torch, a ground clamp, and a gas system if you are using shielding gas. The wire feeder pushes welding wire through the torch. The torch sends wire, electricity, and gas to the weld area. The ground clamp completes the electrical circuit by connecting to your workpiece or welding table.
If your setup includes shielding gas, the gas bottle, regulator, and hose are also important. The gas protects the weld pool from air. Without proper shielding, the weld can become weak and ugly.
Another small but important part is the drive roller inside the feeder. The roller must match the wire type and wire size. If the wrong roller is installed, the wire can slip, jam, or feed unevenly.
Place the machine in the right location
Put the welder on a flat and stable surface. The machine should not wobble or sit where it can tip over. If you are using a gas cylinder, secure it upright with a chain or strap.
Keep the machine in a place with good airflow. MIG welders can heat up during use, and the fan needs space to cool the internal parts. Do not push the back of the machine tight against a wall.
Also keep the cable path as straight and free as possible. Long bends or sharp turns can make wire feeding less smooth. A clean cable path often improves arc stability more than beginners expect.
Install the wire spool correctly
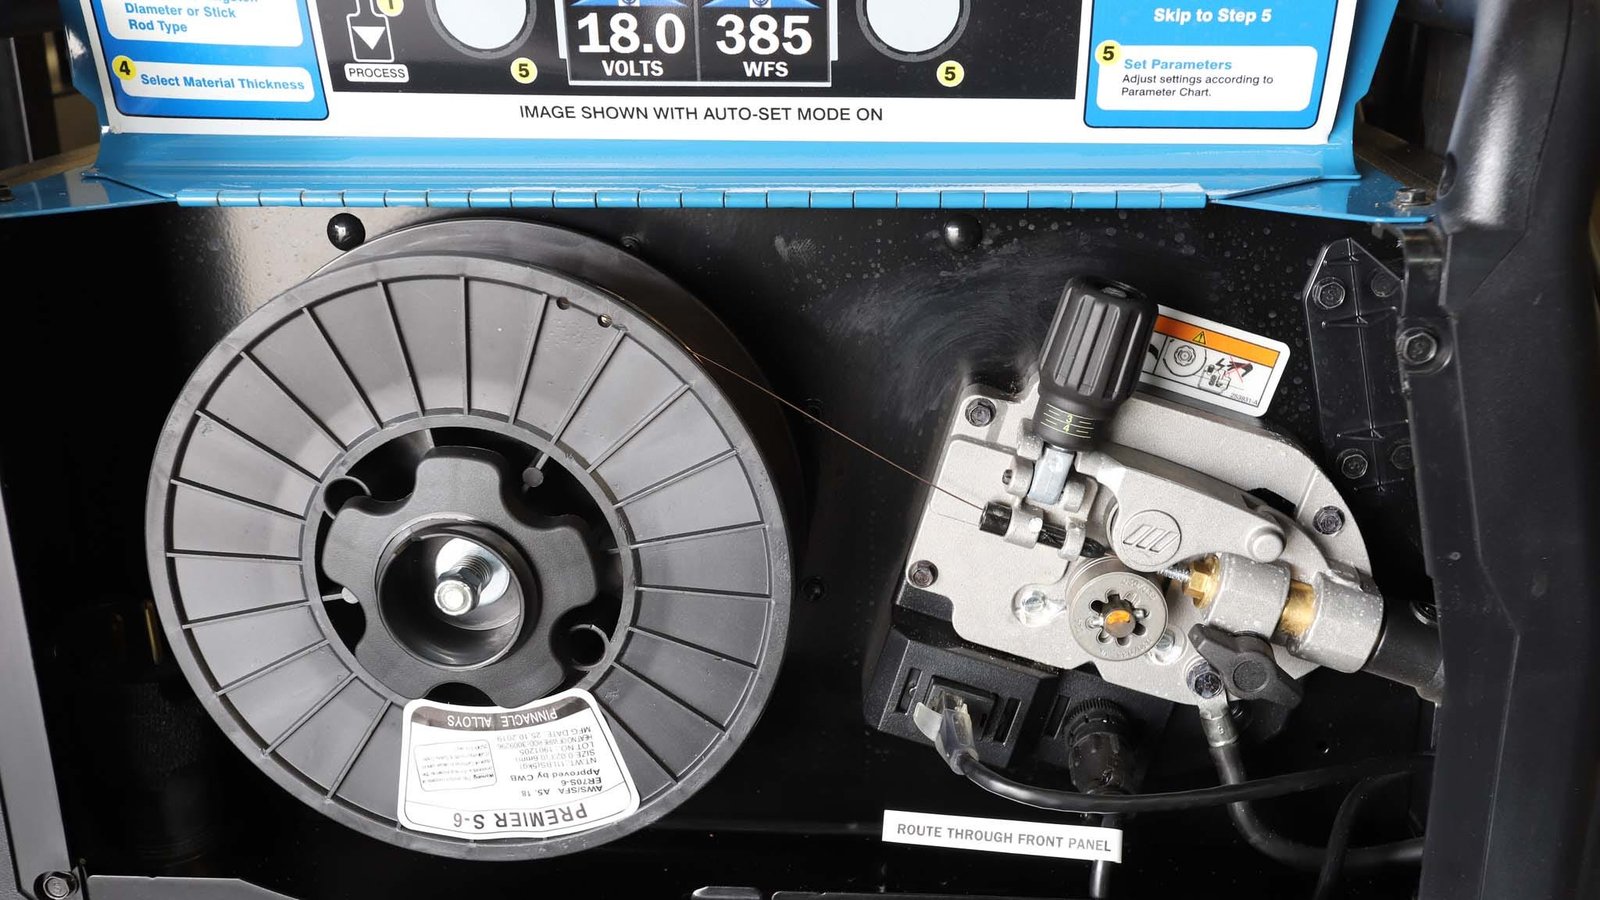
Loading the wire spool is one of the most important steps in how to set up a mig welder. If the spool is installed the wrong way, the wire can unwind badly and create a bird nest inside the feeder.
Open the side panel of the machine and place the spool on the spindle. Make sure the spool turns in the correct direction so the wire can feed out smoothly. Most machines show the proper direction near the spool holder.
Once the spool is on, tighten the retaining nut just enough to keep the spool in place. It should not spin freely and spill wire, but it should also not be clamped so hard that the wire pulls unevenly.
Cut the wire end cleanly before feeding it into the liner. A bent or sharp wire tip can catch inside the feeder. Hold the wire firmly so it does not spring loose and unravel.
One non-obvious point: wire should unwind with only light resistance. If the spool tension is too tight, the feeder must work harder, and the arc can become jumpy. If it is too loose, the spool can keep spinning after feeding stops and tangle the wire.
Choose the correct drive roller and liner
The drive roller must match the wire type and wire diameter. Solid steel wire, flux-cored wire, and aluminum wire may need different rollers. Many rollers have grooves for specific wire sizes, such as 0.023, 0.030, or 0.035 inch.
Check the wire packaging or spool label, then match the roller to that size. If you are unsure, read the machine manual. Using the wrong groove can crush the wire or allow it to slip.
The liner inside the torch also matters. The liner guides the wire from the feeder to the tip. If it is dirty, damaged, or the wrong size, feeding problems can appear even when the roller is correct.
For beginners, this is a common hidden problem. People often blame the machine, but the real issue is poor wire guidance inside the gun cable. If wire feed feels rough, do not ignore the liner.

Credit: motortrend.com
Set the drive tension the right way
Drive tension should be firm enough to move the wire, but not so tight that it flattens the wire. This balance is very important.
Here is a simple way to set it:
- Feed the wire through the rollers and close the tension arm.
- Set the tension adjustment to a medium starting point.
- Pull the trigger and watch the wire feed.
- If the rollers slip and the wire stops, increase tension slightly.
- If the wire becomes flattened or the machine struggles, reduce tension.
Too much tension can damage the wire and make feeding worse. Too little tension makes the rollers slip. Beginners often think “more pressure is safer,” but with MIG wire, that is not true.
Thread the wire through the torch
After the spool and rollers are ready, feed the wire into the torch cable. Keep the torch as straight as possible while feeding. This helps the wire travel smoothly.
Press the trigger or use the feeder control to advance the wire until it comes out of the contact tip area. Trim any bent or damaged wire before it reaches the tip. A clean end makes starting easier.
If the wire stops halfway, do not force it. Pull it back slightly and check for kinks, dirt, or a misaligned roller. Forcing the wire can create a jam inside the cable.
One useful habit is to keep the torch cable relaxed during setup. Tight coils and sharp bends can make the wire drag inside the liner. A smooth cable path is a simple way to avoid feeding trouble.
Pick the right shielding gas and flow rate
If you are using solid wire, shielding gas is usually required. A common choice for mild steel is a mix of argon and carbon dioxide. Flux-cored wire may work with or without gas depending on the wire type, so always check the spool label.
Set up the gas cylinder safely first. Open the valve slowly. Then adjust the regulator and flow meter. A common starting point is around 20 to 25 cubic feet per hour for many indoor welds, but the exact amount depends on wind, nozzle size, and joint conditions.
Too little gas can let air reach the weld pool, which causes porosity and a rough bead. Too much gas can create turbulence and also hurt shielding. More gas is not always better.
If you want a reliable reference on welding safety and setup basics, the American Welding Society is a trusted source with helpful standards and guidance.
Set polarity correctly
Polarity is one of the most misunderstood parts of MIG setup. If the polarity is wrong, the weld may spit, burn badly, or barely penetrate.
For most solid wire with shielding gas, the setup is usually electrode positive, often written as DCEP. For many flux-cored wires, the setup may be electrode negative, but this depends on the wire type.
Always check the wire package and your machine manual. Do not guess. A wrong polarity setting can waste time and make a good machine seem faulty.
This is one of the beginner mistakes people miss because the welder still makes an arc. But an arc is not enough. It must be the correct arc for the wire and gas you are using.
Set voltage and wire speed as a starting point
These two settings work together. Voltage affects the arc length and heat. Wire speed affects how much wire enters the puddle.
Many welders have a chart inside the door or on the machine body. Use that chart first. It is a very good starting point based on wire size and material thickness.
If no chart is available, begin with the following idea: thin metal needs lower voltage and slower wire speed, while thicker metal needs more heat and more wire feed. Do not try to guess exact numbers without testing.
| Material thickness | Starting point | What you want to see |
|---|---|---|
| Thin sheet metal | Lower voltage, lower wire speed | Stable arc without burn-through |
| Medium steel | Medium voltage, medium wire speed | Steady crackling sound |
| Thicker plate | Higher voltage, higher wire speed | Good fusion and smooth puddle |
Listen to the arc. A smooth MIG weld often sounds like steady frying bacon, not loud popping or harsh snapping. Sound is not the only guide, but it helps a lot once you know what to hear.
Attach the work clamp properly
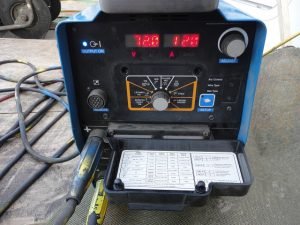
The ground clamp is not a small detail. A weak ground connection can cause unstable arc starts, poor bead shape, and confusing machine behavior.
Attach the clamp directly to clean metal on the workpiece or a clean welding table. Do not clamp over paint, rust, or dirt. The clamp needs a solid metal-to-metal connection.
Keep the clamp close to the weld area when possible. A longer current path can sometimes create more resistance. Good contact gives you a smoother, more reliable arc.
If the arc keeps cutting in and out, check the ground first. Many beginners spend time changing settings when the real problem is a loose clamp.
Credit: gowelding.org
Prepare the torch tip and nozzle
The contact tip must match the wire size. If the tip is too tight, the wire may drag. If it is too loose, the arc can become unstable.
Make sure the nozzle is clean and free from heavy spatter. Spatter build-up can block gas flow and make the weld worse. A light coating of anti-spatter can help, but do not overuse it.
Check that the tip is tight enough and not badly worn. A worn tip can cause poor wire contact and uneven feed.
Beginners often skip this part because the tip looks small. In reality, the tip is where power enters the wire, so it has a big effect on weld quality.
Do a quick test before welding your project
Before working on the real piece, test the setup on scrap metal of the same thickness. This is the safest way to confirm that everything is working.
Hold the torch at a steady angle, then make a short test weld. Watch the arc, listen to the sound, and look at the bead. If the wire is stubbing into the work, your wire speed may be too high. If the arc feels weak and the bead sits too high, your voltage may be too low.
Use small changes, not big ones. A little adjustment often makes a large difference. Beginners usually improve faster when they change one setting at a time.
Here are common test results and what they often mean:
- Too much spatter: voltage may be low, wire speed may be too high, or gas coverage may be weak.
- Wire keeps stubbing: wire speed may be too high or voltage too low.
- Arc feels harsh and wide: voltage may be too high.
- Weak fusion: travel speed may be too fast, or heat may be too low.
Common mistakes beginners make
Even with a good machine, small setup mistakes can cause big welding problems. Knowing these early will save you time.
Using the wrong wire for the job
Not all wire is the same. Solid wire and flux-cored wire behave differently. Some are made for gas-shielded welding, while others are made for gasless use. Always match wire type to your process.
Forgetting to match roller and tip sizes
Wire that does not match the roller groove or contact tip may feed badly. If the wire hesitates, slips, or jams, check these parts first.
Starting with poor metal preparation
Rust, mill scale, and oil cause many welding issues. A clean joint often matters more than small setting changes.
Ignoring the gas flow path
A cracked hose, loose fitting, or dirty nozzle can reduce shielding gas effectiveness. The weld may look bad even though the machine settings seem correct.
Making large setting changes too fast
Small changes are easier to understand. If you change voltage, wire speed, torch angle, and travel speed all at once, you will not know what fixed the problem.
Simple setup checklist for a smoother first weld
Before your first real weld, take a final slow look at the machine and materials. This quick check helps prevent avoidable mistakes.
- Machine is on a stable surface
- Wire spool is installed in the correct direction
- Drive roller matches wire type and size
- Wire tension is firm but not crushing the wire
- Wire feeds smoothly through the torch
- Shielding gas is connected and flowing correctly
- Polarity matches the wire being used
- Contact tip matches the wire size
- Work clamp is attached to clean metal
- Test weld has been done on scrap metal
Credit: hotrod.com
Final thoughts on getting the setup right
Learning how to set up a mig welder is one of the best first skills for any beginner. Once the machine is set up properly, welding becomes easier, cleaner, and much less frustrating. Good setup does not remove the need for practice, but it gives you a strong start.
Remember the basic order: check the area, install the wire, match the roller and tip, set the tension, connect the gas, choose the right polarity, attach the ground clamp, and test on scrap. If you work in that order, you will avoid many common problems.
Most beginners do not need a perfect setup on the first try. They need a correct starting point, a calm testing process, and the patience to make small adjustments. That is how good welds begin.
FAQs
What is the first step in setting up a MIG welder?
The first step is to prepare your work area and safety gear. After that, check the machine parts, wire, gas, and ground clamp before you turn anything on.
How do I know if my wire speed is too high?
If the wire keeps pushing into the workpiece, stubbing, or making the arc feel rough, the wire speed may be too high. Try lowering it a little and test again on scrap metal.
Do I need shielding gas for all MIG welding?
No. Some flux-cored wires are made for gasless welding. Solid wire usually needs shielding gas. Always check the label on the wire spool.
Why does my MIG welder keep feeding wire badly?
Common reasons include the wrong drive roller, poor drive tension, a damaged liner, a bent wire end, or a spool that is too tight or too loose.
Can I use any polarity setting for MIG welding?
No. Polarity must match the wire type you are using. Solid wire with gas often uses electrode positive, while some flux-cored wires use a different setting. Check the wire instructions and machine manual.
