
If you want aluminum to look bright, clean, and almost like a mirror, a buffer can help a lot. But the result is not just about speed. It is about using the right process, the right pads, and the right polish in the right order.
Many people try to polish aluminum fast and end up with swirl marks, dull spots, or even burned metal. That happens because aluminum is soft. It reacts quickly to heat and pressure. So if you want a true mirror finish, you need patience and control.
In this guide, you will learn how to polish aluminum with a buffer step by step. You will also learn how to prep the metal, choose the right compound, avoid common mistakes, and keep the shine for longer. Whether you are working on wheels, trim, a boat part, motorcycle pieces, or shop tools, the process is very similar.
What makes aluminum hard to polish well
Aluminum looks simple, but it can be tricky. Fresh aluminum can shine beautifully, yet it also oxidizes fast. That thin oxide layer makes the surface look dull. If the aluminum already has scratches, pitting, or old clear coat, a buffer alone will not fix everything at once.
The biggest challenge is this: aluminum is soft, but the surface can still be uneven. A buffer removes small marks and smooths the top layer. If you rush, the pad can create heat or leave visible lines. If you prepare the metal well, the final shine becomes much deeper and more even.
Another thing beginners often miss is that different aluminum parts need different levels of work. A smooth decorative panel may only need cleaning, sanding, and buffing. A cast wheel or old marine part may need much more sanding first because it has pits and rough texture.
What a buffer actually does
A buffer does not magically create a mirror finish by itself. It helps spread polish evenly and add enough friction to refine the metal surface. The pad and compound work together to remove very fine scratches and bring out shine.
Think of it like this: sanding removes the ugly marks, and buffing brings the surface to life. If sanding is weak, buffing will only make the existing flaws shinier. That is why surface prep matters so much.
Tools and materials you need
Before you begin, gather everything. Stopping in the middle of the job wastes time and can leave uneven results. Here is what you need for the best outcome.
- Buffer or polishing machine with variable speed
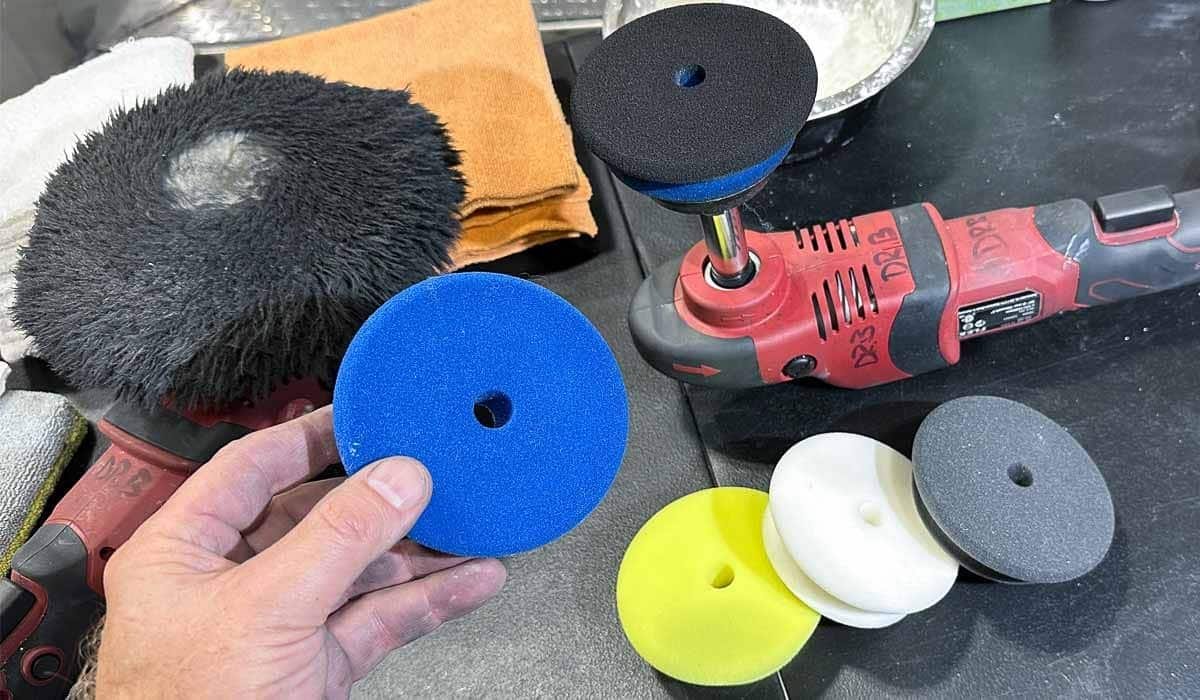
- Buffing pads in different levels of firmness
- Aluminum polish or metal compound
- Sandpaper in multiple grits, usually from coarse to very fine
- Microfiber cloths
- Degreaser or mild soap
- Masking tape for nearby edges or sensitive parts
- Safety glasses, gloves, and a dust mask
If the aluminum has old coating, corrosion, or heavy damage, you may also need a plastic scraper, adhesive remover, or a stripping product. For delicate parts, test every product on a small hidden spot first.
Choosing the right buffer
A variable-speed buffer is best because speed control matters a lot. Too much speed can overheat aluminum and ruin the finish. A slower start gives you more control and reduces the risk of mistakes.
For most jobs, a dual-action polisher is safer for beginners. It is less aggressive than a rotary buffer. A rotary buffer can give faster results, but it also creates heat and swirl marks more easily. If you are new, start with the safer tool.
Choosing the right pad
Pads are not all the same. Soft pads are good for finishing. Firmer pads help with cutting and removing marks. The wrong pad can make the surface look worse, not better.
A useful rule is to start more aggressive only when needed. Use the least aggressive pad that still gets results. This gives you a cleaner finish and lowers the chance of haze or buffer trails.
| Pad type | Best use | Result |
|---|---|---|
| Cutting pad | Removing heavier oxidation and fine marks | More aggressive, faster correction |
| Polishing pad | Bringing out shine after cutting | Smoother finish |
| Finishing pad | Final pass for mirror-like appearance | Bright, clean gloss |
Prepare the aluminum before buffing
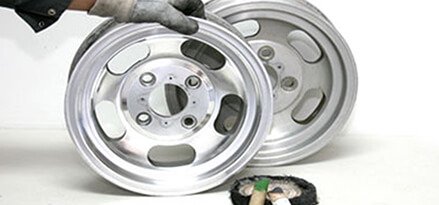
This step decides most of the final result. If the surface is dirty, oily, or rough, the buffer will only polish the mess. Cleaning and sanding are not optional.
Credit: mobil.com
1. Wash the surface well
Use mild soap and water or a safe degreaser to remove dirt, grease, and road film. Dry the part completely. Any leftover grime can interfere with polishing and cause scratches.
If the aluminum has wax, oil, or old polish on it, remove that too. A clean surface gives you a true view of the metal condition.
2. Inspect for damage
Look closely for oxidation, deep scratches, pitting, corrosion, and old coating. Decide what must be removed before buffing starts. A buffer is for refining, not for fixing deep damage on its own.
This is where beginners often save time in the wrong place. They skip inspection, then wonder why the shine looks patchy. A few extra minutes here can save an hour later.
3. Sand if needed
If the aluminum is dull, scratched, or rough, sanding is usually necessary. Start with the grit that matches the damage. Then move up gradually to finer grits until the surface feels smooth.
For mirror-like results, each sanding stage should remove the marks from the previous grit. If scratches from the old grit remain, buffing will not hide them.
Common sanding progression can include:
- 320 grit for heavy oxidation or rough spots
- 400 grit to start refining the surface
- 600 grit for smoother correction
- 800 grit for a better pre-polish finish
- 1000 to 1500 grit for very smooth prep
- 2000 grit for an even finer base before buffing
For some parts, wet sanding works best because it reduces clogging and heat. Keep the paper and surface wet, and wipe away residue often.
A quick note on coated aluminum
If the part has clear coat or paint, the buffer will not polish through it in a useful way. You may need to strip the coating first. Trying to buff over a failing coating often gives a cloudy, uneven result.
How to polish aluminum with a buffer step by step
Now comes the main process. Work slowly and watch the surface as it changes. The goal is not just brightness. The goal is even reflection without haze, marks, or burnt spots.
1. Secure the part
Make sure the aluminum is stable before you start. If it moves while buffing, the pad may catch an edge and leave a mark. For small parts, clamp them gently or hold them on a stable surface. For larger parts, make sure you can move around them safely.
2. Tape off nearby areas
Use masking tape on trim, rubber, plastic, painted sections, or sharp edges you do not want to touch. Buffing pads can grab and damage nearby materials quickly.
3. Apply a small amount of polish
Do not overload the pad. A small amount of compound or polish is usually enough for one section. Too much product can create mess and reduce cutting power.
Put a little polish on the pad or lightly on the metal surface. Spread it before starting the buffer at full contact. This helps prevent splatter.
4. Start at low speed
Turn on the buffer at low speed first. Spread the polish over a small area. Then increase speed slowly if needed. This helps you control the polish and reduces the chance of sling or heat buildup.
Keep the pad moving. Do not hold it in one place. That is one of the fastest ways to create heat marks or uneven shine.
5. Work in small sections
Polish one small area at a time. A section around 1 to 2 square feet is often manageable. This lets you watch the finish closely and correct problems before they spread.
Use overlapping passes. Move in straight, steady lines or controlled crosshatch passes. This helps create a more even finish than random movement.
6. Wipe and inspect often
After a few passes, wipe the area with a clean microfiber cloth. Look at the reflection under good light. If you still see fine scratches or haze, you may need another pass with the same polish or a finer step.
This inspection step is one of the most important parts of how to polish aluminum with a buffer. The surface can look shiny while still having subtle defects. Good light tells the truth.
7. Move to a finer pad and polish
Once the cutting step is done, switch to a finer pad and a finishing polish. This is where the surface becomes more reflective and smooth.
The change from “bright” to “mirror-like” often happens in this final stage. Many beginners stop too early, but that last refinement is what creates the real depth.
8. Finish with a clean microfiber wipe
When the surface looks right, wipe away all residue. A clean cloth shows the true finish. If needed, use a fresh cloth for the final wipe so old compound does not smear back onto the metal.
Speed, pressure, and heat: the three things that matter most
These three factors control the quality of the finish more than almost anything else. If you understand them, your results improve fast.
Credit: drbeasleys.com
Speed
Low to medium speed is usually safer for aluminum. High speed can help with correction, but it also raises heat and increases the chance of swirl marks. Let the result guide your speed, not your impatience.
Pressure
Use light to moderate pressure. Let the pad and compound do the work. Pressing too hard can slow the pad, increase heat, and make the finish uneven.
Heat
Heat is the enemy of a clean finish. Aluminum warms up fast. If the part feels hot, stop and let it cool. Heat can soften the metal surface behavior and make polishing less controlled.
A good habit is to touch the metal carefully between passes. If it is too hot to work comfortably, it is time to pause.
Common mistakes that ruin the shine
Some polishing problems happen again and again. If you avoid these mistakes, your finish will improve a lot.
- Skipping sanding when the surface still has scratches or oxidation
- Using too much polish and creating a messy, weak cut
- Running the buffer too fast and burning the surface
- Holding the pad in one spot and leaving marks
- Using a dirty pad that carries grit back onto the metal
- Not changing to finer pads for the final finish
- Polishing over contamination like oil, road film, or old residue
One mistake beginners often miss is pad contamination. A pad that picked up old compound, dirt, or metal dust can scratch freshly polished aluminum. Clean or replace pads often. It makes a bigger difference than many people expect.
How to get a true mirror-like finish
A mirror finish is not just “shiny.” It is smooth enough to reflect clearly with very little haze. To get there, you need a finer and finer surface at each step.
Here are a few practical habits that help:
- Sand in stages and do not rush grit changes
- Use a clean pad for each compound when possible
- Work under strong light so defects are easy to see
- Use a finishing polish after the cutting stage
- Keep the pad flat and moving
Another useful tip: polish in a controlled direction first, then cross over it from another angle. This helps level the finish more evenly. Also, do not judge the result only by sunlight. Indoor light with a lamp can reveal fine haze better than outdoor glare.
If you are polishing a decorative item, you may want to finish with a very soft pad and a fine polish designed for final gloss. That last step often makes the reflection look deeper and cleaner.
How to maintain polished aluminum
Once aluminum is polished, it can lose shine again if left unprotected. Air, moisture, road salt, and fingerprints all slowly dull the finish. Good care keeps the work from fading quickly.
Clean gently
Use mild soap, water, and a soft cloth. Avoid harsh scrubbers. They can leave tiny scratches that build up over time.
Apply protection
Use a metal protectant, wax, or a product made for polished aluminum. This adds a light barrier against oxidation and makes future cleaning easier.
Avoid harsh chemicals
Acidic cleaners and strong degreasers can damage the finish. If you are not sure, choose a product that clearly says it is safe for polished metal.
For detailed metal care advice, you can also check the guidance from 3M, which offers useful information on polishing and surface finishing products.
When a buffer is not enough
Sometimes the aluminum needs more than buffing. Deep pitting, heavy corrosion, gouges, and thick coatings may require extra repair first. If the surface is badly damaged, polishing can improve it, but it may not create a perfect mirror.
That is not a failure. It is just the nature of the metal. The finish you can get depends on the starting condition. A lightly scratched part may become highly reflective. A badly corroded part may become clean and bright, but not flawless.
Knowing this early helps you set the right goal. It also prevents wasted effort trying to force a perfect finish where the metal will not support it.
Credit: vmtcnc.com
Simple example of a full polishing workflow
Here is a basic workflow for a small aluminum panel or trim piece:
- Wash and dry the part completely.
- Inspect for coating, scratches, and oxidation.
- Sand from a coarser grit to a finer grit until smooth.
- Apply a cutting compound with a firmer pad.
- Buff at low to medium speed with light pressure.
- Wipe and inspect the surface under bright light.
- Switch to a finishing polish with a softer pad.
- Do a final wipe with a clean microfiber cloth.
- Add protection once the finish looks right.
This workflow works because it moves from rough correction to fine finishing. That order matters more than expensive tools. Careful technique usually beats brute force.
Final thoughts
Learning how to polish aluminum with a buffer is really about control. Clean the surface, sand when needed, use the right pad and polish, and keep the buffer moving. If you work in small sections and avoid heat, the results can be excellent.
For a mirror-like shine, patience is your best tool. The shiny finish does not come from one aggressive pass. It comes from a steady process that removes defects step by step. Once you understand that, polished aluminum becomes much easier to handle.
FAQs
1. Can I polish aluminum with a buffer without sanding first?
Yes, but only if the aluminum is already smooth and lightly dull. If there are scratches, oxidation, or rough spots, sanding is usually needed first. Buffing alone will not remove deeper marks.
2. What speed should I use on a buffer for aluminum?
Start at low speed and increase slowly if needed. For most aluminum jobs, low to medium speed is safer. Too much speed can create heat and leave swirl marks.
3. What is the best polish for aluminum?
The best polish depends on the condition of the metal. Use a stronger compound for correction and a finer polish for the final shine. A two-step process usually gives better results than one product alone.
4. Why does my aluminum look cloudy after buffing?
Cloudy or hazy results usually come from dirty pads, too much compound, not enough sanding prep, or using the wrong finishing step. It can also happen if the metal gets too hot during buffing.
5. How do I keep polished aluminum from dulling again?
Clean it gently, avoid harsh chemicals, and apply a protective product made for polished metal. Regular light maintenance helps keep the mirror finish for much longer.
