
If your walls are always messy, a pegboard can change everything. It gives you a simple way to store tools, craft items, kitchen items, or office supplies in one easy place. The best part is that you can make one yourself with basic materials and simple tools.
Learning how to make a pegboard is not hard. You do not need advanced woodworking skills. You only need a clear plan, the right board, and a few careful steps. Once it is done, you will have a custom wall organizer that fits your space much better than many store-bought options.
In this guide, you will learn how to build a pegboard from scratch, choose the right materials, drill clean holes, mount it safely, and avoid common mistakes. You will also see a simple comparison of board types so you can pick the best one for your project.
What a pegboard does and why a DIY version is worth it
A pegboard is a flat board with evenly spaced holes. You use hooks, pegs, baskets, and holders to keep items off the floor and within reach. It is popular in garages, craft rooms, kitchens, laundry spaces, and home offices.
A DIY pegboard has one big advantage: you can control the size, look, and hole pattern. That matters more than many beginners realize. Store-bought boards often come in fixed sizes. If your wall space is unusual, or if you want a cleaner finish, making your own is the smarter choice.
Another thing people often miss is that a homemade pegboard can be stronger than a cheap ready-made one. If you choose solid material and mount it well, it can hold tools and accessories for years.
Best places to use a pegboard
- Garage: hang hand tools, cords, and small containers.
- Workshop: keep screwdrivers, pliers, and measuring tools visible.
- Kitchen: store ladles, cups, and small baskets.
- Craft room: organize scissors, thread, tape, and paint items.
- Office: hold headphones, notes, cable clips, and pens.
Materials and tools you will need
Before you start, gather everything in one place. This saves time and helps you work more accurately. The exact materials can vary a little, but the list below covers a strong and simple DIY pegboard project.
| Item | Purpose | Good beginner choice |
|---|---|---|
| Plywood or hardboard | Main pegboard surface | 1/4-inch to 1/2-inch plywood |
| Drill | Makes the holes | Cordless drill with sharp bit |
| Wood drill bit or spade bit | Creates clean holes | 3/16-inch to 1/4-inch bit |
| Measuring tape | Marks even spacing | Standard tape measure |
| Pencil | Marks hole positions | Any sharp pencil |
| Square or straight edge | Keeps lines aligned | Speed square or ruler |
| Sandpaper | Smooths rough edges | 120 and 220 grit |
| Paint or sealant | Protects and finishes the board | Primer and latex paint |
| Wall screws and anchors | Mounts the pegboard safely | Drywall anchors or studs |
| Spacers or furring strips | Creates room for hooks | 1/2-inch wood strips |
If you want a more technical guide for safe drilling and fastening, a useful source is Wood Magazine. It offers solid woodworking advice that can help if you want a cleaner finish.
Choose the right board material
Not all boards work the same. This is one of the most important choices in the whole project.
- Plywood: strong, easy to work with, and good for most DIY pegboards.
- Hardboard: often used for store-bought pegboards, but it can feel less sturdy.
- MDF: smooth and cheap, but heavy and weaker around drilled holes.
If you want durability, plywood is usually the best choice. It holds screws well and does not break down as easily around the holes. That is one of the non-obvious details beginners often overlook. The board itself is not just a background. It affects how long your pegboard lasts and how much weight it can handle.
Plan the size and layout before cutting
Good planning makes the whole project easier. Measure your wall space and decide how large the pegboard should be. You can make one large panel or several smaller panels. A smaller board is easier to handle, while a larger board gives you more storage.
Think about what you will hang on it. Heavy tools need stronger mounting and enough space between holes. Small office items need less strength but more hole coverage. If you know the use case first, you can make the board smarter from the start.
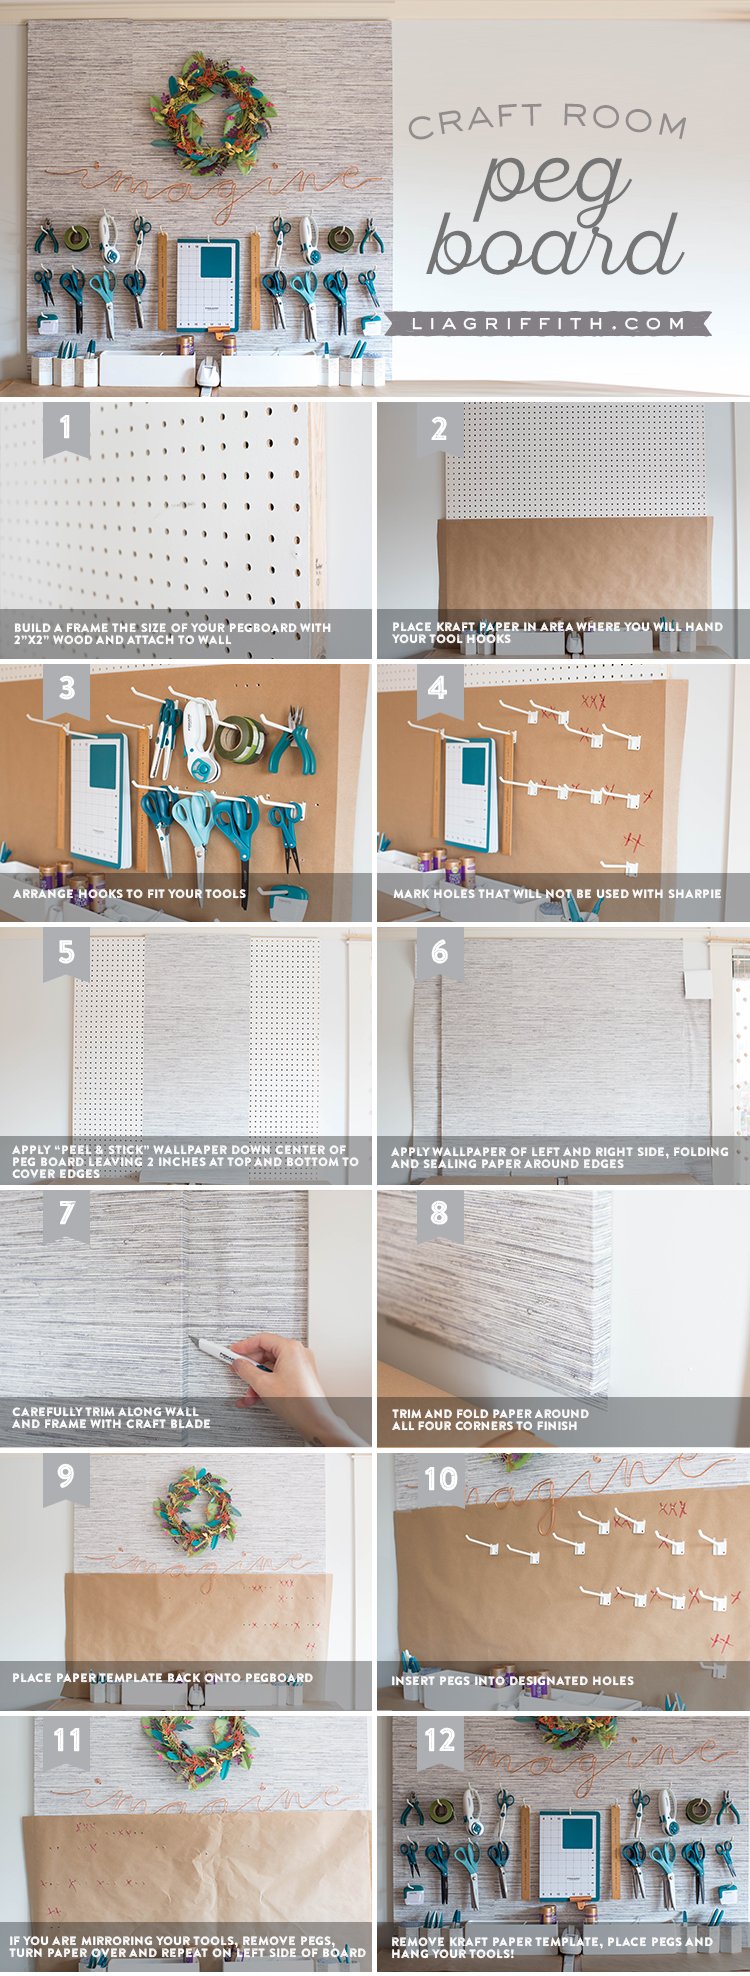
Credit: liagriffith.com
Useful sizing tips
- Leave room around the board for hooks and baskets.
- Do not make the pegboard so big that it becomes hard to mount alone.
- Keep the board size close to common sheet sizes if possible, since this reduces waste.
- For garage use, a wider board often works better than a very tall one.
Now is also the time to decide hole spacing. The standard pegboard hole pattern is often about 1 inch apart. That spacing works well because it gives you many hook placement options. A tighter layout may look nice, but it can weaken the board if the holes are too close together.
Cut the board to size
Once you know the final measurements, mark the board carefully with a pencil and straight edge. Cut it using a saw that gives you a clean edge. A circular saw, jigsaw, or table saw can work, depending on what you have.
Take your time here. A square, even board is much easier to mount and looks much better on the wall. If one edge is crooked, the whole pegboard can look uneven after installation.
Cutting tips for cleaner results
- Use a straight guide when cutting long edges.
- Support the board so it does not bend while cutting.
- Cut slowly to reduce chips and rough edges.
- Sand the edges after cutting to remove splinters.
Mark the hole pattern carefully
This step takes patience, but it is the heart of the project. Even holes make the pegboard look neat and work properly. If the marks are uneven, hooks may not line up well.
Start by drawing light guide lines across the board. Then mark the hole positions at regular spacing. Many people use a 1-inch grid. You can also use a pegboard drilling template if you want more speed and accuracy.
A simple way to keep spacing even
- Draw a horizontal reference line near the top edge.
- Mark points along the line at equal distances.
- Use a square to copy those marks down the board.
- Double-check the spacing before drilling.
One beginner mistake is rushing this part. Even a small measurement error can show up across the entire board. If you are making a large pegboard, check your marks every few rows. That small habit saves a lot of frustration later.
Drill the pegboard holes
Now the board starts looking like a real pegboard. Choose a bit size that fits your pegs or hooks. For many projects, 3/16-inch or 1/4-inch holes work well. Make sure the bit is sharp so the holes stay clean.
Place a scrap board under your workpiece before drilling. This helps prevent tear-out on the back side. Drill straight down at each mark. If you tilt the drill, the holes can become uneven, and hooks may not sit properly.
How to get cleaner holes
- Use a sharp bit.
- Clamp the board so it does not move.
- Drill at a steady speed, not too fast.
- Remove wood dust often so the bit stays cool.
If you want a more polished result, drill a few test holes in a scrap piece first. This helps you confirm the bit size and spacing before you drill the full board. That is one of the smartest beginner moves, because it avoids waste and mistakes.
Sand and finish the surface
After drilling, the board will likely have rough spots, dust, and small splinters around the holes. Sand the entire surface and edges with medium-grit sandpaper, then finish with finer grit for a smoother feel.
After sanding, clean off all dust. Then apply primer, paint, stain, or sealant depending on the look you want. A painted pegboard looks clean and can match your room. A clear sealant keeps the natural wood look. Either way, finishing helps protect the board from wear and moisture.
Finish choices that work well
- Paint: best for a modern, clean look.
- Stain: brings out the wood grain.
- Clear sealant: protects the board while keeping the natural color.
If the board will be used in a garage, laundry room, or kitchen, finish it well. Unsealed wood can absorb moisture over time. That is a small detail, but it matters for long-term use.
Mount the pegboard on the wall
This is the step that makes the pegboard useful. A weak mount can ruin the project, so do not treat it casually. The easiest safe method is to attach spacers or furring strips behind the board. This creates space for hooks to fit behind the board.
Find wall studs if possible. Screwing into studs gives the strongest hold. If studs are not available in the right places, use strong wall anchors rated for the load you plan to hang.
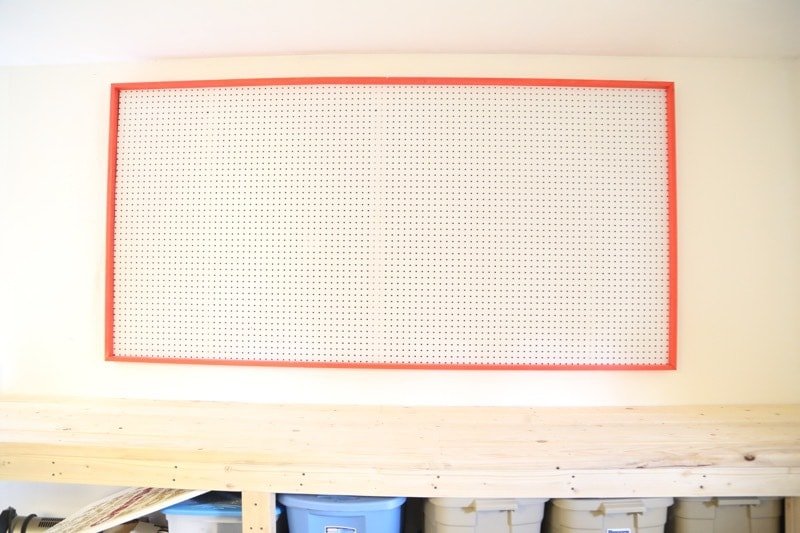
Credit: loveandrenovations.com
Why spacers matter
Without space behind the board, many hooks will not work correctly. The hooks need room to pass through the holes and rest behind the panel. A gap of about 1/2 inch is usually enough.
- Attach furring strips to the wall or back of the board.
- Check that the board sits level.
- Drive screws through the board into studs or anchors.
- Test the board gently before loading it fully.
Do not over-tighten screws. That can bend the board or damage the wall. A secure pegboard should sit flat and feel stable, but it should not be crushed against the wall.
Test the board and add accessories
Once it is mounted, test a few hooks before filling the board. Try different accessories such as bins, shelves, or hanging cups. Move items around until the layout feels useful.
This is where many people discover a smart truth: a pegboard works best when it is flexible. Do not force every item into one fixed spot. Leave open areas so you can change the layout as your needs change.
Good accessories to try
- Standard hooks for tools and small items
- Small baskets for screws, nails, or office supplies
- Shelves for paints, jars, or craft materials
- Clip holders for notes, photos, or labels
If the hooks wobble or slip out, the hole size may be too large or the board may be too thin. That is another beginner issue people often miss. The hole pattern is only part of the system. Board thickness and mounting depth also matter a lot.
Common mistakes to avoid
Even a simple project can go wrong if you skip a few key details. Here are the mistakes that cause the most trouble.
- Using thin, weak material: the holes may tear out faster.
- Poor spacing: hooks may not line up well.
- No spacer behind the board: hooks cannot sit correctly.
- Weak wall mounting: the board may pull away from the wall.
- Skipping sanding: rough edges can snag hands and tools.
Another common mistake is hanging too much weight in one small area. Spread heavier items across the board instead of loading one corner. This keeps the board balanced and helps the wall anchors last longer.
Simple ways to customize your pegboard
Once you know how to make a pegboard, you can turn it into a very personal storage wall. A little customization makes it more useful and better looking.
Easy upgrade ideas
- Paint the board in a bright color.
- Label sections for different item types.
- Add a frame around the edges for a finished look.
- Use two boards side by side for a larger wall system.
- Mix hooks, shelves, and baskets for better organization.
If you want a more professional appearance, add a border frame after the holes are drilled and before mounting. This hides rough edges and makes the board look more polished. It also gives the wall setup a more custom built-in feel.
How to make a pegboard that lasts
A durable pegboard is not just about drilling holes. It is about choosing materials, spacing, mounting, and finish with care. If you want the board to last, think about future use, not just today’s setup.
Use stronger board material if you plan to hang heavier tools. Keep the hole pattern even. Protect the wood with paint or sealant. Mount it into studs where possible. These steps may seem small, but together they make a big difference.
The real advantage of a DIY board is that you can build it around your habits. That is what makes it better than a one-size-fits-all organizer. You are not just making a board. You are building a storage system that works for your room.
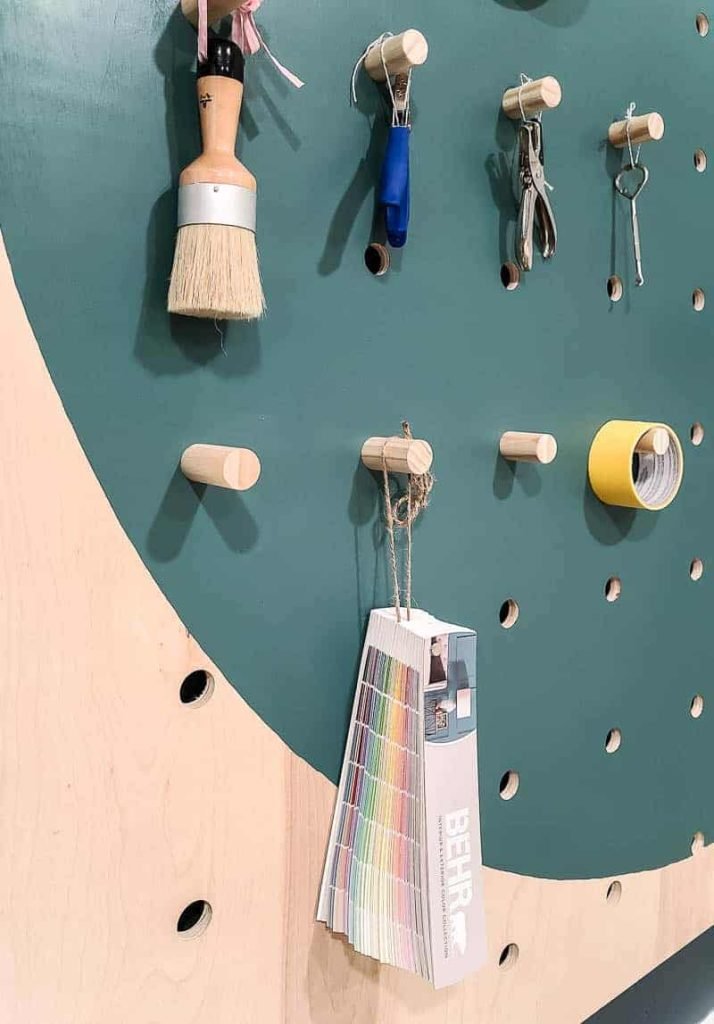
Credit: makingmanzanita.com
Quick project summary
If you want the shortest version of the process, it looks like this: measure the wall, cut the board, mark the hole grid, drill evenly, sand and finish, add spacers, mount the board, and test the hooks. That is the basic path for how to make a pegboard at home.
Take your time with the layout and mounting. Those two steps matter most. A well-built pegboard should look clean, hold firmly, and make daily life easier.
FAQs
1. What is the best material for a DIY pegboard?
Plywood is usually the best choice for most DIY pegboards. It is strong, easy to cut, and holds screws better than many cheaper boards. If you want a lighter-duty board, hardboard can also work, but it may not last as long.
2. How far apart should pegboard holes be?
A common spacing is 1 inch apart. This gives you many hook placement options and works well for most home projects. If the holes are too close together, the board may become weak.
3. Do I need spacers behind a pegboard?
Yes, in most cases you do. Spacers create room for the hooks to sit properly behind the board. Without that gap, many pegboard accessories will not work as they should.
4. Can I hang heavy tools on a homemade pegboard?
Yes, but only if you use strong material, proper spacing, and secure wall mounting. It is best to screw the board into wall studs and spread heavy items across the surface instead of placing them all in one area.
5. How do I keep pegboard hooks from falling out?
Make sure the board has the right hole size, the proper spacer gap, and a secure mount. If hooks still feel loose, try using better-quality accessories or slightly adjusting the hole size in future builds.
