
If you want clean, neat walls, baseboards matter more than many people think. They hide small gaps, protect drywall, and make a room look finished. The good news is that you do not need a nail gun to get a professional result.
Many homeowners avoid trim work because they think special tools are required. That is not true. With the right adhesive, a few hand tools, and a careful method, you can get a strong hold and a smooth finish. This guide shows how to install baseboards without a nail gun in a simple, practical way.
You will learn how to plan the job, cut the trim, attach it securely, and finish the seams so everything looks sharp. I will also point out common mistakes, because small errors are what usually ruin a nice trim job.
What you need before you start
A good installation starts with good preparation. If you rush this part, the trim may not sit flat, and gaps will be harder to hide later. Before you cut anything, gather your tools and check your walls and floor.
Tools and materials
- Baseboards
- Measuring tape
- Pencil
- Handsaw, miter saw, or miter box
- Utility knife
- Caulking gun
- Construction adhesive
- Wood glue for joints
- Wood filler or putty
- Sandpaper
- Paintable caulk
- Painter’s tape
- Level
- Clamps or heavy objects for holding trim in place
- Stud finder, if you want extra support in some areas
If you want one reliable reference for safe use of adhesives and indoor materials, check the EPA indoor air quality guidance. This is useful when choosing products for enclosed rooms.
Choose the right baseboard material
Not all trim behaves the same. MDF is smooth and cheap, but it can swell if it gets wet. Pine is easy to cut and paint. Hardwood looks beautiful, but it may cost more and needs cleaner cuts. For a first project, pine or MDF often works well because they are easier to handle.
Non-obvious tip: choose a baseboard height that fits the room style. Very tall trim can look good in older homes, but it may feel too heavy in a small room. A medium profile is often easier for beginners because it hides small wall irregularities better.
Check the walls and floor first
Walls are rarely perfectly straight. Floors may slope a little. That matters because baseboards follow both surfaces. Before you begin, place a long level or straight board along the wall and floor edge. Look for dips, bulges, and tight corners.
Non-obvious tip: the lowest point of the floor often decides where your baseboard should sit. If you start too high, the trim may leave a visible gap. If you start too low, it may drag unevenly. A small pencil line can help you keep the top edge level around the room.
Measure the room and plan the cuts
Good trim work is mostly careful planning. Measure each wall separately, even if the room seems square. Rooms often change slightly from one corner to the next.
How to measure correctly
- Measure each wall from corner to corner.
- Write down the length of every wall.
- Mark where doors, vents, and built-ins interrupt the trim.
- Add 10% extra material for mistakes and waste.
That extra material matters more than many beginners expect. Small cutting errors, damaged ends, and tricky corner angles can use up more trim than planned.
Decide how the corners will join
You have two main choices: mitered corners or coped corners. For most beginners, mitered corners are easier. A miter cut makes two pieces meet at an angle, usually 45 degrees in a square room.
Coped corners are more forgiving in older houses because they can handle wall movement and uneven angles better. But they take more skill. If this is your first trim project, mitered corners are a smart starting point.
Practical rule: if your walls are clearly not square, do not assume every corner is exactly 90 degrees. Use an angle finder or test cuts on scrap before cutting the final pieces.
Cut the baseboards with care
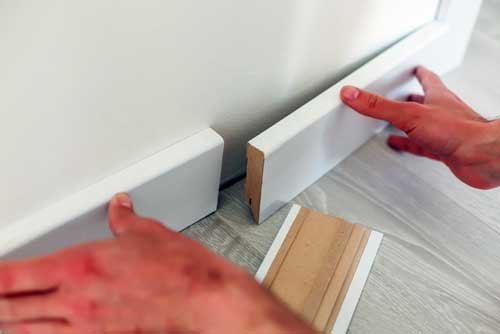
Clean cuts make the whole room look better. Even a small chip can stand out once the trim is painted. Take your time here.
Credit: toolsgearlab.com
Use the right cutting method
A miter saw gives the best results, but a miter box and handsaw can still work well. If you use a handsaw, mark your cut clearly and keep the blade steady. Cut slightly long first, then trim to fit if needed.
For inside corners, many people cut the left and right pieces at matching angles. For outside corners, the angle must wrap around the wall edge cleanly. Always test-fit before applying adhesive.
Mark each piece before cutting
Label the back of each board with its wall location. Write simple notes like “north wall” or “left side of door.” This avoids confusion when you have several similar-looking pieces on the floor.
Non-obvious tip: when measuring, mark the long point of the miter, not the short point. Beginners often make this mistake and end up with pieces that are too short. A few millimeters can matter a lot at corners.
How to install baseboards without a nail gun using adhesive
This is the core method. Instead of fastening trim with nails, you use construction adhesive and pressure to hold it in place. When done correctly, this can create a strong, clean installation.
Choose a strong adhesive
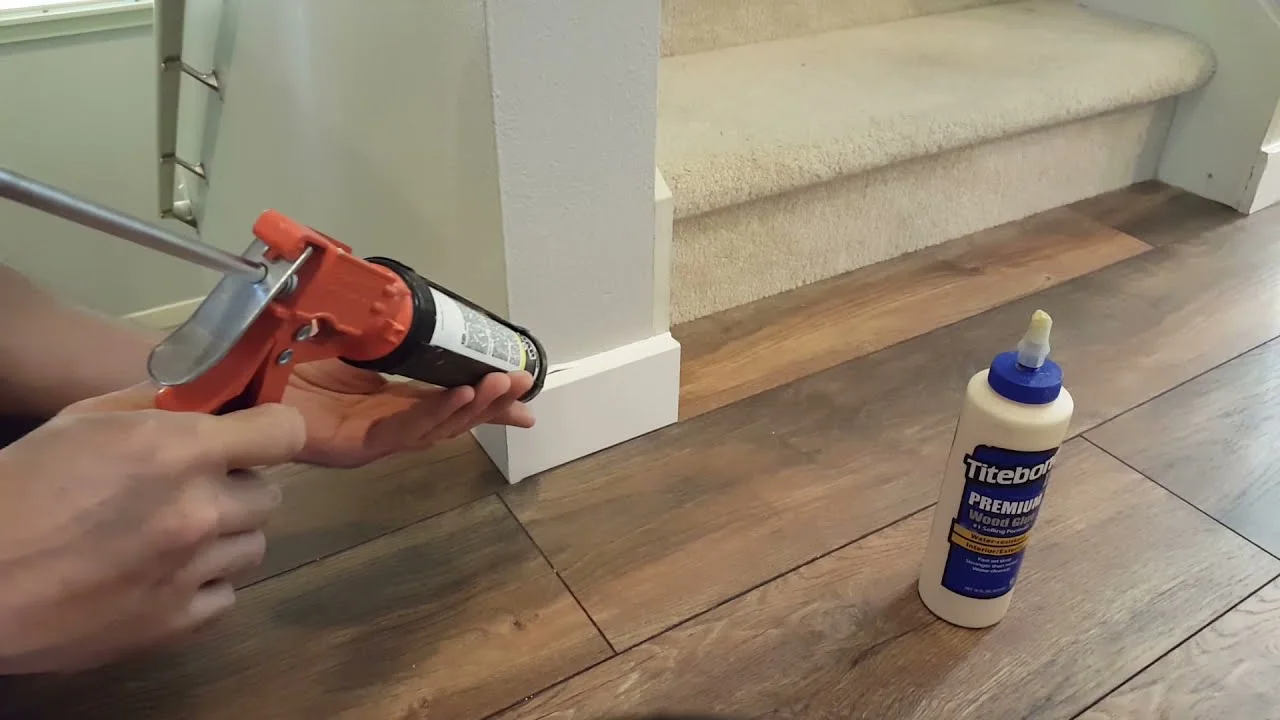
Look for a construction adhesive that is labeled for trim or woodworking. It should bond well to drywall, painted surfaces, and wood. If the trim is lightweight, adhesive alone may be enough. For larger or heavier boards, you may also use small finish screws in hidden spots or temporary supports while the glue cures.
Read the product directions carefully. Some adhesives grab quickly, while others allow more repositioning time. That difference matters when you are trying to align a long piece.
Apply adhesive the right way
- Cut the adhesive tube tip at a small angle.
- Run a thin zigzag bead along the back of the baseboard.
- Keep the glue away from the top and bottom edges so it does not squeeze out too much.
- Press the board firmly against the wall.
Do not use too much adhesive. More glue does not mean a better bond. It only creates cleanup problems and may push the board away from the wall.
Set the first board carefully
Start in a corner or at a long, straight wall. Hold the board in place and check that the top edge is even. If you begin with a crooked first piece, every next piece will also look off.
Use painter’s tape, heavy books, or a block brace to hold the trim while the adhesive sets. In some rooms, a helper can make this much easier.
When extra support helps
Some walls are too uneven for adhesive alone. If the board keeps pulling away, place temporary bracing against the floor or use a few small hidden fasteners in difficult spots. The goal is a secure fit, not speed.
Fit joints and corners for a cleaner look
Corners and seams are where DIY trim work usually shows mistakes. If you handle these well, the whole project will look better than expected.
Make inside corners tight
Inside corners should meet neatly with no obvious gap. If the first cut does not fit well, trim a little more off the end and test again. It is better to cut too long first than too short.
If you are using mitered corners, press both boards into place and check the point where they meet. If the wall is not square, one side may need a slight adjustment.
Hide seams along long walls
When one wall needs two pieces of trim, do not join them with a simple square cut if you can avoid it. A scarf joint, which uses angled cuts, usually looks better and hides the seam more naturally.
Put the seam in a less visible area if possible. For example, place it away from the center of a long open wall, or closer to furniture where the eye does not go first.
Non-obvious tip: before joining two pieces, lightly sand the cut edges and dry-fit them first. Small splinters or rough saw marks can create tiny gaps that become very visible after painting.
Handle outside corners carefully
Outside corners get bumped more often, so they need a strong bond and a neat edge. Check the angle before cutting. If the corner is not exactly 90 degrees, a standard 45-degree cut may not fit well. Test cuts save a lot of frustration.
Use filler, caulk, and sanding for a polished finish
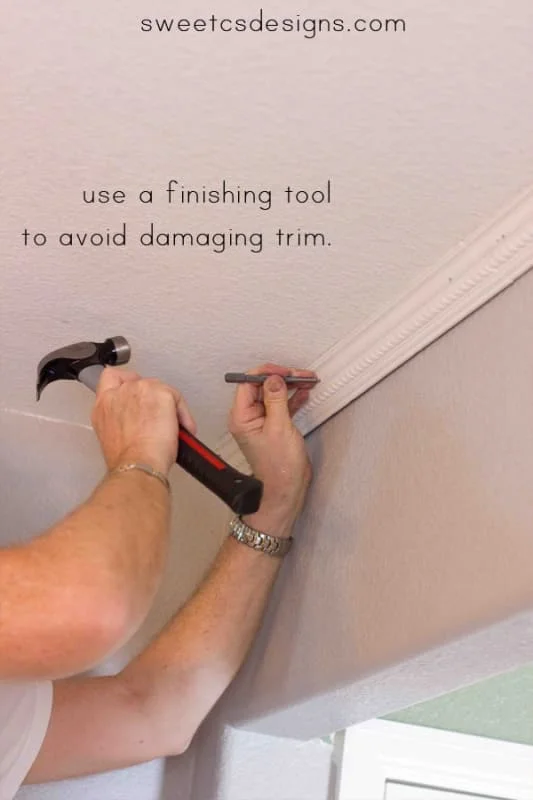
The final look comes from the finishing work. Even a well-cut board can look rough if gaps and nail holes are left untouched. Since you are learning how to install baseboards without a nail gun, finishing matters even more because adhesive-only jobs depend on a clean appearance.
Credit: powertoolstoday.com
Seal small gaps with caulk
Use paintable caulk where the trim meets the wall. Run a thin bead, then smooth it with a damp finger or a caulk tool. This hides tiny gaps caused by uneven walls.
Do not use caulk to fix large gaps. If the gap is wide, it usually means the board was cut poorly or the wall is too uneven. In that case, adjust the fit first.
Fill seams and imperfections
Use wood filler on seams, tiny dents, and cut edges. Once it dries, sand it smooth. If the baseboard is already painted, choose a filler that can be painted cleanly.
For a truly neat finish, inspect the trim from a low angle with room light. Side light often shows problems that are easy to miss at eye level.
Sand before painting
Light sanding helps blend repaired areas and smooth rough edges. Use fine-grit sandpaper so you do not scratch the trim surface. Wipe away dust before paint or primer goes on.
Paint or touch up the baseboards
Paint is the step that pulls the whole project together. It hides minor flaws and gives the trim a crisp edge against the wall.
Prime if needed
If the trim is raw wood, MDF, or patched with filler, primer is a smart move. Primer helps paint stick better and gives a more even final color. It also reduces patchy spots where filler may absorb more paint than the rest of the board.
Choose a finish that is easy to clean
Baseboards are touched often by shoes, vacuums, and mops. A semi-gloss or satin finish is usually a practical choice because it is easier to clean than flat paint.
Use painter’s tape if you want a sharp line, but remove it before the paint fully hardens so it does not peel the edge.
Common mistakes that make baseboards look amateur
Even simple trim work can go wrong if you skip a few basic steps. These are the mistakes most beginners make.
- Using too much adhesive: it creates squeeze-out and can keep the trim from sitting flat.
- Not measuring each wall separately: rooms are often uneven, even when they look square.
- Cutting every corner the same way: some corners need a custom angle.
- Skipping dry-fit checks: test the piece before glue goes on.
- Leaving gaps unfilled: paint alone will not hide them.
- Painting before the adhesive cures: moving the trim too soon can break the bond.
A clean baseboard job is usually not about perfect tools. It is about patient fitting, steady cuts, and careful finishing.
A simple workflow you can follow room by room
If the process feels long, break it into small parts. Working in order helps you stay calm and avoid mistakes.
- Measure the room.
- Buy extra trim.
- Check wall and floor unevenness.
- Cut the first piece and test-fit it.
- Apply adhesive and press it into place.
- Hold or brace the board while it sets.
- Repeat for the next piece.
- Fill seams, caulk gaps, and sand.
- Prime and paint.
This order saves time because you are not stopping to rethink each piece from scratch. It also reduces waste since you are checking fit before committing with glue.
Why this method works well for DIY homeowners
Installing trim without a nail gun is practical for many homes. You avoid loud tools, air hoses, and extra equipment. You also reduce the risk of hitting hidden wires or plumbing behind the wall.
Another benefit is control. Adhesive gives you time to adjust the board before it fully sets. That can be useful if your room has a few uneven areas. For small to medium rooms, this method can produce a very clean result with less setup.
Still, you should be realistic. If the room is large, the walls are badly damaged, or the trim is heavy hardwood, you may need extra support. In those cases, adhesive plus hidden screws or finishing methods may be the safest approach.
Credit: powertoolstoday.com
Final thoughts on getting a clean finish
If you want the simplest answer to how to install baseboards without a nail gun, it is this: measure carefully, cut accurately, use a strong adhesive, and finish the edges well. That is the whole process in plain terms.
The best-looking trim is usually not the one installed the fastest. It is the one where every board was checked, every joint was fitted, and every small gap was handled before painting. If you take your time, you can get a result that looks polished and professional.
FAQs
1. Can baseboards stay on without nails?
Yes, they can. With the right construction adhesive and proper surface prep, many baseboards stay secure without nails. Lightweight trim works best with this method.
2. What is the best adhesive for baseboards?
A strong construction adhesive made for trim or woodworking is usually best. Choose one that works on painted drywall and wood, and follow the curing time on the label.
3. How do I hold baseboards in place while glue dries?
You can use painter’s tape, clamps, temporary braces, or heavy objects. In some rooms, a helper is the easiest way to keep the trim tight against the wall.
4. Should I caulk baseboards before or after painting?
Usually, you caulk after the trim is installed and before the final paint coat. This helps hide small gaps and gives a smoother finish.
5. Is this method good for bathrooms or damp areas?
It can work, but you should be more careful with material choice. Use moisture-resistant trim and an adhesive rated for humid spaces. MDF is not the best choice in wet areas.
