
If your pliers always end up in a drawer, you know the problem. They tangle with wires, screwdrivers, and random parts. You waste time searching. You may even damage the tools or the drawer itself. A pegboard gives you a cleaner and faster way to store them.
Learning how to hang pliers on pegboard is simple, but doing it well takes a little planning. The wrong hook can let the pliers fall. The wrong layout can make them hard to grab. A good setup, on the other hand, keeps every pair visible, secure, and easy to return after use.
In this guide, you will learn the best hook types, the right pegboard setup, smart spacing tips, and common mistakes to avoid. You will also see how to organize pliers by size and use, so your board stays useful for a long time.
Start with the right pegboard setup
Before you hang a single pair of pliers, make sure the pegboard can support the way you plan to use it. Not all pegboards are the same. Some are thin and flexible. Others are thicker and stronger. For hand tools like pliers, strength matters more than style.
A standard hardboard pegboard works for light use, but metal pegboard or heavy-duty wall panels are better if you store many tools. Also, check the hole spacing. Most pegboards use 1/4-inch holes with 1-inch spacing, which fits many common hooks. If your board uses a different pattern, buy hooks made for that system.
One detail many beginners miss: the wall behind the pegboard matters too. If the board is mounted flat against the wall, some hooks may not sit properly. Use spacers or a pegboard mounting frame so the hooks have enough room to lock in place and hold the pliers correctly.
Choose a board location that feels natural
Put the pegboard at a height where you can reach tools without stretching. Keep the most-used pliers between chest and eye level. This is a small change, but it makes daily work much easier. It also helps you return tools to the right spot after each use.
If your workshop has limited space, use a section of wall near your workbench. That way, the pliers stay close to where you use them. A board placed too far away often becomes a storage area you ignore.
Pick hooks that actually hold pliers
The hook choice is the heart of the setup. Pliers have narrow handles, uneven weight, and often sharp jaws. A weak hook may let them slip off. A good hook should support the tool without wobble and without making it hard to remove.
For most pliers, these hook types work well:
- Single pegboard hooks for light pliers and compact tools
- Double-prong hooks for better stability
- Loop hooks or ring-style holders for pliers with narrow handles
- Tool clips for a tighter grip on smaller tools
- Bin-style holders if you want pliers grouped with other hand tools
For a secure setup, double-prong hooks are often the best choice. They spread the weight across two pegboard holes, so the hook stays steadier. If your pliers are heavier, such as large locking pliers or cable cutters, this small upgrade can make a big difference.
If you want a simple guide on tool storage hardware, the Wood Magazine pegboard accessory guide is a useful reference for understanding common hook types and uses.
Match the hook to the plier size
Not every plier should hang the same way. Needle-nose pliers are light and easy to manage. Slip-joint pliers and locking pliers need stronger support. Large linesman pliers may need a deeper hook or two-point support.
Non-obvious tip: many people use the same hook for all pliers, then wonder why one pair keeps falling. The answer is usually simple: the handle shape is wrong for that hook. Try different hook depths and angles until each tool sits naturally.
The easiest way to hang pliers on pegboard
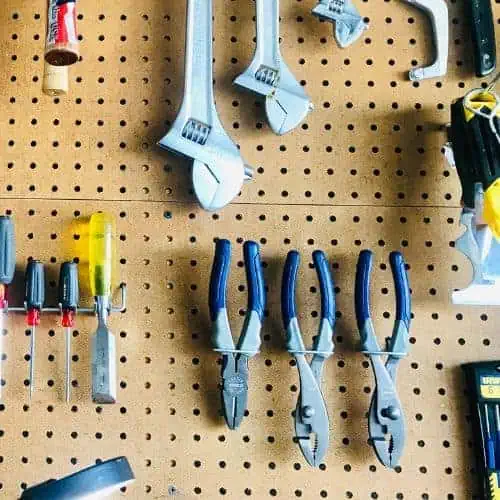
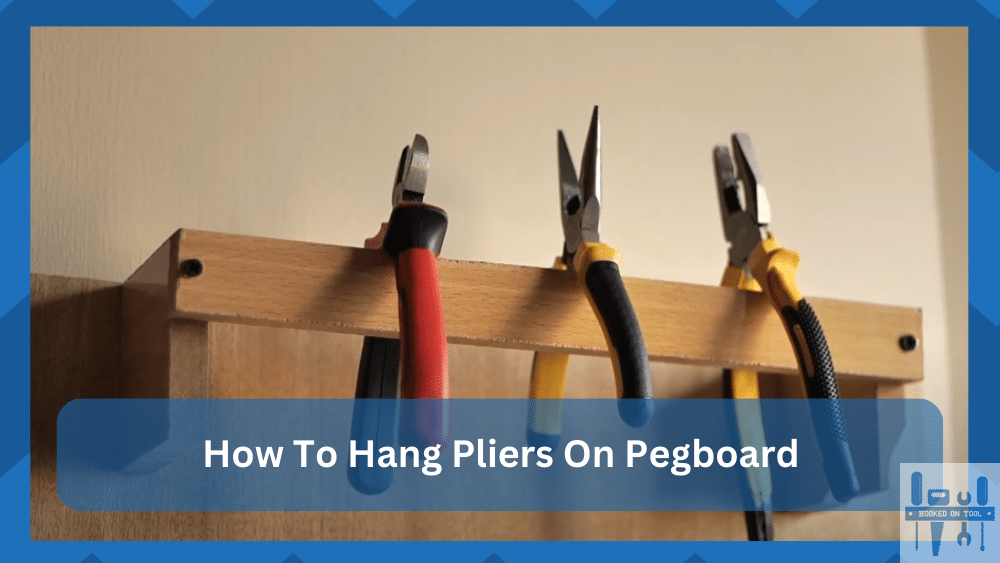
If you want the most practical answer to how to hang pliers on pegboard, here it is: hang them by the handle loop or the handle body, not by the jaws. The jaws are the heaviest and most awkward part. Hanging by the handles keeps the tool balanced and easier to remove.
Here is a simple method that works for most pliers:
- Choose a hook that fits the weight and shape of the pliers.
- Insert the hook firmly into the pegboard holes.
- Hang the pliers with the handles resting on the hook.
- Make sure the pliers hang straight and do not swing too much.
- Test by gently lifting and replacing the tool a few times.
If the pliers slip forward, the hook may be too shallow. If they tilt too much, the hook may be too short or too smooth. A small bend in the hook, or a hook with a stop end, can solve the issue.
Credit: powertoolstoday.com
Use a stable angle instead of forcing a perfect fit
Some pliers hang straight down. Others sit at a slight angle. That is fine. The goal is not to make every tool look identical. The goal is to keep them secure and easy to grab. A small angle is often better than a forced straight position, especially for larger tools.
What to avoid
Do not hang pliers from the tip of the jaws. Do not balance them on a hook that is too short. Do not overload one hook with two heavy tools unless the hook is built for that use. These mistakes may seem minor, but they lead to dropping tools and messy storage.
Arrange the board for fast use
Once the pliers are hanging safely, the next step is organization. A well-arranged pegboard saves time every day. You should be able to see each tool, identify it quickly, and return it without thinking too hard.
A good method is to group pliers by type:
- Needle-nose pliers
- Slip-joint pliers
- Linesman pliers
- Diagonal cutters
- Locking pliers
- Specialty pliers
You can also group them by frequency of use. Keep the tools you use most often in the easiest-to-reach area. Less-used tools can go higher or lower on the board.
| Plier type | Best hook type | Storage tip |
|---|---|---|
| Needle-nose pliers | Single hook or loop hook | Store in the most visible row |
| Diagonal cutters | Double-prong hook | Keep jaws facing away from your hand path |
| Slip-joint pliers | Double-prong or deep hook | Place near other general-purpose tools |
| Locking pliers | Strong double-prong hook | Use lower placement because of weight |
| Large cutters | Heavy-duty hook | Use extra support or a reinforced pegboard area |
Another detail beginners often miss: leave enough space between tools so they do not hit each other when you remove one pair. If pliers bump together, they can scratch, slide, or become harder to put back in the right place.
Make the storage more secure
Some tools stay in place with a simple hook. Others need a little help. If your pliers are heavy, slippery, or used often, add extra security so they do not fall when the board shakes or when you pull another tool nearby.
These small upgrades help a lot:
- Hook caps to reduce slipping
- Rubber-coated hooks for extra grip
- Hook clips that stop tools from bouncing off
- Label strips so each tool has a clear home
- Magnetic strips nearby for very small tools or accessories
If your pegboard is in a busy shop, vibration can be an issue. Doors closing, heavy work on the bench, or someone brushing against the board can slowly move tools out of position. A hook with a stop or a slight upward bend can prevent that problem.
Use hook direction to your advantage
Pointing the hook slightly upward can help keep pliers from sliding off. This is especially useful for tools with smooth handles. Just do not angle it too sharply, or the tool will be harder to remove. A gentle upward angle is usually enough.
For tools that get used a lot, test the removal motion. If you need to twist the tool too much to take it off, the hook is probably not ideal. Secure storage should still feel easy.
Label and color-code when the board gets crowded
A small pegboard may not need labels. But once you have several pliers and multiple rows, labels can save time. They also help other people in the shop return tools to the right place.
Keep labels simple. Use short names like “Needle Nose,” “Cutter,” or “Locking Pliers.” If your board is very full, color-coding can help too. For example, you can use one color for cutting tools and another for gripping tools.
This is not just about neatness. It reduces clutter in your thinking. When each tool has a clear spot, your workspace feels calmer and your routine becomes faster.
Credit: hookedontool.com
Avoid the mistakes that cause tools to fall
Many pegboard problems come from a few common errors. The good news is that they are easy to fix once you notice them.
Using hooks that are too short
Short hooks may work for very light tools, but pliers often need more support. If the hook does not hold enough of the handle, the tool can slide off. Choose a deeper hook or one with a second support point.
Overcrowding the board
When tools are packed too closely, you will knock one tool against another while removing a pair of pliers. This creates noise, wear, and slow access. Leave a little breathing room between items.
Hanging heavy pliers on weak board material
Thin boards can bend or loosen over time. If you notice sagging, upgrade the board or reinforce the mounting. Secure hooks are only useful if the board itself is stable.
Ignoring repeated movement
If a pair of pliers is used often, it will be taken off and put back many times. That repeated motion can loosen a hook over time. Check those spots more often and replace worn hooks before they become a problem.
Build a system that stays useful long term
The best pegboard storage is not the one that looks perfect on day one. It is the one that still works after months of use. That means your setup should be easy to maintain.
Set a simple rule: every tool returns to the same place after use. If a plier does not fit where you put it, the system needs adjustment. Do not force yourself to keep a bad layout just because it looks neat. Function matters more.
Also, review your board every few months. You may find that some tools are used more often than others. Move those tools to better spots. You may also notice that one hook style works better than another. A pegboard should change with your work.
Think in work zones, not just rows
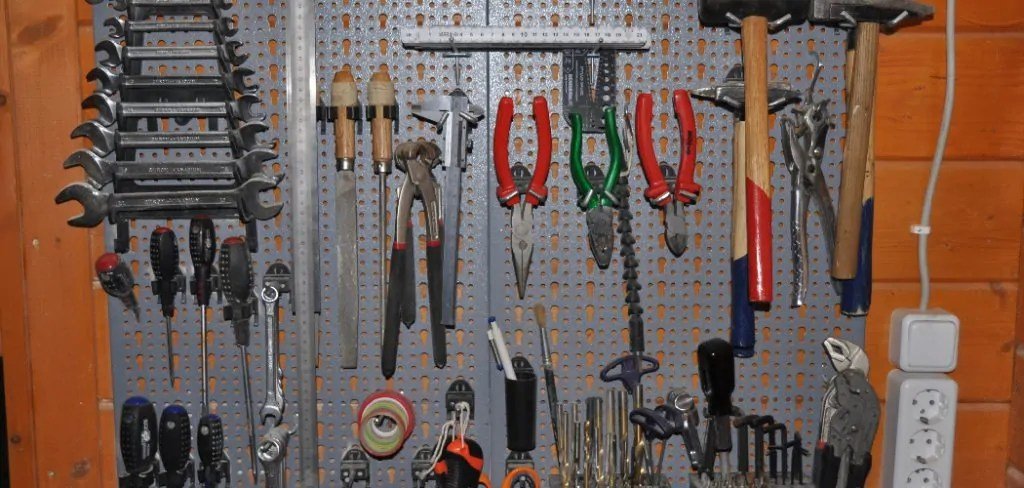
Instead of arranging pliers only by size, try arranging them by job. Put cutting tools together, gripping tools together, and specialty pliers together. This makes it easier to work fast because your hand naturally goes to the right area.
Useful insight: a pegboard that matches how you work is more important than one that looks symmetrical. A practical layout often looks less “perfect,” but it saves more time.
Quick setup process for a clean result
If you want a simple path from start to finish, use this approach:
- Mount a strong pegboard with proper wall spacing.
- Choose hooks based on plier weight and handle shape.
- Place the most used pliers at easy reach.
- Leave space between tools so they do not bump.
- Add labels if the board starts to feel crowded.
- Check the hooks after a few days of use.
This method keeps the process simple while still giving you a secure result. You do not need expensive storage products to do it well. You just need the right hook, the right placement, and a little attention to detail.
When you understand how to hang pliers on pegboard the right way, the whole workspace improves. You spend less time searching, less time cleaning up, and less time replacing damaged tools. That is a small upgrade with a real daily payoff.
Credit: toolsli.com
FAQs
1. What is the best hook for hanging pliers on a pegboard?
For most pliers, a double-prong pegboard hook works best because it is more stable. For lighter pliers, a single hook or loop hook can also work well. Heavier tools usually need a stronger hook with a deeper hold.
2. Can I hang heavy pliers on a regular pegboard?
Yes, but only if the pegboard is strong enough and the hooks are sturdy. For very heavy pliers, metal pegboard or reinforced mounting is safer than thin hardboard. Always test the setup before loading the whole board.
3. Should pliers hang by the handles or the jaws?
They should usually hang by the handles. Hanging by the jaws is less stable and can make the tool harder to remove. Handle storage keeps the weight balanced and reduces slipping.
4. Why do my pliers keep falling off the pegboard?
The hook may be too short, too smooth, or not made for the weight of the pliers. The board itself may also be weak or mounted without enough spacing behind it. A better hook and stronger mounting usually fix the problem.
5. How do I keep my pegboard organized over time?
Return each tool to the same spot after use, leave space between pliers, and review the layout every few months. If you notice one area getting crowded, adjust the board so the tools you use most are easiest to reach.
