
If you want a wall storage system that is simple, flexible, and strong, pegboard is one of the best choices. It can hold tools, craft supplies, kitchen items, garage gear, and more. But the result depends on one thing: a secure installation.
Many people think pegboard is easy to hang. In one way, it is. But there are a few details that matter a lot. The wrong wall anchors, weak spacing, or poor leveling can make the board sag, crack, or pull away from the wall. The good news is that you can avoid these problems with the right method.
In this guide, you will learn how to hang pegboard step by step. You will also see what tools you need, how to choose the best mounting method, and how to make sure your pegboard stays safe and level for years.
Choose the right pegboard and wall setup first
Before you drill any holes, you need to know what kind of pegboard you have and what wall you are working with. This matters more than many beginners realize. A light pegboard on a drywall wall needs a different setup than a heavy board on a garage wall or over studs.
Standard pegboard is usually made from hardboard, metal, or plastic. For most home projects, hardboard works well for light to medium storage. Metal pegboard is stronger and often better for garages or workshops. Plastic pegboard is moisture-resistant, but it may not hold heavy items as well as metal.
Your wall type also changes the method. Drywall is common in homes, but it needs anchors or studs for support. Concrete and brick need masonry anchors. Wood walls are easier, because you can screw directly into the frame.
If you skip this step, the pegboard may look fine at first but fail later when you hang real weight on it. A secure install starts with matching the board, wall, and load.
What you should know about pegboard weight
Not all pegboard setups are made for the same load. A board used for lightweight craft tools does not need the same support as one holding a drill, hammer, or metal pliers. If you plan to hang heavier items, you need stronger mounting points and better spacing between the wall and the board.
One thing many beginners miss is that the hooks add leverage. The weight of the item is not just pulling down. It also pulls the pegboard outward. That is why spacing and support matter so much.
Gather the tools and materials
Having everything ready makes the job much easier. It also helps you avoid mistakes caused by stopping halfway through the project.
- Pegboard panel
- Stud finder
- Measuring tape
- Level
- Pencil
- Drill and drill bits
- Screws
- Wall anchors, if needed
- Spacers or pegboard mounting kit
- Washers, if required
- Screwdriver
- Safety glasses
For most jobs, you will also want a helper if the board is large. A second person can hold the pegboard while you mark and drill. This makes the work faster and reduces the chance of a crooked installation.
If you are mounting pegboard in a garage, workshop, or storage room, consider using a mounting kit or strips that create space behind the panel. That gap lets pegboard hooks fit properly.
Plan the layout before drilling
Good planning saves time and prevents patching holes later. Start by deciding where the pegboard should sit on the wall. Think about what you will store on it and how often you need to reach those items.
For example, tools you use every day should be at eye level or slightly lower. Heavier items are usually safer lower on the board. If the pegboard is for a kitchen or craft room, place it where it will not block doors, cabinets, or switches.
Use a tape measure and level to mark the outline of the pegboard on the wall. Lightly mark the corners and top edge with a pencil. Then step back and check the position. A board that looks centered from close up can still feel off when you view the whole wall.
This is also the moment to check for studs. If your pegboard will hold moderate or heavy items, try to place at least part of the board over studs. Anchoring into studs gives much better strength than drywall alone.
Why spacing behind the board matters
Pegboard hooks need room to tilt and lock into place. If the board sits flat against the wall, many hooks will not fit correctly. That is why spacers are important. They keep the board slightly away from the wall and make the whole system work better.
Many people make the mistake of mounting pegboard directly on the wall. It may seem secure, but the hooks may not sit right, and the board may warp over time. A small gap gives you both function and durability.
Cut the pegboard if needed
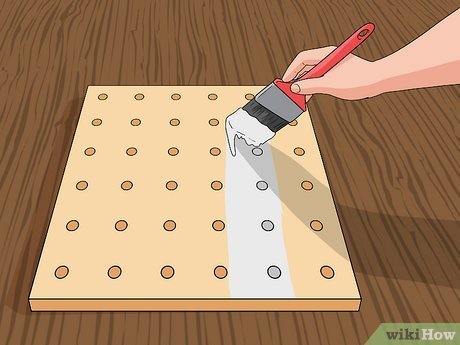
Sometimes the pegboard panel is too large for your wall space. If that happens, measure carefully and cut it before installation. A clean cut makes the board look better and fit more safely.
Use a fine-tooth saw for hardboard pegboard. For metal pegboard, follow the maker’s cutting advice, since different products need different tools. Always wear safety glasses when cutting.
Measure twice before you cut. A mistake of even one inch can affect alignment, especially if the board will sit between shelves, cabinets, or other wall features.
If you are using more than one panel, plan the seam carefully. Try to place seams where they will not be stressed by heavy tools. A seam is usually not the best place for a large load.
Credit: wikihow.life
Mark the mounting points
This is the part that decides whether your pegboard goes up straight and stays secure. Hold the board in place or use your wall outline as a guide. Mark where the screws will go.
If you are using a mounting kit, follow the spacing it recommends. If you are making your own spacer system, place fasteners at the top, middle, and bottom areas so the board does not flex.
Use a level again before you mark every hole. Even a small tilt can make the board look uneven once it is mounted. Pegboard often makes alignment errors more visible because it has a grid pattern.
If you plan to secure into studs, use a stud finder and mark those positions first. If stud placement does not line up with your ideal pegboard position, use a combination of studs and proper wall anchors.
Common marking mistake to avoid
Do not assume all walls are perfectly flat. Small bumps, texture, or old paint layers can affect how the board sits. Before drilling, press the pegboard area lightly against the wall and check for gaps.
If the wall is uneven, stronger spacers or more mounting points may be needed. A board that is forced against a bumpy surface can bend, and bent pegboard does not hold hooks as well.
Install the spacers or mounting strips
Spacers are a key part of how to hang pegboard securely. They create the space needed for pegboard hooks and help keep the panel straight. Without them, the board may bow inward when you add weight.
You can use wood strips, metal spacers, or a pegboard mounting system. If you make your own setup, cut the strips so they run horizontally behind the board. Place them near the top, middle, and bottom for even support.
When installing spacers, make sure they are level. A crooked spacer will cause the pegboard to tilt. Use screws long enough to reach solid support, especially if you are fastening into studs.
For many home projects, a simple and strong method is to mount a wood frame or strips behind the board and then screw the pegboard into that frame. This gives better support than using only a few screws at the corners.
Best support method for heavier use
If you want to hang power tools, metal tools, or other heavy items, do not rely on a couple of small anchors. Use several mounting points and try to fasten into studs when possible. The more evenly the load is spread, the better the board performs.
This is another detail many beginners miss: the pegboard itself is not the only support. The support structure behind it does a lot of the real work. Strong support behind a weaker board often works better than a weak support behind a strong board.
Drill and attach the pegboard
Now you are ready to mount the panel. Hold the pegboard against the spacers or support strips and line it up with your marks. If the board is large, ask someone to help hold it steady.
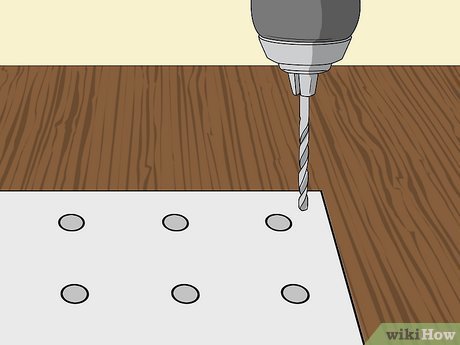
Drill pilot holes where needed. Pilot holes help prevent cracking, especially in hardboard pegboard. Then drive the screws through the board and into the spacers, studs, or anchors.
Do not overtighten the screws. If you drive them too hard, you can crush the board or distort the surface around the holes. Tight is good. Damaging the board is not.
After the first few screws are in place, check the level again. Make small adjustments before adding the rest of the fasteners. Once all screws are installed, the panel should sit flat, even, and stable.
| Wall type | Best mounting method | Notes |
|---|---|---|
| Drywall | Studs plus anchors | Best for medium to heavy use |
| Wood wall | Screws into framing | Usually the easiest option |
| Concrete or brick | Masonry anchors | Use the right drill bit and anchors |
| Garage paneling | Support strips and screws | Check for hidden framing first |
Check the board for strength and alignment
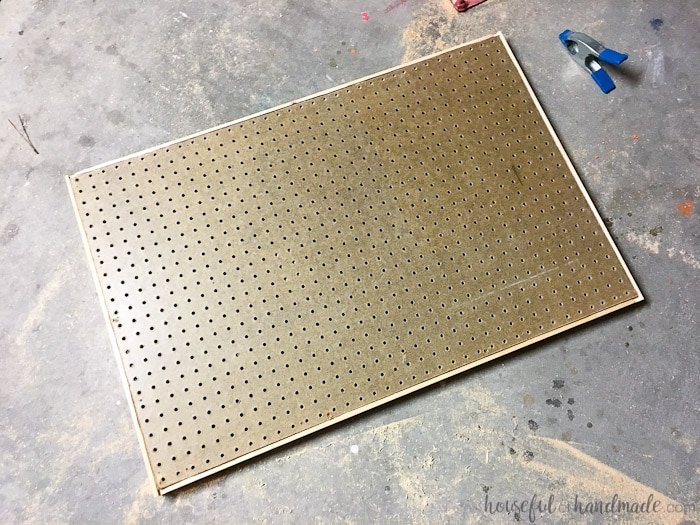
Once the pegboard is mounted, test it before loading it with tools. Push lightly on different parts of the board. It should feel solid, not loose or wobbly.
Look from the side and check for gaps. The board should sit evenly on the spacers. If one side pulls away more than the others, adjust the screws or support before adding weight.
Also test a pegboard hook with one small item first. Make sure it locks in place correctly. If the hook falls out or sits at the wrong angle, the spacing may be off.
Do not rush this step. A five-minute check can prevent a future mess, especially in a garage where tools may fall and damage the wall or floor.
Credit: housefulofhandmade.com
Load the pegboard the smart way
How you hang items on the board matters almost as much as how you mount the board itself. Start with lighter items and spread them out. Avoid packing all the weight in one area.
Put heavier tools near the bottom or close to mounting points. This lowers strain and reduces the chance of the board flexing. If you have long tools, balance them across several hooks instead of using one hook alone.
Use the right pegboard hooks for the job. Thin hooks are fine for light items. Stronger, coated, or locking hooks are better for heavier tools. Some hooks are designed to resist lifting out when you remove items nearby.
Another useful tip is to group similar items together, but not too tightly. A crowded pegboard is harder to use and can put uneven pressure on the panel. Leave enough space to remove and return items easily.
Two beginner mistakes that cause problems later
First, many people overload the top row. That creates extra pull on the board and can weaken the upper screws over time. Spread heavy items across the board instead.
Second, people often use hooks that are too short or too loose for the board thickness. If the hook does not fit the pegboard holes well, it may slip out. Always match the hook style to the pegboard type.
How to make pegboard last longer
A well-installed pegboard can last a long time, but only if you use it wisely. Keep an eye on the screw points and check them every few months, especially if the board holds heavy items.
In damp areas, choose moisture-resistant pegboard or protect the surface from water. Standard hardboard can swell if it gets wet. If you are installing pegboard in a basement, laundry area, or garage, this matters more than you might think.
If the board starts to sag, do not ignore it. Add support before the damage gets worse. Sometimes a small reinforcement is enough to solve the issue early.
For more technical wall mounting guidance, you can also review advice from the Fine Homebuilding website, which is a trusted source for home improvement methods.
When to choose a different setup
Pegboard is very useful, but it is not perfect for every situation. If you need to hold very heavy power tools, long metal bars, or bulky equipment, a stronger wall system may be better.
In some workshops, a mix of pegboard and open shelving works best. Pegboard handles small and medium items well. Shelves handle the heavy stuff. This gives you more safety and more flexibility.
If you are unsure about load size, stay conservative. It is better to underload a pegboard than to force it beyond what the wall can safely support.
Credit: wikihow.life
Simple step-by-step summary
- Choose the right pegboard type for your space.
- Check your wall type and find studs if possible.
- Measure the wall area and plan the layout.
- Cut the pegboard if the panel needs resizing.
- Mark mounting points carefully and keep everything level.
- Install spacers or support strips behind the board.
- Drill pilot holes and fasten the pegboard securely.
- Test the board before hanging tools.
- Load items evenly and avoid overloading one section.
If you follow these steps, you will have a pegboard that looks neat and performs well. The biggest difference between a weak install and a strong one usually comes down to spacing, support, and level mounting. Those small details are what make the system reliable.
FAQs
How do I hang pegboard on drywall?
You can hang pegboard on drywall by using wall anchors or, better yet, by fastening into studs when possible. Add spacers behind the board so the hooks have room to fit properly. For heavier storage, combine anchors with stud support.
Do I need spacers behind pegboard?
Yes, in most cases you do. Spacers create the gap needed for pegboard hooks to lock in place. They also help prevent the board from bending inward when you hang items on it.
Can pegboard hold heavy tools?
Pegboard can hold many medium-weight tools, but heavy items need strong support. Use good mounting points, fasten into studs if you can, and spread the weight across the board. For very heavy tools, a stronger wall system may be better.
What screws should I use for pegboard?
Use screws long enough to pass through the pegboard and spacers and reach solid support behind the wall. If you are using drywall anchors, choose ones rated for the expected load. Washers may help keep the screw head from pulling through the board.
Why does my pegboard sag after installation?
Sagging usually happens when the board does not have enough support, the spacers are weak, or the board is overloaded. Check the mounting points, tighten loose screws, and move heavy items closer to support areas.
