
If your turning jobs often look rough, chatter, or leave a poor finish, the problem may not be the lathe. It may be the tool edge. A sharp, well-shaped cutting tool can change everything. It can reduce cutting force, improve surface finish, and make the machine feel smoother and easier to control.
Learning how to grind lathe tools is one of the most useful skills in metalworking. It helps you work better with high-speed steel tools, especially for general turning, facing, parting, threading, and boring. You do not need a fancy setup to get good results. You need the right angles, a steady hand, and a clear process.
In this guide, you will learn how to shape lathe tools for sharper cuts and better turning results. You will also see common mistakes, practical angles, and a simple method you can use again and again. If you understand the edge, the rake, and the relief, your tools will cut cleaner and last longer.
Start with the right tool material and grinding setup
Before you touch the grinder, make sure you are working with the correct tool material. The most common tool to grind by hand is high-speed steel or HSS. It is easy to shape, forgiving, and ideal for beginners. Carbide inserts are not usually ground by hand in the same way, so this guide focuses on HSS lathe tools.
A bench grinder is the most common machine for this job. A medium-grit wheel is often enough for rough shaping. A finer wheel helps with final edge cleanup. If the wheel is damaged, glazed, or out of balance, it will make accurate grinding harder and can leave a poor edge.
Safety matters too. A sharp tool is only useful if the person grinding it stays safe. Wear eye protection, keep the grinder rest close to the wheel, and never force the tool into the wheel. Let the wheel do the work.
If you want a trusted source on safe grinding practice, the OSHA website gives general safety guidance that is worth reading before machine work.
What you need before grinding
- HSS lathe tool blank
- Bench grinder with a suitable wheel
- Wheel dresser
- Water container for cooling the tool
- Marker or layout dye for marking angles
- Eye protection and proper clothing
One beginner mistake is trying to grind without a plan. Another common mistake is overheating the tool. If the cutting edge turns blue, it has likely lost hardness. That does not always ruin the tool, but it can reduce cutting performance near the edge.
Understand the basic geometry that makes a tool cut well
Good lathe tools are not sharp by accident. They are shaped with a purpose. Each surface and angle affects how the tool enters the material, breaks the chip, and leaves the surface behind. When you understand the geometry, how to grind lathe tools becomes much easier.
The main angles you need to know
| Angle or surface | What it does | Why it matters |
|---|---|---|
| Side rake | Helps the chip flow away | Reduces cutting force and improves finish |
| Back rake | Helps the tool slice into the work | Makes cutting smoother, especially in softer materials |
| Side relief | Keeps the tool from rubbing | Prevents heat and tool wear |
| End relief | Clears the front face of the tool | Allows the cutting edge to engage cleanly |
| Nose radius | Rounds the tool tip slightly | Improves finish and tool life |
Many beginners focus only on making the tool “look sharp.” But sharpness alone is not enough. A tool may be razor-like and still cut badly if the rake and relief are wrong. A better goal is a tool that cuts freely, clears chips, and does not rub.
Non-obvious insight: A slightly dull-looking edge can sometimes cut better than an ultra-fine edge if the geometry is correct. The shape of the tool often matters more than mirror-like polish. In rough turning, a strong edge with proper clearance can outperform a fragile one.
Choose the right tool shape for the job
Not all lathe tools are ground the same way. The best shape depends on what you are doing. A general turning tool is different from a parting tool or threading tool. If you use one shape for everything, you will get mixed results.
Common HSS lathe tool shapes
- Right-hand turning tool – Cuts from right to left on the lathe.
- Left-hand turning tool – Cuts from left to right.
- Round-nose tool – Good for smooth finishing cuts.
- Threading tool – Ground to match the thread profile.
- Parting tool – Thin and narrow for cutting off stock.
- Boring tool – Designed for internal turning.
If you are just starting, begin with a general-purpose right-hand and left-hand turning tool. These two tools teach the basics of clearance, rake, and nose shape. Once you understand them, the other tool forms become easier.
Non-obvious insight: A tool that is perfect for steel may not perform well on aluminum or brass. Softer materials often like more positive rake and a sharper edge, while tougher steels may need a stronger edge with less aggressive rake. This is why one “universal” grind rarely works best for every material.
Grind a basic turning tool step by step
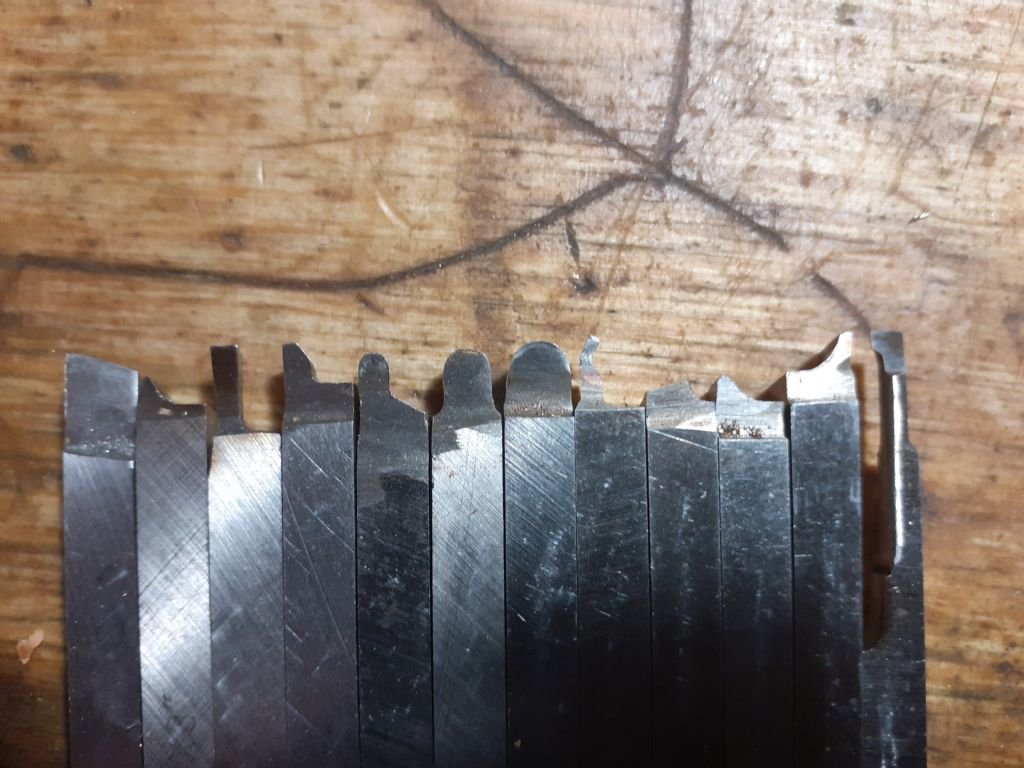
This is the most useful place to begin. A basic turning tool can face, turn, and help you learn edge control. The exact angles can vary, but the process stays the same. Keep the tool cool, work slowly, and inspect the shape often.
Credit: model-engineer.co.uk
1. Square the end if needed
If the blank is rough or uneven, first clean up the end. This gives you a better starting point for the rest of the grind. Keep the tool flat and stable against the grinder rest.
2. Grind the side relief
Hold the tool at a slight angle so the side behind the cutting edge clears the workpiece. The goal is to prevent rubbing. Too little relief causes heat and poor cutting. Too much relief weakens the edge.
3. Grind the end relief
Now shape the front side of the tool so the cutting edge does not drag. Keep the angle even. You want enough clearance to cut freely, but not so much that the edge becomes fragile.
4. Add side rake and back rake
Rake helps the chip flow away from the cut. For general turning, moderate rake is often a safe choice. More rake can help in softer materials, but too much can weaken the cutting edge.
5. Shape the nose radius
The tool point should not be a sharp corner. A small nose radius improves finish and reduces edge damage. If the radius is too large, the tool may push too much and create chatter. If it is too small, the finish may look rough and the edge may chip faster.
6. Hone the edge lightly
After grinding, use a fine stone or honing tool to remove small burrs. This final touch can improve cutting quality a lot. Do not over-hone, or you may round the edge too much.
A simple visual check
Place the tool next to your eye and look at the edge under good light. The cutting edge should look crisp and even. The relief surfaces should be smooth and meet cleanly at the tip. Uneven grinding often causes the tool to cut harder on one side than the other.
Set angles with the work material in mind
One of the biggest secrets in learning how to grind lathe tools is this: the work material matters. A tool that works beautifully on aluminum may chatter on steel if the angles are too aggressive. Matching the grind to the job improves both finish and tool life.
General angle guidance by material
- Aluminum – Often likes more rake and a sharper edge for easier chip flow.
- Mild steel – Usually works well with balanced rake and strong clearance.
- Stainless steel – Often needs a strong edge and careful chip control.
- Brass – Many grades cut well with less rake and a clean edge.
- Cast iron – Usually needs a durable edge and less concern for chip flow.
These are general patterns, not strict rules. Machine rigidity, feed rate, and speed all matter too. A good grind on a weak setup may still chatter. A slightly less aggressive grind on a stiff setup may work better than expected.
Another detail many beginners miss is chip control. A tool can cut well but still create long, stringy chips that wrap around the work. Small changes in rake and nose shape can help break chips earlier and keep the cut safer.
Avoid the most common grinding mistakes
Most poor turning results start with a few simple grinding errors. The good news is that these are easy to fix once you know what to look for.
1. Overheating the tool
If the tool gets too hot, its edge can lose hardness. Dip it in water often. Short grinding passes are better than long heavy ones.
2. Making relief too shallow
Without enough relief, the tool rubs instead of cuts. Rubbing causes heat, poor finish, and fast wear.
3. Making rake too large
Excessive rake can make the edge weak. The tool may chip, chatter, or wear quickly, especially in harder metals.
4. Leaving a square corner at the tip
A perfectly sharp corner is often too fragile. A small nose radius gives a better balance of finish and strength.
5. Grinding unevenly on both sides
If the tool is not symmetrical where it needs to be, the cut can drift or dig in. Keep the grind balanced unless the tool shape calls for a specific direction.
Non-obvious insight: Many people blame the lathe for chatter, but a badly ground edge is often the real cause. A tool with inconsistent relief can vibrate even on a solid machine. Before changing speed or feed, inspect the tool geometry carefully.
Use the grinder in a controlled way
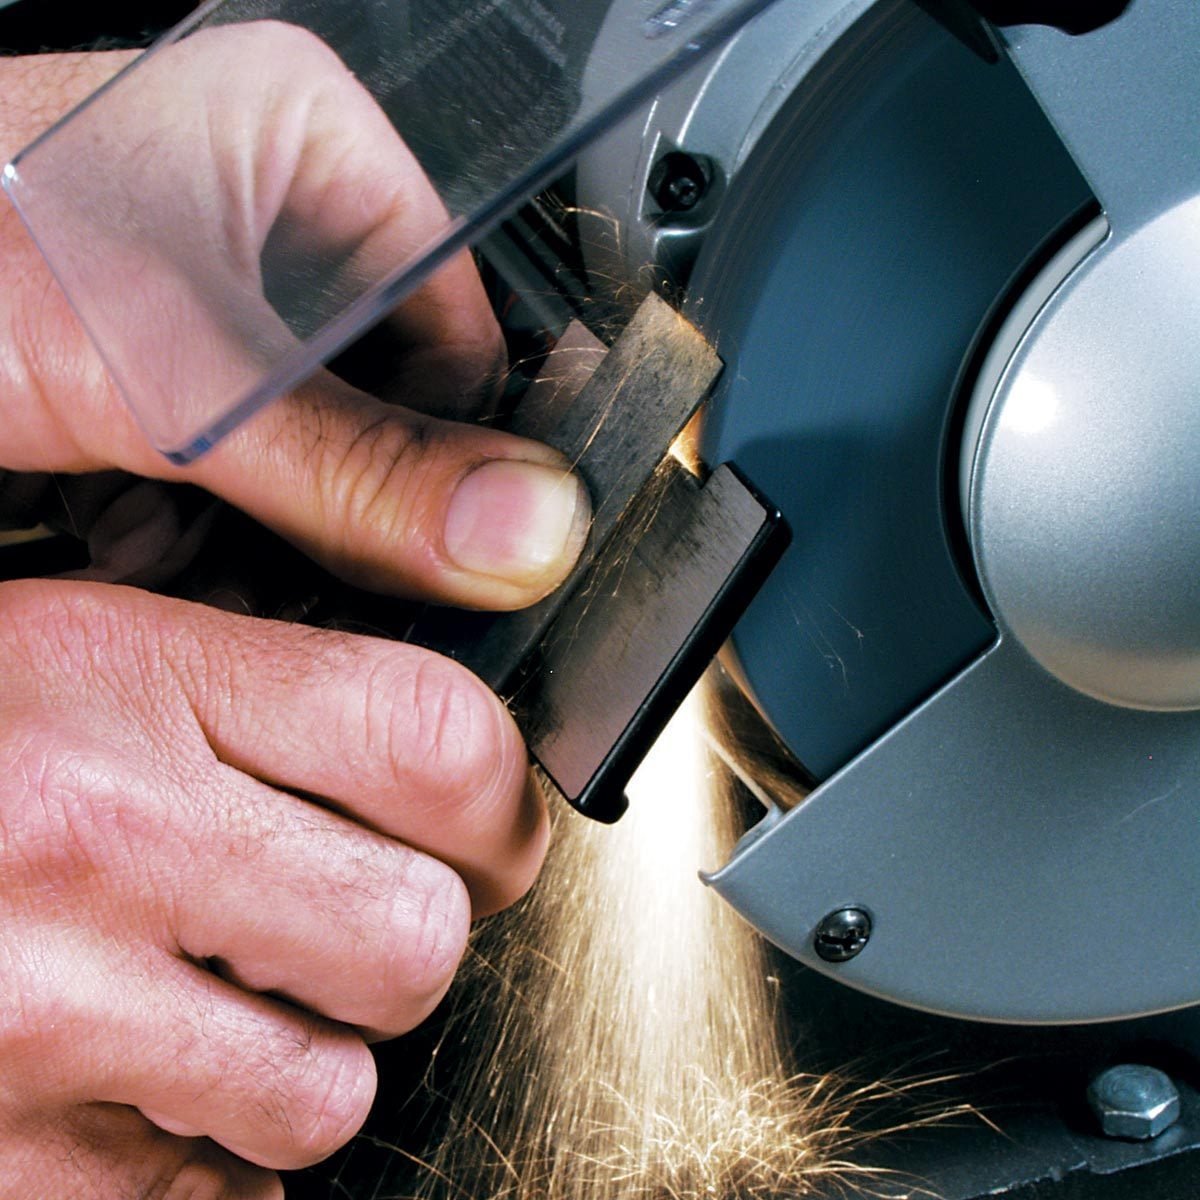
The grinding motion should feel calm, not rushed. Control matters more than pressure. Let the wheel remove material gradually. Move the tool smoothly so you do not create flat spots or grooves.
Keep the grinder rest close to the wheel. This reduces the chance of the tool catching and gives you more control. If the rest is too far away, the tool can drop into the wheel gap and become unsafe.
For best results, work in small sections. Shape one surface, check it, then move to the next. If you try to grind all surfaces at once, it is easy to lose the angles.
Credit: familyhandyman.com
Good habits during grinding
- Use light pressure
- Keep the tool cool
- Watch the spark pattern
- Check the edge often
- Dress the wheel when it becomes glazed
The spark pattern can tell you whether the wheel is cutting evenly. If the sparks change suddenly, the tool may be hitting the wheel at an odd angle. Adjust your hand position and recheck the rest.
Test the tool at the lathe and fine-tune the edge
Grinding is only part of the job. The real test happens at the machine. A tool may look correct on the grinder but still need a small adjustment in the lathe. That is normal.
What to watch during the first cut
- Does the tool enter the cut smoothly?
- Is the chip flowing away cleanly?
- Does the finish look even?
- Is there squealing or chatter?
- Does the tool feel like it is rubbing?
If the tool rubs, you likely need more relief. If it digs in too easily, the rake may be too aggressive or the tool point may be too sharp for the job. If the finish is rough, the nose radius may be too small, the speed may be wrong, or the tool may need honing.
A small change can make a big difference. It is better to adjust one feature at a time than to grind the entire tool again. This helps you learn what each angle really does.
Match grinding with lathe speed, feed, and depth of cut
A sharp tool helps, but it does not work alone. Speed, feed, and depth of cut all change the way the tool behaves. If these settings are wrong, even a well-ground tool can produce a poor result.
Higher speed often helps finish on many materials, but too much speed can burn the edge or worsen chatter. A steady feed keeps the tool cutting. If the feed is too light, the tool may rub instead of bite. If the depth of cut is too shallow, the tool may skate on the surface and leave a poor finish.
This is one of the most useful things to remember: a cutting edge needs enough load to cut cleanly. Very light cuts can sometimes make a machine sound worse, not better. The tool is not always the problem. The cutting conditions may be.
Make your tools last longer
A good grind should not just cut well on the first pass. It should also stay useful over time. Tool life depends on how you grind, how you cut, and how you maintain the edge.
Simple ways to extend tool life
- Use the smallest angle that still gives good clearance
- Avoid overheating during grinding
- Hone the edge lightly after grinding
- Use the correct tool for each material
- Keep the workholding rigid
- Regrind before the tool becomes badly worn
Resharpening early is often better than waiting too long. A badly worn edge takes more grinding to restore, and more grinding means more heat and more chance of damage. Small touch-ups are easier than major repairs.
Quick reference for stronger cutting performance
The table below gives a simple way to think about the relationship between tool shape and cutting result. It is not a rigid formula, but it can help you make better choices faster.
| Goal | What to adjust | Expected result |
|---|---|---|
| Cleaner finish | Add a small nose radius and keep the edge sharp | Smoother surface with less tearing |
| Less rubbing | Increase relief slightly | Lower heat and easier cutting |
| Stronger edge | Reduce rake a little | Better durability in harder work |
| Better chip flow | Add more rake where suitable | Chips move away more easily |
| Less chatter | Use a more rigid tool shape and stable cutting setup | Smoother sound and better surface |
Non-obvious insight: Sometimes a better finish comes from reducing tool over-sharpness, not increasing it. A tool that is too delicate can vibrate at the edge. A slightly stronger grind can cut more steadily and leave a better surface on the work.
Why hand-ground tools still matter today
Even with modern inserts, hand-ground HSS tools still have a place. They are cheap, flexible, and easy to customize. They also teach you how cutting really works. Once you know how to grind your own tools, you are less dependent on a fixed insert shape.
That flexibility is powerful in a home shop or training setting. You can create a special radius, a narrow threading form, or a tool with just the right clearance for a difficult setup. When the job is unusual, hand grinding gives you options.
Just as important, it builds skill. When you understand the edge, you understand the cut. That skill transfers to better setup, better feed choices, and better problem solving at the lathe.
Credit: lathehub.com
Conclusion
Learning how to grind lathe tools is one of the best ways to improve your turning results. It does not require magic or expensive equipment. It requires clear geometry, careful grinding, and attention to heat, relief, and chip flow. Once you learn the basics, your tools will cut more smoothly and last longer.
Start with a simple turning tool. Focus on balanced angles. Keep the edge cool. Test the tool at the lathe and make small improvements. With practice, you will see cleaner cuts, better finish, and more control over every job.
FAQs
1. What is the best first tool to learn how to grind lathe tools?
A basic right-hand or left-hand HSS turning tool is the best place to start. It teaches you relief, rake, and nose shaping without being too complex.
2. How do I know if my lathe tool is sharp enough?
A sharp tool cuts smoothly, makes steady chips, and does not rub or squeal. If the tool needs too much force or leaves a rough finish, it may need more grinding or light honing.
3. Should I use water while grinding lathe tools?
Yes, dip the tool in water often to keep it cool. Overheating can weaken the cutting edge and reduce tool life.
4. Why does my tool chatter even after grinding it sharp?
Chatter can come from poor tool geometry, too much tool overhang, weak setup, or the wrong speed and feed. A sharp edge alone does not solve all vibration problems.
5. Can I grind one lathe tool for all materials?
You can make a general-purpose tool, but it will not be perfect for every material. Softer metals often like more rake, while harder or tougher materials may need a stronger, less aggressive edge.
