
A loose wood joint can make a chair wobble, a table feel weak, or a cabinet door pull out of line. It is a small problem at first, but it often gets worse fast. The good news is that most loose joints can be fixed at home with simple tools and a little care.
If you want to know how to fix a loose wood joint, the first step is not to rush in with glue. You need to understand why the joint failed. Sometimes the glue is old. Sometimes the wood moved because of moisture. In other cases, a screw is stripped, a dowel is broken, or a mortise and tenon joint has worn down over time.
This guide will show you how to inspect the damage, choose the right repair method, and make the joint strong again. You will also learn common mistakes to avoid, so the repair lasts longer instead of failing again a few weeks later.
First, find out why the joint became loose
Before you repair anything, look closely at the joint. A loose joint can happen for different reasons, and the fix depends on the cause. If you use the wrong repair method, the joint may still feel weak even after you glue it back together.
Wood joints usually fail for one of these reasons:
- The old glue dried out and lost strength.
- The wood moved because of humidity or temperature changes.
- Screws or fasteners became loose over time.
- The joint was built badly from the start.
- The wood fibers around the joint wore down or broke.
Here is a simple way to inspect the problem:
| What you see | Likely cause | Common fix |
|---|---|---|
| Joint separates but wood looks fine | Old glue failure | Clean and re-glue |
| Screw turns but does not tighten | Stripped hole | Fill hole and reset screw |
| Joint feels sloppy or rattles | Worn joint fit | Add glue, shim, or rebuild fit |
| Wood split near the joint | Stress or over-tightening | Repair split first, then reassemble |
Non-obvious insight: A joint can look fine from the outside and still be weak inside. If it creaks when moved, that often means the bond has already started to fail even if the pieces are not fully apart yet.
Gather the right repair tools and materials
You do not need a full workshop to fix most loose wood joints. But the right basic tools make the repair much easier and cleaner.
Useful items include:
- Wood glue
- Clamps
- Scraper, putty knife, or chisel
- Sandpaper
- Small brush or cloth
- Rag and water
- Drill and bits, if screws or holes need repair
- Wood filler or toothpicks for stripped screw holes
- Masking tape
For most indoor furniture, a strong PVA wood glue works well. If the piece is exposed to moisture, you may need a stronger adhesive made for tougher conditions. For more details on adhesive safety and general wood glue guidance, the Wood Magazine site has useful woodworking information.
Non-obvious insight: Clamps are not only for pressure. They also help keep the joint aligned while the glue dries. A joint can be glued strongly but still fail later if it dries slightly twisted.
How to fix a loose wood joint step by step
The exact repair depends on the type of joint, but the basic process is similar. You need to open the joint enough to clean it, remove old glue, apply fresh glue, then clamp it correctly.
1. Open the joint carefully
Do not force it apart with too much strength. If the joint is already partly loose, work it gently with your hands. If needed, tap lightly with a rubber mallet or use a thin wooden wedge. Try not to crack the wood or damage nearby edges.
If the joint will not separate, it may still be possible to inject glue into small gaps. But for a proper repair, full access is usually better.
2. Remove old glue and dirt
Old glue is one of the biggest reasons repairs fail. Fresh glue does not bond well to dried glue, dust, or oily dirt. Scrape the old material away as much as possible. A sharp chisel, scraper, or even coarse sandpaper can help.
Wipe the surfaces clean with a dry cloth. If the old glue is stubborn, use a little warm water on a rag and let it soften before scraping again. Be careful not to soak the wood.
3. Check the fit of the joint
Before adding glue, test how the pieces fit together. They should go together snugly, but not with huge force. If the fit is too loose, the joint may need extra help, such as a shim, dowel repair, or new hardware.
If the wood is slightly swollen or rough, a light sanding can improve the fit. If the joint has worn down too much, simple glue alone may not be enough.
4. Apply glue in the right amount
Use enough glue to coat the contact surfaces, but do not flood the joint. Too much glue can create a mess and make the parts slide around while clamping.
Spread the glue evenly on both sides of the joint when possible. A small brush, stick, or the tip of a clean scrap piece of wood can help you reach deeper areas.
Important tip: Some joints need the glue to reach hidden inner surfaces. If the joint is deep, a thin nozzle or glue syringe can help place the adhesive exactly where it is needed.
5. Reassemble and clamp firmly
Put the joint back together and align it carefully before tightening the clamp. Start with light pressure, then tighten until the pieces sit firmly together. You want strong contact, not crushing force.
Check the alignment from more than one angle. A chair leg, for example, may look straight from the front but twist slightly from the side. Fixing that now saves trouble later.
6. Remove squeeze-out and let it cure
Wipe away extra glue before it hardens. A damp cloth works for fresh PVA glue. If the glue has already started to set, use a scraper after it dries.
Leave the joint clamped for the full drying time listed by the glue maker. Do not rush this step. Even if the surface feels dry, the inside may still be weak.
After unclamping, let the piece rest before heavy use. For furniture that carries weight, giving it extra time is a smart habit.
When the loose joint is caused by screws or bolts
Not every loose wood joint is a glue problem. Many furniture pieces rely on screws, bolts, or metal connectors. If these parts are loose, the repair process is different.

Credit: reddit.com
Stripped screw holes
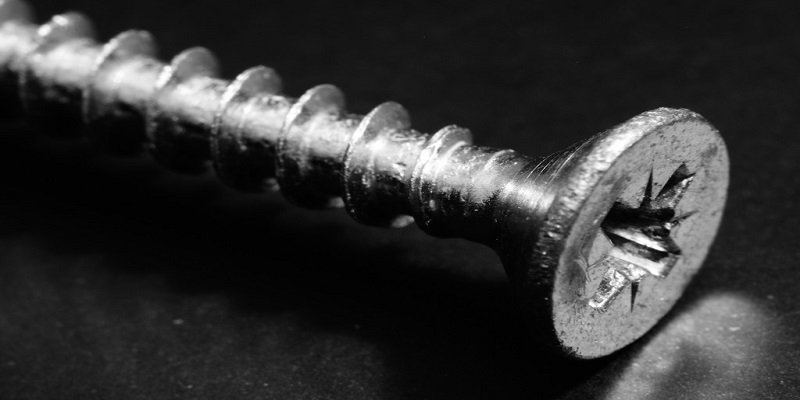
If a screw spins without tightening, the hole is likely stripped. The screw hole has become too wide for the threads to bite into.
One simple fix is to fill the hole with wood slivers, toothpicks, or a hardwood dowel coated in glue. After the filler dries, drive the screw back in. This gives the screw fresh wood to grip.
For larger or more important joints, drilling a clean new hole and using a dowel plug can create a stronger repair.
Loose bolts and connector hardware
Some furniture uses bolts, machine screws, or knock-down connectors. These can loosen with use. Tighten them first, but do not overtighten. If the threads are damaged, replace the hardware.
Check the surrounding wood too. If the hardware keeps loosening, the wood around it may be crushed or worn. In that case, you may need to rebuild the hole instead of just tightening the fastener.
Repair methods for different joint types
Knowing the joint type helps you choose the best fix. Here are the most common cases.
Mortise and tenon joints
This is a classic furniture joint, often used in chairs and tables. If it becomes loose, the tenon may have shrunk, or the glue may have failed.
Clean the joint fully, then reglue and clamp it. If the fit is too loose, thin wood shims can sometimes help. In severe cases, the tenon may need to be rebuilt.
Dowel joints
Dowel joints rely on round wooden pegs inside holes. When they loosen, the dowels may have pulled partly out or the holes may have widened.
Old dowels often need to be replaced. Drill out the damaged dowel, clean the hole, and install a new one with glue. Make sure the new dowel size matches the hole well.
Butt joints
Butt joints are simple but not very strong. They often fail on shelves, picture frames, and light furniture.
When fixing a loose butt joint, glue may help, but added support is often better. Small screws, corner blocks, or brackets can strengthen the repair.
Corner joints in cabinets
Cabinet corners may use glue, nails, screws, or a mix of methods. If the corner opens up, inspect both the fasteners and the glue line.
Clean the area, re-glue if needed, then clamp the corner square. If nails are loose or bent, remove and replace them. If the cabinet is painted, tape around the repair area to reduce damage during cleanup.
How to strengthen a repair so it lasts
A good repair is not only about fixing the loose part. It should also reduce the chance of the same problem returning. That means thinking about stress, movement, and daily use.
Credit: thesprucetools.com
Add support where needed
If a joint carries weight or gets a lot of movement, glue alone may not be enough. You can often improve strength by adding one of these:
- Corner blocks
- Brackets
- Dowels
- Dowels with glue
- Small screws in the right location
The goal is not to cover the repair with hardware. The goal is to spread the load so the joint does not fail in the same spot again.
Control moisture and movement
Wood expands and shrinks as humidity changes. This is one of the hidden reasons joints loosen over time. A table kept near a heater or a window may move more than one stored in a stable room.
If possible, keep furniture in a steady indoor climate. Avoid placing it where it gets very wet, very dry, or exposed to direct heat for long periods.
Non-obvious insight: Many joint failures are seasonal. A joint may seem fine in one season and loose in another. That is why a repair that works in summer may still need checking in winter.
Common mistakes to avoid
Many repairs fail because of small mistakes, not because the job was too hard. Avoid these problems if you want a strong result.
- Using too little glue: The bond may be weak or uneven.
- Using too much glue: The joint can slip out of position.
- Skipping cleaning: Old glue blocks fresh glue from bonding well.
- Clamping too hard: This can squeeze out too much glue and weaken the bond.
- Not checking alignment: A strong joint can still be useless if the furniture is crooked.
- Using the piece too soon: The glue may not be fully cured yet.
One mistake beginners often miss is trying to repair a joint while the surrounding wood is still dirty, oily, or dusty. The glue may harden, but the bond will not be dependable.
What to do if the joint is badly damaged
Sometimes a loose joint is only part of the problem. The wood may be split, crushed, or badly worn. In those cases, a simple re-glue will not be enough.
If the wood is cracked, repair the crack first. If the hole is worn out, rebuild it with a dowel or filler. If the joint parts are too damaged to fit tightly, you may need to remake the joint or replace the part entirely.
Do not keep forcing a broken joint back together. That can make the damage worse. If a chair leg or structural part is badly split, replacing the piece may be the safest option.
Final check after the repair
Once the glue has cured, test the joint gently. Move it by hand and look for any wobble, gap, or noise. If the repair feels solid, apply normal use slowly at first.
For furniture, sit, lean, or place weight on it carefully during the first test. If the joint moves again, stop and inspect it before the problem grows.
It is also smart to check the rest of the piece. If one joint failed, nearby joints may be under similar stress. Fixing one area is good, but preventing the next failure is even better.

Credit: reddit.com
Helpful repair mindset for beginners
When learning how to fix a loose wood joint, patience matters more than speed. The best repairs are usually clean, simple, and well fitted. You do not need expensive tools to do careful work.
Take your time with cleaning, fit, and clamping. These three steps decide most of the result. If you do them well, the repair often lasts for years.
Also, remember that not every joint should be repaired the same way. A decorative frame, a chair leg, and a kitchen cabinet corner all have different stress levels. The right fix is the one that matches the part’s job.
FAQs
1. What is the best glue for a loose wood joint?
For most indoor furniture, a quality PVA wood glue is a strong and easy choice. If the item is exposed to moisture or heavier stress, you may need a stronger adhesive made for tougher conditions.
2. Can I fix a loose wood joint without taking it apart?
Yes, in some cases. If the gap is small and the joint is still mostly aligned, you can inject glue into the opening. But if you want the strongest repair, opening and cleaning the joint is usually better.
3. How long should I leave a glued joint clamped?
Follow the glue maker’s instructions. Many wood glues need at least a few hours of clamping time, and the joint should not carry heavy weight until it has fully cured.
4. Why does my repaired wood joint become loose again?
This often happens because old glue was not removed, the joint fit was too loose, or the wood keeps moving with humidity changes. In some cases, the repair also needed extra support, such as dowels or brackets.
5. When should I replace the wood part instead of repairing it?
If the wood is badly split, crushed, or worn beyond a tight fit, replacement may be the better choice. This is especially true for load-bearing parts like chair legs, support rails, or structural corners.
