
Stainless steel looks simple on the surface, but it is one of the hardest materials to drill cleanly. It work-hardens fast, gets hot quickly, and can ruin cheap bits in seconds. That is why many people start a hole, see smoke or squealing, and end up with a damaged bit or a rough edge.
The good news is that how to drill stainless steel is not a mystery. With the right drill bit, the right speed, and a steady process, you can make smooth, accurate holes without much drama. The key is to go slower than you think, keep the bit cool, and let the tool cut instead of forcing it.
In this guide, you will learn a practical step-by-step method for drilling stainless steel safely and cleanly. You will also see what beginners usually get wrong, how to choose the right drill bit, and how to avoid the small mistakes that cause big problems.
What makes stainless steel hard to drill
Before you start drilling, it helps to understand why stainless steel behaves differently from mild steel or aluminum. Stainless steel is strong, dense, and resistant to heat and corrosion. Those same strengths also make it harder on cutting tools.
One major issue is work hardening. If the drill bit rubs instead of cuts, the metal surface becomes even harder. After that, the bit slips more, gets hotter, and cuts worse. This is why a weak setup can turn a simple job into a frustrating one.
Heat is the second big challenge. Stainless steel keeps heat near the cutting edge. If you drill too fast, the bit overheats. Once that happens, the sharp edge can dull very quickly. A dull bit makes the hole rough and increases the chance of slipping.
You should also know that stainless steel often has a smooth surface. That means the drill bit can wander at the start unless you create a good starting point. A centered mark and a proper pilot hole matter much more here than on softer metals.
Choose the right drill bit first
The best results start with the right bit. For most jobs, use a high-speed steel cobalt drill bit or a bit made for metal. Cobalt bits are better for stainless steel because they handle heat better and stay sharp longer. If you drill stainless often, this upgrade is worth it.
For the best drilling performance, many professionals prefer bits with a split point. These bits start more easily and reduce walking. Standard bits can work, but you must center them carefully.
If you are drilling a large hole, begin with a smaller pilot bit and move up in size. This reduces stress on the main bit and helps keep the hole accurate.
| Bit type | Best use | Why it helps |
|---|---|---|
| Cobalt HSS | Most stainless steel drilling jobs | Handles heat better and lasts longer |
| Split-point metal bit | Starting holes with less wandering | Centers more easily |
| Step bit | Thin stainless sheets | Makes clean, gradual hole sizes |
| Hole saw for metal | Large diameter holes | Removes material efficiently |
Gather the tools and materials
Keep your setup simple and ready before you begin. You do not want to stop halfway through because you forgot cutting fluid or a clamp.
- Variable-speed drill
- Cobalt or metal drill bits
- Center punch
- Hammer for the punch
- Cutting fluid or light oil
- Clamps or a vise
- Safety glasses
- Deburring tool or metal file
- Marker or scribe
One practical detail beginners often miss: the drill matters as much as the bit. A variable-speed drill gives you more control. If your drill only has one fast speed, it may be harder to cut stainless without overheating.
Mark and secure the workpiece correctly
Accuracy starts before the drill touches the metal. If the piece shifts even a little, your hole can end up off-center or angled. For thin sheet metal, movement can also create ugly scratches and burrs around the hole.
Start by marking the exact hole position with a marker or scribe. If you need high accuracy, measure from two edges instead of trusting one quick guess. Then use a center punch to make a small dent at the mark. That dent gives the drill bit a place to start.
This is one of the most important steps in how to drill stainless steel. Stainless surfaces are slippery, and a punch mark helps stop the bit from walking.
After marking, clamp the stainless steel firmly to a stable surface. Never hold the piece by hand while drilling. Even a small plate can spin or grab the bit. That is dangerous and it also ruins hole quality.
A small tip that saves a lot of trouble
If you are drilling through thin stainless sheet, place a piece of wood beneath it. The wood supports the metal as the bit exits. Without support, the back side can tear or form a sharp burr. This simple step creates a cleaner hole and reduces cleanup later.
Set the drill speed the right way
Speed control is one of the biggest secrets to clean drilling. Stainless steel should usually be drilled at a slow speed, not a fast one. Fast speed creates heat too quickly and dulls the bit before it can cut properly.
As a general rule, use the slowest speed setting that still allows the bit to cut steadily. For larger bits, go slower. For smaller bits, you can go a little faster, but still keep control. If the drill starts screaming or smoking, the speed is too high.
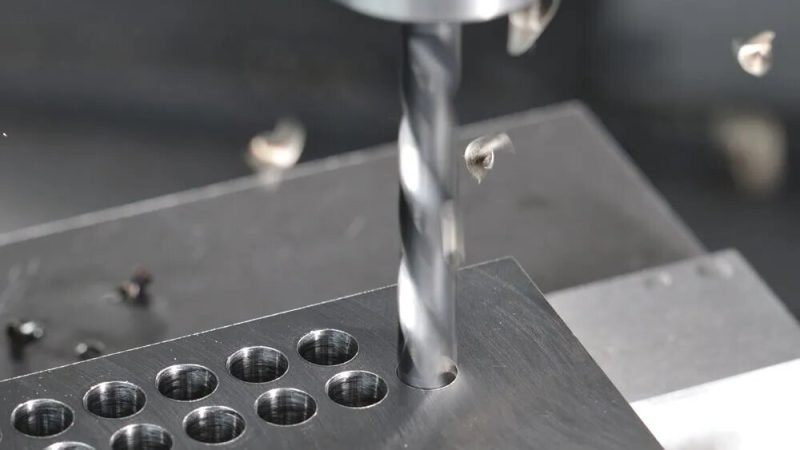
Pressure also matters. Push with steady force, but do not force the bit. You want the cutting edge to shave metal, not rub against it. If the bit stops cutting, do not simply push harder. Instead, check your speed, add cutting fluid, and make sure the bit is still sharp.
Another common mistake is starting too slowly while the bit barely touches the metal. That can cause rubbing and work hardening. The right approach is a firm, controlled start, followed by consistent cutting pressure.
Credit: shengenfab.com
Drill the hole in controlled steps
Now you are ready to drill. Work in a methodical way. Clean holes in stainless steel come from patience, not speed.
- Put on safety glasses and secure the stainless steel firmly.
- Place the center punch mark under the drill bit.
- Start the drill at a slow speed and keep it straight.
- Let the bit bite into the punch mark before increasing pressure.
- Add a few drops of cutting fluid to reduce heat and friction.
- Keep drilling with steady pressure until you reach the full depth.
- For larger holes, use a pilot hole first, then move up to the final size.
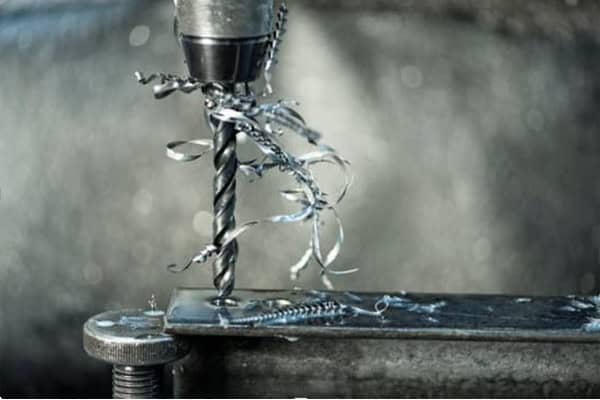
If you are drilling a thick piece of stainless steel, pull the bit out occasionally to clear chips. This helps remove heat and keeps the cutting edge working properly. Chips that stay trapped in the hole can create friction and make drilling harder.
When the drill is near the end of the hole, ease up slightly on pressure. This helps prevent a sudden grab or a rough breakout on the back side. If you are drilling through thin sheet, support the backside with wood or scrap metal to keep the exit clean.
Use cutting fluid, not just force
Cutting fluid is not optional if you want good results. It lowers heat, improves cutting action, and extends bit life. If you do not have professional cutting fluid, a light machine oil can help in a pinch. The goal is to reduce friction, not flood the workpiece.
Apply a small amount before drilling and reapply as needed. Too much fluid is messy, but too little leaves the bit dry and hot. A little goes a long way.
This is a detail many beginners ignore. They assume more pressure will solve slow cutting. In stainless steel, that usually makes the problem worse. Lubrication is often the better fix.
Finish the hole cleanly
After the bit passes through, the hole may still have sharp edges or small burrs. That is normal. Stainless steel is tough, and the exit edge often needs a little cleanup.
Use a deburring tool, a larger bit by hand, or a light metal file to smooth the edge. Move gently. You only want to remove the sharp lip, not enlarge the hole too much.
If the hole must fit a bolt, screw, or fitting precisely, measure it after drilling. Stainless steel can leave a tighter or slightly rougher hole than softer metals. A quick test fit is smart before moving on to the next step in your project.
For professional-looking work, wipe away metal chips and oil when you are done. Stainless steel may resist rust better than other metals, but leftover chips and residue can still make the surface look messy.
Common mistakes that ruin stainless steel holes
Many drilling problems happen because of a few repeated errors. If you avoid these, your results will improve fast.
- Using the wrong bit — Soft, cheap bits dull too fast.
- Drilling too fast — High speed creates heat and burns the edge.
- Skipping the center punch — The bit can wander and scratch the surface.
- Not clamping the piece — The metal can spin or shift dangerously.
- Forcing the bit — Too much pressure causes rubbing and work hardening.
- Ignoring cutting fluid — Dry drilling wears out bits much faster.
- Using a worn bit — A dull edge makes rough holes and overheating worse.
One less obvious mistake is stopping too often after the bit has already started to rub. If you pause in the wrong place, the surface can harden even more. If the bit starts squealing, correct the problem quickly instead of continuing with the same setup.
Another easy-to-miss issue is hole size planning. If the final hole must be exact, drill a smaller pilot hole first and step up in sizes. Trying to make a large hole all at once often leads to poor accuracy and more heat.
Credit: tenyutool.com
How to choose the best method for your project
Not every stainless steel project is the same. Thin sheet, thick plate, and round tubing all need slightly different handling.
For thin stainless sheet, a step bit often gives the cleanest result. It cuts gradually and reduces tearing. For thicker plate, use a cobalt bit with a pilot hole and plenty of cutting fluid. For large holes, use a metal hole saw designed for stainless, but go slowly and keep the tool lubricated.
If you are drilling stainless steel tubing, secure the tube so it cannot roll. A V-block or a solid jig helps a lot. Without support, the curved surface makes the bit wander and the hole may end up uneven.
These small choices matter because the “best” method depends on the shape and thickness of the material. That is another beginner detail people often miss. One technique does not fit every stainless steel job.
Recommended speeds and bit choices
The right speed depends on bit size, tool power, and material thickness, but this simple guide works well for many jobs:
| Hole size | Suggested approach | General speed idea |
|---|---|---|
| Small holes | Sharp cobalt bit, light pressure | Slow to medium-low |
| Medium holes | Pilot hole first, then finish size | Slow |
| Large holes | Step bit or hole saw for metal | Very slow |
If you are unsure, choose the slower setting. Stainless steel rewards patience far more than speed.
Safety habits that matter
Drilling stainless steel is not only about clean holes. It is also about staying safe. Stainless chips can be sharp, and broken bits can be dangerous.
Always wear safety glasses. Small metal chips can fly farther than expected. Keep loose clothing, jewelry, and long hair away from the drill. Wear gloves only when handling the metal before and after drilling, not while the bit is spinning, because gloves can catch.
Also, let the drill stop completely before setting it down. A spinning bit can scratch the surface or catch on the workbench. If you are using a portable drill, hold it with both hands for better control.
For more official guidance on metalworking safety, you can review the OSHA safety resources.
Simple troubleshooting when things go wrong
Even with good technique, stainless steel can still fight back. The important thing is knowing how to react.
If the bit wanders, stop and deepen the center punch mark. You can also start with a smaller pilot bit. If the bit squeals, slow down and add cutting fluid. If the drill smokes, the speed is too high or the bit is dull.
If the hole edge looks rough, the bit may be worn, the pressure may be uneven, or the exit side may need support. If the hole is slightly off-center, do not try to force it straight after starting. That usually makes the damage worse. Instead, stop, check alignment, and begin again if needed.
The most useful habit is to pay attention early. Stainless steel gives warning signs before it fails. Heat, noise, and slipping are all signals to slow down and reset the process.
Credit: tenyutool.com
Final tips for cleaner, more accurate holes
If you want better results every time, focus on the basics: sharp cobalt bits, solid clamping, low speed, cutting fluid, and a punched starting point. Those five things solve most drilling problems in stainless steel.
Remember that accuracy is not only about measuring the hole. It is also about keeping the drill steady, supporting the material, and letting the tool work at the right pace. A careful setup often matters more than raw strength.
Once you understand how to drill stainless steel the right way, the job becomes much easier. The metal is still tough, but it is no longer mysterious. Work slowly, stay cool, and let each step support the next one. That is how you get clean, accurate holes with less wear on your tools and less frustration for you.
FAQs
1. What is the best drill bit for stainless steel?
Cobalt drill bits are usually the best choice because they hold up well under heat and stay sharp longer. A split-point metal bit also helps when you need a cleaner start.
2. Should I use high or low speed on stainless steel?
Use low speed. Stainless steel heats up quickly, and fast drilling can dull the bit or harden the surface. Slow, steady drilling gives better control and cleaner holes.
3. Do I need cutting fluid to drill stainless steel?
Yes, cutting fluid is strongly recommended. It lowers friction, reduces heat, and helps the bit cut instead of rub. That means cleaner holes and longer bit life.
4. Why does my drill bit keep slipping on stainless steel?
This usually happens because the surface is smooth or the starting mark is too shallow. Use a center punch, start with a pilot hole, and make sure the workpiece is clamped firmly.
5. How do I stop burrs after drilling stainless steel?
Support the backside of thin metal with wood, drill at a slow speed, and finish the edge with a deburring tool or file. A small amount of cleanup after drilling is normal and helps the hole look professional.
