
Drilling ceramic can feel scary the first time. One wrong move, and the tile may crack, chip, or split across the surface. The good news is that how to drill a hole in ceramic is not hard once you know the right method, the right drill bit, and the right speed.
Ceramic is strong on the outside, but it is also brittle. That means it does not bend much before breaking. So the goal is not to force the drill through. The goal is to make a clean, slow, controlled hole with light pressure and the right support.
If you are installing a towel bar, hanging a shelf, adding a pipe opening, or mounting bathroom hardware, this guide will show you exactly what to do. You will learn the tools you need, the mistakes that cause cracking, and the safest step-by-step process for drilling ceramic without damage.
What makes ceramic tricky to drill
Ceramic looks smooth and simple, but the surface is harder and more delicate than many people expect. The glaze on top is especially slick, so a normal drill bit can slide before it bites into the surface. Once it slips, the bit can scratch the tile or create a weak point that cracks later.
The main problem is not only hardness. It is also brittleness. Ceramic does not absorb vibration well. Too much force, too much speed, or a dull bit can make the material split. That is why slow drilling and steady support matter so much.
Another thing many beginners miss is that the hole often fails after the surface layer is pierced. The tile may look fine at first, then crack when the bit pushes through the back side. So you need to protect both the front and the exit side of the hole.
Tools and materials you should prepare
Before you start, gather everything first. Stopping midway to search for a bit or tape often leads to rushed work, and rushed work is where cracks happen.
Essential items
- Drill with adjustable speed
- Tile or carbide drill bit for ceramic
- Painter’s tape or masking tape
- Marker or pencil
- Safety glasses
- Vacuum or brush for dust
- Spray bottle of water or damp sponge
Helpful extras
- Center punch for marking the spot
- Drill guide to keep the bit steady
- Rubber mat or scrap wood if drilling a loose ceramic piece
- Wall anchor if you are mounting hardware
If you want a reliable reference on drill bit types and safe drilling practices, this guide from This Old House is useful and easy to follow.
Choose the right drill bit
This is one of the biggest differences between success and failure. A standard wood bit or metal bit is not the best choice for ceramic. You need a bit made to handle hard, brittle surfaces.
| Bit type | Best use | Why it works |
|---|---|---|
| Carbide-tipped bit | Light ceramic drilling | Hard tip that can cut through glaze with care |
| Diamond-tipped bit | Hard ceramic and cleaner holes | Excellent for precision and lower chip risk |
| Masonry bit | Some ceramic jobs | Can work, but usually less clean than tile-specific bits |
For most home projects, a tile drill bit or diamond drill bit is the safest choice. If you only drill ceramic once in a while, carbide-tipped bits are often enough. If you need a cleaner hole or the ceramic is thick and high-quality, diamond bits usually perform better.
A small but important detail: do not use a worn-out bit. A dull tip makes you press harder, and pressure is one of the fastest ways to crack ceramic.
How to drill a hole in ceramic without cracking it
Now let’s get into the process. Take your time with each step. Most cracks happen when people rush the first few seconds or push too hard near the end.
Credit: grayhousestudio.com
1. Mark the exact spot
Measure carefully and mark the spot with a pencil or marker. If the ceramic is glazed and the mark does not stay well, use a small piece of painter’s tape and mark on the tape instead.
The reason this matters is simple: once the drill starts spinning, it is hard to correct. A mark that is even a few millimeters off can force you to reposition, and repositioning a bit often scratches the surface.
2. Put tape over the drilling point
Place one or two strips of painter’s tape across the spot. This gives the drill bit more grip at the start. It also helps reduce slipping on the glossy glaze.
Many beginners skip this step because it seems small. But it is one of the easiest ways to improve control. Think of the tape as a tiny traction layer for the bit.
3. Set the drill to a low speed
Use the slowest practical speed on your drill. High speed creates heat, and heat can damage the bit and weaken the ceramic surface. Slow speed gives you more control and less vibration.
If your drill has a hammer function, turn it off. Hammer mode is useful for concrete, but it is too aggressive for ceramic.
4. Start at a slight angle, then straighten
Begin with the bit slightly angled, just enough to let it grip the surface. Once it starts to bite, bring the drill upright and continue straight in.
This is a useful trick many people do not know. It helps the bit avoid skating across the glaze at the start. Just keep the angle very small. Do not dig in at a wide angle, or you may chip the surface.
5. Apply light, steady pressure
Let the bit do the work. Push gently, not hard. If the bit is sharp and the speed is right, you should see slow progress without force.
When people crack ceramic, it is often because they think more pressure means faster drilling. It does not. Heavy pressure builds stress around the hole and can split the tile.
6. Keep the area cool
Heat is another common problem. A dry bit can get hot quickly, especially with diamond or carbide tips. Spray a little water on the spot, or keep a damp sponge nearby and touch it to the area between short drilling bursts.
Do not flood the area if you are drilling near electrical parts or finished surfaces that could be damaged by water. Use just enough moisture to reduce heat and dust.
7. Drill in short bursts
Instead of drilling nonstop, work in short bursts. Pause briefly, remove dust, and let the bit cool. This also lets you check whether the hole is staying centered.
Short bursts are safer than forcing a long continuous drill. That is especially true on thin ceramic pieces or glazed wall tiles.
8. Reduce pressure as you near the back side
The moment you feel the bit nearing the back of the ceramic, ease up. This is the point where many cracks happen. The tile has less support at the exit, so the back side can chip if you push too hard.
Move slowly through the last part. If possible, place scrap wood or a firm support behind a loose ceramic piece. For wall tiles, light pressure is the best protection.
9. Clean the hole and inspect the edges
After drilling, remove the tape and clean away dust. Check the edges of the hole. A clean hole should look even, with no long cracks radiating outward.
If there is slight chipping, that is not always a problem. Small edge chips can often be hidden by the fixture or covered by a washer. But if the crack is long or growing, stop and reassess before adding more hardware.
Best way to drill different ceramic surfaces
Not all ceramic jobs are the same. The best method depends on whether you are drilling a wall tile, a loose ceramic piece, or a thick decorative item.
Wall tiles
Wall tiles are common in bathrooms and kitchens. These are usually fixed to a surface, so support from the back is limited. That makes speed control even more important. Use tape, a tile bit, and very light pressure.
If the tile is already mounted on drywall, be careful once you pass through the ceramic and hit the wall behind it. The backing material may require a different bit after the tile is pierced.
Loose ceramic pieces
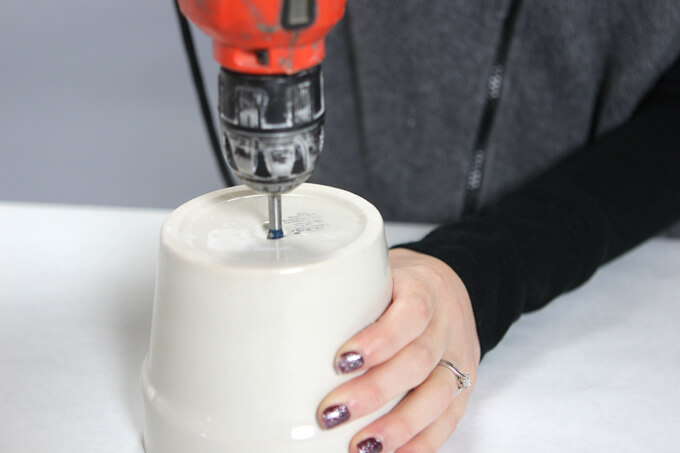
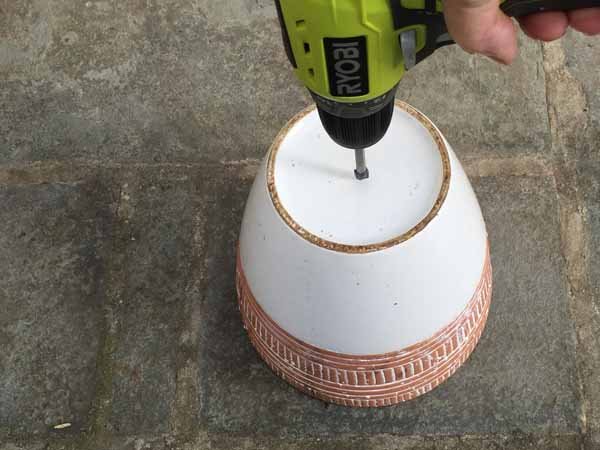
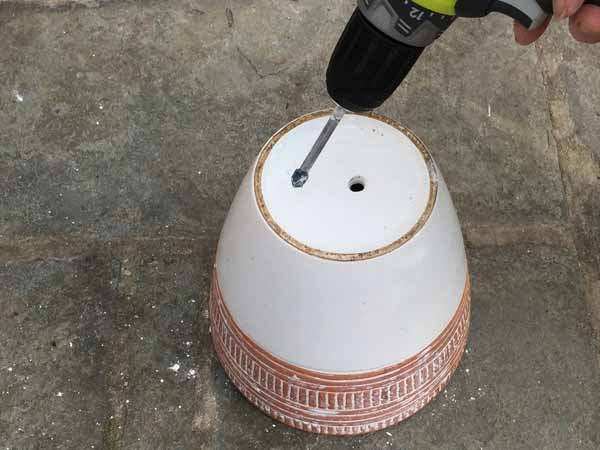
If you are drilling a ceramic pot, plate, or craft item, place it on a folded towel, rubber mat, or scrap wood. This reduces vibration. It also keeps the piece from moving while you drill.
Loose pieces are often easier to drill than wall tiles because you can support the underside. Still, the same rules apply: slow speed, light pressure, and a sharp bit.
Thick or glazed ceramic
Thicker ceramic usually needs more patience. A diamond bit can be helpful here because it wears more evenly and can produce a neater hole. Keep the drill cool and avoid long nonstop drilling.
Glossy glaze can also be slippery. Tape and a steady start become even more important on these surfaces.
Common mistakes that cause cracks
Some mistakes look small, but they create big problems. If you avoid the following, your chance of success improves a lot.
- Using the wrong bit – A general-purpose bit is more likely to slip, overheat, or chip the surface.
- Drilling too fast – High speed creates heat and vibration, both of which can damage ceramic.
- Pushing too hard – Heavy pressure can split the tile, especially near the end of the hole.
- Skipping tape – Without tape, the bit can skate on the glazed surface.
- Forgetting to cool the bit – Heat weakens control and increases wear.
- Using hammer mode – Impact drilling is too aggressive for ceramic.
One less obvious mistake is drilling at a bad spot. If the ceramic is already cracked, hollow, or weak near an edge, even perfect drilling can fail. Try to stay away from edges, corners, and existing damage whenever possible.
Credit: needlepointers.com
How to make the hole cleaner and safer
A few small habits can improve the result a lot. These are the details people often learn only after a mistake.
Start with a tiny pilot mark
If you are nervous about the drill slipping, make a tiny starter mark with a center punch or a sharp nail. Use only very light force. The goal is not to crack the surface. The goal is simply to give the bit a place to begin.
Use a drill guide if possible
A drill guide helps hold the bit steady and straight. This is useful if you need several holes or if the surface is very smooth. A straighter hole usually means less edge stress.
Keep the hole size as small as needed
Do not make the hole bigger than necessary. Larger holes remove more material and can weaken the ceramic around the opening. Match the hole size to the anchor, screw, or fitting you are using.
Do not force the bit when it stops cutting
If the bit stops making progress, stop and check it. It may be dull, too hot, or clogged with dust. Forcing it only increases the chance of cracking. Sometimes a quick cleanup and cool-down is all it needs.
What to do after drilling
Once the hole is finished, your work is not quite done. A few finishing steps help protect the ceramic and the hardware you install.
- Remove all dust from the hole.
- Check that the edges are smooth enough for the screw or anchor.
- Insert anchors gently if the project needs them.
- Do not overtighten screws, because extra force can split ceramic around the hole.
This last point matters more than people think. A perfect hole can still fail later if the screw is too tight. Ceramic does not flex much, so the pressure has nowhere to go.
Quick safety reminders
Drilling ceramic is not a dangerous job if you stay careful, but you should still protect yourself. Wear safety glasses, especially when drilling overhead or near your face. Small chips can fly off quickly.
If you are drilling near plumbing or wiring, check what is behind the surface first. Hitting a pipe or cable is far worse than cracking a tile. When in doubt, inspect the area before drilling.
Also, if you are working on an expensive tile, antique ceramic, or a piece you cannot replace, test your setup on a scrap piece first. A test run can save the real surface.
Credit: needlepointers.com
Simple process you can follow every time
If you want a short memory aid, remember this sequence: mark, tape, slow speed, light pressure, cool the bit, and ease up near the end. That order works for most ceramic drilling jobs.
The most important idea is control. Drilling ceramic is not about power. It is about patience and clean technique. Once you accept that, the job becomes much easier and much safer.
And if you remember only one thing, remember this: the drill bit should cut the ceramic, not your hand pressure. That single habit prevents many cracks.
FAQs
1. Can I use a regular drill bit on ceramic?
You should avoid a regular wood or metal bit if possible. A carbide-tipped or diamond-tipped tile bit is much safer and gives a cleaner result. Regular bits can slip and crack the glaze.
2. Should I use water when drilling ceramic?
Yes, light cooling with water can help reduce heat and dust. A small spray or damp sponge is usually enough. Do not soak the area if water could damage nearby surfaces or electrical parts.
3. Why did my ceramic crack while drilling?
The most common reasons are too much pressure, too much speed, the wrong bit, or poor support. Cracks also happen when the drill exits the back side too forcefully.
4. Is hammer drill mode safe for ceramic?
No, hammer mode is not a good choice for ceramic. It creates impact that can chip or split the tile. Use normal drilling mode with low speed instead.
5. How do I stop the drill bit from slipping on glazed ceramic?
Use painter’s tape over the spot, start at a slight angle, and drill at low speed. A small center punch mark can also help the bit grip the surface at the start.
