
A concrete mixer is one of those tools that works hard and gets dirty fast. Cement, sand, gravel, and water leave a thick layer inside the drum, on the blades, and around the frame. If you ignore it, the mixer becomes harder to use, less efficient, and much harder to clean later.
Knowing how to clean concrete mixer the right way saves time, protects the machine, and helps every batch mix better. It also reduces the chance of hardened concrete building up in spots you cannot easily reach. That means less damage, less waste, and fewer repair problems later.
The good news is that cleaning a concrete mixer is simple when you do it soon after use and follow a clear process. You do not need special skills. You just need the right steps, a little care, and the habit of cleaning before the material sets.
Why cleaning the mixer right away matters
Fresh concrete is easy to remove. Hardened concrete is not. That is the biggest reason to clean the mixer as soon as the job is done. Once cement paste starts to cure, it sticks to metal, fills corners, and gets much tougher to remove.
A dirty mixer can also affect the next batch. Old chunks can break loose and fall into new concrete, which may change the mix quality. In some cases, leftover material can also make the drum spin unevenly or put extra strain on the motor.
Another point many beginners miss is that buildup does not only happen inside the drum. It also forms around the rim, paddles, discharge opening, wheels, and under the frame. If these areas stay wet and dirty, the mixer can rust faster and become harder to move.
What you need before you start
You do not need expensive equipment. Most of the time, basic cleaning tools are enough. The important thing is to have them ready before the concrete dries.
- Garden hose or bucket of clean water
- Stiff brush or scrub brush
- Plastic or wooden scraper
- Spade or shovel for loose material
- Safety gloves
- Safety glasses
- Work boots
- Optional: mild detergent
- Optional: pressure washer for heavy buildup
If you want a trusted safety reference for handling concrete-related materials, the OSHA website is a useful authority for workplace safety guidance.
How to clean concrete mixer step by step
The best way to clean a mixer is to do it immediately after use, while the concrete is still wet. This method works for most portable electric mixers and many larger mixers as well. If your machine is different, always check the manufacturer’s manual first.
1. Shut off the machine and unplug it
Before touching anything, make sure the mixer is turned off. If it is electric, unplug it. If it is gas-powered, switch it off and let it cool for a few minutes. Never clean a mixer while it is still running.
This seems obvious, but it is one of the most important steps. Wet concrete, moving parts, and rotating drums can be dangerous together.
2. Empty the remaining concrete completely
Tip the drum and pour out as much leftover mix as possible. Use a shovel or trowel to remove loose material from the mouth and lower edge. If there is still a usable batch inside, place it where you need it before it starts to set.
Do not leave a small amount in the drum “for later.” Even a little leftover mix can harden and cause a stubborn layer inside the mixer.
3. Rinse the inside drum with water
Add a small amount of clean water into the drum. Rotate the drum for a short time so the water reaches all sides. This helps loosen fresh cement paste and sand.
Then pour the water out. If the mixer is large, tilt the drum and let the water flow through the discharge side. If there is a drain area, make sure it is clear.
4. Scrub the drum walls and blades
Use a stiff brush to scrub the inside surface while it is still damp. Focus on the blades, corners, and edges near the mouth of the drum. These are the places where concrete buildup usually starts.
For sticky spots, use a plastic or wooden scraper. Avoid metal tools if possible, because they can scratch the drum surface. Scratches give cement more places to cling next time.
5. Clean the outside surfaces
The outside of the mixer matters too. Wipe off splashes on the frame, handles, wheels, and motor cover. Wet concrete left on the outside can harden and make the machine look old fast.
If you work on muddy ground, also clean the wheels and base. Dirt and concrete together create a heavy crust that gets harder to remove later.
6. Wash stubborn residue with water and light scrubbing
If thin concrete film remains after the first rinse, repeat the process with fresh water. Rotate the drum again and scrub the area a second time. A little detergent can help with greasy dirt or dust mixed with cement.
Do not use harsh chemicals unless the manufacturer allows them. Strong cleaners can damage paint, seals, or metal parts.
7. Check hidden areas around the mixer
Many people clean only the drum and stop there. That is a mistake. Look at the hinge points, underside, wheel brackets, and discharge chute. Wet concrete often splashes into these places and gets missed.
Also check the edges where the drum meets the frame. Buildup in these areas can interfere with movement and make future cleaning harder.
8. Let the mixer dry fully
After cleaning, leave the mixer open so air can dry the inside. If possible, keep it in a dry place away from rain. A dry mixer lasts longer and is less likely to rust.
If you must store it outside, cover it after it is fully dry. Never cover a wet mixer tightly, because trapped moisture can speed up corrosion.
What to do if the concrete has already hardened
Sometimes you are not able to clean the mixer right away. Maybe the job ran long. Maybe the water was not nearby. In that case, you need a different approach.
Start by removing any loose hardened pieces with a scraper or small hammer. Be careful not to damage the drum surface. Then add water and let the remaining material soak. Soaking softens some of the cement paste, especially around the edges.
After that, scrub again and rinse. Repeat as needed. For very hard buildup, you may need a concrete-safe cleaning product approved for mixer use. Always read the label and follow the directions closely.
Here is a simple way to think about it:
| Condition of residue | Best cleaning approach |
|---|---|
| Still wet | Rinse, rotate, and scrub right away |
| Partly dry | Soak with water, then scrape and scrub |
| Fully hardened | Careful mechanical removal and approved cleaner if needed |
One useful insight many beginners miss: hardened concrete is not always equal in hardness. Thin cement film can soften faster than thick chunks. That means it is worth repeating short soaking cycles instead of trying one aggressive clean. Gentle patience often works better than force.

Credit: bison-machinery.com
Cleaning mistakes that can damage the mixer
Some cleaning habits do more harm than good. If you want the mixer to last, avoid these common errors.
- Leaving concrete inside overnight
- Using sharp metal tools on the drum surface
- Cleaning while the mixer is still powered on
- Using too much water near electric parts
- Forgetting to clean the frame and wheels
- Storing the mixer while it is still wet
- Using strong chemicals without checking the manual
Another mistake people often make is trying to force out hardened concrete by hitting the drum too hard. Light tapping may help loosen small chunks, but strong impact can bend parts, damage the drum, or loosen joints.
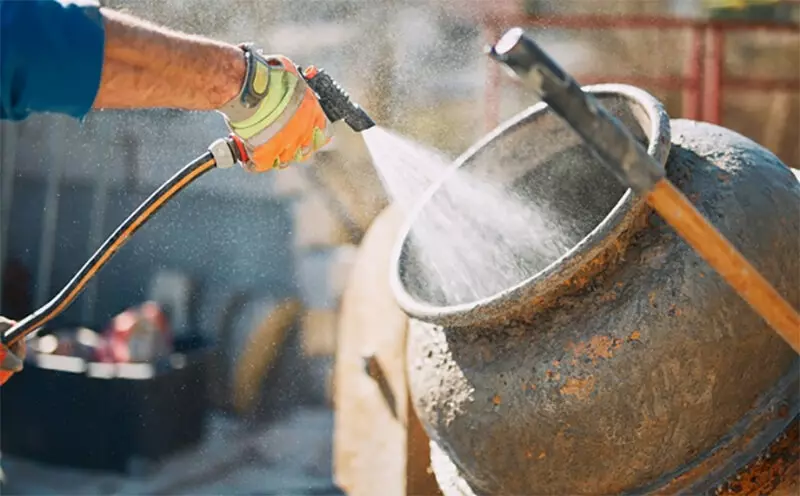
Credit: bison-machinery.com
How often should you clean it
The short answer is: after every use. If you use the mixer for several batches in one day, rinse it between batches if concrete starts to build up. Do not wait until the end of the day if the material is already beginning to set.
A quick rinse takes a few minutes. A fully hardened cleanup can take much longer. That time difference is one reason experienced workers clean early every time.
If you use the mixer only once in a while, it still needs the same care. Infrequent use can make people forget the cleaning habit, but a neglected mixer often causes the biggest problems.
Extra tips for better results
These small habits make a big difference over time.
Use a rinse batch when the manual allows it
Some workers run a small amount of water and gravel through the mixer to help knock off residue. This can work well, but only if the mixer maker approves it. Not every machine is built for that method.
Keep a cleaning station nearby
If you work on construction sites often, keep a hose, brush, scraper, and gloves close to where the mixer runs. The easier cleaning is to start, the more likely it is to happen on time.
Inspect the mixer while cleaning
Cleaning is also a good inspection moment. Look for cracks, loose bolts, worn blades, damaged cords, and rust spots. Finding small problems early can save a repair later.
Do not forget the drain and discharge area
Some of the worst buildup happens where material exits the drum. If this spot clogs, the mixer may not empty well and the next batch may mix unevenly. A clean discharge area keeps the machine working smoothly.
Simple routine for faster cleanup
If you want an easy habit to follow every time, use this routine:
- Empty the drum fully.
- Rinse with water right away.
- Rotate the drum to loosen residue.
- Scrub the inside while it is still wet.
- Clean the frame, wheels, and discharge area.
- Let everything dry before storage.
This routine is simple, but it is effective. The real secret is speed. The sooner you start, the easier the work becomes.
How to keep the mixer in good shape long term
Cleaning is only part of the job. To keep the mixer in strong condition, store it properly and use it with care. Place it on level ground before mixing so material does not pool on one side. Do not overload the drum. Follow the capacity limit from the manufacturer.
Check moving parts from time to time. Lubricate parts only if the manual recommends it. If you see rust, remove it early before it spreads. If the mixer has electrical parts, keep water away from switches and motor housing.
One non-obvious detail: repeated tiny residue layers can slowly change the mixer’s balance. That means a mixer may still “work” but perform worse over time. Regular cleaning helps prevent that slow decline.
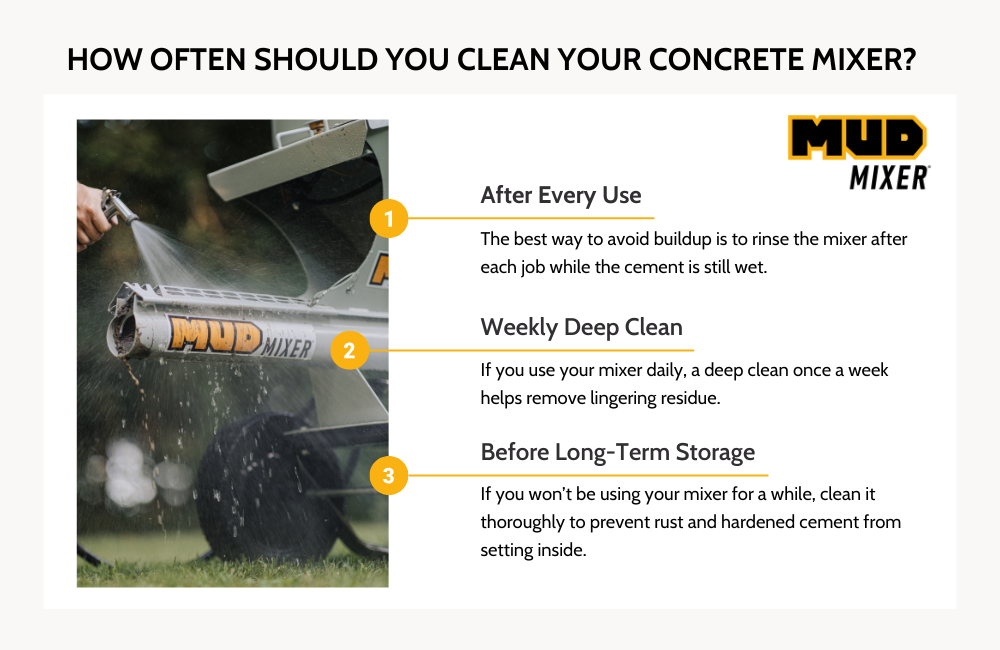
Credit: mudmixer.com
Final thoughts
Learning how to clean concrete mixer the right way is not complicated, but it makes a big difference. Clean it soon after use, scrub the drum and hidden areas, and dry it properly. These simple habits protect the machine and improve every future batch.
When you clean the mixer on time, you avoid hard buildup, save effort, and reduce wear. That is the easiest way to get better results and a longer machine life without extra cost.
FAQs
1. How do I clean a concrete mixer after one use?
Empty the drum, rinse it with clean water, rotate it to loosen residue, scrub the inside with a stiff brush, and clean the outside frame and wheels. Do this right after use for the easiest result.
2. Can I use vinegar or chemicals to clean concrete from a mixer?
Only use cleaning products that the mixer manufacturer allows. Mild detergent may help with dirt, but strong chemicals can damage parts. Always check the manual before using any special cleaner.
3. What is the best way to remove hardened concrete?
Start by scraping loose pieces, then soak the hardened areas with water and scrub again. For very stubborn buildup, use a concrete-safe cleaner approved for mixer use. Avoid sharp metal tools that can damage the drum.
4. How often should a concrete mixer be cleaned?
It should be cleaned after every use. If you are mixing multiple batches in one day, rinse it between batches when needed so concrete does not start setting inside the drum.
5. Can I leave water in the mixer overnight to help clean it?
It is better not to leave water sitting in the mixer for too long. A short soak can help loosen residue, but after cleaning, drain it fully and let the mixer dry to reduce rust and corrosion.
