
If you need to change a miter saw blade, the job can feel more serious than it really is. The saw is powerful, the blade is sharp, and one small mistake can lead to a bad cut or even an injury. But with the right steps, this is a simple maintenance task you can do at home.
A fresh blade can improve cut quality right away. You may notice smoother edges, less tearing in wood, and less effort while cutting. That is why knowing how to change a miter saw blade is useful for anyone who uses the tool often, even only for weekend projects.
In this guide, you will learn the safe way to remove an old blade, install a new one, and check that everything works correctly before you cut again. The steps are easy to follow, but the small details matter.
Before you start, make the saw safe
The first goal is simple: remove all power and make the saw impossible to start by accident. Many beginners rush this part, but this is where safety begins.
Unplug the miter saw from the wall. Do not trust the switch alone. If your saw uses a battery, remove the battery pack. Wait until the blade stops fully if it was still moving.
Let the blade cool if the saw was used recently. A hot blade can burn your hand fast. Also clear the area around the saw. You want enough space to move your hands without hitting anything.
Wear safety glasses and gloves if you are comfortable using them. Thin work gloves can help protect your fingers while handling the old blade. However, gloves should never make your grip feel weak or slippery.
One useful habit many people miss is to place the saw on a stable surface before starting. A wobbly bench makes the job harder and more dangerous. Good lighting also helps a lot, because the arbor bolt and washer are small parts that are easy to drop.
Gather the right tools and the correct blade
You do not need many tools for this task, but the right ones make the job smoother. Before you begin, collect everything in one place.
- A wrench or hex key that fits your saw
- The new miter saw blade
- Safety glasses
- Gloves, if you want them
- A clean cloth
- Possibly a small brush to clean dust from the guard area
The most important choice is the replacement blade. Not every blade fits every saw. Check the blade diameter, arbor hole size, and maximum RPM rating. These details must match your saw’s requirements. If they do not, do not force the blade to work.
Also think about the type of cuts you do most often. A fine-tooth blade works better for smooth finish cuts. A rougher blade may be fine for framing or basic trimming. If you use the wrong blade type, the saw may still cut, but the result may not be clean.
A simple rule helps here: match the blade to the material and the job. Wood, trim, laminate, and non-ferrous metal each may need a different blade style. Read the blade label carefully before buying.
Understand the blade parts before removal
Before you remove anything, take a moment to see how the blade is held in place. This will save time and prevent mistakes during reassembly.
Most miter saws use an arbor bolt, an outer washer or flange, and sometimes an inner flange. The blade sits between these parts. One side of the blade usually has the teeth pointing in a clear direction. The blade body often has an arrow showing the correct rotation direction too.
This matters more than many beginners think. A blade installed backward can cut badly, create more vibration, and increase risk. It may also damage the workpiece or the saw.
If you are not sure about the exact arrangement on your model, look at the owner’s manual. The manual is the best source for your saw’s design. If you need general safety information from a trusted source, you can also review guidance from the Occupational Safety and Health Administration.
How to change a miter saw blade step by step
Now you are ready for the main job. Move slowly and keep the parts in order. If you work carefully, the process is usually quick.
Credit: sawsonskates.com
1. Raise the blade arm and lock it if needed
Lift the saw arm to its highest position. Many miter saws make blade access easier when the arm is up. Some models also have a lock pin or transport lock. Use it only if the manual says it is safe for blade changes.
Make sure the blade guard moves freely. You do not want the guard to trap your hand while you work.
2. Lock the blade in place
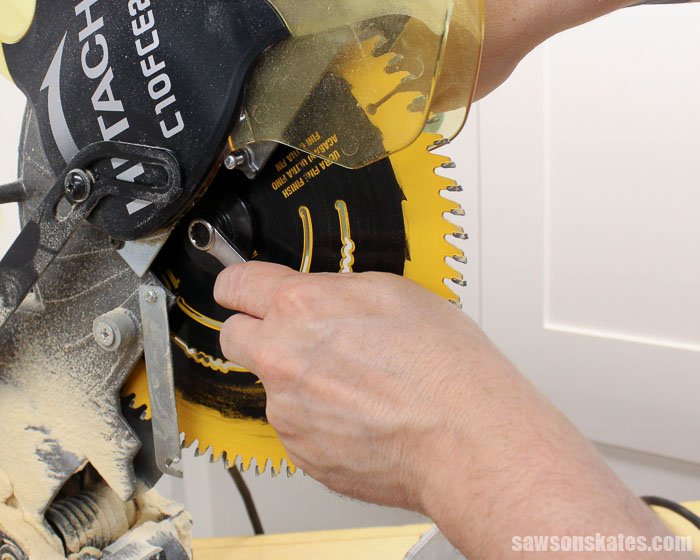
Most miter saws have a spindle lock or arbor lock button. Press it so the blade cannot turn. Then slowly rotate the blade by hand until the lock catches. This step keeps the arbor from spinning when you loosen the bolt.
Do not force the blade hard while the lock is engaged. If the lock does not catch easily, move the blade a little and try again. Gentle pressure is enough.
3. Remove the arbor bolt
Use the correct wrench or hex key to loosen the arbor bolt. A simple tip: remember that some saws use a reverse-thread bolt. On many miter saws, the bolt loosens in the direction opposite to normal. That surprises a lot of people.
If you are unsure, check the manual before turning too hard. Forcing the wrong direction can damage the threads or the bolt head.
Once loose, remove the bolt and keep it in a safe place. A magnetic tray or small container works well. Losing one washer or spacer can delay the whole job.
4. Take off the outer washer and old blade
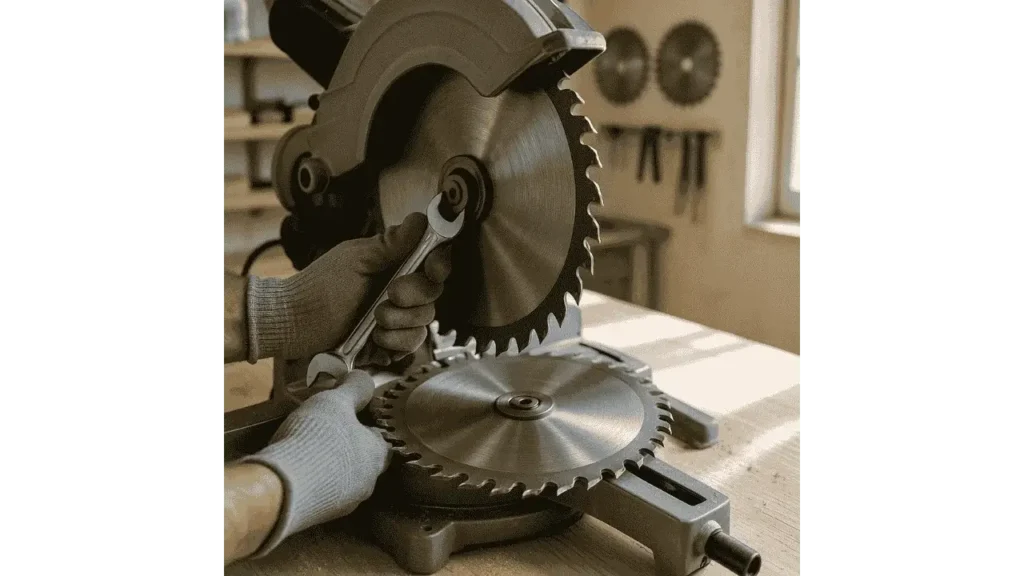
Remove the outer washer or flange carefully. Then slide off the blade. Hold it by the center hole, not the teeth. Even a dull blade can cut skin.
Put the old blade aside right away. Do not leave it loose on the bench where someone can touch it by accident. If the blade is damaged, bent, or heavily worn, mark it so you do not reuse it later by mistake.
5. Clean the arbor area
This is one step many people skip, but it matters. Sawdust and pitch can build up on the flange or arbor area. If debris stays there, the new blade may not sit flat.
Use a clean cloth or small brush to remove dust. Check the washer surfaces too. They should be clean and smooth. A blade that does not sit flush can wobble, vibrate, or make rough cuts.
6. Check the new blade direction
Look for the arrow on the blade. Match that arrow to the rotation direction shown on the saw. The teeth should also face the correct way. On most miter saws, the teeth point downward at the front when installed properly, but always confirm with your model.
This is one of the easiest places to make a mistake. If the blade is backward, the saw may still spin, which can fool a beginner. But the cut quality will be poor, and the blade may grab the wood instead of slicing it cleanly.
7. Install the new blade
Slide the new blade onto the arbor carefully. Make sure it sits flat and centered. Then put the washer or flange back in the same order it came off.
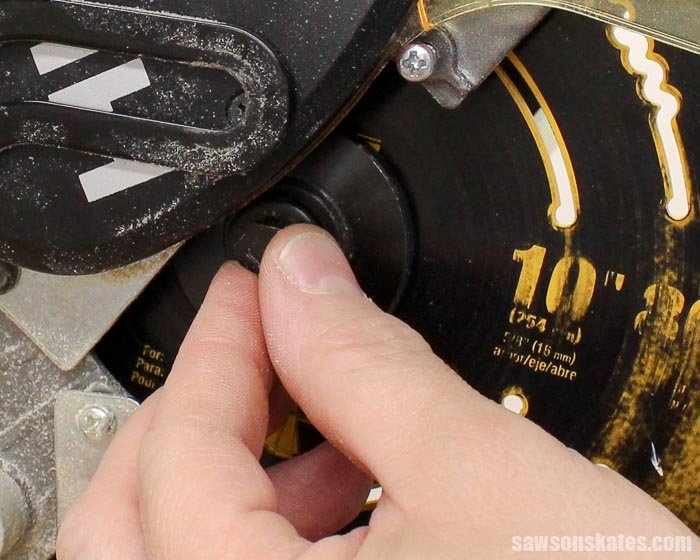
Keep the blade steady while you reattach the arbor bolt. Start the bolt by hand first, if possible. That helps avoid cross-threading. Once it is seated, tighten it with the wrench while the spindle lock is engaged.
Do not over-tighten. The bolt should be snug and secure, but extreme force is unnecessary. Over-tightening can make future blade changes difficult and may stress the parts.
8. Release the lock and test the blade by hand
Release the spindle lock. Turn the blade slowly by hand a full rotation. It should move smoothly without rubbing the guard or scraping other parts. If it feels tight, stop and recheck the installation.
This hand test is important because it helps you catch a problem before powering the saw. A blade that does not spin freely may not be seated correctly.
9. Close the guard and inspect everything
Let the blade guard return to its normal position. Look at the blade from the side and front. Check that it is centered and aligned. Make sure no tools, cloths, or loose parts are left near the blade area.
If your saw has a lower guard that sticks or moves slowly, clean the pivot area before use. A guard must move freely for safe operation.
10. Plug in the saw and perform a short test run
Stand to one side, not directly in line with the blade. Plug in the saw or reinstall the battery. Turn the saw on and let it run for a few seconds without cutting anything.
Listen for strange sounds. A smooth hum is normal. Grinding, wobbling, or shaking is not. If you hear or feel a problem, turn the saw off and unplug it again before checking the blade.
After the test, make one light cut in scrap wood. This confirms that the blade is installed correctly and cutting as expected.
How to know if the blade is on correctly
After replacement, a few signs tell you the blade is properly installed.
- The blade spins freely by hand
- The saw runs smoothly without loud vibration
- The cut is straight and clean
- The blade does not rub the guard
- The arbor bolt stays tight after the test
If any of these signs are missing, stop and inspect the setup again. A small alignment issue can cause poor cutting performance even if the saw still powers on.
Another detail beginners often miss is blade stability during start-up. If the saw jerks hard when starting, the blade may be mounted wrong or the wrong blade type may be installed. That is a signal to recheck everything, not to “just keep using it.”
Credit: sawsonskates.com
Common mistakes to avoid
Changing a miter saw blade is simple, but a few mistakes happen often. Avoiding them keeps the job safe and saves time.
Using the wrong replacement blade
Not every blade fits every saw. The wrong diameter, arbor size, or speed rating can create serious problems. Always check the saw label and the blade box.
Forgetting to unplug the saw
This is the biggest safety mistake. Do not rely on the switch. Power must be fully removed before you touch the blade.
Installing the blade backward
A backward blade is one of the most common errors. It may still spin, but it will cut poorly and can be unsafe.
Over-tightening the bolt
Some people think tighter is always better. It is not. The bolt must be secure, but not forced beyond reason.
Skipping the hand-spin test
Turning the blade by hand before powering up helps you catch problems early. It is a quick step that can prevent damage.
How often should you change a miter saw blade?
There is no single rule for every user. The blade changes when performance drops or when the blade becomes damaged. If you cut wood often, the blade may wear out faster. If you use the saw only now and then, the blade may last longer.
Look for these signs:
- Burn marks on the wood
- Rough or chipped cuts
- More effort needed to cut
- Loud vibration or noise
- Missing, bent, or dull teeth
One non-obvious point: sometimes the blade is not truly “worn out.” It may simply be dirty. Resin and pitch buildup can make a good blade perform badly. Cleaning the blade can bring back much of its cutting quality.
Another useful insight: if you switch between materials, keep different blades for different jobs. A blade used on framing lumber is not the best choice for trim work. Separate blades often last longer and cut better.
After the change, take care of the blade
A new blade can stay sharp longer if you handle it well. Store it in a dry place. Do not toss it into a tool box where the teeth can hit metal objects. That can dull the blade early.
Clean the blade now and then, especially if you cut resin-heavy wood. A simple blade cleaner or mild cleaning method approved by the manufacturer can help. Always follow the blade maker’s advice.
Also check the saw after a few jobs. Vibration can loosen parts over time, especially if the saw is used often. A quick inspection after installation is a smart habit.
Credit: chainsawguru.com
A simple way to remember the process
If you want a short memory aid, think in this order: power off, lock, loosen, remove, clean, align, install, test. That sequence covers the full job without confusion.
Once you do it a couple of times, the process becomes much easier. What feels technical at first becomes a normal part of saw maintenance.
Knowing how to change a miter saw blade is not just about convenience. It helps you cut better, work safer, and get more value from your tool. A sharp, correctly installed blade makes a big difference in every project.
FAQs
1. How do I know which blade fits my miter saw?
Check your saw’s manual or the label on the machine. Look for blade diameter, arbor size, and maximum RPM. The replacement blade must match all three.
2. Do I need to unplug the saw every time I change the blade?
Yes. Always unplug the saw or remove the battery before touching the blade. This is the most important safety step.
3. Can I use any miter saw blade for wood?
Not always. Different wood jobs need different blades. A fine-tooth blade is better for smooth finish cuts, while other blades work better for rough framing or special materials.
4. Why does my saw vibrate after I install a new blade?
The blade may be backward, loose, dirty, or the wrong size. Stop using the saw and inspect the installation before cutting again.
5. How long does it take to change a miter saw blade?
For most people, it takes about 10 to 20 minutes. The first time may take longer, but the job becomes faster once you know the steps.
