
If you want clean cuts, safer work, and less wasted time, learning how to change a jigsaw blade is one of the first skills you should master. It is a small task, but it has a big effect on your results. A loose blade, the wrong blade, or a blade installed the wrong way can make cutting harder and more dangerous.
The good news is that the process is simple once you know your jigsaw type and the locking system it uses. In most cases, you can change the blade in a few minutes without special tools. What matters most is doing it the right way, every time. That means switching off the tool, removing power, checking the blade direction, and locking it in place properly.
This guide explains the full process in clear steps. You will also learn common mistakes, safety tips, and how to choose the right blade for the job. If you are new to power tools, this will help you work with more confidence and better control.
Know Your Jigsaw Before You Start
Before you try to remove or install a blade, you need to know which type of jigsaw you have. This is important because blade change systems are not all the same. Some models use a lever lock. Others use a hex key, clamp, or screw. The blade shape can also vary between brands.
The two most common blade connection styles are T-shank and U-shank. Today, most modern jigsaws use T-shank blades because they are easier to install and remove. They also hold more securely in many tools. U-shank blades are still used on some older models.
If you are unsure, check the manual for your jigsaw. If you no longer have it, look at the blade end and the clamp area. You can also search the model number online. Knowing the exact system saves time and helps you avoid forcing the wrong blade into place.
Common blade change systems
| System | How it works | Common on |
|---|---|---|
| Tool-free lever lock | A lever or switch opens the blade clamp | Many modern jigsaws |
| Hex key clamp | A small key loosens and tightens a screw | Some mid-range and older models |
| Screw clamp | A screw holds the blade in place | Basic or older jigsaws |
| Quick-release chuck | The blade releases with a push or slide motion | Higher-end models |
Get the Tool Ready Safely
Safety comes first. A jigsaw blade is sharp, and the tool can start unexpectedly if it still has power. Many beginners skip this part because the blade change looks simple. That is a mistake. Even a short moment of carelessness can cause injury.
Before touching the blade, unplug the jigsaw from the wall. If your tool is cordless, remove the battery. Do not just switch the tool off. Make sure it cannot start by accident. Then place the jigsaw on a stable surface with good light.
You may also want to wear work gloves. Gloves are not always needed for every tool job, but they can help when removing an old blade, especially if it is hot or damaged. Keep the new blade nearby so you do not have to search for it while the tool is open.
Helpful safety habits
- Disconnect power before doing anything else.
- Wait for the blade to stop moving if the tool was recently used.
- Keep your fingers away from the blade teeth and clamp area.
- Work on a clean bench or table with no loose objects nearby.
- Use only the correct blade type for your jigsaw.
Remove the Old Blade
Now you can take out the old blade. The exact method depends on your jigsaw, but the basic idea is always the same: release the clamp, pull out the blade, and set it aside safely.
If your jigsaw has a tool-free release, look for a lever, switch, or locking collar near the front of the tool. Move it to the open position. The blade should loosen or pop up slightly. If it does not move, do not force it. Check whether the clamp is fully released.
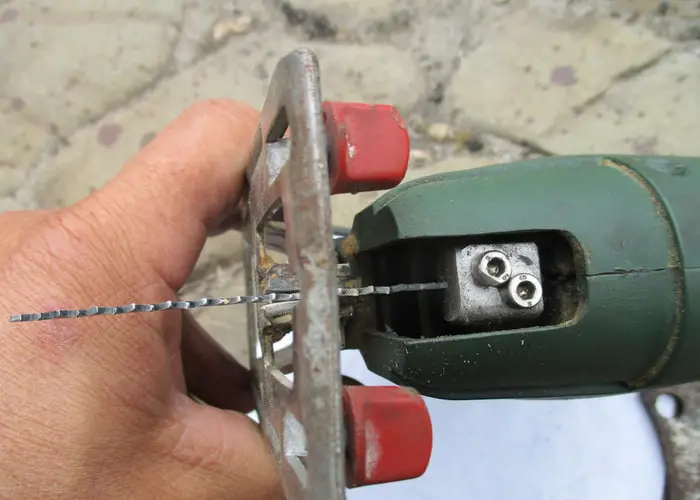
If your model uses a hex key or screwdriver, insert the tool into the clamp screw and turn it counterclockwise until the blade comes free. Keep a firm grip on the blade while loosening the clamp so it does not fall unexpectedly.
Once the blade is loose, pull it straight out. If it feels stuck, wiggle it gently, but do not bend it. A blade that bends too much can snap or damage the clamp. Place the used blade in a safe spot right away. Many blades are still sharp enough to cut skin even after use.
If the blade is stuck
Sometimes an old blade will not come out easily. This can happen if sawdust has built up around the clamp, or if the blade has rusted or become warped. In that case, use a small brush or compressed air to clean the clamp area first. Then try the release again.
If the blade still sticks, check the blade lock to be sure it is fully open. On some tools, the clamp does not release all the way unless the lever is moved into the correct position. Do not use pliers unless the manual allows it, because pliers can damage the clamp.
Choose the Right Replacement Blade
This step matters more than many beginners think. A jigsaw blade is not just a jigsaw blade. Different blades are made for wood, metal, plastic, laminate, curved cuts, and fine finish work. Choosing the wrong one can make the cut rough, slow, or messy.
Look at the material you plan to cut and match the blade to that material. Also check blade length and tooth count. A blade that is too short may not handle thick stock well. A blade with the wrong tooth pattern can tear the material instead of cutting cleanly.
One detail people often miss is blade thickness. Thinner blades can make tighter curves, but they may also flex more. Thicker blades stay straighter for long cuts. So the best blade is not always the one with the most teeth. It is the one that fits the job.
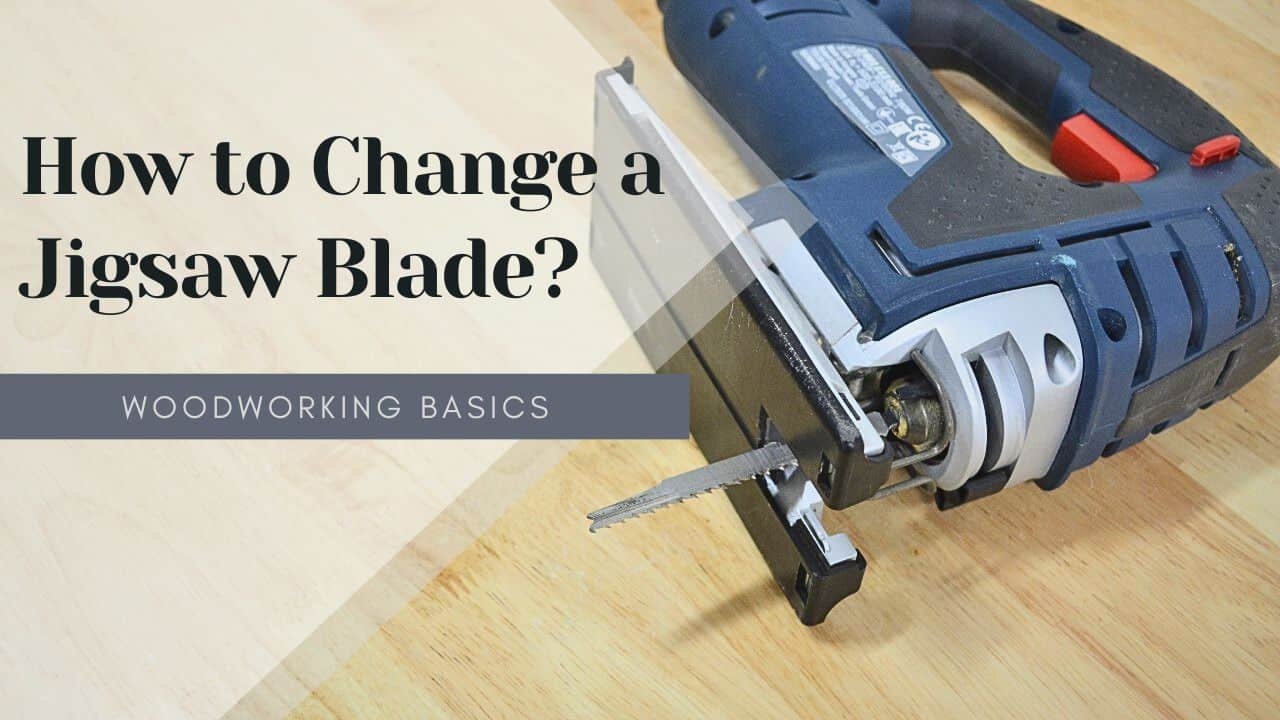
Credit: allflavorworkshop.com
Quick blade selection guide
- Wood cutting: Use a blade with medium to large teeth.
- Fine finish cuts: Choose a blade with more teeth per inch.
- Metal cutting: Use a blade made for metal with fine teeth.
- Plastic cutting: Pick a blade that reduces melting and cracking.
- Curved cuts: Use a narrower blade for better turning ability.
Insert the New Blade the Right Way
Now you are ready for the most important part of how to change a jigsaw blade: putting the new one in correctly. The blade must sit straight, lock firmly, and point in the right direction. If it is even slightly misaligned, the cut may wander or the blade may slip out while working.
First, check the blade teeth. On most jigsaws, the teeth should face forward, toward the front of the tool and the direction of the cut. Some models and specialty blades may be different, so confirm with your manual if needed.
Slide the blade into the clamp until it is fully seated. You may feel it stop in place. If your jigsaw has a tool-free clamp, close the lever or locking collar until it clicks or locks firmly. If it uses a hex key, tighten the screw until the blade is secure. The blade should not wobble or slide out.
One useful habit is to gently tug the blade after locking it. This quick check tells you whether it is actually held in place. If it moves, remove it and try again. A few seconds spent here can prevent a blade from coming loose during cutting.
What a proper fit looks like
- The blade sits straight in the clamp.
- The teeth face the correct direction.
- The blade does not wobble when you pull it lightly.
- The clamp closes completely.
- No metal part looks crooked or partly open.
Test the Setup Before Cutting
After installing the blade, do not start cutting right away. A short test can save the blade, the material, and your fingers. Plug the tool back in or reinstall the battery only after the blade is locked in place and the work area is clear.
Turn the jigsaw on for a moment without touching the material. Listen for unusual noise or vibration. The blade should move smoothly without shaking too much. If the blade wobbles, the clamp may not be tight enough or the blade may not match the tool.
Then make a short test cut on scrap material that is similar to your project. This tells you if the blade is the right type and if the jigsaw is tracking straight. Many beginners skip this and then damage their real workpiece. That small test piece can save time and money.
Signs something is wrong
- The blade moves side to side too much.
- The cut drifts away from your line.
- The tool vibrates more than usual.
- The blade makes scraping or clicking sounds.
- The blade feels loose after a short run.
Common Mistakes Beginners Make
When people learn how to change a jigsaw blade, they often make the same few mistakes. These mistakes are easy to avoid once you know them. Some are small, but they can still affect your safety and cutting quality.
Forgetting to remove power is the biggest one. Even if the trigger is off, the tool can still start if bumped. Another common mistake is using the wrong blade style for the jigsaw. A blade may look close enough, but if it is not designed for the clamp system, it may not hold properly.
Installing the blade backward is also common. This causes poor cutting and can damage the workpiece. Another issue is not seating the blade fully before locking it. The clamp may seem closed, but the blade can shift after the first few cuts.
Some beginners also try to cut with a dull blade because it is already installed. That often leads to rough edges and extra force. A fresh blade usually cuts faster and more cleanly, especially in wood and laminate.

Credit: reddit.com
Small mistakes that create big problems
- Using a blade that does not match the jigsaw type.
- Failing to lock the clamp fully.
- Skipping the test cut.
- Using a worn blade for precision work.
- Forcing a blade into a dirty clamp.
How to Keep the Blade Clamp in Good Shape
Changing the blade is easier when the clamp stays clean and healthy. Sawdust, resin, and metal dust can build up around the blade holder over time. That buildup makes the release harder to use and can stop the blade from seating correctly.
After a few blade changes, brush out the clamp area with a small dry brush. You can also use compressed air carefully, but do not blow dust deeper into the tool. If the area is sticky, clean it according to the manufacturer’s instructions. Never use oil unless the manual says it is safe. Too much lubricant can attract more dust.
Another useful habit is to inspect the clamp for wear. If the blade keeps slipping even when you install it correctly, the clamp may be damaged. At that point, continuing to use the tool can be unsafe. A worn clamp should be repaired or replaced.
Two beginner mistakes many people miss
First, they treat all jigsaw blades as universal. They are not. Even if two blades look similar, the shank type, length, and thickness can differ in a way that changes performance.
Second, they think blade change is only about safety. It is also about accuracy. A properly installed blade cuts straighter, reduces tear-out, and gives you better control on curves and detail work.
When to Replace the Blade Instead of Reusing It
Not every blade needs to be thrown away after one cut, but there are times when replacement is the smart choice. If the teeth look dull, chipped, or bent, the blade will struggle. You may also notice burning, slow cutting, or rough edges. Those are signs the blade is no longer doing its job well.
Metal-cutting blades often wear out faster than wood blades, especially if they are used on hard or thick material. If you force a dull blade, you can strain the tool and make the cut less accurate. Replacing a worn blade early usually saves more time than trying to finish a job with a bad one.
It is also wise to change blades when switching between different materials. A blade that was used on metal may not give a clean result on wood. Keeping separate blades for different tasks is a simple way to improve your work.
If you want to learn more about jigsaw safety and tool handling from a trusted source, the Health and Safety Executive provides useful general guidance on safe work practices.
Simple Routine for Faster Blade Changes
Once you have done this a few times, you can build a simple routine. That makes the process faster and safer. You do not need fancy steps. You just need a habit you can follow every time.
- Disconnect the power source.
- Open the blade clamp.
- Remove the old blade carefully.
- Check and clean the clamp area if needed.
- Insert the correct new blade.
- Lock the blade firmly in place.
- Pull gently to confirm it is secure.
- Run a quick test before real cutting.
This simple flow works well because it prevents skipped steps. It also helps you notice problems early, before they affect your project. After a while, the process becomes natural.
Credit: startwoodworkingnow.com
Final Thoughts
Learning how to change a jigsaw blade is one of the easiest ways to improve your tool use. It does not take long, but it makes a real difference in safety and cut quality. Once you understand your clamp system, use the right blade, and check the lock properly, the job becomes very simple.
Take your time the first few times you do it. A careful setup is always better than a rushed one. With a little practice, you will be able to swap blades quickly, work more confidently, and get cleaner results on every project.
FAQs
1. How do I know if my jigsaw uses a T-shank or U-shank blade?
Check your jigsaw manual first. If you do not have it, look at the blade end and the clamp. Most newer jigsaws use T-shank blades, while older models may use U-shank blades. The wrong shank type will not lock correctly.
2. Can I change a jigsaw blade without tools?
Yes, many modern jigsaws have a tool-free release system. These models let you change the blade by moving a lever or switch. Some older tools still need a hex key or screwdriver.
3. Which way should the jigsaw blade face?
On most jigsaws, the teeth should face forward, in the direction of the cut. This helps the blade cut cleanly and safely. Always check your tool manual if you are unsure.
4. Why does my blade keep slipping out?
This usually means the blade was not fully seated, the clamp is dirty, or the locking system is worn. Remove the blade, clean the clamp area, and reinstall it carefully. If the problem continues, the clamp may need repair.
5. How often should I replace a jigsaw blade?
Replace it when the teeth become dull, bent, or chipped, or when cuts start to look rough. The replacement time depends on the material you cut and how often you use the tool. Metal usually wears blades faster than wood.
