
If your belt sander is slipping, leaving rough marks, or the belt looks worn out, you do not need a repair shop right away. In most cases, the fix is simple: replace the belt. Once you learn how to change a belt sander belt, you can keep working fast and get cleaner results with less effort.
The good news is that this job usually takes only a few minutes. You do not need special skills, but you do need to do it the right way. A belt that is too loose, installed backward, or set off-center can cause bad sanding, extra noise, and even damage to the machine.
In this guide, you will learn the safe, easy method for changing a belt sander belt, plus a few small details many beginners miss. Those small details matter. They help your belt last longer, run straighter, and sand better from the first pass.
What to Know Before You Start
Before you open the sander, take a quick look at the old belt. The wear pattern can tell you something useful. A belt that is smooth in the center and worn at the edges may mean the belt was not tracking correctly. A belt with deep burns or shiny spots may mean you were pressing too hard or sanding the wrong material.
Also check the direction arrow on the belt. Many belts have one. It matters more than people think. If you install a belt backward, the grit may still look fine, but the belt may wear faster and cut less cleanly.
Most belt sanders use a spring-loaded lever or tension release arm. Some also have a tracking knob. If your model has both, the belt change is easy once you understand the order of the steps.
| Part | What it does | Why it matters |
|---|---|---|
| Belt | Does the sanding work | Wrong size or direction can cause slipping or poor sanding |
| Tension lever | Releases and tightens the belt | Lets you remove and install the belt safely |
| Tracking knob | Moves the belt left or right | Keeps the belt centered on the rollers |
| Rollers | Guide the belt | Dirt or damage can affect belt movement |
If you want the official safety basics for power tools, the U.S. Consumer Product Safety Commission has helpful general guidance at cpsc.gov.
1. Unplug the Sander and Check the Belt Size
The first step is simple, but it is the most important. Always unplug the sander before touching the belt. Never trust the switch alone. A tool that starts by mistake can cause a serious cut.
Next, check the belt size printed on the old belt or in the tool manual. Belt sanders are not all the same. The wrong width or length will not fit correctly. Even if it seems close, do not force it. A belt that is slightly off size may keep slipping or may not sit flat on the rollers.
If the old belt is still readable, look for three things:
- Length — the full loop size
- Width — must match the sander
- Grit — choose based on the job
For example, coarse grit like 40 or 60 is good for fast material removal. Medium grit like 80 or 100 works for general sanding. Fine grit like 150 or 180 is better for finishing. Many beginners make the mistake of using a very rough belt for everything. That can remove wood too fast and leave deep scratches that take longer to fix.
Tip for a better belt choice
If you are sanding soft wood, start with a less aggressive belt than you think you need. Soft wood dents quickly. A belt that is too rough can make the surface uneven very fast. This is one of those small details that saves time later.
2. Release the Tension Lever
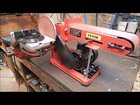
Now find the belt release mechanism. On many sanders, this is a lever near one end of the belt cover. Move it to the open position. This reduces tension on the old belt and makes removal easy.
Do not pull hard on the belt before releasing tension. That can strain the rollers or damage the edge of the belt cover. A good belt change should feel smooth, not forced.
Some models feel stiff the first few times. That is normal. If the lever does not move easily, check whether dust is packed around the mechanism. A quick clean with a dry brush or compressed air can help. If your machine has a dust bag or vacuum port, this is also a good time to empty it. Built-up dust can affect belt movement more than many people expect.
Credit: reddit.com
Common mistake beginners make
Many people stop after releasing the lever and think the belt should fall off by itself. Sometimes it does not. That is normal. The belt may still sit lightly on the rollers, so you may need to guide it off by hand in the next step.
3. Remove the Old Belt and Inspect the Rollers
Slide the old belt off the front or rear roller, depending on your sander design. Keep the belt in one piece while removing it so you can inspect it later if needed. Uneven wear can help you diagnose sanding problems.
Once the belt is off, take a close look at the rollers and inside surfaces. You are checking for dust, pitch, glue, or small bits of debris. Even a tiny bump can make a new belt wander from side to side.
Wipe the rollers with a clean dry cloth. If there is sticky buildup, use a cleaner recommended by the tool maker. Avoid soaking the parts. Too much liquid can hurt the bearings or leave residue that makes the belt slip.
Look for these signs before installing the new belt
- Cracks on the rollers
- Loose or noisy bearings
- Dust packed into the edge guides
- Rubber surfaces that look glazed or worn
This step is easy to skip, but it is one of the biggest reasons a new belt fails early. Beginners often blame the belt when the real issue is dirt or roller wear. A clean roller helps the belt track straighter and last longer.
4. Install the New Belt in the Right Direction
Check the arrow on the new belt before putting it on. The arrow should match the direction of belt travel on the machine. If there is no arrow, look for the seam and grit pattern, or check the manual. Most belts are designed to run in one direction.
Wrap the belt over the rollers with the abrasive side facing out, of course, and make sure it sits squarely on both ends. It should not twist. A twisted belt may appear to fit at first, but it will track badly as soon as the motor starts.
Once the belt is in place, move the tension lever back to the locked position. The belt should feel snug, but not overly tight. Too much tension can wear the belt and put extra load on the motor. Too little tension can cause slipping.
If your model has a tracking knob, center it before turning the sander on. This gives you a better starting point and reduces the chance of the belt running off one side.
Non-obvious detail many users miss
The belt seam matters. Some belts have a seam that is slightly thicker than the rest of the belt. If the seam is badly installed or damaged, you may feel a small bump during use. That is normal in small amounts, but if it feels rough, the belt may be low quality or already defective.
Also, do not touch the abrasive side more than needed. Oil from your fingers can reduce grip in some cases, especially on specialty belts. Hold the belt by the edges if possible.
5. Test the Tracking and Make Final Adjustments
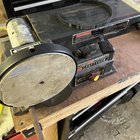
Now plug the sander back in and hold it firmly on a clear surface or above the work area, depending on the tool manual. Turn it on briefly and watch the belt. It should run centered on the rollers, not slide toward one edge.
If the belt moves left or right, stop the tool and adjust the tracking knob a little at a time. Small changes are best. A tiny turn can move the belt a lot. This is where patience pays off. Many beginners turn the knob too far, then spend more time fixing the new problem.
Let the sander run for a short test period after adjustment. If the belt stays centered, you are ready to work. If it continues drifting, turn off the tool, unplug it again, and check whether the belt is installed straight, whether debris is still inside, or whether the belt size is correct.
Credit: reddit.com
Quick test before real sanding
Before starting on your project piece, test on a scrap board. This helps you see how the belt cuts and whether the machine is running smoothly. A belt that tracks well in the air may still feel rough on wood if the grit is wrong for the job.
How to Keep the New Belt Working Longer
Replacing the belt is only part of the job. Good use habits matter too. If you want the new belt to last, avoid pushing the sander too hard. Let the belt do the work. Heavy pressure creates heat, and heat wears belts fast.
Move the tool steadily across the surface. Do not keep it in one place unless you want a visible mark. A belt sander removes material quickly, so even a short pause can leave a low spot.
Try to keep the belt clean. Resin, paint, and glue can clog the grit. A clogged belt cuts poorly and builds heat. If you work with sticky wood, a belt cleaner block can help extend belt life.
Also, store belts flat and dry. Bent or damp belts can curl and track badly when installed. This small storage habit can save you from wasting new belts before you even use them.
When the Problem Is Not the Belt
Sometimes a new belt does not fix the real issue. If the sander still slips, makes strange noise, or tracks badly after replacement, the problem may be deeper.
Here are a few signs:
- The roller surface is worn smooth or damaged
- The tracking knob does not respond
- The motor sounds weak or uneven
- The belt stops under light pressure
If you see these signs, check the manual or talk to a service center. A worn drive roller, bad bearing, or failing motor can look like a belt problem at first. Beginners often waste time buying new belts again and again when the machine itself needs attention.
That is why learning how to change a belt sander belt also means learning how the machine behaves when something is wrong. The belt is the most common fix, but not always the only one.
Useful Reminders for Safer, Cleaner Work
Keep both hands clear when testing the sander. Wear safety glasses and a dust mask, especially when sanding paint, old wood, or MDF. Fine dust can irritate your eyes and lungs.
Check the power cord before you begin. A damaged cord is a serious safety problem. If the cord is cracked or exposed, do not use the tool until it is repaired by a qualified person.
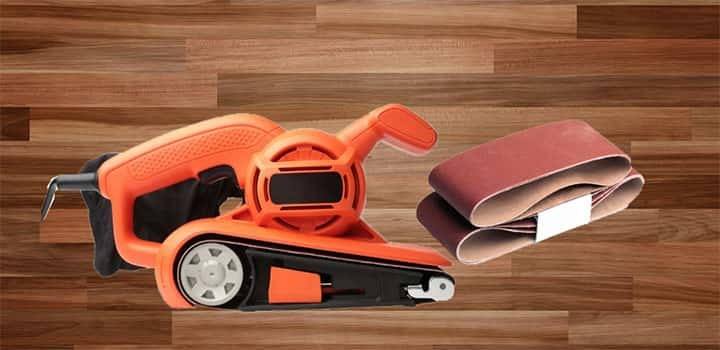
Finally, do not force the belt onto the rollers if the size is wrong. A belt that almost fits is not a usable belt. Forcing it can damage the sander and waste your time.
Credit: toolslord.com
FAQs
1. How often should I change a belt sander belt?
There is no fixed rule. Change it when it becomes dull, glazed, torn, stretched, or unable to cut well. If you use the sander often, you may need new belts more often than a casual user.
2. Can I use any belt that fits the sander?
No. The belt must match the exact size your tool needs. Width and length must both be correct. The grit should also match the job you want to do.
3. Why does my new belt keep slipping off to one side?
This usually means the belt is not installed straight, the rollers are dirty, or the tracking knob needs adjustment. A worn roller can also cause this problem.
4. Do I need to unplug the sander every time I change the belt?
Yes. Always unplug it first. Never rely on the switch alone. This is the safest way to handle belt changes and small adjustments.
5. What is the easiest way to remember how to change a belt sander belt?
Think in five steps: unplug, release, remove, install, and test. If you follow that order, the process stays simple and safe.
