
An orbital sander looks simple, but it does a very smart job. It helps smooth wood, remove old finish, and prepare surfaces for paint or stain. If you have ever asked how does an orbital sander work, the short answer is this: it moves in small circles or orbits very fast, so it sands evenly without leaving deep swirl marks.
This makes it one of the most useful tools for home projects and woodworking. It is easier to control than many other sanders, and it can save a lot of time compared to sanding by hand. That is why beginners and experienced builders both use it so often.
In this guide, you will learn how the tool works inside, why it sands so smoothly, where it is best used, and how to get better results with less effort. You will also see common mistakes, buying tips, and simple ways to make your sanding safer and cleaner.
What Makes an Orbital Sander Different
An orbital sander is designed to remove material in a controlled way. The sanding pad does not spin in one fixed circle like a drill. Instead, it moves in tiny orbits. These small movements reduce visible scratch marks and help the surface stay flatter.
Most orbital sanders have a round pad. Some models are called random orbital sanders, which add a second movement to the orbit. That extra motion changes the sanding path each second. This helps prevent circular marks and gives a smoother finish. For this reason, many people use the term “orbital sander” when they really mean random orbital sander.
The tool is popular because it gives a good balance between speed and finish quality. It is not as aggressive as a belt sander, but it is much faster than hand sanding.
The main parts you should know
Before you can really understand how does an orbital sander work, it helps to know the parts that do the work:
- Motor — powers the movement of the pad.
- Sanding pad — holds the sandpaper and touches the surface.
- Backing plate — supports the pad and helps transfer motion.
- Dust port — lets dust leave the tool and go into a bag or vacuum.
- Grip and trigger — let you guide and control the sander.
These parts work together to create smooth, even abrasion on wood, metal, plastic, or painted surfaces.
How the sanding motion actually works
The core idea is simple. The motor turns the internal drive system, which makes the pad move in a small orbit. The sandpaper then rubs against the surface thousands of times per minute. Each tiny pass removes a very thin layer of material.
Because the movement is not a fixed spin in one place, the sanding scratches overlap in many directions. That makes the marks less visible. It also reduces the chance of digging one deep groove into the wood.
In a random orbital sander, the pad usually makes two motions at once:
- It spins around its center.
- It vibrates or moves in a small orbit.
This dual action is the reason the finish looks more natural and less patterned. The sanding marks are fine and mixed, so the eye does not notice them as easily.
Why this motion gives a cleaner finish
A hand sanding block often creates straight marks in one direction. A belt sander can remove material fast, but it is easy to leave visible lines if you stay in one spot too long. An orbital sander sits between these two.
Its motion spreads the sanding action over a wider pattern. That means:
- Less risk of deep scratches
- Better control on corners and flat panels
- More even results on large surfaces
- Less chance of sanding one area too much
This is one of the main reasons people choose it for furniture, cabinets, doors, and trim work.
How orbital sanders remove material
Sanding is not about cutting like a knife. It is about abrasion. The tiny grains on the sandpaper act like small cutting edges. As the pad moves, those grains scrape away high spots, old finish, rough fibers, or damaged coating.
Different sandpaper grits remove material at different speeds:
- Coarse grit removes material fast and is good for rough wood or old paint.
- Medium grit smooths the surface after heavy sanding.
- Fine grit prepares the surface for finishing.
The orbital motion keeps these grit marks more even. That is useful because a finish looks much better on a surface with consistent scratch depth.
A simple example
Imagine a pine board with rough fibers after cutting. If you sand it with a fine pad by hand, it will take a long time. If you use an orbital sander with the right grit, the high fibers are cut down quickly and the surface becomes smoother in minutes.
Now imagine a table that has an old varnish layer. The orbital sander can help break down that top layer evenly, making it easier to refinish. It is a practical tool because it reduces effort without sacrificing control.
Types of orbital sanders and when they matter
Not all orbital sanders work in exactly the same way. The two most common types are standard orbital sanders and random orbital sanders. Many users prefer random orbital models because they leave a better finish.
| Type | Motion | Best use | Main advantage |
|---|---|---|---|
| Standard orbital sander | Small orbital pattern | Light sanding and finishing | Simple, smooth action |
| Random orbital sander | Orbit plus random spin | General woodworking, paint prep, finish sanding | Fewer visible swirl marks |
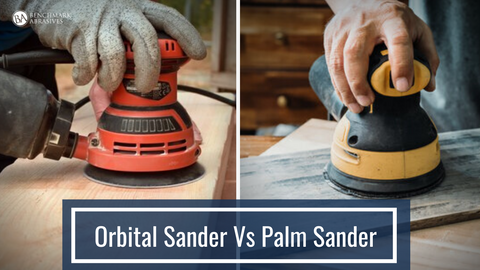
There are also palm-style models and larger dual-action versions. The right tool depends on the job, the surface size, and how fine you want the finish to be.

Credit: benchmarkabrasives.com
What beginners often miss
Many new users think all orbital sanders are equal. They are not. A random orbital sander is often the safer choice for most tasks because it is more forgiving. If you are learning, that extra randomness can help hide small mistakes.
Another detail beginners miss is dust collection. A good dust system does more than keep the area clean. It also helps the sandpaper cut better. When dust builds up on the pad, the sanding action becomes weaker and less even.
Best uses for an orbital sander
An orbital sander is useful in many projects, especially when you want a smooth surface without a lot of aggressive cutting. It works well on:
- Wood furniture
- Cabinet doors
- Tabletops
- Doors and trim
- Drywall patch areas
- Paint preparation
- Light rust removal on metal
- Plastic or composite surfaces, if the grit is chosen carefully
It is especially helpful before staining or painting. A properly sanded surface absorbs finish more evenly and looks more professional.
Jobs it handles very well
For sanding between coats of finish, this tool is excellent. A light pass with fine grit can knock down dust nibs and make the next coat smoother.
It is also good for restoring old furniture. You can remove a tired top layer without making the piece look damaged. The tool gives enough power to work quickly, but not so much that you lose control easily.
If you want a broader overview of safe sanding and surface prep, the Occupational Safety and Health Administration offers useful safety information for workshop work and dust control.
Benefits that make the tool so popular
The biggest benefit is balance. An orbital sander is powerful enough to save time, but gentle enough to reduce damage. That balance makes it useful for both beginners and skilled makers.
1. Faster than sanding by hand
Hand sanding can work well for small touch-ups. But for a full tabletop or cabinet door, it takes a lot of time. An orbital sander handles the same area much faster and with less physical effort.
2. Easier to control than more aggressive sanders
A belt sander removes material very quickly. That sounds good until you make a mistake and cut too deep. An orbital sander is easier to guide, so it is better for detail work and finish prep.
3. Better finish quality
The random motion helps hide scratches. That means the final surface usually looks cleaner. This is important when the wood will be stained or sealed, because flaws become more visible after finishing.
4. Less tiring to use
Since the machine does much of the work, your hands and arms do not have to push as hard. This can make a big difference during long projects.
5. Good dust control options
Many models connect to a dust bag or vacuum. That keeps the work area cleaner and can improve sanding performance. It also makes the job more pleasant and safer.
How to use an orbital sander the right way
Even a good tool can give poor results if used badly. The right technique matters a lot. A smooth finish comes from light pressure, correct grit, and steady movement.
- Choose the right grit for the job.
- Attach the sandpaper firmly to the pad.
- Place the sander on the surface before turning it on.
- Move it slowly and evenly across the wood.
- Keep the tool flat so the pad makes full contact.
- Do not press down too hard.
- Overlap each pass slightly for even sanding.
- Check your progress often and stop when the surface looks right.
Light pressure is one of the most important habits. Many beginners think more force means faster sanding. In reality, too much pressure can slow the motor, wear the paper faster, and create uneven results.
Two beginner mistakes that matter a lot
First, staying in one spot too long can create low areas. The orbital pattern helps, but it cannot fix over-sanding if you keep the tool parked in one place.
Second, skipping grits can leave scratches that show later. If you move from very coarse sandpaper straight to a fine finish, the deeper marks may stay visible after staining.
Simple sanding sequence for wood
A common approach is to start with a grit that matches the condition of the surface, then move step by step to finer grit. For many projects, this may look like 80 grit, then 120 grit, then 180 or 220 grit. The exact order depends on the wood and the final finish you want.
What sandpaper grit should you choose?
The grit number tells you how rough the paper is. Lower numbers are rougher. Higher numbers are smoother. Choosing the right grit matters more than many people think.
- 40 to 60 grit — heavy removal, rough wood, or old finish
- 80 grit — general shaping and smoothing
- 100 to 120 grit — surface prep after rough sanding
- 150 to 180 grit — finer smoothing before finish
- 220 grit and above — fine prep between coats or for delicate finishing
One non-obvious point: using too fine a grit too early can slow your project a lot. The paper may polish the surface instead of leveling it. That can leave small high spots behind. Starting with the right grit saves time and gives better results.
Credit: benchmarkabrasives.com
How dust collection changes the result
Dust collection is not just about cleanliness. It also affects how the sander performs. When dust stays under the pad, the abrasive grains cannot cut as well. The tool may feel weak, and the finish may become uneven.
Good dust removal helps in three ways:
- It keeps the sanding surface active.
- It improves visibility while working.
- It reduces airborne dust in the room.
If your sander has a dust bag, empty it often. If it connects to a vacuum, make sure the hose fits well and does not pull the tool off balance. Small setup details like this can make sanding much easier.
Common mistakes to avoid
Most sanding problems come from a few simple errors. Once you know them, they are easy to avoid.
- Pressing too hard — let the motor and abrasive do the work.
- Using worn sandpaper — dull paper heats up and cuts poorly.
- Skipping grit steps — deep marks may stay under the finish.
- Moving too fast — the surface may stay uneven.
- Tilting the sander — this can round over edges too much.
- Ignoring dust buildup — this reduces cutting power.
Another useful tip: always check your work under good light. Scratches and uneven areas are much easier to see before finishing than after.
Safety and care tips
An orbital sander is safer than many power tools, but it still deserves respect. The pad moves quickly, and the dust can irritate your lungs and eyes.
- Wear safety glasses.
- Use a dust mask when sanding for long periods.
- Keep loose clothing away from the moving parts.
- Unplug the tool before changing sandpaper.
- Let the pad stop fully before setting the tool down.
For care, clean the pad regularly and replace worn paper often. A clean sanding surface lasts longer and works better. If the hook-and-loop backing is damaged, the paper may not grip well, which can lead to slipping during use.
Choosing the right orbital sander
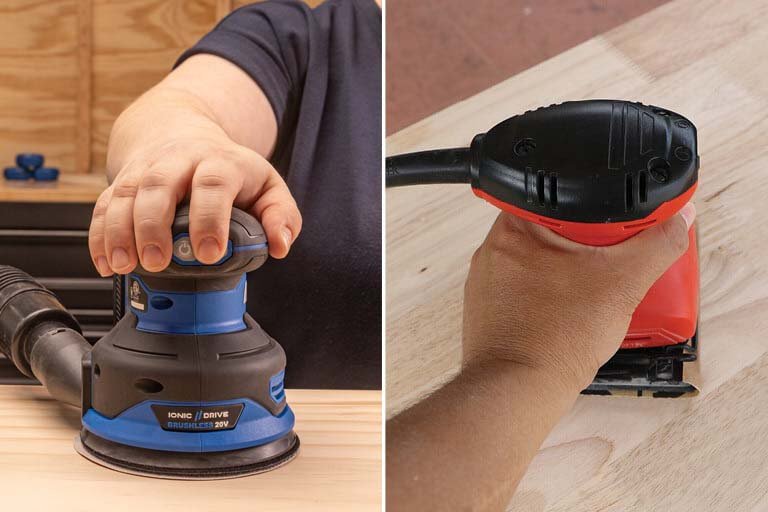
If you plan to buy one, focus on comfort, control, and dust handling more than on raw speed. A strong motor is helpful, but a tool that feels awkward will be hard to use well.
Pay attention to these points:
- Pad size — common sizes are good for most home projects.
- Speed control — useful when working on different materials.
- Grip comfort — matters a lot during long sessions.
- Dust collection — important for cleaner work and better cutting.
- Weight — a lighter tool is often easier for beginners.
A second non-obvious insight: speed control is often more useful than high power for home users. Many people never need the fastest setting. Being able to slow the pad on delicate wood or speed it up for rough sanding gives more control and better results.
Credit: learn.kregtool.com
So, how does an orbital sander work in simple words?
It works by moving a sandpaper pad in tiny, fast orbits while the abrasive grains scrape away the top layer of material. In random orbital models, the pad also spins in a changing pattern, which helps reduce swirl marks and creates a smoother finish.
That is why the tool is so effective. It gives you speed, control, and a clean result in one machine. Whether you are refinishing furniture, smoothing wood before stain, or removing old paint, it can make the job easier and better.
Once you understand the motion, grit choice, and pressure needed, the sander becomes much easier to use. The tool does not need force. It needs patience, the right sandpaper, and steady movement.
FAQs
1. How does an orbital sander work compared to a belt sander?
An orbital sander uses small circular or random motions to smooth a surface. A belt sander uses a moving belt that removes material much faster. The orbital sander gives a finer finish and is easier to control.
2. Can an orbital sander remove paint?
Yes, it can remove paint, especially when you use a coarse grit. It works best on flat surfaces. For thick paint or rough stripping, you may need more time or a stronger tool first.
3. What grit should I use with an orbital sander?
It depends on the task. Use coarse grit for heavy removal, medium grit for smoothing, and fine grit for finish prep. Many wood projects move through 80, 120, and 180 or 220 grit.
4. Why does my orbital sander leave swirl marks?
Swirl marks can happen if the pad is dirty, the paper is worn, or you press too hard. They can also appear if you stay in one area too long. Clean paper and light, even movement usually help.
5. Is an orbital sander good for beginners?
Yes, it is one of the best power tools for beginners. It is easy to control, useful for many jobs, and less likely to damage the surface than more aggressive sanders.
