
Box joints are one of the cleanest ways to join wood. They look neat, strong, and balanced. They also tell people something important: the maker cared about detail. If you want that same look in your own work, learning how to make box joints with a router is a smart skill to build.
A router can cut box joints quickly and repeatably once your setup is correct. The key is not speed. The key is control. A small setup mistake can throw off the whole joint. But when your jig is right, the results can be very accurate, even in a small home shop.
This guide walks you through the full process in clear steps. You will learn how box joints work, what tools you need, how to build or set up a jig, how to cut the fingers, and how to fix common problems. By the end, you will have a simple system you can use again and again.
What makes box joints useful in woodworking
Box joints, also called finger joints, are a type of interlocking corner joint. The “fingers” on one board fit into the spaces on the other board. When glued, the joint becomes strong and stable. It also gives a bold, handmade look.
They are often used for small boxes, drawers, trays, organizers, and shop projects. Many woodworkers prefer them because they are easier to cut than dovetails, but still look much more refined than a plain butt joint.
One reason box joints work so well is that they have a lot of glue area. That extra surface helps the joint hold firmly. Another reason is that the joint keeps the corners square during glue-up if the cuts are accurate.
There is also a practical advantage that beginners often miss: box joints are forgiving in some ways. If your spacing is even and your router cuts are clean, the joint can still look good even if your finish work is simple. The shape itself does much of the visual work.
Tools and materials you need
Before you start cutting, gather everything first. A good setup saves time and reduces mistakes.
- Router — a fixed-base router works best for this job.
- Straight router bit — choose a bit that matches the finger width you want.
- Router table or router jig — both can work, but a box joint jig gives better control for most people.
- Fence — needed to guide the workpiece and keep cuts square.
- Clamps — useful for securing the jig and test pieces.
- Hardwood or softwood boards — choose straight, flat stock.
- Combination square or ruler — for layout and checking setup.
- Scrap wood — essential for test cuts.
- Wood glue — for final assembly.
- Safety glasses and hearing protection — always use both.
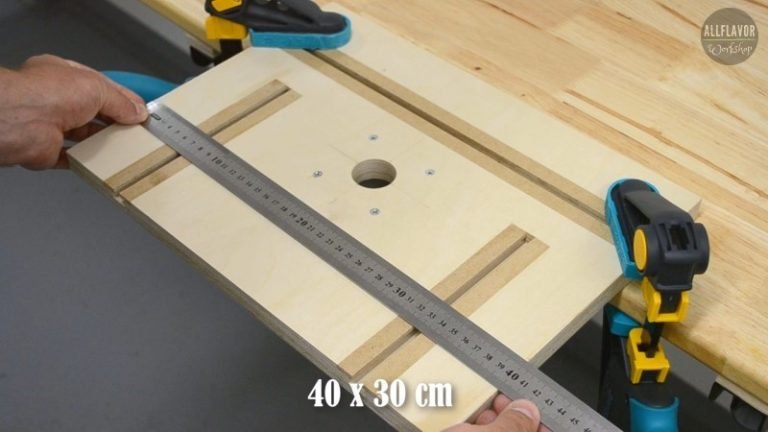
If you are building a box joint jig from scratch, you may also need plywood, a sled base, a stop block, and a guide pin or indexing key. These parts help the board move the exact same distance after each cut.
Choose the right router bit and finger size
The bit size matters more than many beginners realize. The width of the bit determines the width of the fingers. A 1/4-inch bit gives small, delicate joints. A 1/2-inch bit gives larger, stronger-looking joints. Both can work well, depending on the project.
For small decorative boxes, many woodworkers choose a 1/4-inch or 3/8-inch bit. For larger boxes or drawers, a 1/2-inch bit often looks better and cuts faster. The important thing is to match the scale of the joint to the project.
Use a sharp carbide bit. A dull bit burns the wood and leaves rough edges. If you are working with hardwood, sharpness matters even more. Tear-out around the fingers can ruin a clean joint and make glue-up harder.
Non-obvious insight: the bit width does not only affect appearance. It also changes how much risk you have during cutting. Wider fingers are usually easier to align and glue, while very narrow fingers demand a more accurate jig and steadier technique.
Set up an accurate box joint jig
The jig is the heart of the process. It is what makes the cuts repeatable. If the jig is off, every cut will be off in the same way, and the joint will not fit.
You can buy a box joint jig or build one. Either way, the idea is the same: after each cut, the board moves one exact finger width. That movement is what creates the interlocking pattern.
A simple jig layout
A basic jig usually includes a flat base, a fence, and an indexing pin or key. The pin marks each new cut position. When you slide the board over one step at a time, the bit removes the next slot.
To set it up, make sure the fence is square to the router bit. Even a small angle error can make the fingers drift. Check the fence with a square, then lock it down tightly.
Next, test the distance from the indexing pin to the edge of the bit. That distance must match the bit width very closely. This is the critical part. If it is wrong, the fingers will not line up.
Non-obvious insight: many people focus only on the pin-to-bit distance, but the height of the workpiece on the jig also matters. If your stock sits unevenly or rocks during cutting, the fingers can end up slightly different in depth. Flat support is just as important as spacing.
Check the setup with scrap wood
Never use your final boards first. Make test cuts on scrap of the same thickness. Cut one joint, fit it together, and inspect the result.
If the joint is too tight, the indexing distance may be too small or the bit may be cutting slightly wide. If the joint is loose, the spacing may be too large. Make small adjustments and test again.
Keep your test pieces labeled. One side should stay the “reference” piece while you adjust the jig. This helps you avoid confusion when changing settings.
Prepare the wood before cutting
Good joinery starts with good stock. The boards should be flat, straight, and cut to final width before you begin. If the edges are warped, the fingers will not meet cleanly at the corners.
Mill all mating pieces to the same thickness if possible. This is especially important when the joint will be seen from the outside. Even a small thickness difference can leave an uneven top or bottom edge after assembly.
Mark the inside faces and top edges of every board. These reference marks help you keep the parts oriented correctly. Box joints depend on consistent positioning, so this step saves trouble later.
If the boards are very dry or very soft, be careful with tear-out at the edges. A backing board or climb-cut-free approach may help keep the corners crisp. A sharp bit also reduces damage.

Credit: reddit.com
How to make box joints with a router step by step
Now you are ready for the main part. This is the process you will repeat for each board.
Set the bit height. Raise or lower the bit so it cuts slightly deeper than the thickness of the mating board. The fingers should be fully formed, but not so deep that they weaken the joint.
Place the first board against the fence. Align the edge exactly where your first cut needs to begin. Hold the board firmly so it does not shift.
Make the first cut. Feed the board into the bit slowly and steadily. Do not rush. Let the router remove the wood cleanly.
Move to the next index position. Slide the board to the next slot using the jig’s pin or key. The movement must be exact and repeatable.
Cut the next slot. Repeat the process across the board, keeping the same pressure and feed speed each time.
Cut the mating board. The second board usually starts in the opposite position so the fingers and gaps interlock properly. Follow your jig’s spacing method carefully.
Dry fit the joint. Before glue, check that the pieces fit together with light hand pressure. You want snug, but not forced.
Fine-tune if needed. If the fit is too tight, make a very small adjustment and test again on scrap. Do not force the final pieces together.
Work slowly on your first few joints. Once you understand the rhythm, the process becomes much easier. Many beginners try to cut too fast and then spend more time fixing mistakes than they saved.
Keep the joint square and even
Square cuts are essential. If the boards lean, the fingers will not line up neatly. A small tilt at the router can create a visible gap at the corner.
Use consistent pressure against the fence and base. Do not twist the board as you feed it. If your hands are shaky, use featherboards or clamps to help hold the piece steady.
Another useful habit is to always reference from the same face and edge. If you flip pieces randomly, the joint pattern may shift. This is one of the most common beginner mistakes.
Also, check your router speed. A bit that spins too fast for the wood can burn the edges. A speed that is too slow can make the cut rough. Follow the router and bit recommendations when possible.
Common mistakes and how to avoid them
Even a simple box joint can go wrong if one small step is off. Knowing the common problems helps you avoid frustration.
| Problem | Likely cause | How to fix it |
|---|---|---|
| Joint is too tight | Indexing gap is too small or bit cuts wide | Adjust the jig slightly and test on scrap again |
| Joint is too loose | Indexing gap is too large | Move the pin or key closer to the bit |
| Fingers do not line up | Wrong starting position or inconsistent orientation | Mark boards clearly and follow the same reference edge |
| Burn marks on wood | Dull bit or slow feed with too much friction | Use a sharper bit and maintain steady motion |
| Chipped corners | Weak support or tear-out at exit points | Use scrap backing and cut with better support |
One mistake that is easy to miss is forgetting to account for bit diameter when setting the jig. If the indexing distance is measured from the wrong point on the bit, every cut will be slightly off. That small error can make a perfect-looking test joint impossible.
Another common issue is changing stock thickness after the jig is set. Even a small thickness change can alter the visible alignment of the corners. Keep the mating boards consistent.
Credit: allflavorworkshop.com
Dry fit before glue-up
Do not skip the dry fit. It tells you whether the joint is ready or needs one more adjustment. Press the parts together by hand. They should fit tightly, but you should not need a mallet unless the fit is intentionally snug for a special reason.
Look at the outside corners. The faces should meet cleanly. Small sanding changes are fine, but if the joint is far off, stop and correct the setup before gluing.
When the fit is right, assemble the parts in the same order you tested them. Spread glue evenly on the fingers and inside the slots. Do not flood the joint. Too much glue can create slippery parts and messy squeeze-out.
Clamp the box carefully. Check that the corners stay square while the glue sets. A square clamp-up now saves a lot of cleanup later.
Finishing the joint for a clean look
After the glue dries, remove any dried squeeze-out. A sharp chisel or light scraping works well. Be careful not to damage the edges of the fingers.
Then sand the corners smooth. Start with moderate grit and move up as needed. Do not over-sand the joint lines. If you round the edges too much, the crisp box-joint pattern will lose its sharp look.
If you plan to stain the piece, test the finish on scrap first. End grain absorbs color faster than face grain, so the fingers may look darker. That contrast can be beautiful, but it should be a choice, not a surprise.
For a deeper explanation of router safety and best practices, you can also review the guidance from the Woodworkers Journal.
Practical tips for better results
Use matching wood species when possible. Mixing very soft and very hard woods can make the joint behave unevenly during cutting and finishing.
Make more test cuts than you think you need. A few extra minutes on scrap can save an expensive project board.
Label the first mating pair and keep them together. If you mix up parts after cutting, the fit may become confusing.
Keep your router bit clean. Resin buildup can change cut quality over time. A clean bit cuts more predictably and leaves smoother walls.
Non-obvious insight: if you are making several boxes, do not assume one setup works forever. Small changes in humidity, bit wear, or stock thickness can affect fit. Recheck your test joint every time you begin a new batch.
Also, take note of how the wood grain runs near the corners. Strong grain direction can reduce chip-out and improve the final look. A little attention to grain can make the joint appear much sharper after finishing.
When a router is the best choice
A router is ideal when you want repeatable box joints with clean edges and a professional look. It works especially well for small to medium projects where a jig can control the spacing accurately.
For very large joints, some woodworkers use a table saw with a dado stack or a dedicated box joint blade. But for many home shops, the router is a safer and more flexible choice. It also gives you control over bit size, which helps you match the joint to the project.
If you already own a router, this is one of the most useful joinery techniques you can learn. The tool is common, the setup is manageable, and the result looks far more advanced than the process really is.

Credit: reddit.com
Conclusion
Learning how to make box joints with a router is one of the best ways to improve your woodworking skills. The process is simple in theory, but accuracy matters at every step. A good jig, a sharp bit, careful layout, and patient test cuts are the keys to success.
Once you get the setup right, box joints become repeatable and reliable. You can use them for boxes, drawers, small storage projects, and many other builds. They give your work strength and a clean handmade style at the same time.
Start with scrap, take your time, and trust the process. After a few practice cuts, the joint will begin to make sense. After a few real projects, it may become one of your favorite woodworking techniques.
FAQs
What is the best router bit size for box joints?
There is no single best size. A 1/4-inch bit works well for small boxes, while a 3/8-inch or 1/2-inch bit is better for larger, stronger-looking joints. Choose the size based on the project scale and the look you want.
Do I need a special jig to make box joints with a router?
Yes, you need some kind of indexing setup. It can be a store-bought box joint jig or a simple homemade jig. The important part is that each cut moves the board by one exact bit width.
Why do my box joints come out too tight?
This usually means the jig spacing is slightly too narrow or the bit is cutting a bit wide. Make a very small adjustment and test again on scrap wood before cutting the final pieces.
Can I make box joints without a router table?
Yes. Many woodworkers use a router-mounted jig or a sled-style setup instead of a router table. The key is stable support, accurate indexing, and steady control during each cut.
What wood is best for box joints?
Hardwoods like maple, cherry, and oak work very well because they cut cleanly and hold up over time. Softwoods can also work, but they may dent more easily and need extra care to avoid tear-out.
