
A dull drill bit wastes time, makes ugly holes, and can even burn your workpiece. The good news is that you do not need a special machine to fix it. With a bench grinder, a steady hand, and a little practice, you can bring old bits back to life in just a few minutes.
If you want to learn how to sharpen drill bits on a bench grinder, the key is not force. It is control. The angle, the pressure, and the cooling all matter. Once you understand the shape you are trying to create, the process becomes much easier than most beginners expect.
This guide will walk you through the full process in simple steps. You will learn how to set up safely, how to hold the bit, how to judge the cutting edge, and how to avoid the common mistakes that ruin many first attempts.
What a Sharp Drill Bit Should Look Like
Before you touch the grinder, it helps to know what “sharp” really means. A drill bit does not need a knife-like edge. It needs two clean cutting lips, equal in length and angle, plus a centered point in the middle.
When the bit is shaped correctly, it cuts evenly. It does not wander across the metal. It makes cleaner holes and creates less heat. A poor grind, on the other hand, can make the drill bit rub instead of cut. That causes smoke, noise, and fast wear.
For a standard twist drill bit, the most common point angle is 118 degrees. Many general-purpose bits use this angle. Some bits, especially those for harder materials, use 135 degrees. If you are not sure, check the bit style or manufacturer guidance. The point is to match the original shape as closely as possible.
| Drill Bit Part | What It Does | What Good Shape Looks Like |
|---|---|---|
| Cutting lips | Do the cutting | Same length, same angle |
| Chisel edge | Centers the bit | Short and centered |
| Flutes | Carry chips out | Clean and not overheated |
| Point angle | Controls cutting action | Even and matched to the bit type |
Tools and Safety Gear You Need
You do not need many tools, but the right setup makes the job easier and safer.
- Bench grinder with a fine or medium wheel
- Drill bits that need sharpening
- Safety glasses or a face shield
- Water container for cooling the bit
- Good lighting so you can see the cutting edge clearly
- Optional magnifier for checking the edge
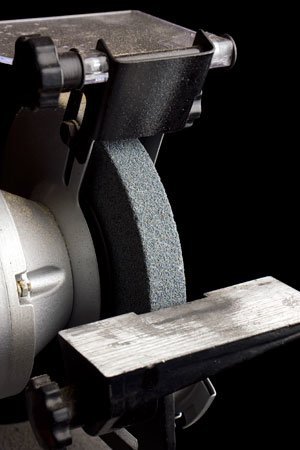
If your grinder has a tool rest, use it. A stable support helps you control the angle. Also make sure the wheel is in good condition. A worn or damaged wheel can make sharpening harder and less accurate.
Important safety note: wear eye protection every time. Tiny metal sparks and abrasive particles can fly off the wheel. If your workspace is crowded or dusty, clean it first. A clear area gives you better control and fewer accidents.
One thing beginners often miss
Many people think sharpening is only about removing metal. That is partly true, but heat control matters just as much. If you overheat the bit, especially smaller ones, the cutting edge can lose hardness. That means the bit may look sharp but wear out quickly. Short grinding passes and frequent cooling are the safer choice.
Set Up the Grinder the Right Way
Before sharpening, check the bench grinder itself. A well-prepared grinder makes the process smoother and gives better results.
- Inspect the wheel. Look for cracks, chips, or uneven wear.
- Adjust the tool rest. Keep it close to the wheel, usually about 1/16 inch or as close as safely possible.
- Turn on the grinder and let it reach full speed.
- Stand in a balanced position. Keep both feet steady so your hands stay controlled.
- Place water nearby. You will use it often to cool the bit.
Do not try to sharpen on the side of the wheel unless your grinder and wheel are designed for that purpose. The face of the wheel is the normal and safer contact area for most bench grinding tasks.
Good light is also important. The cutting lips are small, and you need to compare both sides. If you cannot clearly see the point, your grind will be less accurate.
How to Sharpen Drill Bits on a Bench Grinder, Step by Step
This is the main process. Take your time. It is better to remove too little metal than too much metal. You can always make another light pass.
Credit: simpleweld.com
1. Hold the bit correctly
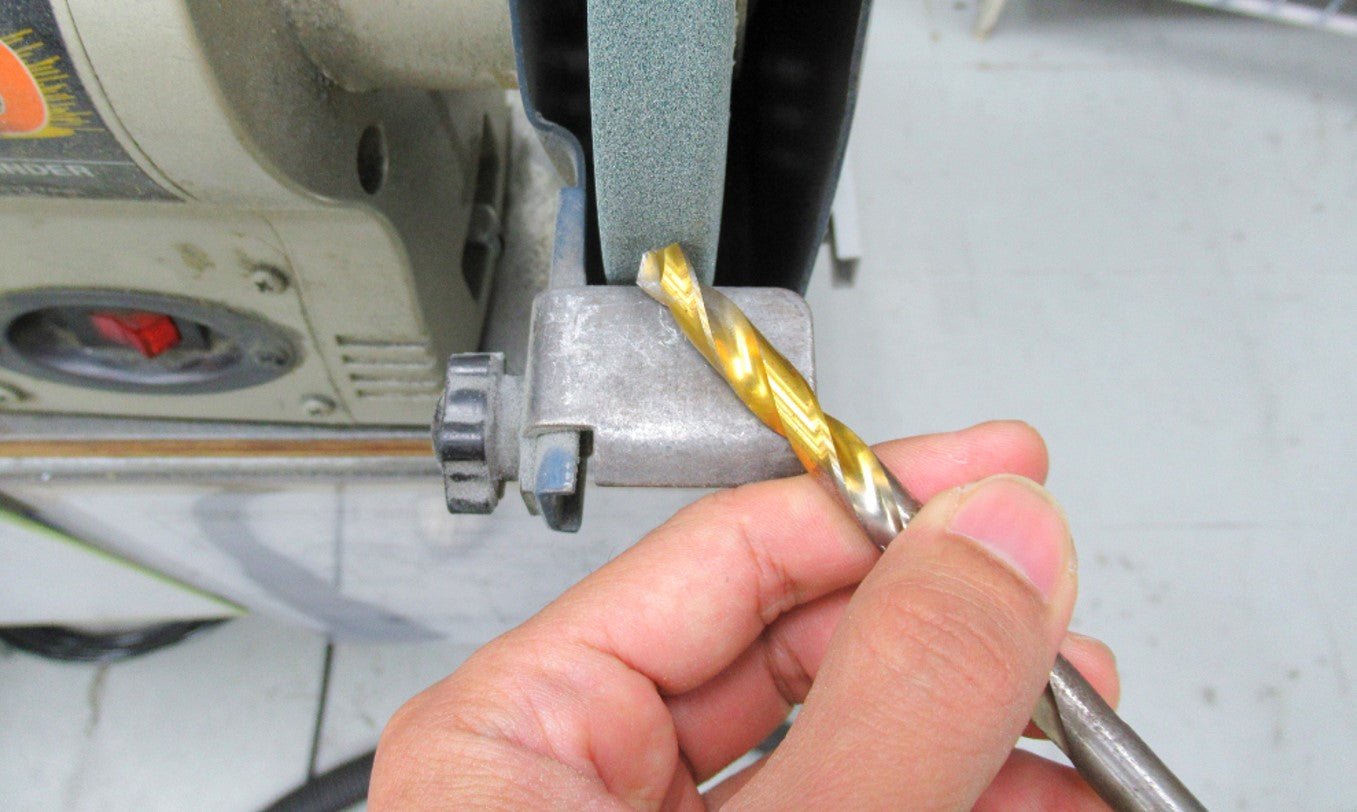
Grip the drill bit firmly with both hands if needed. The point should face the wheel, and the cutting lip should be positioned at the right angle against the grinding surface. Most people find it helpful to use their dominant hand for control near the shank and the other hand closer to the point.
Try to keep the bit steady, but not stiff. A rigid grip can make your movements jerky. Smooth control is better than brute force.
2. Match the original angle
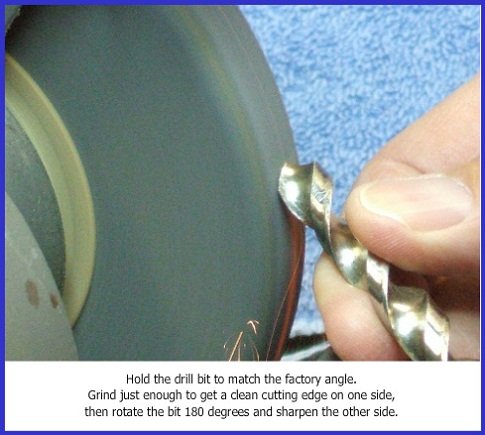
Bring the cutting lip to the wheel at roughly the original angle of the bit. For a standard bit, that is often around 118 degrees total point angle. If you angle it too steeply, the lip will be too blunt. If you angle it too flat, the point may become too sharp and weak.
A useful mental image is this: one cutting lip should lie flat enough to cut, but steep enough to leave a centered point.
3. Touch the wheel lightly
Start with a light touch. Let the wheel do the work. Do not push hard. A light contact removes material in a controlled way and reduces heat buildup.
Move the bit slightly as you grind so the edge gets shaped evenly. One short pass is usually enough for a first try. Then stop and inspect the result.
4. Cool the bit often
After each short pass, dip the bit in water. This helps keep the metal from overheating. It also lets you handle the bit comfortably while checking your work.
If the metal starts turning blue or straw-colored, that is a warning sign. The edge may be getting too hot. Cool it more often and use lighter contact.
5. Grind the second cutting lip
Now rotate the bit and sharpen the second lip. This is where many beginners make mistakes. Both lips must match. If one side is longer than the other, the bit will cut unevenly and may drill a hole that is slightly larger than expected.
Try to make the second side look like the first. Same angle. Same length. Same shape.
6. Check the point in the middle
The chisel edge should sit in the center. If one lip is longer, the point will drift off-center. That can make the drill bit walk across the surface when you start drilling.
Compare the two cutting lips visually. They should look balanced. If one side seems duller or longer, give the other side a tiny correction pass.
7. Test the edge with a visual check
Hold the bit up to the light. A sharp edge usually reflects very little light. A dull edge often shines more because it has a rounded surface. This is not a perfect test, but it helps you see whether the lip is clean.
Also look at the point head-on. It should appear centered and even. If it looks crooked, grind lightly again and rebalance the two sides.
8. Repeat until the shape is right
Most sharpening jobs need more than one pass. That is normal. The goal is not speed. The goal is a clean cutting shape that drills straight and cuts without extra force.
The Easiest Way to Control the Angle
Many people struggle because they try to “eyeball” everything at once. A better method is to think about one cutting lip at a time. First, set the angle. Then keep the bit steady while you grind only enough to refresh that edge. After that, switch sides and repeat.
Here is a simple trick that helps: keep the bit’s shank level while you angle only the point into the wheel. This makes the motion more repeatable. If you twist your whole wrist too much, the lip shape becomes uneven.
Non-obvious insight: the best sharpened bit is not always the one that looks the sharpest. Sometimes a slightly less sharp-looking point cuts better because both lips are balanced. In drilling, symmetry often matters more than extreme sharpness.
How to Know If the Bit Is Sharpened Correctly
Once you finish grinding, inspect the bit before using it. A quick check can save you from bad holes and damaged material.
- The two cutting lips should be close in length.
- The point should be centered.
- The edges should not be blue, black, or burned.
- The flutes should still look clean and not heavily damaged.
- The point should not feel rounded or blunt.
If you want a more detailed technical reference on drill point geometry, the drill bit overview on Wikipedia can help you understand the basic parts and common point styles.
Credit: home-security-systems-answers.com
Simple drill test
After sharpening, try the bit on a scrap piece of similar material. A good bit starts cutting with less pressure. It should not wander much at the start. If it squeals, slips, or produces dust instead of chips, the point may still need work.
Do not test on your final project first. Use scrap material so you can make small corrections without risk.
Common Mistakes People Make
Many first-time sharpeners fail for the same few reasons. Knowing them in advance makes the job much easier.
Grinding too long in one pass
This causes heat buildup and removes too much metal. It also makes it harder to keep both lips equal. Short, repeated passes are better.
Forgetting to cool the bit
Heat can ruin the cutting edge. Even if the bit looks fine, overheating may weaken it. Dip it often.
Making one lip longer than the other
This is one of the biggest problems. Uneven lips cause poor cutting and walking at the start of a hole. Always compare both sides.
Using too much pressure
Pressing hard does not make sharpening faster. It usually makes the edge worse. Let the wheel remove metal gradually.
Ignoring the original bit style
Not all drill bits use the same point angle. If you sharpen every bit the same way, some will perform poorly. Match the shape as closely as possible.
Special Tips for Better Results
If you want your sharpening to look cleaner and work better, these small habits help a lot.
- Practice on old bits first. Do not start with your most important bit.
- Mark the cutting lips with a marker. This helps you see where metal is being removed.
- Use steady body movement, not just your hands. A stable stance gives better control.
- Check both sides in strong light. Small mistakes are easier to catch early.
- Keep the grinder wheel clean. A clogged wheel cuts poorly and can create more heat.
Non-obvious insight: smaller drill bits are much less forgiving than larger ones. On tiny bits, even a slight angle error can change how the bit cuts. For very small bits, move even more gently and use shorter grinding contact.
When a Drill Bit Is Too Far Gone
Not every drill bit is worth saving. If the point is badly chipped, the flutes are heavily damaged, or the bit has already been ground too short many times, sharpening may not help much.
Very small bits can also be difficult to sharpen by hand on a bench grinder because there is less material to hold and less room for error. In some cases, replacing the bit is the smarter choice.
If the bit has been overheated many times, it may have lost its hardness. That kind of damage is hard to fix. A bit that looks polished but fails fast may be beyond simple sharpening.
How Often You Should Sharpen Drill Bits
There is no exact rule, because it depends on the material you drill and how often you use your tools. But you do not have to wait until a bit is completely useless.
Sharpen a bit when you notice:
- More pressure is needed to start drilling
- The bit squeals or burns the workpiece
- Holes are rough or oversized
- The bit makes dust instead of clean chips
- You see visible dullness or chipping at the point
Regular sharpening helps your bits last longer. It also saves money because you replace tools less often. A lightly dulled bit is much easier to restore than one that has been neglected for a long time.
Credit: bobvila.com
Final Thoughts
Learning how to sharpen drill bits on a bench grinder is a useful shop skill that pays off again and again. The process is simple once you understand the shape you are trying to create. Focus on balance, keep the pressure light, cool the bit often, and check both lips carefully.
At first, your sharpened bits may not look perfect. That is normal. With practice, your hand learns the angle and your eyes get better at seeing symmetry. After a while, sharpening a dull drill bit becomes a fast routine instead of a frustrating task.
Remember the main idea: do not rush. A few careful passes are better than one aggressive grind. If you work slowly and stay consistent, your bench grinder can keep your drill bits cutting cleanly for a long time.
FAQs
1. Can I sharpen any drill bit on a bench grinder?
Most standard twist drill bits can be sharpened on a bench grinder. However, some specialty bits, very small bits, and bits with special coatings may be harder to sharpen by hand. If the bit is damaged badly, replacement may be better.
2. What angle should I use when sharpening drill bits?
Many general-purpose drill bits use a 118-degree point angle. Some bits use 135 degrees, especially for harder materials. The safest approach is to match the original shape of the bit as closely as possible.
3. How do I know if the two cutting lips are even?
Look at the point head-on and compare the length and shape of both lips. They should look balanced and meet in the center. If one side is longer, the bit may drill unevenly or wander at the start.
4. Why does my drill bit turn blue while sharpening?
Blue color usually means the bit is getting too hot. This can damage the hardness of the cutting edge. Use lighter pressure, shorter grinding passes, and cool the bit in water more often.
5. Is it better to sharpen bits by hand or with a drill bit sharpening jig?
A jig can help beginners keep a more consistent angle, but many people still sharpen well by hand with practice. If you want more control and repeatability, a jig is helpful. If you want speed and flexibility, hand sharpening works well once you learn the motion.
