
A hedge trimmer works hard. Sap, plant juice, dust, and tiny leaf bits stick to the blades after each use. If you leave that dirt there, the tool starts to cut badly, feels harder to use, and may wear out faster than it should.
The good news is that cleaning is not difficult. With a few simple steps, you can keep the blades sharp-looking, reduce friction, and make the trimmer last longer. This guide shows how to clean hedge trimmer blades the right way, with safe methods, common mistakes to avoid, and simple care tips that really matter.
If you want better cutting results and fewer repair problems, blade cleaning should become part of your regular garden routine.
Why clean blades matter more than most people think
Dirty hedge trimmer blades do more than look bad. Sticky sap and plant residue create drag, so the blades do not move as freely. That means the tool must work harder to cut the same branches. Over time, this can lead to dullness, extra strain on the motor, and rougher cuts on your hedges.
Clean blades also help you get neater results. A clean, smooth blade slices branches instead of tearing them. That is better for the plant and better for the finish of your hedge. It also lowers the chance of rust, which is a big problem if the trimmer is stored in a damp shed or garage.
One thing many beginners miss is that cleaning is not only about the visible dirt. A thin, sticky film can stay on the blade even when it looks “mostly clean.” That film is enough to slow the tool down. Another detail people often overlook is that a dirty blade can make you think the trimmer is dull when the real problem is just buildup.
Signs your hedge trimmer blades need cleaning
- The blades feel sticky when cutting.
- The trimmer leaves ragged or uneven cuts.
- The tool seems to vibrate more than usual.
- Leaf bits and sap are visible on the blade edges.
- You hear the motor working harder on normal branches.
What you need before you start
You do not need fancy tools. In most cases, a small set of basic cleaning items is enough. Keep everything nearby before you begin so the job stays quick and safe.
| Item | Why it helps |
|---|---|
| Soft brush or old toothbrush | Removes loose dirt and plant pieces from blade gaps |
| Clean cloth or microfiber towel | Wipes off sap, cleaner, and moisture |
| Mild soap and water | Useful for light dirt and fresh residue |
| Rubbing alcohol or blade cleaner | Helps break down sticky sap |
| Lubricating oil or blade spray | Protects the blades after cleaning |
| Gloves | Protect your hands from sharp edges |
If your hedge trimmer is electric or battery-powered, make sure the power is off and the battery is removed before you begin. If it is gas-powered, turn it off and let it cool fully first. Never start cleaning while the blades can move.
How to clean hedge trimmer blades step by step
The safest and most effective method is simple. Work slowly, remove loose debris first, then clean the sticky parts, and finish with protection oil. This process works for most home garden trimmers.
1. Disconnect the power source
Unplug the trimmer or remove the battery. For gas models, switch the engine off and wait until all moving parts stop. If the machine was used recently, let it cool before touching the blades. This is one of the most important safety steps.
2. Brush off loose debris
Use a soft brush, dry cloth, or even a wooden stick to remove leaves, twigs, and dirt from the blade area. Focus on the spaces between the teeth. Do not use metal tools that can scratch the blade surface or bend the teeth.
3. Wipe away sap and sticky residue
Sap is the part that usually causes the most trouble. Spray the blades with rubbing alcohol or a proper blade cleaner. Let it sit for a minute or two, then wipe with a cloth. For thick buildup, repeat the process instead of rubbing very hard. Hard rubbing can push grime deeper into the blade joints.
4. Clean the blades more deeply if needed
If the blade is still dirty, mix mild soap with warm water and lightly dampen a cloth. Wipe the blade carefully. Avoid soaking the tool, especially near the motor or electrical parts. Water can help with surface dirt, but sticky sap often needs alcohol or a specialized cleaner to break down properly.
A useful tip many users miss: always wipe along the blade direction, not against it. This helps you clean more safely and reduces the chance of snagging the cloth on the teeth.
5. Dry the blades completely
Use a dry cloth to remove all moisture. Do not store the trimmer while the blades are still damp. Even a little water can lead to rust, especially on the blade edges and screws.
6. Apply lubricating oil
Once the blades are clean and dry, apply a light coat of blade oil or lubricating spray. Move the oil along the cutting edges and the moving parts. This lowers friction and adds a thin barrier against moisture.
Do not use too much oil. Heavy buildup can attract dust and make the blade dirty again faster. A thin, even layer is better than a thick coat.
7. Check for damage while cleaning
Cleaning time is the best time to inspect the blades. Look for dents, chips, loose screws, or bent teeth. If the blades have visible damage, cleaning alone will not fix the cutting problem. You may need sharpening or professional service.
Best cleaning methods for different blade conditions
Not every hedge trimmer blade gets dirty in the same way. Fresh sap, dry dirt, and rust need different approaches. Choosing the right method saves time and protects the blade.
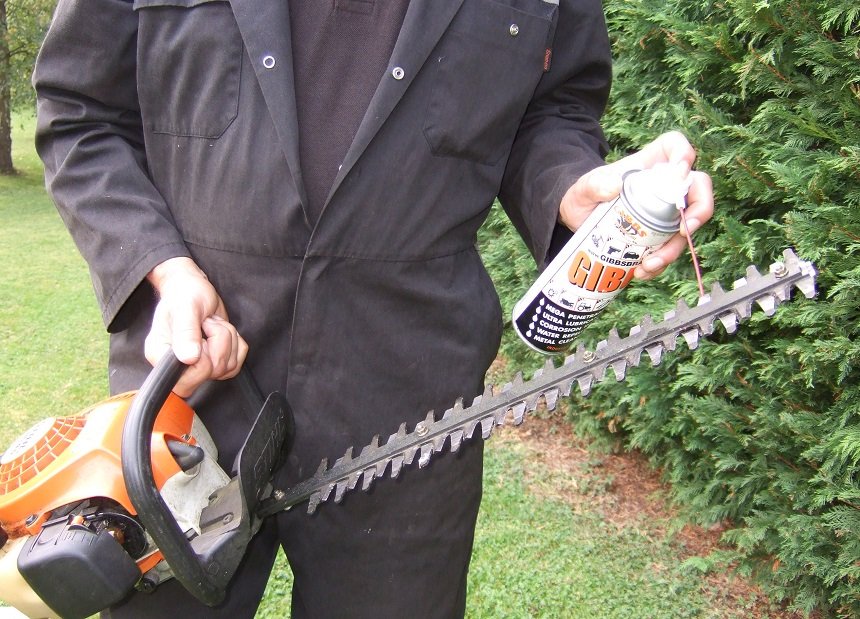
Credit: backyardstyle.com
For light dirt after a quick trim
Use a dry brush and cloth first. Then wipe with a lightly damp cloth and apply a small amount of oil. This is enough for blades used on short, clean hedge jobs.
For sticky sap on evergreen hedges
Evergreen plants often leave heavy sap. Use rubbing alcohol or a sap remover made for garden tools. Let it sit briefly before wiping. Repeat if needed. This works better than scrubbing because it dissolves the sticky layer.
For dried-on grime after storage
If the trimmer sat unused for weeks, the dirt may be hardened. Start with a dry brush, then use cleaner and a cloth. You may need a second round. Patience matters here. Forcing the grime off can damage the blade finish.
For minor rust spots
Rust should be handled early. Light rust can sometimes be removed with a cleaning cloth and a rust-safe tool cleaner. After that, dry the blade fully and oil it. If rust is deep or the cutting edge is damaged, blade replacement may be a better choice than trying to save it.
How often should you clean hedge trimmer blades?
The best answer is simple: clean the blades after every serious use. If you trimmed sticky, wet, or resin-heavy plants, wipe the blades right away. That saves a lot of work later and makes buildup much easier to remove.
For light garden work, a quick wipe after each session is usually enough. A deeper cleaning can be done once in a while, depending on use. If you use the trimmer often, inspect and clean it more regularly.
Here is a practical rule:
- After each use: remove debris and wipe blades clean.
- Every few uses: do a deeper clean with alcohol or blade cleaner.
- Before storage: clean, dry, oil, and inspect the blades.
One non-obvious point: cleaning after use is easier than cleaning later, but it also helps protect the next cut. Fresh sap is soft and easy to remove. Once it hardens, it often takes more cleaner, more time, and more rubbing.
What not to do when cleaning hedge trimmer blades
Some cleaning habits do more harm than good. Avoiding these mistakes will protect your tool and keep the job safer.
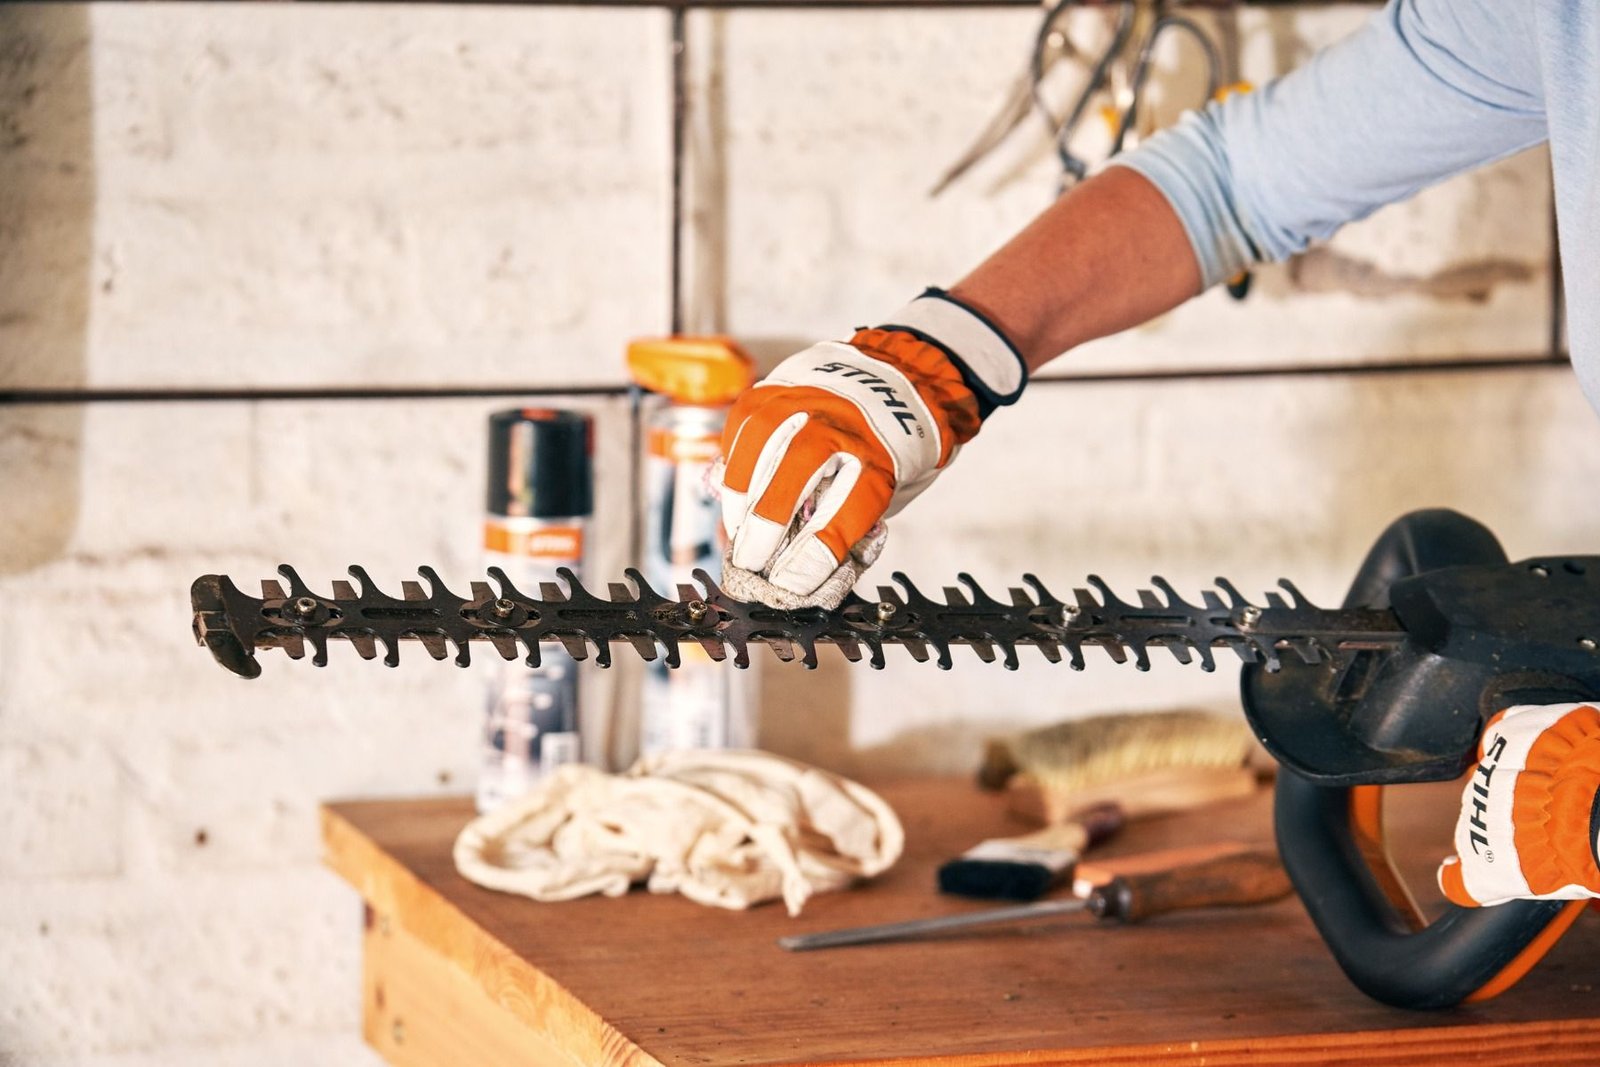
Credit: gustharts.com
Do not use a pressure washer
High-pressure water can force moisture into places it should not go. It can also damage seals, electrical parts, and moving joints.
Do not soak the whole tool
Only the blade area should be cleaned. Too much water can cause corrosion or internal damage, especially on electric models.
Do not use harsh household chemicals
Strong cleaners may damage paint, plastic, seals, or blade coatings. Use products made for tools or simple mild soap and alcohol.
Do not clean while the trimmer is connected
This sounds obvious, but it is a common mistake. Always disconnect power first. A small slip near sharp blades can cause serious injury.
Do not forget to dry the blade
Many people clean the blade but skip the drying step. That is a fast path to rust. Drying is just as important as washing.
Cleaning and sharpening are not the same thing
Some users expect cleaning to solve every cutting problem. It does not. Cleaning removes dirt, sap, and moisture. Sharpening restores the cutting edge. Both matter, but they do different jobs.
If your trimmer still cuts poorly after a full cleaning, the blades may be dull or damaged. In that case, sharpening may be needed. If you are not sure whether the issue is dirt or dullness, clean the blade first. That is the easiest way to check.
Also, cleaning before sharpening is important. A dirty blade can hide small chips and make sharpening less effective. Clean blades give a clearer picture of what the edge really looks like.
How to store hedge trimmer blades after cleaning
Good storage helps your cleaning work last longer. A clean blade can still rust or collect dust if it is stored badly. The goal is to keep it dry, protected, and ready for the next job.
After cleaning and oiling, store the hedge trimmer in a dry place. If possible, use a blade cover. This protects the cutting edge from dust and accidental bumps. Keep it away from wet floors, leaking garden hoses, and damp corners.
If you use the trimmer only in certain seasons, inspect it before putting it away for a long time. A small amount of leftover sap can harden during storage and become much harder to remove later.
Simple habits that extend blade life
Blade cleaning is important, but a few small habits can make a much bigger difference over time. These habits do not take long, but they help protect the tool in real use.
- Clean right after trimming. Fresh residue is easier to remove than dried-on buildup.
- Trim dry hedges when possible. Wet leaves and stems leave more sticky mess.
- Use the right blade oil. A thin protective coat reduces friction and rust.
- Inspect screws and guards. Loose parts can create uneven blade movement.
- Do not force the trimmer through thick branches. That can damage the edge and motor.
Another overlooked detail is blade alignment. If one side looks dirty faster than the other, or if the cut feels uneven, the blades may need more than cleaning. A tool that is out of alignment often wears out faster and gives a poor finish, even if it looks clean.
When to use a professional service
Home cleaning is enough for most hedge trimmers. But sometimes you need help. If the blade is bent, badly rusted, cracked, or still cuts badly after cleaning and sharpening, a service center may be the smarter choice.
Professional service is also helpful if the trimmer has mechanical issues, such as loud grinding, low power, or blade movement that feels rough. Cleaning cannot fix internal wear. In those cases, a proper inspection can save time and prevent bigger damage later.
For reliable safety and maintenance guidance, it is always smart to follow the manufacturer’s manual and check trusted safety advice from official sources like WorkSafe New Zealand.
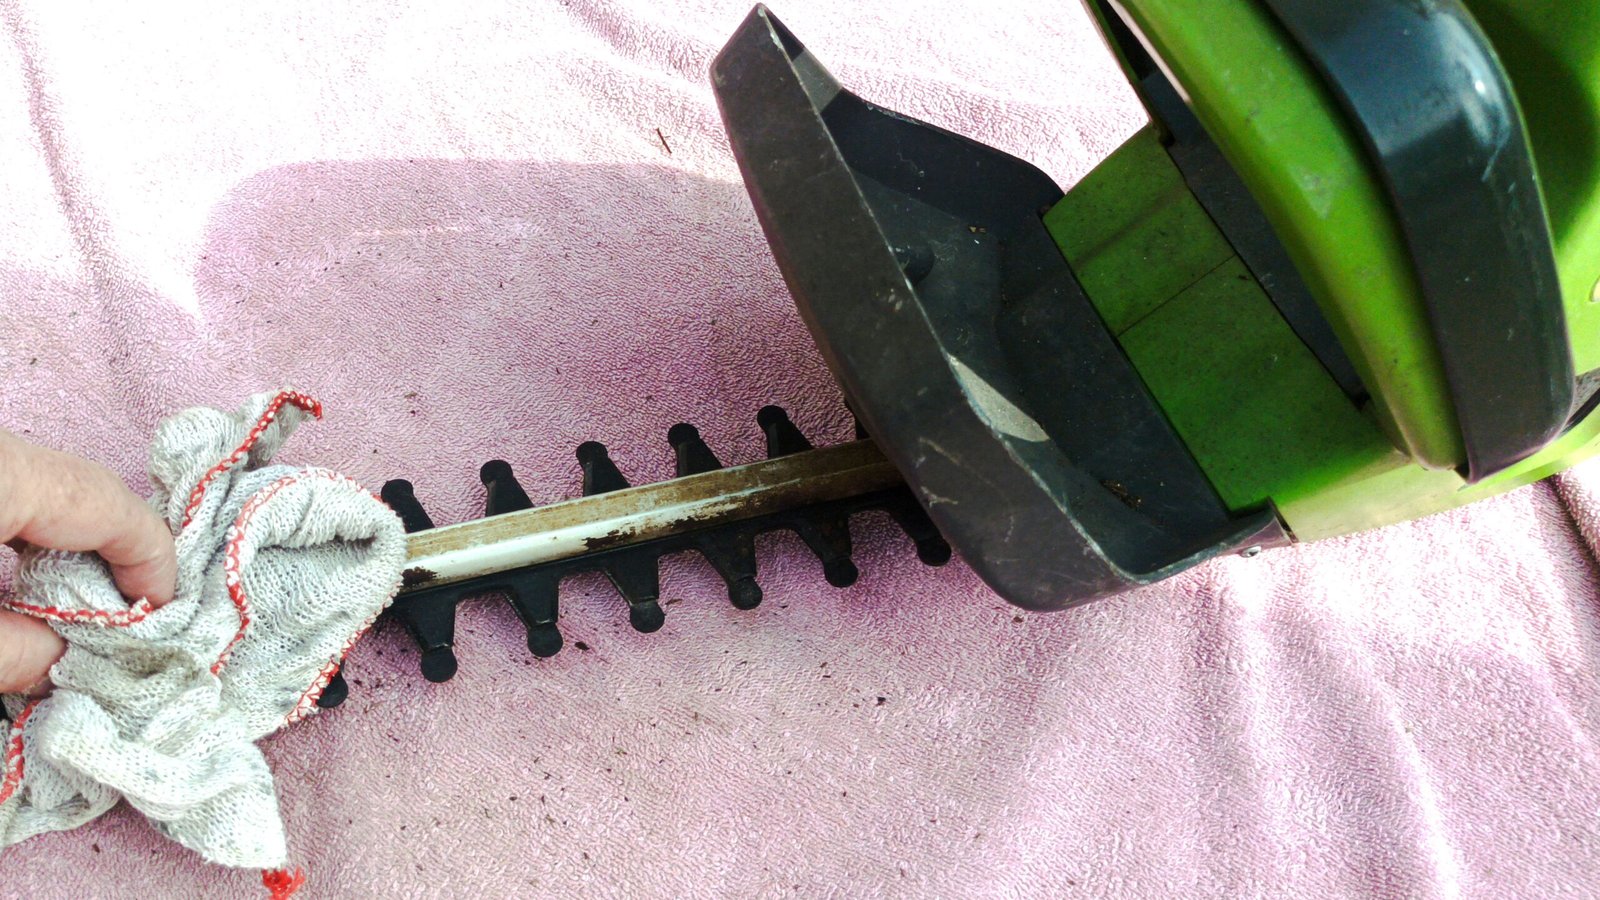
Credit: toptenreviews.com
A simple routine that works for most users
If you want an easy habit to follow, use this one: brush off debris, remove sap, dry fully, oil lightly, and store in a dry place. That routine covers the main risks without wasting time.
This is also the best way to build long-term blade care into normal garden work. You do not need a complicated process. You just need to be consistent. When the blades stay clean, the trimmer cuts better, runs smoother, and lasts longer.
For most homeowners, that means fewer problems, less effort, and better-looking hedges after every trim.
FAQs
1. How to clean hedge trimmer blades after every use?
Disconnect the power, brush off loose debris, wipe away sap with rubbing alcohol or blade cleaner, dry the blades fully, and apply a light coat of oil. This simple routine keeps buildup under control.
2. Can I use water to clean hedge trimmer blades?
Yes, but only in a limited way. A lightly damp cloth with mild soap can help with surface dirt. Do not soak the trimmer or spray water into the motor area, because moisture can cause rust or damage.
3. What removes sticky sap from blades best?
Rubbing alcohol or a garden tool blade cleaner usually works best on sap. Let it sit for a short time, then wipe it off. For thick buildup, repeat the process instead of scrubbing too hard.
4. Do hedge trimmer blades need oil after cleaning?
Yes. A thin coat of lubricating oil helps reduce friction, protect the metal, and slow rust. Use only a small amount, because too much oil can attract dirt.
5. How do I know if my blades need sharpening instead of cleaning?
If the blades are clean but still leave ragged cuts, struggle on normal branches, or feel uneven, they may be dull. Cleaning should come first, because dirt can hide the real cutting problem. If the issue remains after cleaning, sharpening may be needed.
