
If you want wood to look clean, flat, and ready for paint, stain, or finish, learning how to use an orbital sander is one of the most useful skills you can pick up. It is fast, easy to control, and much kinder to surfaces than hand sanding when you use it the right way.
But many beginners make the same mistake: they press too hard, skip the grit steps, or move the tool in a way that leaves swirl marks. The good news is that smooth results are very possible once you understand a few simple rules. You do not need expert-level skill. You just need the right setup, the right motion, and a little patience.
In this guide, you will learn how to choose the right sanding disc, prepare the surface, use the sander safely, and avoid the most common problems. You will also get practical tips that help you work faster without ruining the finish.
What an Orbital Sander Does Best
An orbital sander is made for fine to medium sanding jobs. It moves in small circles while the sanding pad spins slightly. This motion helps smooth wood, remove old finish, and prepare a surface for painting or staining.
It is not the best tool for heavy shaping or removing thick layers quickly. For that, a belt sander is stronger. But for doors, furniture, tabletops, cabinets, shelves, and trim, an orbital sander is often the smarter choice because it leaves a cleaner finish and is easier to control.
One important point many beginners miss is that an orbital sander is not only for removing material. It is also for evening out the surface. That means your goal is not to push hard and grind away wood. Your goal is to let the tool do the work and keep the surface level.
Random orbital or regular orbital?
Most modern home tools are random orbital sanders. They combine circular motion with a random pattern, which reduces visible swirl marks. That makes them better for finish work than older orbital models.
If your tool says random orbital sander, that is usually the one people mean when they ask how to use an orbital sander. The technique is very similar, but random orbital tools are more forgiving and more useful for beginners.
Get the Right Tools and Materials Ready
Before you switch the sander on, prepare everything you need. Good sanding is much easier when the workspace is ready.
- Orbital sander
- Sanding discs in different grits
- Dust mask or respirator
- Safety glasses
- Vacuum or dust collection bag
- Clean cloth
- Painter’s tape if needed
- Work gloves if you prefer extra grip
If you are sanding raw wood, start with a medium grit and move to a finer one. If you are sanding a painted or rough surface, you may need a coarser grit first. Choosing the wrong grit is one of the most common beginner mistakes, and it can waste a lot of time.
For general wood sanding, this simple grit sequence works well:
| Grit | Best Use | Result |
|---|---|---|
| 60–80 | Heavy removal, rough surfaces, old finish | Fast cutting, visible scratch pattern |
| 100–120 | General smoothing | Cleaner surface, good for many projects |
| 150–180 | Pre-finish sanding | Fine, smooth wood ready for stain or paint |
| 220 | Very fine finish sanding | Soft touch, useful before final finish |
For safety guidance on dust and exposure, it is worth reading the official advice from OSHA. Sanding dust may look harmless, but over time it can affect your lungs and eyes if you do not protect yourself.
Prepare the Surface Before Sanding
Great sanding starts before the machine touches the wood. If you skip preparation, you may create scratches, tear the paper, or leave marks that are hard to fix later.
- Clear the surface of nails, screws, staples, glue blobs, and dirt.
- Remove loose material with a scraper or putty knife if old paint or finish is peeling.
- Clean the wood with a dry cloth so dust does not clog the disc.
- Check for raised edges around joints, patches, or repairs.
- Make sure the piece is stable so it does not move while sanding.
This is another detail beginners often miss: a loose workpiece can ruin sanding quality. If the wood shifts, the sander may dig in at the edges. Even a small wobble can cause uneven spots, especially on a tabletop or shelf.
If you are sanding a finished piece of furniture, remove handles or hardware when possible. Tape off areas you do not want to touch, such as glass, metal trim, or delicate edges.
Choose the Right Sanding Disc
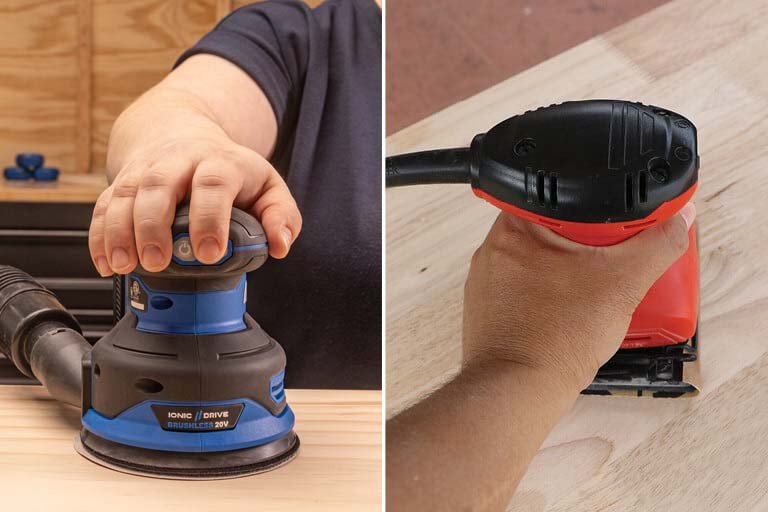
The sanding disc matters more than many people think. A poor disc can load up quickly, cut unevenly, or wear out too soon. A good disc saves time and gives a more even finish.
Credit: learn.kregtool.com
Match the grit to the job
Start coarse only if you need to remove a lot of material. If the surface is already in decent shape, a medium grit is usually enough. Starting too coarse can leave deep scratches that take extra work to remove later.
Here is a simple rule:
- Rough surface → start around 80 grit
- Normal smoothing → start around 100 or 120 grit
- Before finish → finish around 180 or 220 grit
Use the right disc type
Some sanding discs are made for wood. Others work better on paint, metal, or mixed surfaces. For wood projects, a high-quality aluminum oxide disc is a solid choice because it stays sharp and works well on many jobs.
If your sander has dust holes that do not line up with the disc holes, dust removal will suffer. That means the disc clogs faster and sanding gets less effective. So always match the hole pattern if your sander uses one.
How to Use an Orbital Sander the Right Way
Now let’s get into the actual technique. The key idea is simple: light pressure, steady movement, and the right grit. If you can remember those three things, you are already ahead of many beginners.
1. Attach the sanding disc properly
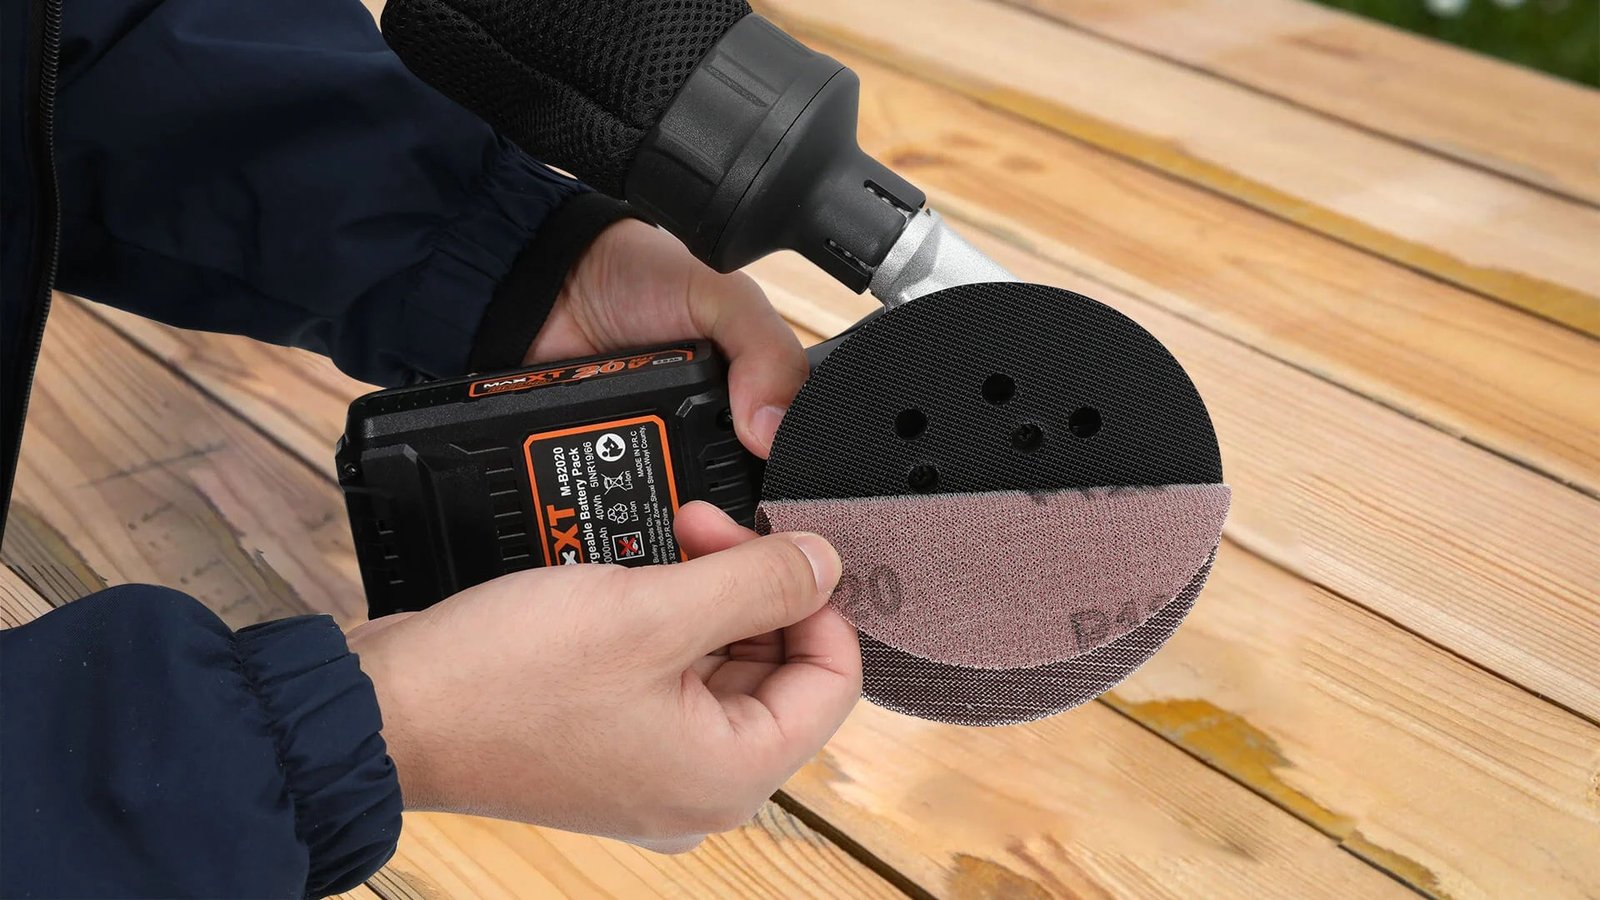
Center the disc on the pad and press it down evenly. If it is off-center, the dust holes may not line up and the pad may wear unevenly.
Make sure the disc is flat against the pad. A lifted edge can peel during use and create uneven sanding.
2. Turn the sander on before touching the wood
Place the sander on the surface first, but keep it steady. Then turn it on before you begin moving it. This helps avoid gouges caused by a sudden start on one spot.
Let the tool reach full speed before moving across the surface.
3. Keep the sander flat
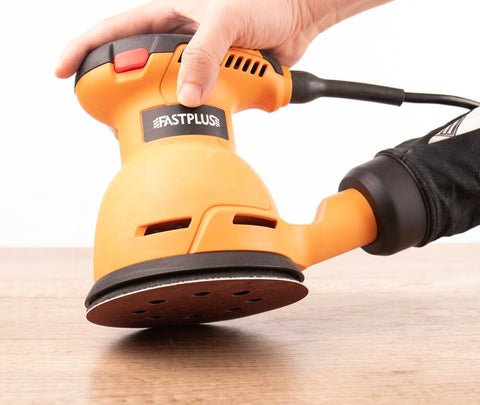
This is one of the most important habits. Hold the sander flat against the wood. If you tilt it, the edge of the disc can dig in and leave marks.
Keep both hands on the tool if possible. That gives you better control and helps maintain even pressure.
4. Move slowly and evenly
Do not rush. Move the sander in overlapping passes, just like mowing a lawn. Each pass should cover part of the previous one so you do not leave stripes or missed areas.
A good speed is steady enough to remove material, but slow enough that you never lose control. If you move too fast, the sanding may be uneven. If you move too slowly, you may create low spots.
5. Use very light pressure
Let the sander cut on its own. Pressing harder does not make it work better. In fact, too much pressure can slow the pad, reduce sanding power, and make the motor work harder.
A useful beginner trick is this: imagine the sander is gliding, not pushing. If you need more removal, use a coarser grit instead of forcing the tool.
6. Sand with the grain when you can
An orbital sander does not require strict grain direction like hand sanding, but moving in a way that follows the wood grain can help reduce visible marks. This is especially useful on final passes.
For a more polished result, make your last pass with a finer grit and a very light touch.
7. Lift only after stopping the tool
Do not lift the sander while the pad is still spinning on the wood. Turn it off, let it slow down, and then lift it away. This avoids swirl marks and accidental scratches.
Work Through the Grits in the Right Order
If you want a professional finish, do not try to get everything done with one grit. The better method is to move from coarse to fine in steps.
A common mistake is jumping from 80 grit straight to 220. That leaves deep scratches from the first grit that may still show through. Each grit should remove the marks from the previous one.
- Start with the lowest grit needed for your surface.
- Sanding evenly until the rough spots are gone.
- Switch to the next grit and cover the full surface again.
- Repeat until the surface feels smooth and the old scratch marks are removed.
Here is a practical example. If you are refinishing a tabletop with an old finish, you might start with 80 grit, move to 120 grit, and finish with 180 grit. If the table is already in good shape, you may only need 120 and 180.
One smart but often ignored rule: do not skip vacuuming between grits. Fine dust from a coarse grit can act like extra grit and leave new scratches when you switch to finer paper.
Avoid the Most Common Mistakes
Even a good tool can give poor results if the technique is wrong. These are the mistakes that cause most problems.
Credit: fastplus.eu
Pressing too hard
Many beginners think more pressure means faster sanding. Usually, it means more heat, more wear, and more swirl marks. Use only enough pressure to guide the tool.
Staying in one place too long
If you stop moving while the sander is running, it can create a flat spot or circular mark. Keep it in motion at all times.
Using one worn disc too long
A dull disc cuts poorly and makes the motor work harder. If the sander feels less effective, check the disc. Replacing it early often gives a better result than forcing a worn pad to continue.
Skipping dust removal
Dust blocks the abrasive surface and hides the real condition of the wood. Clean the piece often so you can see progress and avoid uneven sanding.
Ignoring edges and corners
An orbital sander works best on flat areas. It may not reach tight corners well. For edges, use care and finish those spots by hand if needed. Do not tilt the tool aggressively to “reach” a corner, because that can round it over.
Sand Different Surfaces with a Little Care
Not every job needs the same approach. The surface material changes how you should use the sander.
Raw wood
Raw wood sands smoothly and quickly. Start with a grit that matches the roughness of the board. If the wood is very rough, use 80 or 100 grit first. Then step up to 120 or 180, depending on the finish you want.
Painted wood
Painted surfaces may clog paper faster. Use a grit that removes the coating without cutting too deep into the wood below. If the paint is thick or flaky, begin with a coarser disc only until the loose layer is gone.
Veneer and thin surfaces
Be careful with veneer. It is thin and can sand through fast. Use fine grit, light pressure, and short sanding sessions. Check your work often.
Between coats of finish
When sanding between finish coats, the goal is not removal. The goal is to create a smooth bond for the next coat. Use very fine grit, like 220, and keep pressure extremely light.
Another useful trick: if you are sanding between coats, stop as soon as the surface feels lightly smooth. You do not need to make it look raw again. That is a sign you are sanding too much.
Control Dust for Better Results
Dust control is not just about cleanliness. It also improves sanding quality. When dust is removed well, the disc cuts better and you can see the surface clearly.
- Attach the dust bag if your sander has one.
- Connect a vacuum if the tool supports it.
- Empty the dust bag before it gets too full.
- Wipe the surface between grit changes.
Good dust collection also helps prevent accidental scratches. A dusty workpiece can hide flaws and cause you to keep sanding longer than needed. That can make the surface too thin or uneven.
Finish the Job the Right Way
When the sanding is done, do not rush into paint or stain. Take a few minutes to inspect the surface.
- Feel the surface with your hand for rough patches.
- Look at the wood from the side under good light to spot scratches.
- Vacuum all dust from the board and surrounding area.
- Wipe lightly with a clean cloth if the finish you plan to use allows it.
This inspection step is important because your fingers can often feel flaws before your eyes can see them. If the surface still feels uneven, sand again with the previous grit or the same grit until it feels right.
For stain projects, an even sanding pattern matters a lot. Uneven sanding can make stain absorb at different rates, which creates blotchy color. A smooth, uniform surface gives a much more professional look.
Simple Example: Sanding a Small Tabletop
Here is a practical way to apply the process on a common home project.
- Clean the tabletop and remove any hardware.
- Start with 120 grit if the surface is in fair shape.
- Move the sander in overlapping passes across the full top.
- Vacuum the dust and inspect the surface in bright light.
- Switch to 180 grit for a smoother finish.
- Do a final light pass and clean everything again.
If the tabletop has deep scratches or an old, damaged coating, start with 80 grit only where needed. Then move to finer grits across the whole top. This keeps the surface even and avoids patches that sand differently.
Credit: maxxttools.com
Maintenance That Helps Your Sander Last Longer
A well-kept orbital sander works better and lasts longer. Small habits make a real difference.
- Remove dust after each use.
- Check the pad for wear or damage.
- Replace sanding discs when cutting slows down.
- Keep ventilation openings clear.
- Store the tool in a dry place.
If the hook-and-loop pad gets worn, discs may slip or stop sticking well. When that happens, sanding becomes less even. Replacing the pad at the right time can restore performance.
Conclusion
Learning how to use an orbital sander is really about control, not force. Use the right grit, keep the tool flat, move at a steady pace, and let the sander do the work. When you prepare the surface well and change grits in steps, the result is smoother, cleaner, and much more professional.
The best finish comes from calm technique. Do not rush. Do not press hard. Check your work often. With a little practice, you will be able to sand wood confidently and get results that look far better than hand sanding alone.
FAQs
1. What is the best grit to start with on an orbital sander?
The best starting grit depends on the surface. For rough wood or old finish, start around 80 grit. For normal smoothing, 100 or 120 grit is usually a better choice. Start finer if the surface is already in good shape.
2. Should I press down hard when using an orbital sander?
No. Light pressure works best. Pressing too hard slows the pad, creates heat, and can leave marks. Let the sander do the cutting and guide it gently across the surface.
3. Can I use an orbital sander on painted wood?
Yes, but choose the grit carefully. Use a coarser grit only if you need to remove peeling paint or a thick coating. For light sanding or prep between coats, use a finer grit to avoid damaging the wood.
4. Why does my orbital sander leave swirl marks?
Swirl marks often happen when you press too hard, stay in one area too long, or use a worn disc. They can also appear if dust builds up or if the final sanding step is skipped. Using finer grit and steady motion helps reduce them.
5. Do I need to sand with the wood grain?
Not always, but it helps on final passes. Orbital sanders move in a circular pattern, so exact grain direction is less strict than hand sanding. Still, sanding lightly with the grain at the end can improve the final look.
