
If you want to join thin metal sheets fast and neatly, a spot welder is one of the best tools you can learn. It is common in battery packs, sheet metal repair, and small fabrication jobs. At first, the machine may look simple. But good results depend on timing, pressure, heat, and clean work.
This guide explains how to use a spot welder in a clear, practical way. You will learn what the machine does, how to prepare the metal, how to make a strong weld, and how to avoid the mistakes that beginners make most often. The goal is not just to press a button. The goal is to make solid, repeatable welds with less waste and less frustration.
If you are new to welding, take your time. Spot welding is easy to start, but small details matter a lot. Once you understand those details, the process becomes much safer and much more predictable.
What a spot welder actually does
A spot welder joins two pieces of metal by pressing them together and sending a strong electric current through a small contact area. The heat builds only at the contact point. That heat melts the metal slightly, and pressure helps fuse the pieces together.
This is different from arc welding. You do not create a long bead. You make one small weld at a time. That is why spot welders are popular for thin sheet metal and nickel strips on battery cells. They are fast, clean, and efficient when used correctly.
The key idea is simple: clean metal, correct pressure, and the right amount of current. If one of those is wrong, the weld often fails.
Where spot welding works best
Spot welding is most useful when the metal is thin and the pieces overlap. It works well on:
- Thin steel sheets
- Battery tabs and nickel strips
- Small metal brackets
- Appliance repair jobs
- Light fabrication projects
It is usually not the right choice for thick metal. If the material is too thick, the weld may not penetrate enough to hold well.
Know your machine before you start
Before you try your first weld, learn the parts of the machine. Different models look different, but most spot welders have a few common controls.
| Part | What it does | Why it matters |
|---|---|---|
| Electrodes | Touch the metal and send current through it | Clean electrode tips help create strong welds |
| Timer or weld time control | Sets how long current flows | Too little time gives weak welds; too much can burn through |
| Pressure arms or clamps | Hold the metal together tightly | Good pressure helps current flow where it should |
| Power setting | Controls the strength of the weld | The wrong setting can make welds weak or damaged |
| Foot pedal or trigger | Starts the weld cycle | Helps you control the exact moment of welding |
One thing beginners often miss is that the machine setting is only part of the result. Electrode condition, surface cleanliness, and pressure can matter just as much as power.
If you want a deeper technical reference on resistance welding principles, the American Welding Society is a trusted source.
Prepare the work area first
Spot welding should not start with the machine. It should start with the work area. A small mistake here can cause bad welds, burns, or uneven pressure.
Make the area safe
Work in a dry, stable place with enough light. Keep flammable materials away. Do not weld near liquids, paper, fuel, or dusty piles of debris. If your machine uses mains power, check that the cord and plug are in good condition.
Use basic protection:
- Safety glasses
- Heat-resistant gloves if needed
- Closed-toe shoes
- Short sleeves or fitted sleeves to avoid catching on parts
Do not wear loose clothing, jewelry, or anything that can touch the electrodes by accident.
Keep the metal clean
This step is more important than many beginners expect. Rust, oil, paint, and dirt block current flow. That means the weld heat goes where it should not, and the joint becomes weak.
Use sandpaper, a wire brush, or a clean cloth to remove contamination from the weld area. For battery work, make sure the nickel strip and cell terminal are clean and dry. Even a thin layer of residue can reduce weld quality.
Non-obvious insight: a clean surface is not just about appearance. It also helps the current concentrate in the right spot. That is what creates a strong nugget weld instead of a weak surface mark.
Set up the spot welder correctly
Now you can prepare the machine. Read the manual for your specific model, because controls vary. But the basic setup usually follows the same logic.
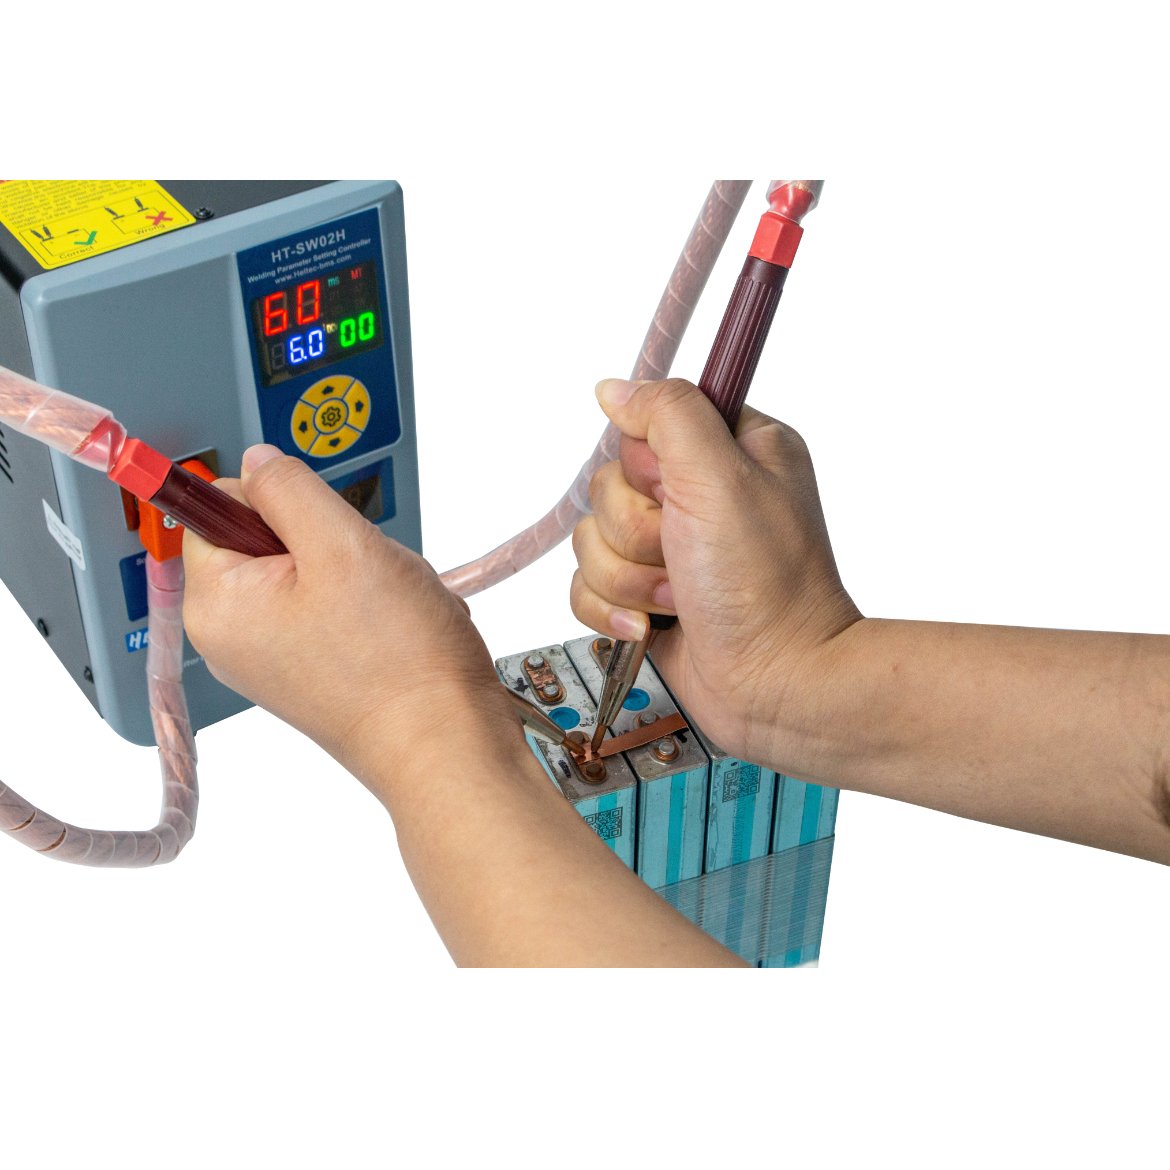
Credit: heltec-energy.com
Check the electrode tips
The electrode tips should be clean, smooth, and correctly shaped. Dirty or damaged tips can leave poor marks and reduce contact quality. If the tips are pitted or burned, dress them if your machine allows it, or replace them.
Good contact is essential. The tips should touch the metal evenly, not at a strange angle.
Choose a starting setting
Start with the lowest recommended setting for your material, then test. It is safer to begin low and increase power than to start too high and damage the workpiece.
The right setting depends on:
- Metal type
- Metal thickness
- Number of layers
- Electrode size
- Machine model
Non-obvious insight: two machines with the same power rating can behave very differently. A lower-cost welder may need different timing than a higher-end model, even when the materials are the same. Always test on scrap first.
Position the pieces with care
Place the metal sheets so they overlap properly. Spot welding works best when the overlap is flat and stable. If the sheets move, the weld may be weak or uneven.
If you are welding battery strips, align the nickel strip exactly where it needs to go. A small shift can make the weld weak or create poor contact with the cell.
How to use a spot welder step by step
Once the work area and machine are ready, you can begin welding. The exact controls may differ, but the process is usually very similar.
Place the metal in position. Make sure the sheets overlap tightly and sit flat. If needed, use clamps or the machine’s built-in pressure system to hold them in place.
Align the electrodes. Put the tips directly on the weld point. The contact should be stable and even. Do not let the tips slide across the metal.
Apply firm pressure. Press the pieces together before the current starts. Good pressure reduces sparking and helps make a stronger weld.
Trigger the weld. Use the foot pedal, hand trigger, or button to start the cycle. Keep the electrodes steady while the current flows.
Hold for the full cycle. Do not lift too early. The machine needs the full weld time to create a proper bond.
Let the joint cool. Remove the electrodes gently and give the metal a moment to cool. A hot weld can look finished before it has fully settled.
Inspect the result. Check for a small, even mark and solid connection. If the pieces separate too easily, the weld may need more power, more pressure, or cleaner surfaces.
At first, practice on scrap metal of the same thickness. That lets you find the right setting without ruining your real workpiece. Small test welds save a lot of time later.
How to tell if the weld is good
A good spot weld is usually neat and consistent. The metal may show a small indentation or discoloration around the weld point. That is normal. What matters most is the strength of the joint.
Try a gentle peel test on scrap pieces. If the weld holds while the metal around it bends or tears, that is a strong sign. If the pieces separate too easily, the weld is too weak.
Do not judge only by looks. Some weak welds look fine on the surface. A real strength check matters more.
Get the settings right without guessing forever
Many beginners keep changing the settings randomly. That usually makes learning slower. A better method is to change one thing at a time.
For example, keep the pressure the same and adjust the power or time in small steps. Record the result after each test. After a few trials, patterns start to appear.
Use this simple thinking:
- Weak weld: Increase power or weld time slightly
- Burned surface: Reduce power or time
- Sparks or spatter: Improve cleaning and pressure
- Poor repeatability: Check electrode tips and hand position
One practical tip: keep a small notebook or phone note with your best settings for each material. This is very helpful if you use the machine often.
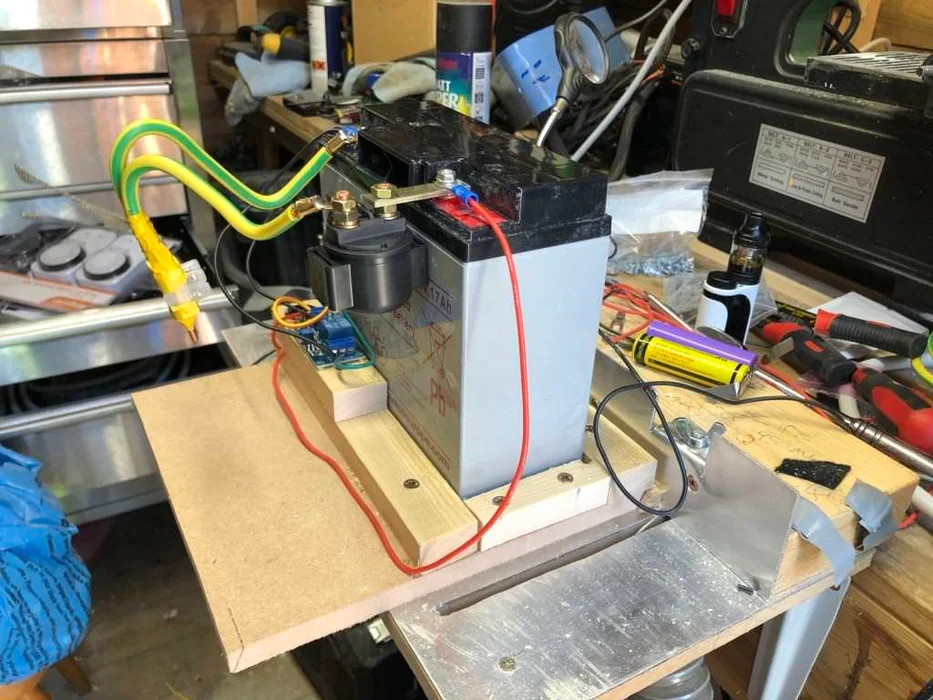
Credit: theselfsufficientliving.com
Common mistakes beginners make
Most spot welding problems come from a few repeated mistakes. If you avoid these early, your progress will be much faster.
Using dirty metal
Oil, rust, and paint prevent proper current flow. The weld may look weak, even if the machine is set correctly.
Not applying enough pressure
If the pieces are loose, the current may not concentrate correctly. That can create poor weld nuggets and excess heat on the surface.
Starting with too much power
Beginners often think more power means a better weld. In reality, too much heat can burn through thin metal, warp parts, or damage batteries.
Holding the electrodes at the wrong angle
Electrodes should make stable, even contact. A bad angle can cause uneven heating and poor weld shape.
Skipping test welds
Testing on scrap is not a waste of time. It is the fastest way to find the right settings without damaging the real job.
Working with different materials
Not all metals behave the same way. That is why a setting that works on one project may fail on another.
Thin steel sheet
This is one of the most common uses. Thin steel welds well when the surface is clean and the pressure is even. Watch for warping if you make too many welds too close together.
Nickel strips on battery cells
This is a very common use in electronics and battery pack work. The main goal is to attach the strip firmly without overheating the cell. Short, controlled welds are usually best.
Be careful here. Battery work has extra safety risks. Follow the cell manufacturer’s instructions and use proper protection for your specific battery type.
Stainless steel
Stainless can be trickier than plain steel. It may need careful testing and more attention to surface condition. Small differences in thickness or finish can change the result a lot.
Aluminum
Many beginner spot welders are not made for aluminum. Aluminum moves heat quickly and often needs special equipment. Do not assume your machine can handle it unless the manufacturer says so.
Safety habits that protect you and your work
Spot welding is simpler than many other welding methods, but safety still matters. Good habits protect both the user and the machine.
- Unplug or switch off the machine before changing tips or moving parts
- Never touch hot metal right after a weld
- Keep hands away from the electrode area when the machine is armed
- Use only the power source recommended by the manufacturer
- Inspect cables, clamps, and connections often
Also pay attention to heat buildup. If you do many welds in a row, the machine may need rest time. Overheating can reduce performance and damage internal parts.
Non-obvious insight: overheating does not always show up as a sudden failure. Sometimes the first sign is less consistent weld strength. If your results start drifting after several welds, let the machine cool and compare again.
How to improve your results over time
Once you can make basic welds, the next step is consistency. That is what separates beginner work from reliable work.
Use the same hand position each time. Keep the electrode tips clean. Use the same pressure. Check the same spot on each joint. Small habits create steady results.
It also helps to inspect your failed welds, not just the good ones. If a weld fails, ask why. Was the metal dirty? Was the pressure uneven? Did the machine run too hot or too cold? Each failure gives useful information.
Over time, you will begin to recognize the sound, feel, and look of a good weld. That is when spot welding becomes much easier.
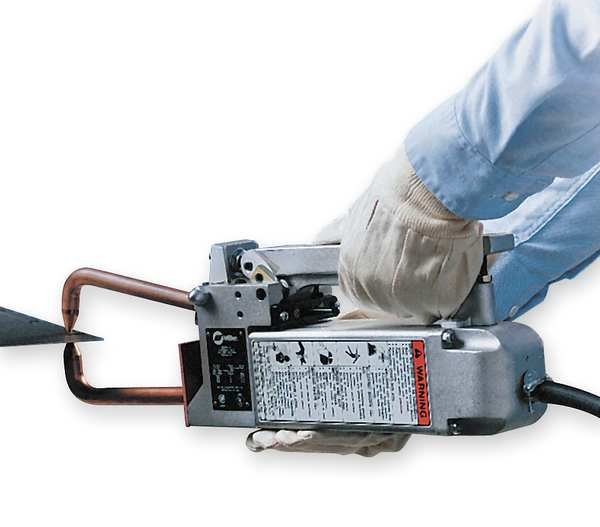
Credit: wcwelding.com
When a spot welder may not be the right tool
A spot welder is excellent for thin overlapping metal, but it is not the answer for every job. If you need deep structural strength on thick metal, another welding method may be better. If the joint is not flat or cannot be overlapped, spot welding may not work well either.
Choose the tool based on the job, not the other way around. That simple rule saves money and avoids poor results.
Final thoughts before your first real weld
Learning how to use a spot welder is mostly about control. You do not need a complicated process. You need clean metal, good pressure, sensible settings, and a careful eye for detail. Once those basics are in place, the machine becomes easy to trust.
Start with test pieces. Keep notes. Make small changes. And do not rush the learning stage. A few careful practice welds are worth far more than one damaged project.
With the right habits, spot welding can become one of the most useful skills in your workshop.
FAQs
1. What thickness of metal can a spot welder join?
It depends on the machine, but spot welders are usually best for thin metal sheets. Many beginner units work well on light steel and nickel strip work. Always check the manufacturer’s guide and test on scrap first.
2. Do I need to clean both sides of the metal?
Yes, if possible. Clean both sides of the weld area for the best current flow and bond strength. At minimum, clean the exact contact area very well.
3. Why do my spot welds look fine but fail easily?
This often happens when the metal is dirty, the pressure is weak, or the weld time is too short. A weld can look normal on the surface but still be weak underneath.
4. Can I use a spot welder on painted metal?
It is not a good idea. Paint blocks current and can ruin the weld quality. Remove the paint from the weld area before you start.
5. How many practice welds should I make before a real project?
There is no fixed number, but you should make enough test welds to feel confident with the settings. For many beginners, that means at least several scrap tests with the same material and thickness.
