
Building your own router table is one of the smartest small workshop projects you can do. It gives your hand router a much bigger role, helps you make cleaner cuts, and saves money compared with buying a ready-made model. If you work with wood often, a good router table quickly becomes one of those tools you use again and again.
The best part is that you do not need advanced woodworking skills to make one. You need careful measuring, basic tools, and a simple plan. When you understand the main parts and how they work together, how to build a router table becomes much less confusing. You can make a solid, safe, and useful table even as a beginner.
This guide will walk you through the full process in clear steps. You will learn what materials to choose, how to build the top and base, how to mount the router, and how to add useful features that make the table easier and safer to use. We will also cover common mistakes, because a router table is only helpful when it is flat, stable, and well planned.
What makes a router table worth building
A router table turns a small handheld tool into a more controlled woodworking station. Instead of moving the router over the wood, you move the wood over a fixed bit. That gives you better control for edge shaping, grooves, slots, and small profiles.
For beginners, the biggest benefit is repeatability. If you need the same cut on many pieces, a router table keeps the height and position more consistent. It also makes some cuts safer because your hands stay farther from the spinning bit. That said, the table must be built with care. A weak top or shaky base will create vibration, and vibration leads to poor cuts.
One thing many beginners miss is this: the router table is not just a flat board with a hole. The top, insert plate, fence, and base all affect performance. If even one part is badly built, the whole setup feels frustrating. That is why a simple, well-made table is better than a fancy one made without planning.
Materials and tools you will need
You do not need expensive parts to make a good table. In fact, a simple build often works better for a beginner than a complex one. The goal is strength, flatness, and easy adjustment.
Basic materials
- One sheet of 3/4-inch plywood or MDF for the top and base parts
- Hardwood strips or plywood strips for edge support
- Router insert plate or thick acrylic plate
- Screws and wood glue
- Optional laminate or hard melamine for a smoother top
- Fence material, usually plywood or hardwood
- Dust port fitting
- Leveling screws or small bolts for the router plate
Useful tools
- Circular saw or table saw
- Drill and drill bits
- Jigsaw or router for opening the insert plate cavity
- Measuring tape and square
- Clamps
- Screwdriver
- Sanding block or sander
If you are buying plywood, choose sheets that are flat and without twist. A router table top needs to stay flat. Poor sheet material can cause the fence and workpiece to rock. That small problem becomes a big problem during routing.
Plan the size before you cut anything
Before you start cutting, decide where the table will live. This matters more than many beginners realize. A router table built for a tight corner should not be the same size as one built for a large workshop wall. If you have little space, a compact table may be the best choice. If you want to route long boards, you need more infeed and outfeed support.
A practical beginner size is about 24 to 36 inches wide and 18 to 24 inches deep. That gives enough room for most small to medium jobs without becoming too heavy or awkward. If you want a larger surface, make sure your base can support it well.
Also think about router access. The router should be easy to remove, adjust, and service. If the design makes bit changes difficult, you will avoid using it. A smart design is not only strong. It is also convenient.
Build a flat, strong top
The top is the heart of the router table. It must be flat, rigid, and smooth. Even a small dip in the surface can change the way the workpiece moves across the bit.
Step 1: Cut the top panel
Cut your top panel to the size you planned. If you are using plywood, one layer may be enough for a basic table, but two layers laminated together make a stronger and flatter top. MDF also works well because it is flat, but it needs protection from moisture and wear.
After cutting, check the panel for bowing or twist. Lay it on a flat floor or workbench. If it rocks, flip it and test again. Choose the side that stays flattest for the working surface.
Step 2: Reinforce the underside
Add support strips under the edges to help prevent sagging. This is one of those beginner mistakes people often skip. A big flat sheet can bend over time, especially around the router opening. Reinforcement keeps the surface stable and helps the fence stay aligned.
Use hardwood or plywood strips and glue them under the edges. Leave space where the router insert will sit. Clamp the strips well while the glue dries.
Step 3: Create the insert opening
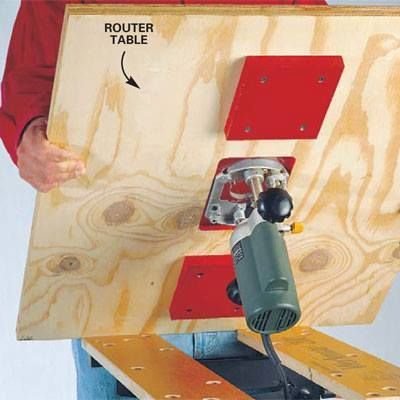
The router insert plate holds the router in the table. Trace the plate shape carefully. Then cut the opening slightly smaller first, and trim it for a snug fit. A tight opening helps the plate sit securely without shifting.
For the cavity, you can use a router with a straight bit and a simple guide, or a jigsaw for rough cutting followed by careful trimming. If the opening is too large, the plate will move, and that movement causes bad cuts. A stable insert is essential.
Set the plate flush with the surface. This is a detail beginners often underestimate. If the plate sits too high or too low, the workpiece can catch on the edge. Use leveling screws or small support blocks to make it even.
Step 4: Smooth and protect the surface
Sand the top until it feels smooth. Then apply a protective surface if you want better sliding. Many woodworkers use laminate or melamine because workpieces move more easily on them. If you keep the raw wood surface, be ready to wax it sometimes so boards slide well.
Build the base for stability
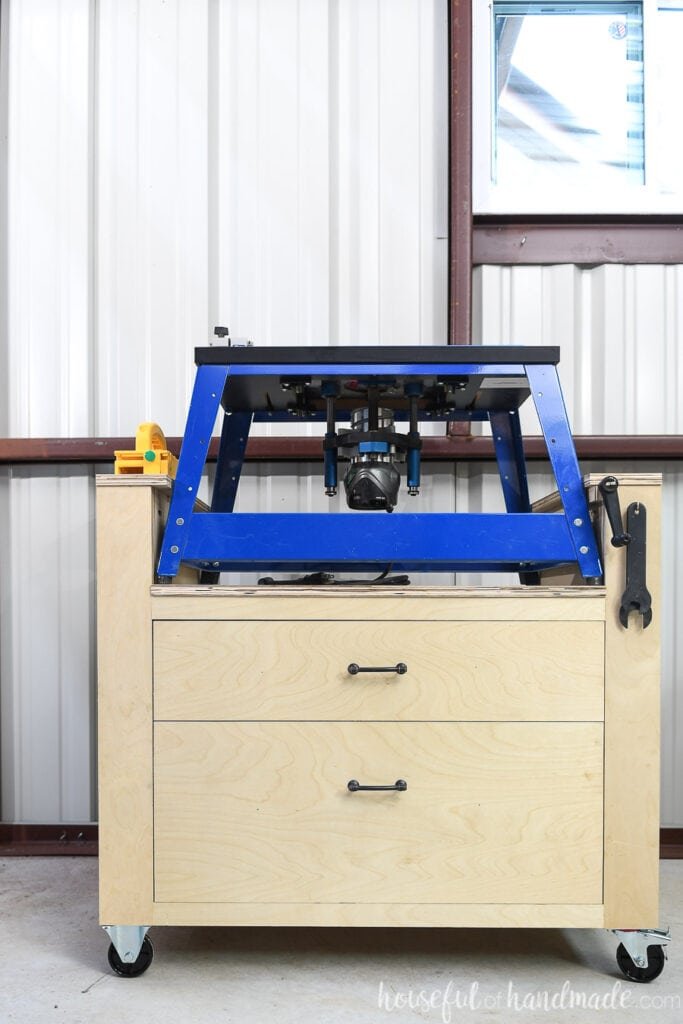
The base must hold the top at a comfortable height and stop the whole table from wobbling. A weak base makes routing harder and less safe. This is especially important if your router is heavy.
Credit: pinterest.com
Step 1: Decide the height
Most router tables are around standard workbench height, often between 34 and 36 inches. If you already have a bench, match the height so the table feels natural to use. If the top is too low, you will bend over too much. If it is too high, you may lose control while feeding workpieces.
Step 2: Build a simple frame
A box-style frame is easy for beginners. Cut four legs and connect them with aprons or stretchers. Add lower braces if needed. Keep the structure square as you work. Use clamps and measure diagonally from corner to corner to check squareness.
If you want a portable design, make the base lighter but still rigid. If the table will stay in one place, a heavier frame is often better because it absorbs vibration.
Step 3: Attach the top securely
Fasten the top to the base with screws from underneath. Do not glue the top permanently unless you are sure you will never need to change it. Screws make future upgrades easier. Leave enough support under the router area so the top does not flex when you push wood across the bit.
A helpful insight here: a router table does not need to be heavy everywhere. It needs to be heavy where it matters. Put strength under the center and around the insert area, where pressure is highest.
Install the router safely
The router mount is one of the most important parts of the build. It should hold the router firmly and allow easy bit height changes.
Choose between fixed and removable mounting
A fixed mount means the router stays installed in the table. This is simple, but it can make hand-held use harder if you remove the same router often. A removable insert plate is better for many beginners because you can lift the whole router out when needed.
If your router has a base that attaches cleanly to an insert plate, that is often the easiest route. Follow the manufacturer’s guidance for mounting if possible. For extra safety and accuracy, you can also consult the router manufacturer’s manual. A useful source is Rockler’s woodworking learning center, which explains router table setup and safety in simple terms.
Make bit changes easier
One common beginner mistake is forgetting about bit access. Some routers are hard to adjust once mounted. Before final installation, test whether you can reach the height adjustment and collet nut. If not, consider a router lift or a better access opening.
A non-obvious but very useful tip: leave enough clearance under the table so you can reach the router switch or use an external switch. Reaching under the table to turn the router on and off can be awkward and unsafe if the layout is poor.
Build a fence that actually works
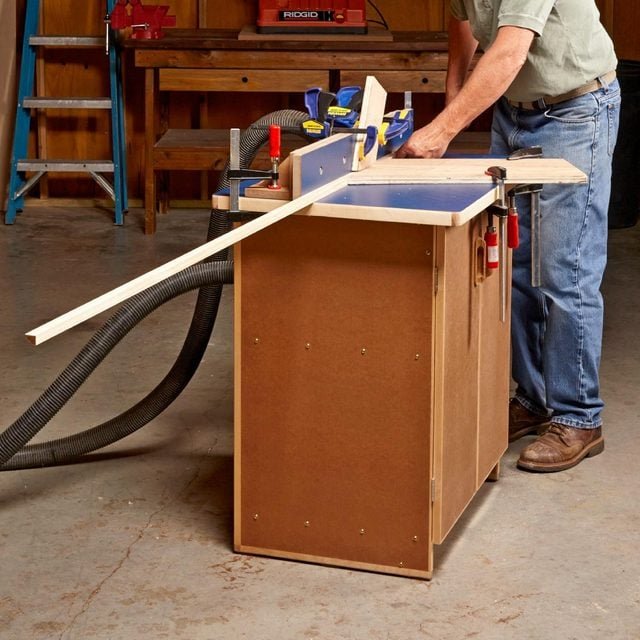
The fence guides the workpiece past the bit. A good fence keeps your cuts straight and helps with dust control. A poor fence causes rough edges and unsafe gaps.
Step 1: Make the fence body
Use plywood or hardwood to make two fence faces joined by a strong body. The fence should sit square to the table and stay straight. Many fences are made in two parts so the opening around the bit can be adjusted as needed.
Step 2: Add an adjustable opening
When routing, the bit needs to come through the fence opening, but the opening should not be wider than necessary. A smaller opening gives better support to the workpiece. You can make a split fence design with movable faces. That allows you to open or close the gap depending on the bit size.
Step 3: Include dust collection
Dust collection makes a huge difference. Routing creates fine chips and dust, especially when cutting hardwood or MDF. Add a dust port to the back of the fence if you can. This keeps your work area cleaner and helps you see the cut line more clearly.
If you route often, dust collection is not a luxury. It protects your lungs and keeps the bit area visible. Better visibility means fewer mistakes.
Check alignment before first use
Before you route any wood, check three things: top flatness, fence alignment, and insert plate flushness. These checks take only a few minutes, but they can save a lot of frustration later.
| What to check | Why it matters | Simple test |
|---|---|---|
| Top flatness | Keeps the workpiece moving evenly | Lay a straightedge across the surface |
| Fence square | Helps make straight, accurate cuts | Use a square against the fence face |
| Insert plate flushness | Prevents snagging | Run your hand across the joint |
| Base stability | Reduces vibration and movement | Push the table gently from different sides |
Another detail many beginners miss is bit height consistency. Once you set the router in the table, mark common bit heights on a scrap piece or use a setup block. This saves time the next time you make the same cut.
Credit: housefulofhandmade.com
Simple upgrades that make the table better
You can stop after the basic build, but a few small upgrades can make the table much easier to use. These upgrades do not need to be expensive.
Add featherboards
Featherboards hold the wood against the fence or table surface. That improves control and helps keep your hands away from the bit. They are especially useful for narrow pieces or repeated cuts.
Use an external power switch
An oversized switch mounted in a convenient place can make the table safer. You do not want to reach under the table every time you need to stop the router. A large paddle switch is easier to hit in an emergency.
Mark common settings
Once you find a fence position or bit height you use often, mark it. This may seem small, but it saves setup time and reduces mistakes. Beginners often waste time trying to “guess” the right position again.
Common mistakes when building a router table
Many first-time builds fail for the same reasons. If you avoid these problems, your table will work much better from the start.
- Making the top too thin. Thin material flexes and makes the table less accurate.
- Ignoring flatness. A warped surface can ruin control and cut quality.
- Cutting the insert opening too large. A sloppy fit leads to movement and vibration.
- Skipping dust collection. Dust makes the area hard to see and harder to breathe in.
- Building the fence too weak. A fence that bends or shifts is not reliable.
- Forgetting router access. If bit changes are difficult, you will avoid using the table.
The biggest mistake is trying to make the table look advanced instead of making it work well. Simpler is usually better. A clean, square, stable build beats a complicated one with weak joints.
How to use your router table for the first time
When the table is finished, start with small test cuts. Use scrap wood before you work on a real project. This lets you check fence position, bit height, and feed direction without risk.
Start with an easy profile
A straight bit or small round-over bit is a good first test. Keep the cut shallow. Feed the wood steadily and do not force it. Let the bit do the work. If the wood burns, you may be moving too slowly or the bit may be dull.
Feed direction matters
Always feed wood in the correct direction against the bit rotation. If you feed the wrong way, the bit can grab the wood and pull it fast. This is dangerous and can ruin the piece. If you are unsure, stop and check before cutting.
Listen to the tool
The sound of the router tells you a lot. A smooth sound usually means the cut is going well. A rough or strained sound may mean the bit is too deep, the feed rate is too fast, or the router is not mounted securely.
Maintenance that keeps the table useful
A router table does not need constant care, but it does need basic maintenance. Wipe the surface clean after use. Remove dust from around the insert plate and fence. Check screws from time to time, especially after several sessions of routing. Vibration can loosen hardware slowly.
Wax the top if wood movement feels rough. Replace worn bits. Keep the fence square and the insert plate flush. These small habits help the table stay accurate for years.
One more beginner tip: store your most used bits near the table, but not loose in a drawer. A small organizer saves setup time and protects the cutting edges.
Credit: familyhandyman.com
Final thoughts before you start cutting
Learning how to build a router table is really about learning how to build a stable, accurate workspace for your router. You do not need a fancy design to get excellent results. You need a flat top, a strong base, a secure insert, and a fence that stays aligned. If those parts are done well, the table will feel solid and easy to use.
Take your time with measurements. Check every fit before final assembly. Build for the way you work, not for how a perfect shop photo looks. A good beginner router table should make woodworking easier, safer, and more enjoyable from the very first project.
FAQs
1. Can I build a router table with basic tools?
Yes. A beginner can build a useful router table with a saw, drill, clamps, square, and basic hand tools. You do not need a full workshop. Careful measuring matters more than expensive tools.
2. What is the best material for a router table top?
Plywood, MDF, and melamine-coated boards are all common choices. Plywood is strong, MDF is flat, and melamine slides smoothly. For most beginners, a reinforced plywood top is a very solid option.
3. Do I need a router lift?
No, not at the start. A router lift is helpful, but a simple mount works fine for a beginner build. If your router is hard to adjust from above the table, you can upgrade later.
4. How big should a beginner router table be?
A practical size is about 24 to 36 inches wide and 18 to 24 inches deep. This gives enough room for most small projects while staying easy to build and move.
5. Is a homemade router table safe to use?
Yes, if it is built well and used correctly. The table must be stable, the router must be mounted securely, and the fence should be aligned. Always use proper feed direction, eye protection, and dust control.
