
If you want a door to close cleanly and look professional, hinge fitting matters more than many beginners think. A hinge that sits too deep can weaken the door. A hinge that sits too high can cause rubbing, gaps, or a door that will not latch correctly. That is why learning how to router door hinges is such a useful skill for woodworkers, carpenters, and DIY homeowners.
A router gives you control, speed, and a neat finish. But it also removes wood fast, so you need a careful method. The good news is that this job is not hard when you follow the right steps. With the right bit, a sharp chisel, and a simple layout process, you can cut hinge mortises that look clean and fit the hinge perfectly.
In this guide, you will learn the full process from marking hinge positions to checking depth and avoiding common mistakes. You will also see practical tips that help the hinge sit flush, swing smoothly, and last longer.
What Makes a Good Hinge Mortise
A hinge mortise is the shallow pocket cut into the door edge and frame so the hinge leaf sits flush. If the mortise is too shallow, the hinge sticks out and the door may bind. If it is too deep, the door may sag or shift out of alignment. The best mortise is flat, square, and exactly the right depth for the hinge leaf.
Most standard butt hinges need only a small amount of wood removed, but the exact depth depends on the hinge thickness. A strong fit does not mean squeezing the hinge into the wood. It means the hinge rests naturally in the pocket without stress. That is what gives the door a smooth swing and a long service life.
One detail beginners often miss is that both leaves of the hinge must line up in the same plane. If one side is even slightly off, the door may rub at the top or bottom. Another missed point is grain direction. Cutting across rough grain can leave tear-out, so the direction of the cut matters as much as the depth.
Tools and Materials You Need
Before you start, gather everything you need. A prepared work area saves time and prevents mistakes.
- Router with a straight bit or mortising bit
- Sharp chisel for cleaning corners
- Measuring tape or ruler
- Pencil and marking knife
- Combination square or hinge marking tool
- Hinges you plan to install
- Clamps to hold the door steady
- Scrap wood for testing depth
- Safety glasses and hearing protection
If you want a reliable reference for basic router safety, the Wood Magazine router guide is a useful place to start. It helps reinforce safe and practical router use.
Measure the Hinge Layout Carefully
Good hinge work starts with good layout. Do not guess hinge positions. Measure from the top of the door for the first hinge, then space the others evenly based on the door height and weight. A typical interior door uses two or three hinges, while heavier doors often need three or more.
Mark the exact hinge outline on the door edge. Then transfer the same marks to the frame. Use the actual hinge leaf as your guide, not only the package size. Hinge dimensions can vary a little, and real hardware should always guide the cut.
Helpful tip: mark the hinge with a sharp pencil first, then score the outline lightly with a knife. This tiny cut helps the router or chisel stay inside the lines and reduces splintering.
Check the Door and Frame First
Before cutting, make sure the door is square and the frame is straight. If the frame is twisted, the best hinge mortise in the world will not fix the problem. Also check that the door has the right clearance at the top, sides, and floor. A hinge cut changes the door position slightly, so plan for that before you begin.
Choose the Right Router Bit and Setup
For hinge mortising, a straight bit is the most common choice. A smaller bit gives more control, while a larger bit removes wood faster. Many woodworkers prefer a 1/4-inch or 1/2-inch straight bit depending on the hinge size and router power.
A plunge router is often easiest because you can lower the bit into the wood gradually. If you only have a fixed-base router, you can still do the job, but setup needs more care. In either case, set the depth to match the hinge leaf thickness. Test it on scrap wood before cutting the door.
| Router setup | Best use | Main advantage | Main caution |
|---|---|---|---|
| Plunge router | Door hinge mortises | Easy depth control | Can cut too fast if rushed |
| Fixed-base router | Small hinge pockets | Simple and stable | Harder to start inside the cut |
| Straight bit | General mortising | Clean flat-bottom cut | Needs careful depth setting |
One non-obvious insight: a very sharp bit makes the cut cleaner, but it also makes it easier to remove too much wood by mistake because the router feels smoother in the cut. That is why controlled movement matters even more than tool sharpness.
How to Router Door Hinges Step by Step
Now let’s get into the main process. Follow these steps in order, and work slowly. If you rush, the hinge pocket may end up uneven or oversized.
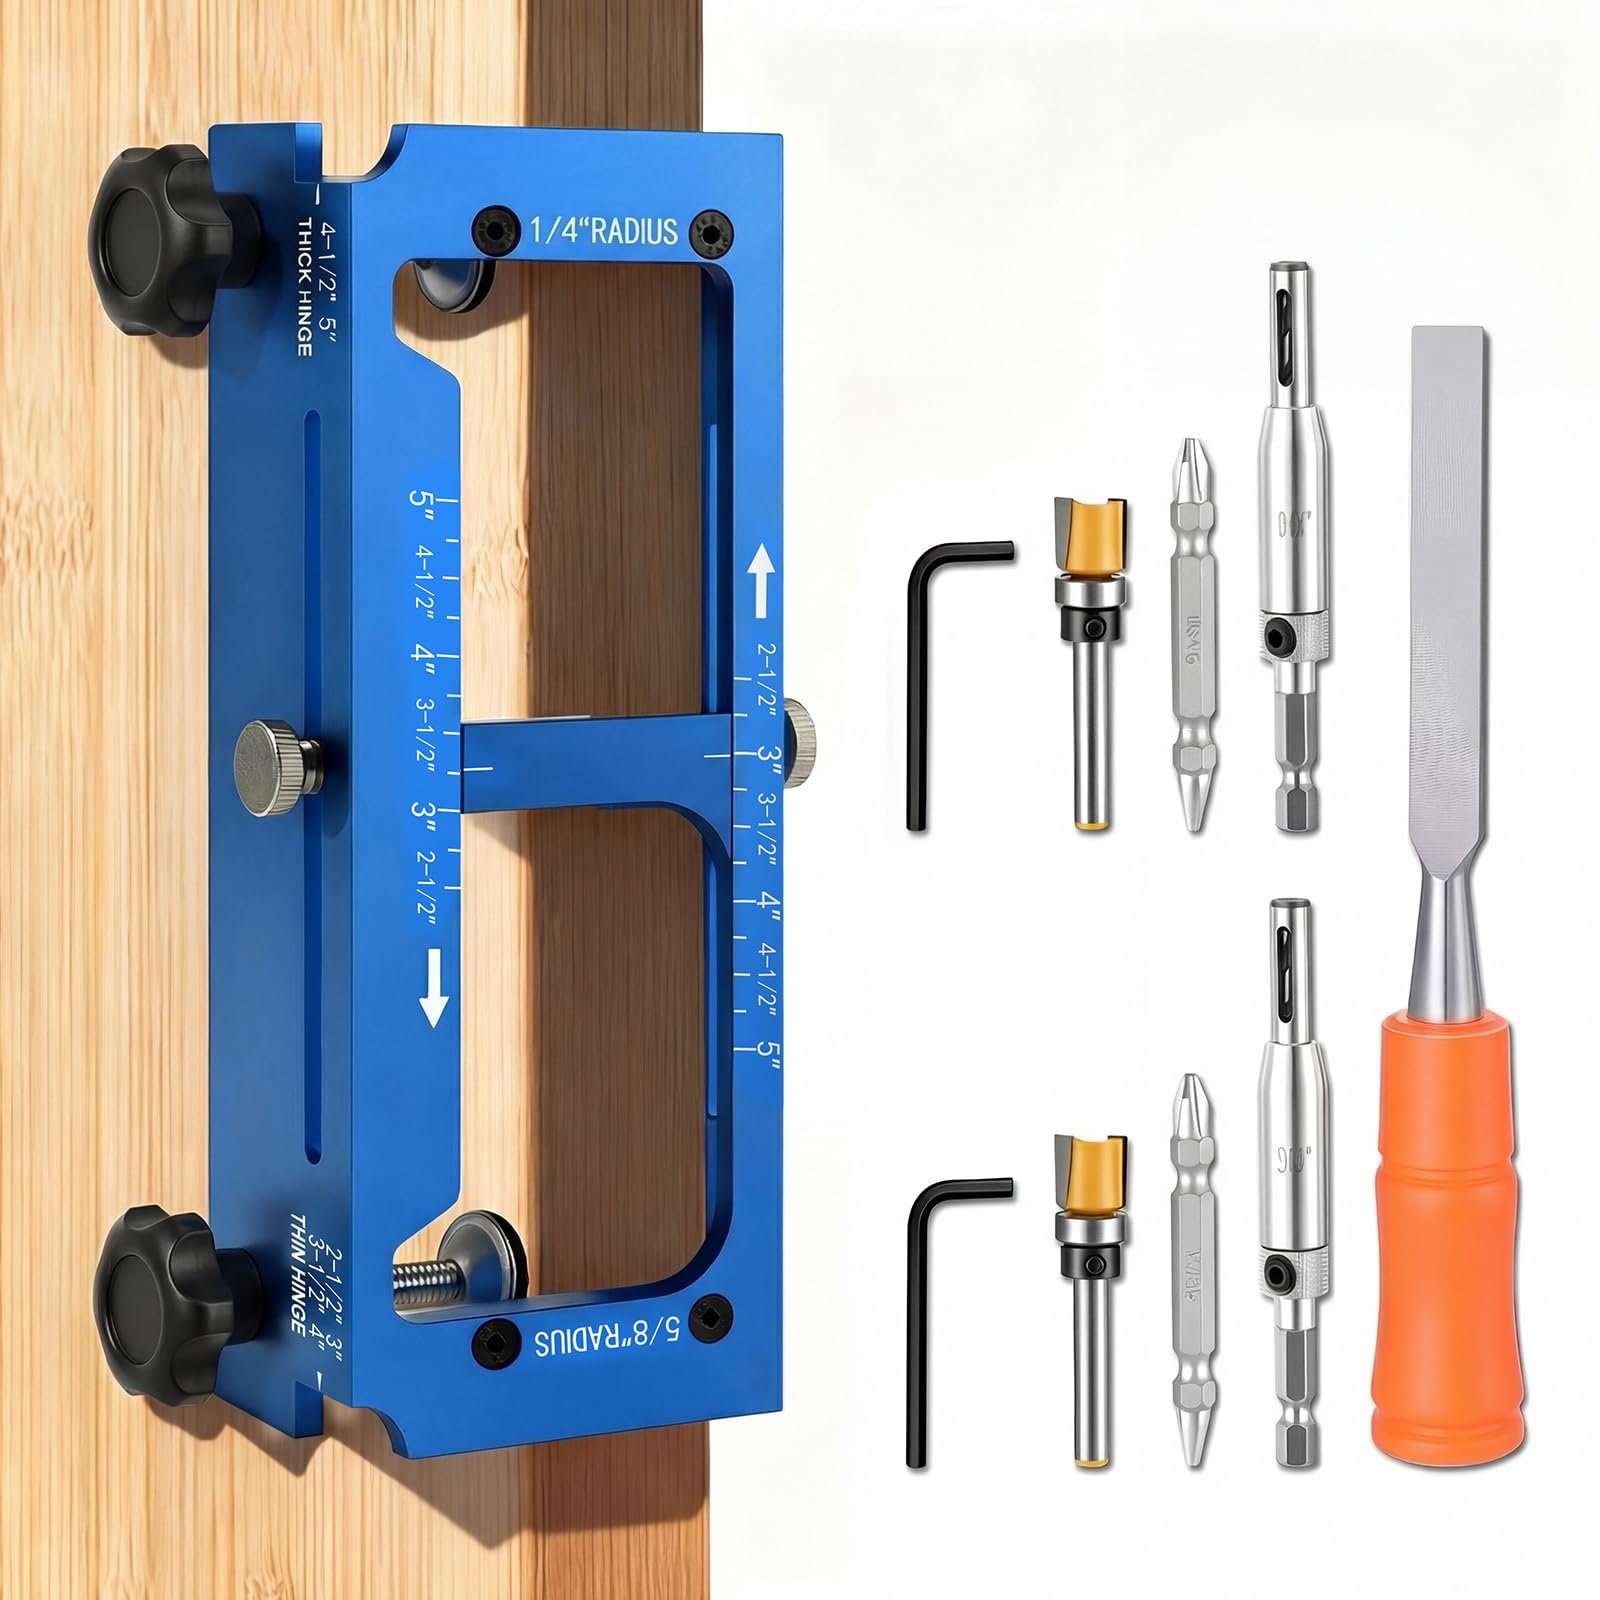
Credit: amazon.com
1. Secure the door
Lay the door flat on stable supports or place it on edge if your setup allows safe handling. Clamp it so it cannot move. A shifting door is one of the most common reasons for a sloppy mortise.
2. Mark the hinge outline clearly
Place the hinge leaf on the door edge and trace around it. Mark the depth lines too. If the hinge has rounded corners, note that now. The router can cut the main pocket, but the corners often need light cleanup with a chisel.
3. Set the router depth
Set the bit depth to match the hinge leaf thickness. Do not assume the label size is exact. Measure the hinge with calipers or compare it directly to the bit depth. Then test the setup on scrap wood of similar thickness.
4. Make the cut in shallow passes
Start the router and lower it into the marked area slowly. Remove a small amount of wood at a time. Do not try to reach full depth in one pass unless the mortise is very shallow and the router is well controlled. Shallow passes give a flatter bottom and reduce tear-out.
Work with the grain when possible
If the wood grain lifts easily, cut in the direction that leaves the cleanest edge. Sometimes that means changing your approach on each hinge pocket. A small change in direction can save a lot of sanding later.
5. Clean the corners
A router bit leaves rounded corners, but many hinge leaves are square. Use a sharp chisel to square the corners carefully. Take thin cuts and stay inside the layout lines. The hinge should sit fully in the pocket without forcing it.
6. Test the fit
Place the hinge in the mortise and check whether it sits flush. It should lie flat without rocking. If it sits proud, remove a little more material. If it sinks too deep, the mortise is too deep, and you may need to adjust the opposite hinge side or use thin shims later.
7. Repeat on the frame
Once the door-side mortise is correct, mark and cut the matching mortise on the frame. The two hinge leaves must align so the pin axis sits correctly. If the leaves are offset, the door may not swing freely.
How to Avoid Common Router Mistakes
Even a simple hinge mortise can go wrong if you overlook small details. These are the mistakes that cause most problems.
- Cutting too deep: This makes the hinge loose and can change door alignment.
- Skipping test cuts: A scrap test shows whether the bit depth is correct before you damage the door.
- Forcing the router: Let the bit cut at its own pace. Pushing too hard can leave burns or rough edges.
- Ignoring grain direction: This leads to tear-out, especially near the edge of the door.
- Not checking hinge size: Some hinges vary slightly, so measure the actual hardware.
- Relying only on pencil marks: Knife lines give a cleaner and more accurate edge.
Another detail beginners often miss is hinge barrel alignment. If the pin center is not placed properly, the door can scrape the jamb even when the mortises look perfect. So do not focus only on the pocket depth. Think about how the whole hinge will move.
Tips for a Better Finish
A clean hinge mortise is not only about fit. It also affects how professional the final door looks. Small improvements can make a noticeable difference.
Use a backer board if the door edge is prone to tear-out. This supports the wood fibers as the bit exits the cut.
Keep the router base flat during the whole pass. Tilting the router changes the depth and can create a sloped pocket.
Work in good light so you can see the layout lines clearly. Shadows hide small mistakes.
Check the hinge with the screws in place before moving on. A hinge can sit slightly differently once the screws pull it down.
Pre-drill screw holes after the mortise is done. This reduces splitting, especially near the edge of hardwood doors.
Credit: tchardwaretools.com
When to Use a Template or Jig
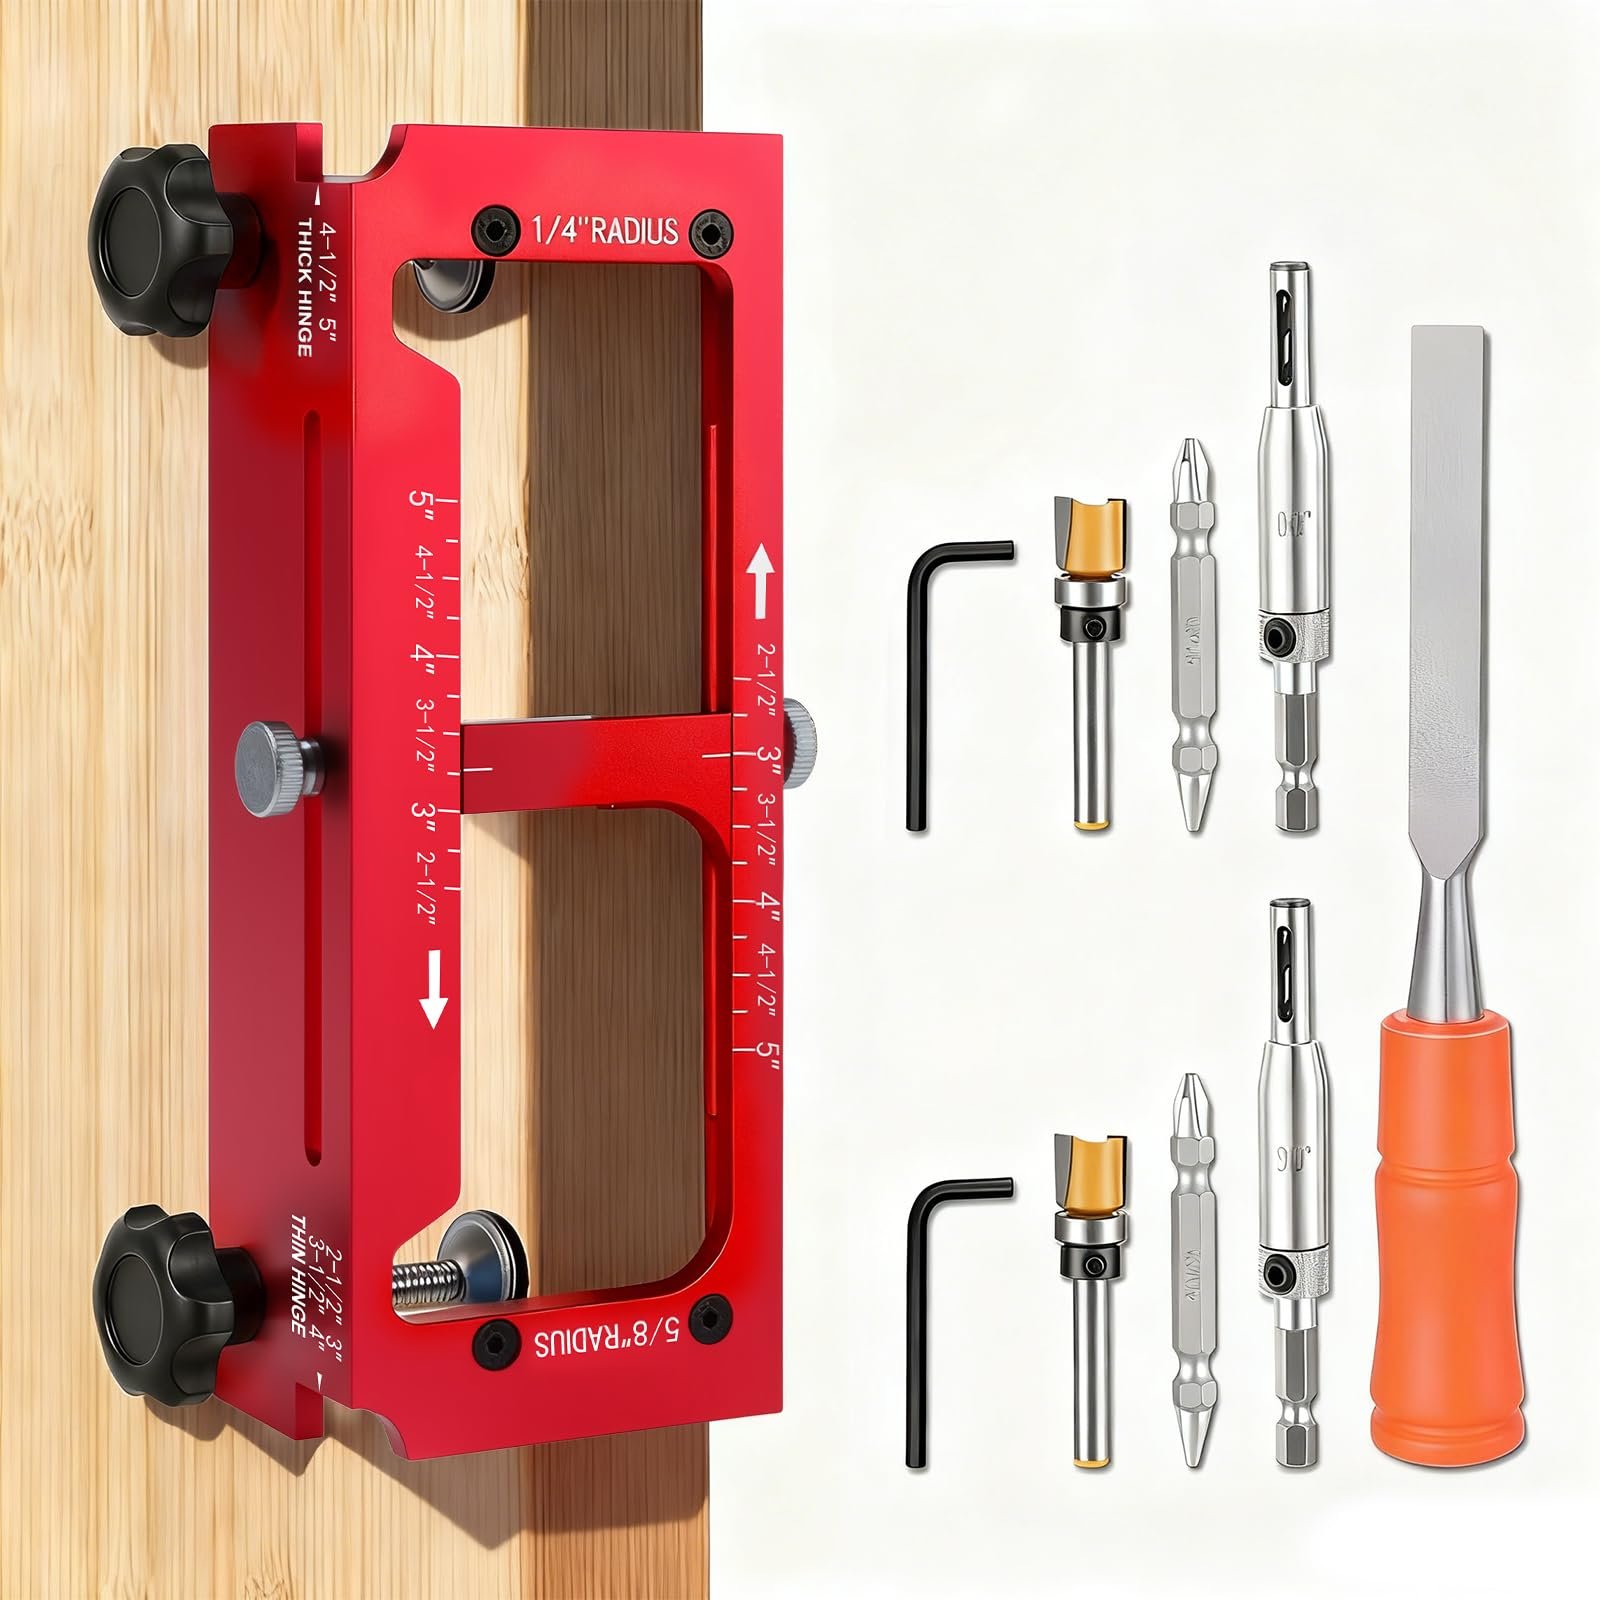
If you need to cut many doors, a hinge jig can save time and improve consistency. A jig keeps the router in the same position for each cut. It is especially useful for standard-sized hinges on interior doors.
However, a jig is not always necessary. For a single door or a custom hinge size, marking by hand can be just as accurate if you take your time. The best method depends on the job, not on the tool alone.
Fast Checks Before You Install the Hinges
Before you screw in the hinges, do a final fit check. Open and close the door leaf or frame piece by hand. Make sure the leaf sits flush, the screw holes line up, and the door position looks even.
Use this simple check:
- Hinge leaf sits flush in the mortise.
- No visible rocking or gaps under the hinge.
- Screw holes line up without forcing.
- Door swing looks smooth and natural.
- Door edge has proper clearance from the jamb.
If one hinge is slightly off, fix it before moving to the next one. Small errors build up fast on a door, especially when there are three hinges.
What to Do If the Mortise Is Slightly Wrong
Small mistakes happen. The key is knowing how to correct them without making the problem worse.
If the mortise is a little too shallow, remove a thin layer of wood with the router or chisel. Work slowly and recheck often.
If it is a little too deep, you may be able to use a thin shim behind the hinge leaf, but this is not ideal. A shim can work for a small fix, yet it is better to keep the mortise correct from the start.
If the mortise is too wide, the hinge may shift while screws are driven. In that case, you may need to pack the area with a hardwood shim or remake the mortise if the error is severe.
Non-obvious insight: many hinge problems are not caused by the mortise itself, but by the first screw hole pulling the hinge slightly out of place. That is why the first screw should be started carefully and checked before tightening the rest.
Simple Depth Guide for Common Hinges
Hinge thickness varies by brand and type, so always measure your actual hardware. Still, a basic reference can help you plan the cut more quickly.
| Hinge type | Common use | Typical mortise depth |
|---|---|---|
| Light interior butt hinge | Bedroom or closet door | About 1/16 in to 1/8 in |
| Standard door hinge | Most interior doors | About 1/8 in |
| Heavy-duty hinge | Solid or exterior door | Match exact leaf thickness |
Use these numbers as a starting point, not a rule. The actual hinge thickness should always control the final depth.
Why Router-Cut Hinges Often Look Better Than Hand-Cut Ones
A router gives a flatter bottom and more even depth than many hand tools. That does not mean hand tools are bad. It means a router saves effort on repeated cuts and helps produce a more uniform result.
The key advantage is consistency. When every mortise is the same depth, the door hangs better and the hinges work as a set. This matters most on heavy doors, where tiny differences become visible quickly.
Still, the router is only part of the process. The final quality depends on layout, setup, and your patience. A careful hand with a router produces better results than a rushed one with a perfect jig.
Credit: amazon.com
Final Thoughts on Getting a Perfect Fit
Learning how to router door hinges is really about control. You are not just removing wood. You are setting the door’s position, swing, and long-term performance. That is why precise marking, shallow cuts, and final test fitting matter so much.
Once you understand the process, hinge mortising becomes a repeatable skill. The first door may take extra time, but later jobs go faster and feel easier. With good layout and careful routing, you can create clean hinge pockets that look professional and help the door work exactly as it should.
Remember the two most important habits: measure the actual hinge, and test before you commit. Those two steps prevent most problems and give you the best chance of a perfect fit.
FAQs
1. What router bit is best for door hinges?
A straight bit is usually the best choice for door hinge mortises. A plunge router with a sharp straight bit gives you the most control. Many people use a 1/4-inch or 1/2-inch bit, depending on hinge size and router power.
2. How deep should I router a door hinge?
The mortise should match the exact thickness of the hinge leaf so it sits flush. Most standard hinges need about 1/8 inch, but you should always measure the actual hinge because thickness can vary by brand and style.
3. Can I router hinge mortises without a jig?
Yes, you can. A jig helps with speed and repeatability, but it is not required for one door or a small project. Careful marking, shallow passes, and a sharp chisel can produce an excellent fit without a jig.
4. Why does my hinge sit proud after routing?
The mortise is likely too shallow, or the bottom may be uneven. Check the depth with the hinge itself, not only with a ruler. If the pocket is flat but still shallow, remove a small amount more material and test again.
5. What is the biggest mistake beginners make when routing hinges?
The most common mistake is removing too much wood too quickly. Beginners also often skip test cuts and do not check the actual hinge thickness. Slow, careful passes are the best way to avoid a poor fit.
