
If you have ever faced a wet floor, a flooded basement, or a pile of sawdust in the garage, a wet dry vacuum can feel like a lifesaver. It is one tool that can handle both liquids and dry messes, which makes it very useful for homes, workshops, cars, and small business spaces.
Still, many people are not fully sure how do you use a wet dry vacuum the right way. It looks simple, but using it correctly matters. The wrong filter, the wrong mode, or the wrong cleanup method can damage the machine or make the mess worse.
In this guide, you will learn the full process step by step. You will also see what to check before starting, how to clean different types of messes, and which mistakes to avoid. By the end, you will know how to use a wet dry vacuum with more confidence and better results.
What a wet dry vacuum can do
A wet dry vacuum is designed to pick up both dry debris and liquid spills. That is the main difference from a regular household vacuum. Standard vacuums are usually made only for dust, dirt, and small debris. A wet dry vacuum can do much more.
You can use it for water spills, mud, pet messes, broken glass, dust, wood chips, and even clogged sink water in some cases. Many models also work well for cars, garages, workshops, basements, and renovation cleanup.
One thing beginners often miss is that not every wet dry vacuum is built for the same job. Some are compact and best for light cleaning. Others are heavy-duty and meant for larger spills or construction mess. Before using yours, it helps to know its tank size, filter system, and whether it has a blower function.
Common jobs a wet dry vacuum handles well
- Small water spills on floors
- Mud near entryways
- Sawdust and drywall dust
- Car interiors
- Garage and workshop cleaning
- Broken glass and small debris
- Flood cleanup in limited areas
Check the vacuum before you start
Before you turn the machine on, take a few minutes to inspect it. This step saves time and prevents damage. It also helps you avoid one of the most common mistakes: using the vacuum in wet mode while the dry filter is still installed.
Look at the owner’s manual if you have it. If not, check the machine labels and parts. Most models clearly show which filter or bag is meant for wet use and which one is for dry use only.
Quick pre-use check
- Make sure the tank is empty and clean.
- Check that the power cord is not damaged.
- Inspect the hose for cracks or clogs.
- Confirm the correct filter is installed.
- Check whether the tank is set for wet or dry pickup.
- Make sure the float mechanism is working if your model has one.
Non-obvious tip: if your wet dry vacuum has a foam sleeve or wet filter, keep it stored in a clean, dry place after use. A damp filter left inside the machine can grow odor fast and reduce suction later.
Set up the vacuum for dry pickup
Dry pickup is the most common use for a wet dry vacuum. This includes dust, dirt, leaves, wood chips, and small debris. The setup is different from wet cleanup, so do not skip this part.
For dry messes, the machine usually needs a dry filter installed. Some models also allow a dust bag. If you are vacuuming fine dust like drywall powder or cement dust, a proper filter becomes even more important. Fine dust can clog a normal filter quickly.
How to prepare for dry messes
- Unplug the vacuum before changing any parts.
- Install the dry filter or cartridge filter.
- Attach the dust bag if your model uses one.
- Connect the hose to the suction port.
- Choose the right nozzle for the surface.
- Make sure the tank is empty and dry inside.
For larger debris, use a wider nozzle. For corners, car seats, or narrow gaps, use a crevice tool. If you are cleaning a workshop, a floor nozzle with a brush can work better than a plain open hose.
Practical insight: do not vacuum large piles of fine dust too fast. A slower pass gives the filter time to catch the dust instead of pushing it deeper into the system.
Set up the vacuum for wet pickup
Wet pickup is where a wet dry vacuum really shines. This mode is used for water, juice, spilled drinks, muddy water, and other non-flammable liquids. The setup matters more here than many people expect.
Never use the dry filter for liquid cleanup unless your model specifically says it is safe. In many machines, the dry filter must be removed and replaced with a wet foam sleeve or another wet-use part.
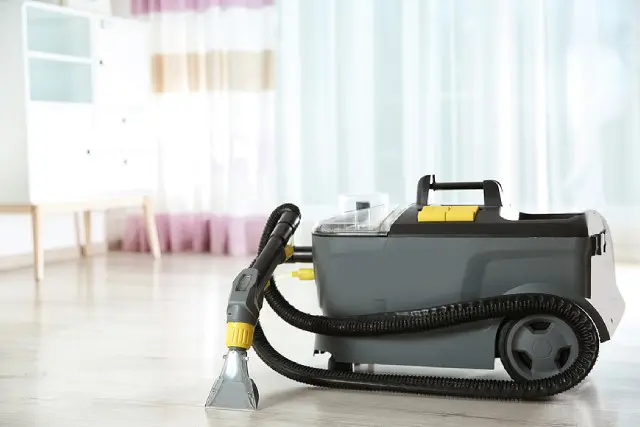
Credit: winstonengineering.com
How to prepare for liquid spills
- Unplug the vacuum.
- Remove the dry filter or dust bag if installed.
- Install the wet filter or foam sleeve if your model has one.
- Check that the tank is empty.
- Attach the hose and wet-use nozzle.
- Make sure the float shutoff is not stuck.
The float shutoff is important. It helps stop suction when the tank gets too full. This protects the motor from liquid overflow. If your vacuum has this feature and it seems stuck, clean it before using the machine.
For more detailed safety guidance on vacuum and appliance use, you can also check the U.S. Consumer Product Safety Commission.
How do you use a wet dry vacuum for dry messes
Once the machine is ready, using it for dry cleanup is simple. The key is to move slowly and choose the right attachment. Many beginners press the nozzle too hard into the mess, which can block airflow.
Start by turning the vacuum on. Then place the nozzle close to the debris and move in smooth passes. Let the suction do the work. You do not need to force the hose into every corner unless the debris is packed tightly.
Step-by-step dry cleanup
- Plug in the vacuum or confirm the battery is charged.
- Turn it on and listen for normal suction sound.
- Place the nozzle near the mess.
- Move slowly across the debris.
- Empty the tank when it gets full.
- Clean or tap out the filter if suction drops.
For carpet, a brush attachment can lift dirt better. For hard floors, a straight floor tool usually works well. In a car, use a crevice tool for seat tracks and between cushions.
Beginners often miss this: suction drops not only when the tank is full, but also when the hose or filter is partly blocked. If the vacuum sounds weaker, stop and inspect those parts before assuming the motor is failing.
How do you use a wet dry vacuum for liquid spills
Liquid cleanup needs a little more care, but the process is still easy once you know the steps. The first rule is simple: do not use the vacuum for hot liquids, flammable liquids, or unknown chemicals unless the manufacturer clearly allows it.
For normal water-based spills, place the nozzle at the edge of the liquid and pull it toward the vacuum. If the spill is spread out, start at the outer edge and work inward. This helps you avoid pushing liquid around.
Step-by-step liquid cleanup
- Switch the vacuum to wet mode with the correct parts installed.
- Place the nozzle near the spill edge.
- Move slowly and keep the nozzle low.
- Watch the tank level as you work.
- Stop before the tank becomes too full.
- Empty the tank as soon as needed.
If the spill is large, remove furniture or objects first if it is safe to do so. That gives you room to work and keeps the vacuum from bumping into obstacles. For standing water, use a wide nozzle or squeegee-style tool if your model includes one.
Non-obvious tip: on smooth floors, a wet vacuum works better if you overlap each pass slightly. That prevents thin water lines from staying behind, which is common on tile, sealed concrete, and vinyl.
Know when to stop and empty the tank
One of the most useful habits is to empty the tank before it gets too full. If you wait too long, suction drops and the float shutoff may activate. That is good for safety, but it also stops your work.
How often you empty it depends on tank size and the kind of mess. A small portable vacuum may need frequent emptying. A large workshop model can handle more before stopping.
Signs the tank needs emptying
- Suction feels weaker
- The vacuum sound changes
- Water is visible near the top
- The float shutoff engages
- Debris keeps getting left behind
When emptying liquid, pour slowly and safely. If the tank contains dirty water, dump it into an approved drain or outdoor area where local rules allow it. Never pour unknown chemical liquids down a drain without checking safety first.
How to clean the vacuum after use
Cleaning the machine after use is not optional. It is one of the best ways to keep the vacuum working well for a long time. A dirty tank, wet filter, or clogged hose can cause odor and weak suction on the next job.
After dry cleanup, empty the tank and clean the filter according to the manual. After wet cleanup, rinse the tank with clean water and let it dry fully. If your machine has a foam filter, rinse it gently and let it air dry before storing it.

Credit: people.com
Post-use cleaning steps
- Turn off and unplug the vacuum.
- Remove the hose and attachments.
- Empty the tank into a safe drain or disposal area.
- Rinse the tank if you used it for liquids.
- Wash or tap out the filter if needed.
- Let all parts dry before storage.
Never store the vacuum with standing water inside. Even a small amount can create odor and make the inside parts dirty. If the tank smells bad, wash it with mild soap and water, then dry it completely.
Choose the right attachments for the job
Attachments matter more than many people think. The wrong one can make cleaning slower and less effective. The right one saves time and improves suction where you need it most.
| Attachment | Best for | Why it helps |
|---|---|---|
| Crevice tool | Car seats, corners, gaps | Reaches narrow spaces |
| Floor nozzle | Hard floors, garages | Covers more area fast |
| Brush tool | Carpets, fabric, dust | Lifts debris gently |
| Squeegee tool | Standing water | Helps collect liquid on flat surfaces |
| Utility nozzle | Mixed messes | Good all-around choice |
If you are not sure which attachment to use, start with the one that gives the best seal on the surface. Better contact usually means better suction. That is especially true for wet pickup on smooth floors.
Common mistakes to avoid
Most problems with a wet dry vacuum come from simple mistakes, not from the machine itself. A few careful habits can prevent damage and save time.
- Using the wrong filter. Dry filters can get damaged by liquid.
- Vacuuming flammable liquids. This is unsafe unless the model is made for it.
- Letting the tank overfill. This can trigger shutdown or cause leaks.
- Ignoring clogs. A blocked hose can make the vacuum seem weak.
- Storing the vacuum wet. This creates smell and may shorten the life of parts.
Another mistake is using the machine on fine construction dust without checking the filter. Fine powder can clog a filter much faster than normal dirt. If you do this often, clean the filter more often than you think you need to.
Simple safety rules that matter
A wet dry vacuum is useful, but it is still an electrical appliance. Safety should always come first, especially when liquids are involved.
Keep these safety rules in mind
- Always unplug the machine before changing filters or emptying the tank.
- Do not use it around flammable vapors.
- Keep the plug and cord away from standing water.
- Do not vacuum sharp objects unless the model can handle them safely.
- Check the user manual for special liquid limits.
If you need to clean up something unusual, such as oil, chemicals, or sewage, stop and confirm whether your vacuum is suitable. Not every wet dry vacuum is designed for those materials.
How to keep suction strong over time
If your wet dry vacuum starts losing power, the cause is often simple. A dirty filter, a full tank, or a bent hose can reduce suction quickly. Regular care keeps the machine working well.
Here are a few habits that make a real difference: clean the filter often, store the hose without sharp bends, empty the tank after each messy job, and check the seals for wear. Small leaks in the lid or hose connection can also reduce suction more than people expect.
Practical insight: if your vacuum has a reusable filter, keep a spare one if possible. That way, you can swap in a dry clean filter while the used one dries after washing. This is very helpful for people who use the vacuum often.

Credit: people.com
Final thoughts
Once you understand the setup, how do you use a wet dry vacuum becomes a simple question with a practical answer: choose the right mode, use the right filter, move slowly, and clean the machine afterward. That is the full process in a clear form.
Whether you are cleaning a wet floor, a dusty garage, or a messy car interior, the wet dry vacuum is one of the most flexible tools you can own. Use it the right way, and it will save time, reduce stress, and handle jobs that a regular vacuum cannot touch.
FAQs
1. Can I use a wet dry vacuum on carpet?
Yes, but only for dry debris unless your model supports wet carpet cleaning. Use a brush attachment for dry carpet dirt. For liquid spills on carpet, vacuum only if the machine is approved for wet pickup and the spill is safe for it.
2. Do I need a special filter for wet use?
Most wet dry vacuums need a wet filter, foam sleeve, or no filter at all during liquid pickup, depending on the model. The dry filter is usually not meant for water. Always check the manual before switching modes.
3. Can a wet dry vacuum pick up broken glass?
Yes, many can handle small broken glass pieces. Use care, and avoid very large sharp shards if the hose or tank could be damaged. A wider nozzle often works better than a narrow crevice tool for this job.
4. How often should I clean the filter?
It depends on what you vacuum. For normal dust, clean it when suction drops or after a few uses. For fine dust like drywall powder, clean it more often. After wet use, let the filter dry fully before storing it.
5. Can I use a wet dry vacuum for a flooded basement?
Yes, if the water level is within the machine’s limits and the model is suitable for wet pickup. Remove obstacles first, watch the tank level closely, and empty it often. For deep flooding or unsafe water, use a professional service instead.
