
If your solar panel is not charging well, the first thing to check is the panel itself. A multimeter can tell you a lot in just a few minutes. You do not need special lab tools. You only need a basic digital multimeter, some sunlight, and a careful method.
This guide shows how to test solar panel with multimeter in a simple way. You will learn how to check voltage, current, and basic health. You will also learn what numbers matter, what mistakes to avoid, and how to tell if the panel problem is real or if the issue is somewhere else in the system.
Many people think a solar panel is broken when the real issue is a loose connector, shade, dirty glass, or a bad charge controller. A multimeter helps you find the truth fast. Let’s go step by step.
What you need before you begin
Before you test anything, get the right tools and prepare the panel properly. A solar panel can only give good test results when it is clean, uncovered, and placed in strong sunlight.
Tools and simple safety items
- A digital multimeter
- Solar panel with accessible wires or MC4 connectors
- Sunlight or a strong controlled light source
- Gloves, if you want extra hand safety
- Screwdriver, if you need to open a junction box or access terminals
If you are testing a larger system, it helps to have the panel disconnected from the charge controller or inverter first. That way, you measure the panel itself, not the rest of the system.
Set up the panel the right way
Place the panel where it gets direct sun. Do not test it under a tree, behind glass, or in weak evening light. Solar panels can still produce some voltage in poor light, but those readings are not useful for a real health check.
Also clean the panel surface. Dust and bird droppings can lower output more than many people expect. This is one of the beginner mistakes people miss: they test a dirty panel and think it has failed, when it is only dirty.
Understand what the multimeter can tell you
A multimeter checks electrical output. For solar panels, the most useful checks are voltage and current. Together, they show whether the panel is alive, weak, or possibly damaged.
| Test | What it shows | Why it matters |
|---|---|---|
| Voltage | Electrical pressure from the panel | Helps confirm the panel is producing power |
| Current | How much electricity is flowing | Shows how strong the panel output is under load |
| Resistance / continuity | Possible wiring problems | Useful for finding broken connections, not for judging panel output directly |
Important: solar panels do not behave exactly like batteries. They produce power based on light, temperature, and load. So a single number does not tell the whole story.
Know the ratings on the label
Look at the back of the panel or the product sheet. You will often see values like:
- Voc = open-circuit voltage
- Isc = short-circuit current
- Vmp = voltage at maximum power
- Imp = current at maximum power
These ratings are your reference points. Real-world readings may be lower or slightly different because of sunlight, temperature, and meter quality.
For a trusted technical overview of solar module ratings, you can also review information from the National Renewable Energy Laboratory.
How to test solar panel with multimeter for voltage
Voltage testing is the easiest and most common first step. It tells you whether the panel is generating power at all.
Step 1: Set the multimeter to DC voltage
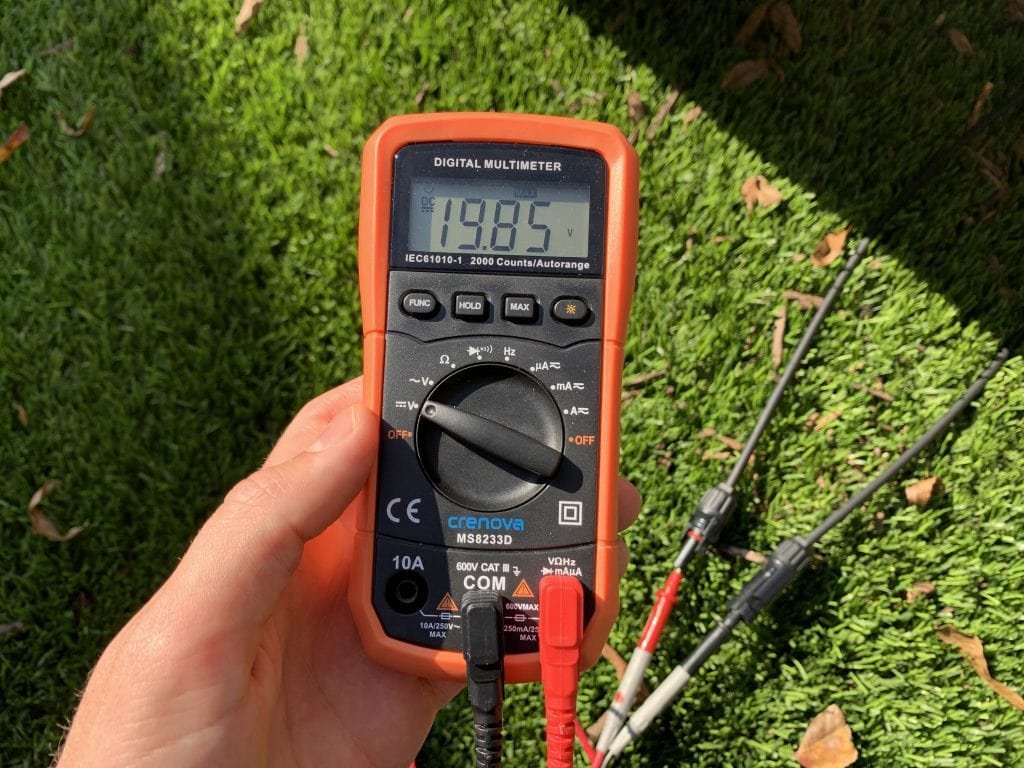
Turn the dial to DC volts. The symbol usually looks like V with a straight line and dotted line. If your multimeter has range settings, choose a range higher than the panel’s expected voltage. For example, use 20V, 200V, or auto-range if available.
Step 2: Connect the probes correctly
Insert the black probe into the COM port. Insert the red probe into the V port. Then touch the black probe to the panel’s negative terminal and the red probe to the positive terminal.
If you reverse the probes, you will usually see a negative reading. That does not mean the panel is bad. It just means the probes are flipped.
Step 3: Read the open-circuit voltage
Leave the panel disconnected from any load or controller. This is called open-circuit voltage, or Voc. A healthy panel in bright sunlight should show a voltage near the label value, though often a little higher than the rated Vmp.
For example, a “12V” panel may show around 18V to 22V open-circuit in strong sunlight. That is normal. The exact number depends on the panel design.
Beginner mistake many people miss: comparing the measured voltage only to the panel’s “12V” name. That name is not the same as the panel’s actual output voltage. Always check the label values, especially Voc.
Step 4: Watch the reading in different light
Move the panel slightly or cover part of it with your hand for a second. The voltage should change. If the reading stays flat no matter what, check your probe contact and meter setting.
If the voltage is very low in strong sun, the panel may be shaded, dirty, damaged, or wired incorrectly.
How to test solar panel with multimeter for current
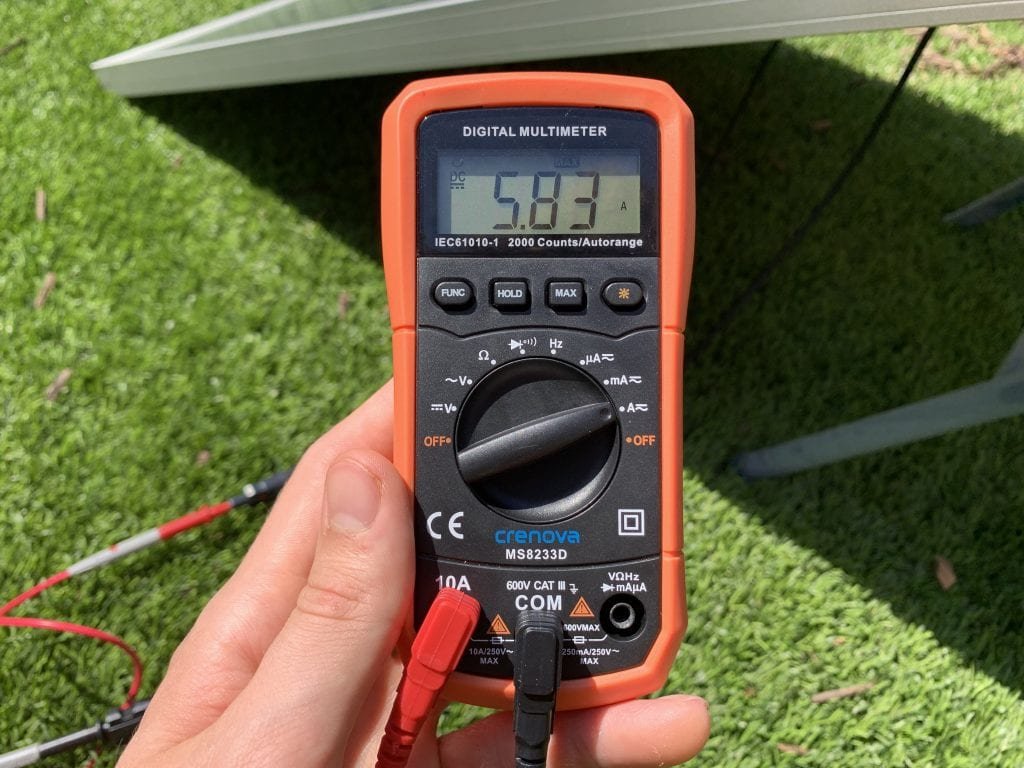
Current testing is a little more sensitive than voltage testing. It gives a better idea of panel strength, but you must do it carefully because the meter must be placed in series or in a short-circuit test mode for brief measurement.
Credit: footprinthero.com
Step 1: Check your meter rating
Make sure your multimeter can measure the current expected from the panel. Many basic meters are fine for small panels, but not all can handle high current safely. Check the fuse and the maximum current rating before you begin.
Step 2: Move the red probe to the current port
On many meters, the red probe must move from the voltage port to the amps or mA port. Choose the correct port based on expected current. If you choose the wrong port, you can blow the fuse.
Step 3: Set the dial to DC amps
Set the meter to DC current. If the meter has multiple current ranges, start with the highest safe range.
Step 4: Measure carefully
For a brief current test, connect the meter in the proper setup so current flows through the meter. Keep the test short. Do not leave the panel shorted for long periods. This can stress the panel and the meter.
Some users prefer to measure current through a load instead of directly shorting the panel. That is often safer and gives a more realistic reading.
Non-obvious insight: solar panels may show much lower current than expected if the sun is strong but the panel is hot. Heat reduces performance. A panel on a very hot roof can produce noticeably less current than the same panel tested in cooler conditions.
How to test panel wiring and connectors
Sometimes the panel itself is fine, but the wiring is not. A multimeter can help you find those hidden problems too.
Check for loose or broken connections
Inspect the cable ends, MC4 connectors, and junction box. Look for melted plastic, corrosion, bent pins, or wires that move too easily. A damaged connector can reduce output even if the panel cells are healthy.
Use continuity mode for wire checks
If you suspect a broken wire, disconnect the panel first and use the continuity setting. Touch the probes to opposite ends of the same wire. A beep or very low resistance usually means the wire is intact.
This test is useful for cables, not for judging panel power. Do not use continuity mode on a live solar panel.
Check polarity before reconnecting
Solar connectors must match positive to positive and negative to negative. Wrong polarity can damage a controller or cause no charging at all. A quick multimeter check before reconnecting can save time and prevent damage.
How to interpret the readings
Getting a number is easy. Understanding it is the real skill. A good reading depends on panel type, sun level, temperature, and meter quality.
Credit: footprinthero.com
Voltage results
- Near rated Voc in strong sun: usually a good sign
- Much lower than expected: possible shade, dirt, bad connection, or damaged cells
- No voltage: wiring issue, meter issue, or failed panel
Current results
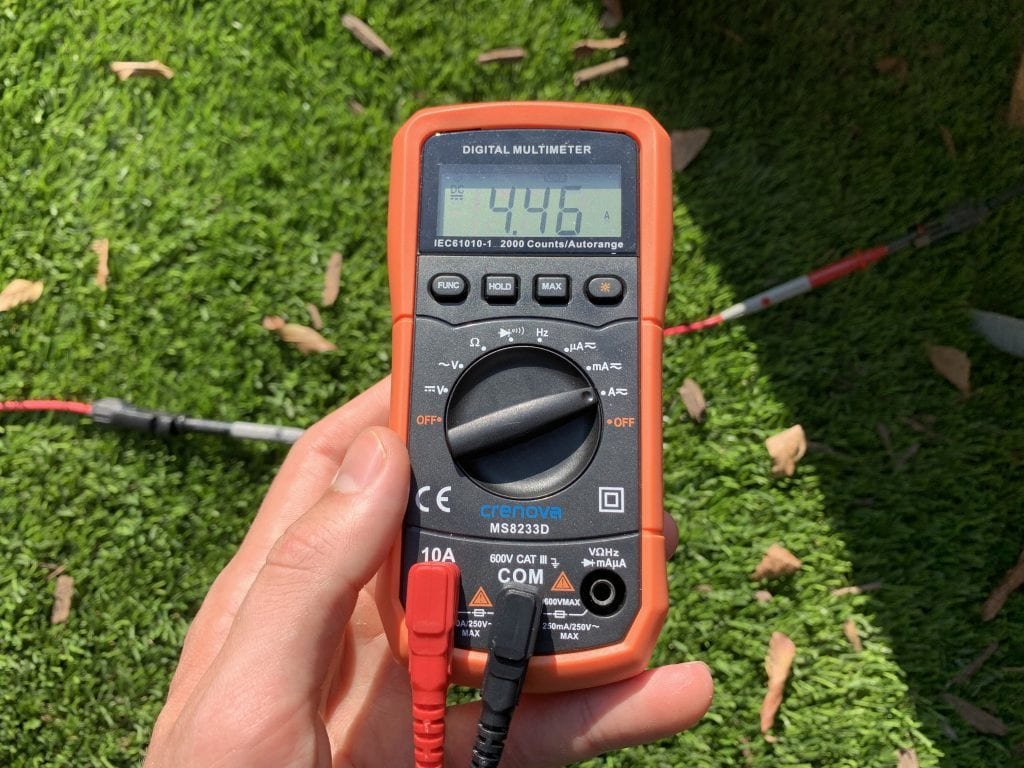
- Near label Isc in strong sun: panel is working well
- Somewhat lower: can still be normal if sunlight is not perfect
- Very low current: shade, dirt, cell damage, or bad wiring may be the cause
Do not panic if the numbers do not match the label exactly. Solar testing is never perfect in the real world. Instead, look for a result that is clearly reasonable or clearly wrong.
Second non-obvious insight: if voltage looks fine but current is weak, the panel may have internal cell damage or partial shading. If current looks okay but voltage is strange, the problem is often wiring or meter setup.
Common mistakes when testing solar panels
Many bad readings happen because of simple errors, not because the panel is broken. If you avoid these mistakes, your test will be far more reliable.
- Testing in weak light – Morning shade or late evening light gives poor results.
- Leaving the panel dirty – Dust can cut output enough to confuse the test.
- Using the wrong meter setting – AC volts instead of DC volts is a very common mistake.
- Putting probes in the wrong ports – This can blow the fuse or give no reading.
- Testing while the panel is still connected – The controller or battery can affect the result.
- Ignoring the label ratings – You need Voc and Isc, not just the “12V” or “24V” name.
When a solar panel may be damaged
Some problems are not simple wiring issues. A panel may need repair or replacement if the readings stay poor even after basic checks.
Warning signs of deeper damage
- Cracked glass or visible physical damage
- Burn marks in the junction box
- Water inside the panel
- Voltage far below normal in full sun
- Current far below normal even after cleaning and reconnecting
- Large hot spots on the panel surface
Hot spots can mean internal cell damage. They may not always be visible at first, but the panel can still lose a lot of performance.
If you suspect serious damage, stop using the panel until you inspect it more closely. A badly damaged panel may also be a safety risk.
A simple test process you can repeat any time
If you want a fast field method, use this practical order every time:
- Clean the panel.
- Place it in strong sunlight.
- Disconnect it from the system.
- Measure open-circuit voltage.
- Compare the reading with the panel label.
- Check connectors and wiring.
- Measure current if your meter supports it safely.
- Repeat the test if conditions change.
This sequence helps you separate panel problems from system problems. It also keeps the test simple enough for beginners.
How often should you test a solar panel?
You do not need to test every day. For most home users, testing after a drop in performance is enough. It also helps to test after storms, long periods of dust, or any repair work.
If you use solar for an off-grid system, a quick voltage check every few months is smart. It takes little time and can catch problems early.
Credit: footprinthero.com
Final thoughts on reading solar panel health
Learning how to test solar panel with multimeter is one of the best basic skills for any solar owner. It helps you avoid guesswork and saves time when your system underperforms. Start with voltage, then check current if your meter and setup allow it safely. Compare your results with the label, but always remember that sunlight, heat, shade, and wiring all affect the numbers.
The real value of this test is not just finding broken panels. It is also finding small issues before they become expensive ones. A loose connector, a shaded corner, or a dirty surface can lower output more than many beginners expect. Once you know how to read the meter, you can diagnose most panel issues with confidence.
FAQs
1. Can I test a solar panel with a regular multimeter?
Yes. A regular digital multimeter can test most small and medium solar panels. Set it to DC voltage for the first check. If you want to test current, make sure the meter is rated for the panel’s output and that you use the correct ports and setting.
2. What voltage should a solar panel show in sunlight?
It depends on the panel rating. A “12V” panel often shows around 18V to 22V in open-circuit sunlight. The best reference is the panel label, especially the Voc value. Weak sun, heat, and shade can lower the reading.
3. Why does my solar panel show voltage but no current?
This can happen if the panel is not connected to a load, if the meter is set wrong, or if there is an internal problem. It can also mean the panel is partially shaded or the current test setup is incorrect. Check the wiring and repeat the test in strong sunlight.
4. Can a dirty solar panel fail a multimeter test?
Yes, a dirty panel can show lower output and make you think it is damaged. Dust, bird droppings, and grime block sunlight. Clean the panel before testing so you get a more accurate result.
5. Is it safe to short a solar panel for current testing?
Only for a very short test and only if your meter and setup are safe for it. Many people prefer testing current through a load instead, which is safer and more realistic. Never leave the panel shorted for long.
