If you are asking where to put screws on metal roof, the short answer is: it depends on the roof panel type, the fastening system, and the exact spot on the panel. Putting screws in the wrong place can lead to leaks, loose panels, and early roof damage. Putting them in the right place helps the roof stay strong for many years.
Metal roofing looks simple from far away, but the fastening pattern is not random. Some roofs use exposed screws, while others hide the fasteners. Some need screws on the flat area of the panel, while others need them on the ribs or laps. The right placement is not just about holding metal down. It is also about allowing movement, sealing water out, and reducing stress on the roof.
In this guide, you will learn the best screw placement for common metal roof types, how spacing works, what mistakes to avoid, and how to get a cleaner, longer-lasting installation. If you are installing or repairing a roof, this is the kind of detail that makes a big difference.
Start by knowing what kind of metal roof you have
Before you decide where to place screws, identify the panel style. This is one of the first things beginners miss. Metal roofing is not one single system. The screw location changes based on the design.
There are two main types:
- Exposed fastener metal roofs – The screws are visible on the surface of the panel.
- Concealed fastener metal roofs – The screws are hidden under clips or panel seams.
With exposed fastener panels, screw placement matters even more because each screw pierces the roof surface. With concealed systems, the fasteners are usually in clips or hidden connections, so the placement rules are different.
If you are unsure which system you have, check the manufacturer guide. That guide always matters more than general advice. A metal roof can look similar but still need a different fastening method. For more technical guidance, the Metal Construction Association is a useful industry source.
Where screws usually go on exposed fastener metal roofs
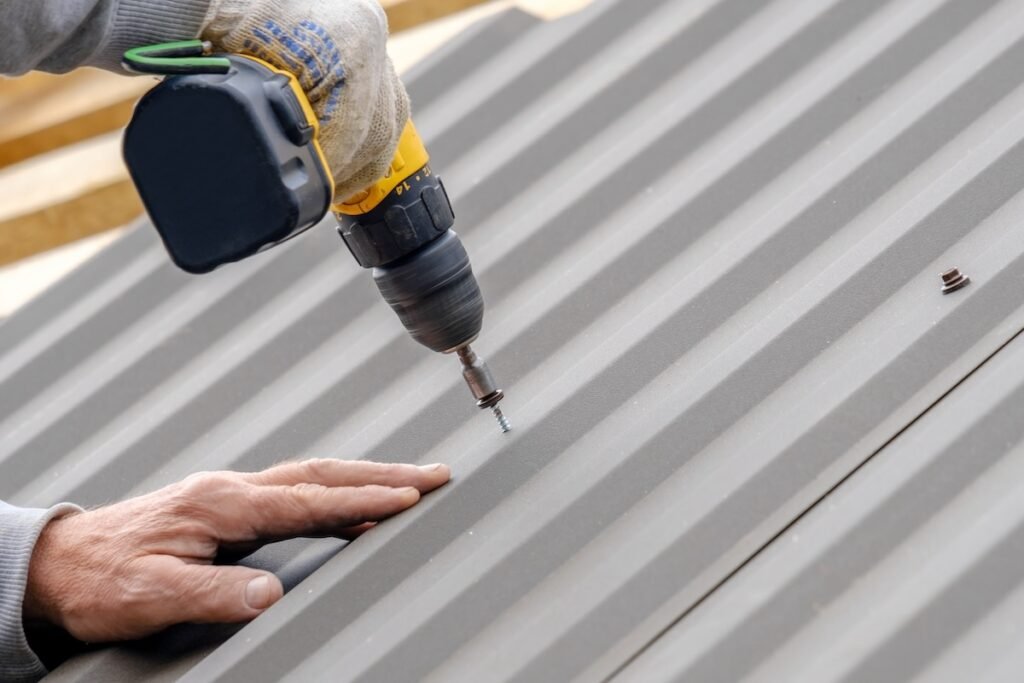
For most exposed fastener systems, screws go in the flat part of the panel, not the peak of the rib. This is the most common rule, but there are exceptions based on panel design. On many through-fastened roofs, placing screws in the flat area helps the washer seat better and reduces the chance of the screw bending under movement.
The screw should sit snugly with its washer compressed just enough to seal. It should not crush the washer flat. That is a small detail, but it matters a lot. If the washer is over-tightened, it can split or wear out early. If it is too loose, water can get in.
Most screws on exposed fastener roofs are placed:
- Along the side laps, if the panel design requires it
- At purlins or roof supports
- At ends and overlaps
- In the flat area of the panel, when specified by the manufacturer
One important point many beginners miss: screws are not only for holding the panel down. They also control panel movement. Metal expands and contracts with temperature changes. If screws are placed or tightened the wrong way, the roof may “fight” that movement and fail sooner.
Flat area vs rib: which is better?
For many exposed fastener roofs, the flat area is preferred because it gives better sealing and reduces stress on the screw. The rib is often more curved and can create a poor seal if the washer does not sit evenly. But not every profile is the same.
Some panels are designed for screws in the rib. Others are designed for screws in the flat. This is why you should never guess. If you put screws in the wrong zone, you can void the warranty or create leaks.
Best practice: follow the manufacturer’s fastening diagram. If the panel profile is engineered for flat-area fastening, do not move the screws to the rib just because it seems stronger.
How screw spacing affects roof strength
Even when you know where to put screws on metal roof panels, spacing is just as important. Too few screws can allow uplift in wind. Too many screws can over-stress the sheet and create unnecessary holes.
Spacing usually depends on the roof design, wind load, panel length, and support layout. A common mistake is copying a screw pattern from another roof without checking the local conditions. That can be risky.
In general, screws are placed:
- At every panel overlap that needs fastening
- At each support line, such as a purlin or batten
- Closer together at edges, corners, and ridges where wind pressure is higher
Roof edges and corners are especially important. Wind does not hit the roof evenly. It lifts hard at the perimeter, so fastening there usually needs extra attention. This is one of the most overlooked parts of metal roof installation.
Why edges need more fasteners
Wind often starts lifting a roof at the edges. Once one section loosens, the damage can spread fast. That is why many metal roofing systems require tighter screw patterns at eaves, ridges, gables, and corners.
If you only fasten the center area well and ignore the edges, the roof may still fail in strong weather. A roof is only as strong as its weakest fastening zone.
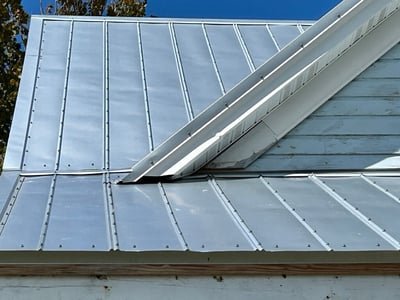
Best screw placement for standing seam roofs
Standing seam roofs are different. In most cases, you do not screw directly through the visible panels. Instead, the panels lock together with concealed clips or fasteners under the seam.
So where do the screws go on this type of roof? Usually:
- At clips attached to the roof deck or substructure
- At termination points, flashing details, or trim pieces
- In hidden locations approved by the panel system
This is a major reason standing seam roofs last so well. The panels can move more naturally as temperatures change, and there are fewer exposed holes. But the system must be installed exactly as designed. If screws are placed through the panel face without approval, the roof can lose its weather resistance and appearance advantage.
Another detail beginners often miss: clip spacing and clip type matter almost as much as screw placement. A standing seam roof is not just about “hiding screws.” It is about managing movement, support, and weather protection as one system.
Credit: roof-crafters.com
Where screws go at overlaps, seams, and trim
Some of the most important screws on a metal roof are not in the middle of the panel. They are at the details: overlaps, trims, ridges, hips, flashing, and closures. These areas are where water and wind try hardest to get in.
At panel overlaps, screws are usually placed according to the manufacturer’s pattern so the panels pull tightly together. The goal is to keep the lap sealed without distorting the metal.
At trim pieces, screws are often used to secure:
- Ridge caps
- Eave trim
- Gable trim
- Valley flashing
- Transition flashing
These fasteners should be placed where they can secure the trim firmly but still allow sealant and closures to do their job. In many cases, screws are hidden in less visible areas for a cleaner look.
Important insight: a leak at the trim often gets blamed on the panel screw pattern, but the real cause is usually one bad detail, such as missing sealant, poor overlap, or a screw that was placed too close to an edge.
Fastener placement rules that help prevent leaks
If you want a roof that lasts, screw placement has to work with water flow, not against it. That means the fasteners should not become easy water entry points.
Here are the main rules that help reduce leaks:
- Keep screws straight. A crooked screw can damage the washer seal and create a small water path.
- Do not overtighten. This crushes the washer and shortens its life.
- Do not under-tighten. A loose screw can back out over time and let water in.
- Keep spacing even. Uneven spacing can create stress points and panel movement.
- Place screws where the panel is supported. Unsupported areas flex more and can loosen fasteners.
Another practical point: if the roof is installed over a deck or purlins, the screw should hit solid support every time. A screw that misses the structural support may hold temporarily, but it will not perform well in wind or vibration.
Washer quality matters more than many people think
The screw head is only part of the sealing system. The washer under it is what helps keep water out. EPDM washers are common because they stay flexible and seal better than cheap rubber for many applications.
If the washer is cracked, brittle, missing, or over-compressed, the screw may look fine but still leak. That is why maintenance checks should include a close look at washer condition, not only screw tightness.
How to place screws in different roof areas
Metal roofs have different zones, and each one has its own fastening needs. If you think only about the middle of the panel, you may miss the parts that matter most.
| Roof area | Common screw placement | Why it matters |
|---|---|---|
| Field of the roof | At support points, usually in the flat or approved fastening zone | Holds the main panel securely |
| Edges and corners | Closer spacing, following wind-load requirements | Resists uplift and peeling |
| Overlaps and seams | At manufacturer-specified locations | Prevents separation and leaks |
| Ridge and hip details | Used in trim and closure attachments | Seals the top transitions |
| Flashing areas | Placed to secure flashing without blocking drainage | Keeps water moving away from openings |
This simple breakdown helps because the roof does not fail evenly. The weakest points are usually transitions, edges, and places where movement or water is concentrated.
Credit: whittsroofing.com
Common mistakes people make with metal roof screws
Many roof problems start with simple fastening errors. These errors are easy to avoid once you know them.
- Putting screws in the wrong part of the panel. This is one of the biggest mistakes. The wrong location can create leaks or stress cracks.
- Using the wrong screw type. Roofing screws should match the panel material and roof structure.
- Overdriving the screw. This damages washers and can deform the metal.
- Underdriving the screw. A loose screw can vibrate out and leave a gap.
- Skipping edge fastening. Wind damage often starts where fastening is weakest.
- Ignoring manufacturer rules. Every panel profile has its own fastening requirements.
One non-obvious issue is thermal movement. A roof can expand in heat and shrink in cold. If screws are placed too tightly in a system that needs movement, the panels may become noisy, warped, or torn around fasteners. That is why “tighter” is not always “better.”
How to know if screw placement is correct
If you are checking an existing roof, there are a few signs that screw placement is probably right or wrong.
Good signs:
- Screws are straight and evenly spaced
- Washers are still flexible and seated properly
- Panels lie flat without visible distortion
- No rust rings or water staining around fasteners
Warning signs:
- Rust around screw heads
- Loose or missing screws
- Washed-out sealant or cracked washers
- Wavy panels around fastener lines
- Leaks near overlaps or trim
If several screws are failing, the problem may not be the screws alone. It can also mean the roof was installed with the wrong fastener pattern or the wrong type of screw for the metal panel.
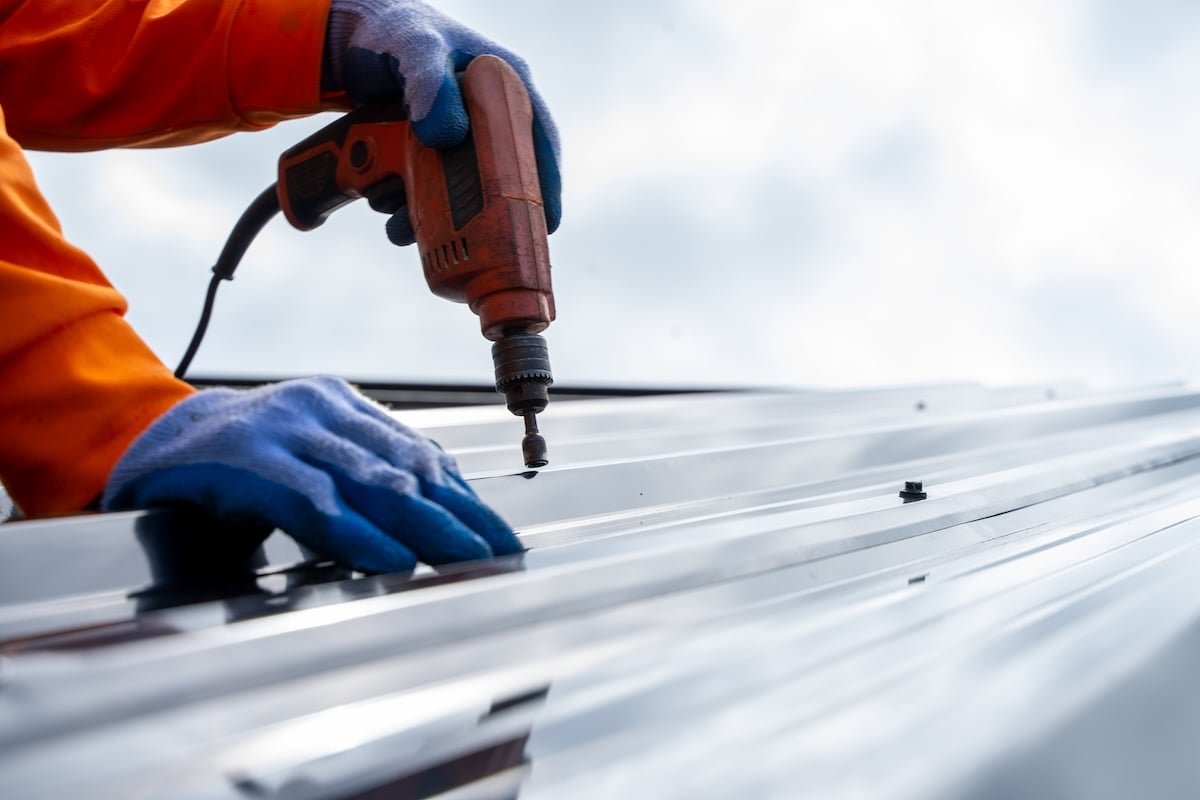
Practical tips for installation and repair
If you are installing or repairing a metal roof, a few practical habits can save a lot of trouble later.
- Use a drill setting that lets you control torque carefully.
- Match the screw length to the panel, insulation, and support thickness.
- Replace damaged washers instead of reusing bad fasteners.
- Keep the screw line neat so the roof looks clean and is easier to inspect later.
- Check the manufacturer’s fastening pattern before every new section.
Helpful insight: if you are repairing only one area, do not assume the old screw pattern was correct. Many older roofs were installed with fasteners placed by habit, not by the current product standard. A repair is a good time to correct hidden problems before they spread.
When to call a professional
Simple screw replacement on a small section may be manageable for an experienced handyman. But if the roof has widespread leaks, damaged panels, or structural movement, a roofing professional is the safer choice.
You should strongly consider expert help if:
- The roof is steep or difficult to access
- Multiple fastener lines are failing
- You are not sure which panel system is installed
- There is visible rust or panel deformation
- You need to meet local wind or building code requirements
A professional can identify whether the problem is screw placement, washer failure, panel fatigue, or a larger design issue. That saves time and prevents repeated repairs.
Credit: firstamericanroofing.com
Final advice on screw placement
When people ask where to put screws on metal roof systems, they usually want one simple answer. But the real answer is more careful: place screws exactly where the panel design and manufacturer say they should go. In many exposed fastener roofs, that means the approved fastening zone, often the flat area. In standing seam roofs, it usually means concealed clips and hidden attachment points. At edges, overlaps, and trim, the screw pattern becomes even more important.
The best roof is not the one with the most screws. It is the one with the right screws in the right places, tightened the right way. That is what keeps water out, resists wind, and helps the roof last for years.
FAQs
1. Where to put screws on metal roof panels for the safest seal?
On many exposed fastener systems, screws go in the manufacturer-approved fastening zone, often the flat part of the panel. The exact location depends on the panel profile, so always check the product guide before installing.
2. Can I put screws in the ribs of a metal roof?
Sometimes yes, but only if the panel is designed for it. Some systems require rib fastening, while others require flat-area fastening. Putting screws in the wrong place can cause leaks and reduce roof life.
3. How far apart should screws be on a metal roof?
Spacing depends on the panel type, support spacing, wind load, and roof edge zones. The edges and corners usually need closer fastening than the center area. Use the manufacturer’s fastening pattern for the correct spacing.
4. Why do metal roof screws leak over time?
Leaks often happen because the washer wears out, the screw is over-tightened, the screw is loose, or the screw was placed in the wrong location. Age, UV exposure, and roof movement can also weaken the seal.
5. Do all metal roofs use exposed screws?
No. Some metal roofs use exposed screws, but standing seam roofs usually use concealed fasteners. The fastening method changes the whole installation approach, including where screws should be placed.
