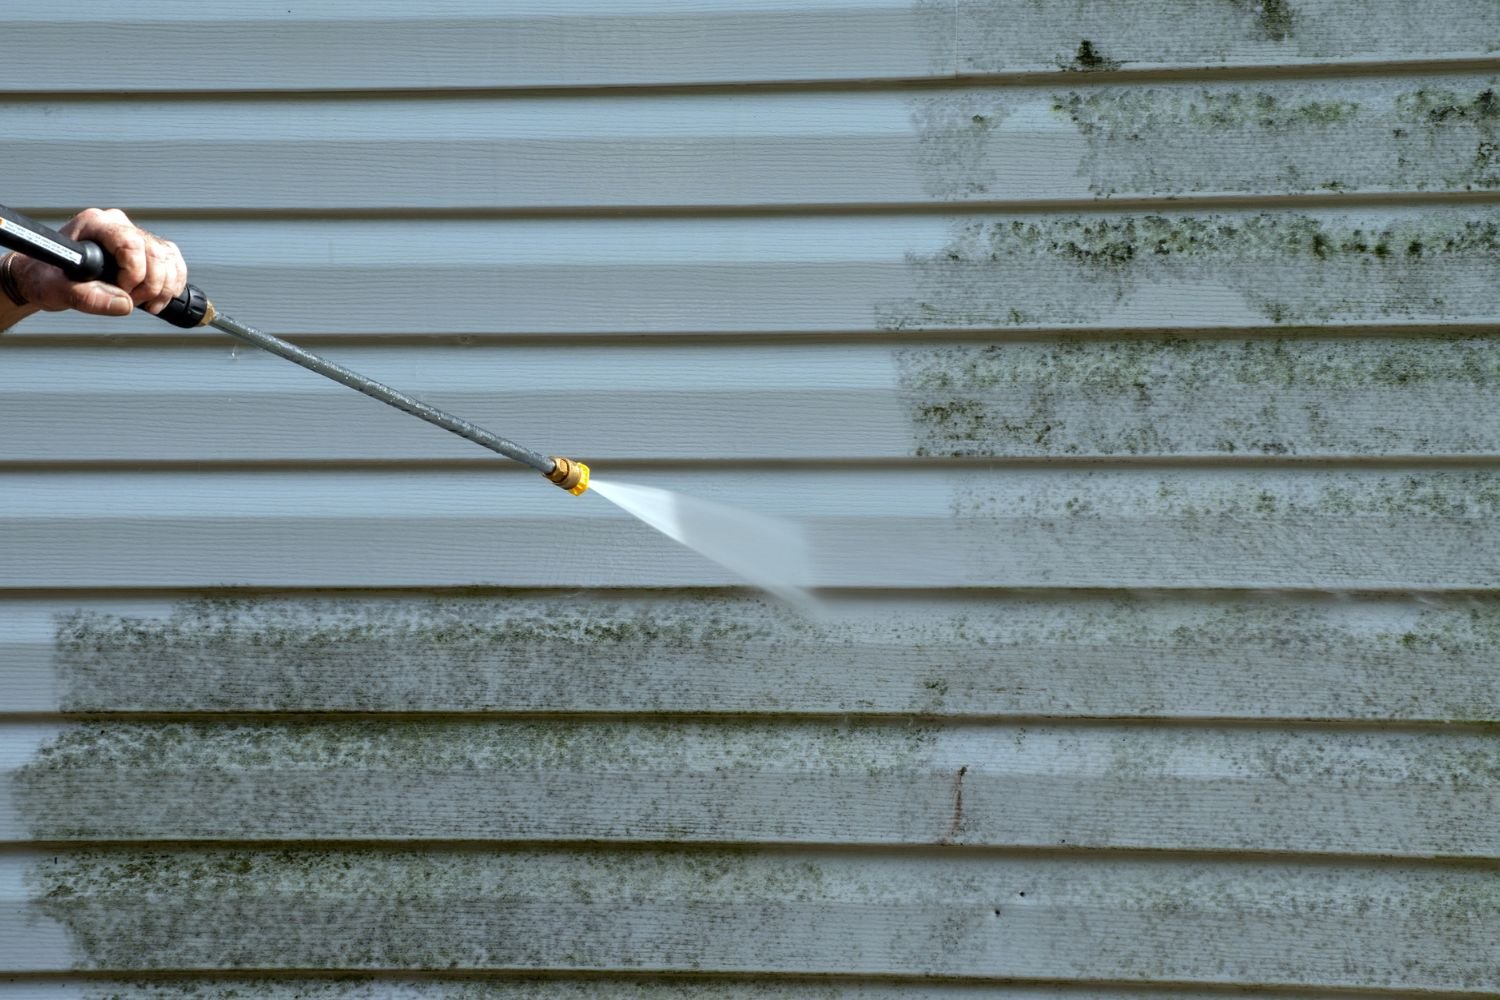
Dirty siding can make a whole house look tired. The good news is that you do not need a pressure washer to fix it. In many cases, gentle cleaning works better because it removes grime without pushing water behind the siding or damaging the surface.
If you are looking for tips on how to clean siding without a pressure washer, you are in the right place. This guide shows safe, easy methods that work on vinyl, fiber cement, wood, and other common siding types. You will learn what to use, what to avoid, and how to clean with less effort and less risk.
The best part is that most jobs only need simple tools: a bucket, a soft brush, a hose, and a mild cleaner. With the right method, you can remove dust, mildew, pollen, and green algae without making a mess or causing damage.
Start with the right cleaning approach
Before you scrub anything, look closely at the siding. Not all dirt is the same. Dry dust needs a different approach than mold, sticky pollen, or dark mildew stains. This matters because using the wrong method can waste time or damage the surface.
For light dirt, water and gentle wiping may be enough. For mold or mildew, you need a cleaner that can break down organic growth. For greasy spots or bird droppings, a mild soap solution usually works better than plain water. The point is to match the cleaner to the problem.
Also, check the siding material. Vinyl can handle a little more scrubbing than painted wood. Fiber cement is strong, but the paint finish still needs care. Wood siding can absorb too much water if you soak it. A smart cleaning plan protects both the siding and the wall behind it.
What you should have ready
- A garden hose with a spray nozzle
- A bucket
- Soft-bristle brush or long-handled scrub brush
- Microfiber cloths or soft sponges
- Mild dish soap
- White vinegar or oxygen bleach, depending on the stain
- Step ladder, if needed
- Gloves and safety glasses
Use soft tools first. Hard brushes can scratch siding, fade paint, or leave dull marks. One beginner mistake is trying to “scrub harder” when the real answer is to use a better cleaning solution and give it a little time to work.
Choose the safest cleaner for your siding
The cleaner matters as much as the scrubbing. A strong chemical is not always better. In fact, too much strength can leave stains, kill nearby plants, or hurt the siding finish. Gentle cleaners are often enough for regular maintenance.
| Cleaning need | Good option | Best for |
|---|---|---|
| Light dirt and dust | Warm water + mild dish soap | Most siding types |
| Mildew or algae | Oxygen bleach solution | Vinyl, fiber cement, painted surfaces |
| Soap scum or water spots | Water + vinegar mix | Vinyl and some metal siding |
| Sticky grime | Mild soap with soft scrubbing | Vinyl and fiber cement |
Oxygen bleach is not the same as chlorine bleach. It is often safer for outdoor cleaning because it is less harsh on surfaces and plants when used correctly. If you want a trusted overview of safer cleaning and disinfecting basics, the U.S. EPA Safer Choice program is a useful place to learn more about product safety.
A second beginner mistake is mixing cleaners together. Never combine bleach with vinegar, ammonia, or other chemicals. That can create dangerous fumes. Keep your cleaning simple and one product at a time.
Wash the siding gently from top to bottom
Once you have your tools and cleaner ready, work from the top down. This helps dirty water run over areas that have not yet been cleaned. It also prevents streaks and makes the job easier to control.
Step 1: Rinse off loose dirt
Use a garden hose to wet the siding lightly. Do not spray hard into gaps, seams, vents, or around windows. You only want to loosen dust, cobwebs, and pollen. This first rinse often removes more dirt than people expect.
Step 2: Apply the cleaning solution
Mix warm water with a small amount of dish soap for general cleaning. For mildew or green stains, use an oxygen bleach solution according to the product directions. Apply the cleaner with a soft sponge, brush, or spray bottle.
Let the solution sit for a few minutes. This is one of the most important tips on how to clean siding without a pressure washer. Dwell time allows the cleaner to break down dirt, so you do not have to scrub aggressively.
Step 3: Scrub with light pressure
Use smooth, gentle strokes. Work in small sections so the cleaner does not dry before you rinse it. A long-handled brush helps reach upper areas without stretching too much. If a stain does not move, apply the cleaner again and wait a bit longer rather than pressing harder.
Step 4: Rinse clean
Rinse each section with a hose before moving on. Make sure no soap or cleaner stays behind. Leftover solution can leave film or streaks, especially on vinyl. On painted siding, residue can dull the finish over time.
One useful trick many people miss
Clean on a cloudy day or in the early morning. Direct sun can dry the cleaner too fast and leave spots. Cooler conditions give you more working time and better results.
How to clean specific siding stains
Different stains need different methods. If you treat all marks the same way, you may scrub too much or use the wrong product. Below are practical options for common siding problems.
Credit: bobvila.com
Dust, pollen, and light dirt
These are the easiest to clean. A hose rinse and mild soapy water are often enough. Use a microfiber cloth or soft brush, then rinse well. If your siding only looks dull from seasonal pollen, you may not need a heavy cleaner at all.
Mildew and algae
Green, gray, or black patches often mean organic growth. Use an oxygen bleach cleaner or a siding-safe mildew remover. Apply it carefully, let it sit, then scrub lightly. Do not leave organic growth untreated for too long. It can spread, especially on shaded sides of the home.
A common mistake is cleaning only the visible spots. Mildew often spreads a little beyond the stain you can see. Clean a larger area around the mark so the result looks even.
Bird droppings and sap
These stains can be sticky and stubborn. Soften them first with warm soapy water, then wipe gently. For sap, you may need to repeat the process several times. Avoid sharp tools or scraping blades, which can scratch the surface.
Rust stains
Rust is harder and often comes from metal fixtures, nails, or nearby watering systems. Use a cleaner made for rust stains and follow the label carefully. Test on a hidden area first. Never assume a strong acid is safe for siding, because it can damage paint and trim.
Work safely around windows, vents, and trim
Cleaning siding is not just about the wall surface. The edges matter too. Water can get into tiny openings around windows, doors, vents, and light fixtures. That is one reason a pressure washer can be risky, and why a gentle method is often smarter.
Use a damp cloth or soft sponge near trim and fixtures. Do not soak these areas. If the cleaner runs down into cracks, wipe it away with a clean cloth. Around electrical fixtures, switch off power if needed and avoid spraying directly on them.
Take extra care near painted trim. Some cleaners can lighten the paint or leave streaks if they sit too long. Always test a small hidden spot first, especially if the home has older paint or mixed materials.
Match the method to the siding material
The safest way to clean depends on what your siding is made of. The method for vinyl is not always the best choice for wood. Knowing the difference saves time and prevents damage.
Vinyl siding
Vinyl is durable, but it can warp if exposed to very hot water or harsh scrubbing. Use a soft brush and a gentle soap solution. Work from the bottom up only if you want to pre-wet a stained area, but always rinse from top to bottom. This helps prevent streaks.
One less obvious issue with vinyl is static buildup. Dust and pollen can stick to it more than people realize. That means regular light cleaning is better than waiting for heavy dirt to build up.
Fiber cement siding
Fiber cement holds up well, but the paint finish still needs protection. Use low-pressure hose rinsing and a mild cleaner. Avoid standing water and never use a very stiff brush. If the paint is old or chipped, be gentle so you do not worsen the finish.
Wood siding
Wood needs the most care. Too much water can lead to swelling or moisture problems. Use a lightly damp cloth or soft brush instead of soaking the boards. Clean small sections and dry areas that stay wet for too long. If the wood is painted, be careful around peeling paint.
Another point beginners often miss
Shaded areas usually need more attention than sunny ones. North-facing walls, spots near trees, and sections close to sprinklers often grow mildew faster. You may not need to clean the whole house equally often. Focus more effort where the problem actually starts.
Use a simple cleaning routine for the best results
If you want siding to stay clean longer, do not wait for major buildup. A light cleaning routine works better than a big rescue job once a year. Most homes can benefit from a quick wash one or two times a year, with spot cleaning when needed.
- Rinse the siding lightly to remove loose dirt.
- Check for mold, algae, stains, and damaged spots.
- Apply a gentle cleaner to one section at a time.
- Scrub softly with a brush or sponge.
- Rinse before the cleaner dries.
- Dry or wipe nearby trim and windows if needed.
By breaking the job into sections, you avoid rushing. This is especially helpful on a warm day when cleaner can dry fast. It also keeps you from missing spots.
:strip_icc():format(webp)/GettyImages-1336188285-00b715bd46b74597a20d3bbd3577f139.jpg)
Credit: bhg.com
Common mistakes to avoid
Many siding problems come from cleaning mistakes, not from dirt itself. Avoid these if you want safe, clean results.
- Using too much pressure and forcing water into seams
- Scrubbing with hard brushes that scratch or dull the surface
- Using strong bleach too often and damaging finish or nearby plants
- Letting cleaner dry on the wall and leaving streaks
- Ignoring the siding type and using the same method everywhere
- Skipping a test spot before cleaning a full section
Another mistake is cleaning only when the siding looks very dirty. Dirt builds up in layers. If you remove small amounts often, the job stays easy. If you wait too long, you may need a stronger product later.
How to protect plants, paint, and nearby surfaces
Even gentle cleaners need care. Wet nearby plants before you start. This lowers the chance that cleaner will cling to leaves. If possible, cover delicate plants with a light sheet while you work, then remove it right away after rinsing.
Keep an eye on walkways, stone edges, and metal fixtures. Some cleaners can leave spots or film on these surfaces if they are not rinsed quickly. If solution drips onto them, wash it off before it dries.
Painted shutters, doors, and trim can react differently from the siding. Do not assume one cleaner is safe for everything. A small test spot saves time and avoids damage later.
When gentle cleaning is not enough
Most routine dirt can be handled without a pressure washer. But some problems need extra care. If the siding has deep staining, heavy mold, loose boards, soft wood, or peeling paint, cleaning may not be the first step. Repairs may be needed before washing.
If you see water damage, swelling, or mold inside the wall area, stop and inspect more closely. Cleaning the outside will not fix a deeper problem. In that case, it is better to solve the moisture issue first.
For very tall homes or hard-to-reach areas, safety matters more than speed. If a ladder feels unstable or the area is too high, hire a pro. The safest cleaning method is not worth it if the job puts you at risk.
Simple upkeep that keeps siding cleaner longer
A few small habits can reduce how often you need to deep clean. Trim plants away from the wall so air can move around the siding. Fix leaking gutters because dirty water often runs down the same spots again and again. Reposition sprinklers so they do not spray the house.
Check shaded sides after rainy seasons. That is when algae and mildew usually start. If you catch growth early, a quick wipe may be enough. This is one of the easiest ways to save time.
You can also rinse the siding lightly after pollen season or after a dusty windstorm. A five-minute rinse now can prevent a much bigger job later.
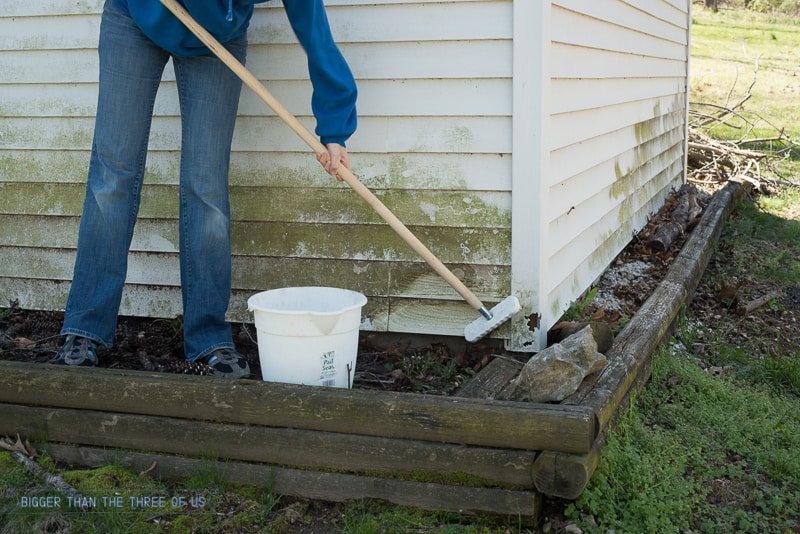
Credit: biggerthanthethreeofus.com
Final thoughts
Cleaning siding does not have to mean loud equipment or risky high-pressure water. With a soft brush, the right cleaner, and a little patience, you can get great results while protecting your home. The best tips on how to clean siding without a pressure washer are simple: use gentle tools, match the cleaner to the stain, work in small sections, and rinse well.
If you follow these methods, your siding can look fresh again without the stress of harsh washing. Clean a little at a time, keep an eye on problem areas, and your home will stay in better shape for longer.
FAQs
1. Can I clean siding without a pressure washer?
Yes. In many cases, a hose, soft brush, and mild cleaner work very well. This method is safer for siding because it lowers the risk of water getting behind the panels or damaging the finish.
2. What is the best cleaner for siding?
For light dirt, warm water with mild dish soap is usually enough. For mildew or algae, an oxygen bleach cleaner is a strong choice. Always test a small area first, especially on painted or older siding.
3. How often should I clean siding?
Most homes do well with cleaning once or twice a year. If your house is near trees, in a damp area, or under heavy pollen, you may need light spot cleaning more often.
4. Is vinegar safe for cleaning siding?
Vinegar can work for some light stains and mineral spots, especially on vinyl. But it is not the best choice for every siding type. Do not mix vinegar with bleach or other cleaners, and always test before using it widely.
5. What should I do if mildew keeps coming back?
If mildew returns often, the siding may stay damp because of shade, poor airflow, or sprinkler spray. Clean the area well, then reduce the moisture source if you can. Trimming plants and improving drainage can help a lot.
