If you want to loosen a nut, tighten a bolt, or do basic repair work at home, a socket wrench is one of the most useful tools you can own. It looks simple, but using it the right way can save time, reduce damage, and make the job much easier.
Many beginners grab the wrong socket, turn the tool in the wrong direction, or use too much force. That can strip fasteners or even hurt your hand. The good news is that once you learn the basic steps, how to use a socket wrench becomes very easy to understand.
This guide will walk you through the process in a clear way. You will learn how to choose the right socket, attach it correctly, turn bolts safely, and avoid common mistakes. By the end, you will feel more confident using this tool on cars, furniture, home repairs, and more.
What a socket wrench does
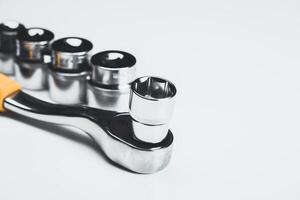
A socket wrench is a hand tool made to turn nuts and bolts. It uses removable sockets that fit over the head of the fastener. This gives you a tighter grip than many other tools, especially when the bolt is deep or hard to reach.
The main parts are easy to understand:
- Handle or ratchet body: the part you hold
- Drive: the square end where the socket clicks on
- Socket: the removable piece that fits the fastener
- Release button on some models: helps remove the socket
Some socket wrenches are simple and only turn in one direction at a time. Others have a ratcheting mechanism. That means you can move the handle back and forth without removing the socket from the bolt each time. This saves time and makes work in tight spaces much easier.
If you are working on cars, bikes, machines, or furniture, this tool is often faster and safer than an open-end wrench. For a basic overview of hand tool safety, the OSHA website is a helpful authority.
Choose the right socket before you start
The most important step is using the correct socket size. If the socket is too small, it will not fit. If it is too large, it can round off the edges of the bolt or nut. That is one of the most common beginner mistakes.
Sockets come in two main measuring systems:
- Metric sizes, such as 10 mm, 12 mm, or 14 mm
- Standard or SAE sizes, such as 3/8 in, 7/16 in, or 1/2 in
Use the system that matches the fastener. Do not guess if you can avoid it. If you are not sure, test a few sizes gently until you find the one that fits snugly.
Here is a simple way to check:
| What you see | What it means | What to do |
|---|---|---|
| Socket slides on loosely | Too large | Try a smaller size |
| Socket will not fit | Too small | Try a larger size |
| Socket fits with little wobble | Correct size | Use that socket |
Non-obvious tip: Many bolts look like one size but are actually slightly worn. If a socket feels close but not perfect, stop and re-check. Using the wrong one even once can damage the corners.
Pick the right drive size too
Sockets also come with different drive sizes, such as 1/4 inch, 3/8 inch, and 1/2 inch. This is the square part that connects to the wrench.
- 1/4 inch: small jobs, light fasteners, tight spaces
- 3/8 inch: very common for general home and auto use
- 1/2 inch: larger bolts and heavier-duty work
A beginner usually does best with a 3/8-inch ratchet because it is flexible and strong enough for many jobs. If you already own a wrench, make sure the socket drive size matches it. A 1/2-inch socket will not fit a 3/8-inch ratchet without an adapter.
Set up your socket wrench the right way
Before turning anything, inspect your tools. A clean, undamaged socket wrench works better and is safer to use. Check the ratchet head, the socket edges, and the handle for cracks, rust, or heavy wear.
Then follow these steps:
- Choose the correct socket size.
- Push the socket onto the drive end of the wrench until it clicks or sits firmly.
- Test the socket by pulling lightly to make sure it stays in place.
- Place the socket straight over the nut or bolt head.
Always keep the socket aligned with the fastener. If it is tilted, it may slip. A straight fit gives you better grip and less chance of damage.
Another beginner mistake: People often rush this part and push the socket on at an angle. That seems harmless, but it can make the socket sit unevenly. When force is applied, the tool may slip off and round the bolt.
Learn the direction before turning
Most bolts follow a simple rule: righty-tighty, lefty-loosey. Turning clockwise tightens the bolt. Turning counterclockwise loosens it.
Still, it is smart to pause and look closely before you turn. Some parts may use reverse threads, especially in special machines or certain automotive parts. If you are unsure, check the manual or look for markings.
On a ratchet wrench, there is usually a small switch that changes the direction of movement. Flip it before you start. That way, the wrench will grip the fastener in the direction you want and free-spin in the other direction.
This detail matters more than many people think. If the direction is wrong, you may assume the bolt is stuck when the tool is simply set backward.

Credit: istockphoto.com
How to use a socket wrench step by step
Once the socket and direction are ready, the actual process is simple. Move slowly at first. With a little practice, the motion becomes natural.
- Fit the socket over the fastener
Press the socket fully onto the nut or bolt head. Make sure it sits flat and covers the fastener completely.
- Hold the wrench handle firmly
Use one hand for most small jobs. Keep your grip steady, but do not squeeze too hard. A controlled hold is better than a tense one.
- Turn the wrench in the correct direction
Move the handle smoothly. If you are loosening a bolt, turn counterclockwise. If you are tightening it, turn clockwise.
- Use the ratchet motion if needed
With a ratcheting wrench, pull the handle in the working direction. Then move it back without changing the socket position. The ratchet mechanism lets the wrench reset without turning the bolt backward.
- Repeat until the fastener is loose or tight
Keep the socket seated properly as you work. If resistance suddenly changes, stop and check the fit before forcing it.
- Finish by hand if needed
For the final tightening, use controlled pressure only. Over-tightening can strip threads or break a bolt. If the job needs a specific torque, use a torque wrench instead of guessing.
How much force should you use?
This is where experience matters. A stuck bolt may need more force, but force alone is not the answer. If you have to pull very hard right away, stop and inspect the setup.
Possible reasons a bolt is hard to turn:
- The socket size is wrong
- The bolt is rusted or dirty
- The wrench is set to the wrong direction
- The fastener is cross-threaded
Try to solve the cause first. If the bolt is rusty, a little penetrating oil may help. If the socket is slipping, switch to the correct size before pushing harder.
Non-obvious tip: A short handle gives you less leverage but more control. A long handle gives more power. If you are working on a delicate part, a shorter ratchet can help you avoid over-tightening.
Use the wrench safely and avoid damage
Safety does not need to be complicated. A few simple habits can protect both you and the tool.
- Wear safety glasses when working near rust, dirt, or flying debris.
- Keep your fingers away from pinch points.
- Do not use a cracked socket or damaged ratchet.
- Do not hammer the wrench unless the tool is made for that use.
- Do not use a socket wrench as a pry bar.
Also, avoid using a pipe to extend the handle unless you truly know the fastener can take that force. Extra leverage can break a bolt, strip threads, or damage the wrench. That is a mistake many beginners make when a fastener feels stuck.
If a bolt will not move, the safer choice is often to stop and use the right method, such as rust remover, heat, or a better-fitting tool. More force is not always better.
Common mistakes beginners make
Learning how to use a socket wrench is easier when you know the most common errors. Avoid these and your work will be smoother.

Credit: vecteezy.com
Using the wrong socket size
This is the biggest problem. Even a small mismatch can round off corners. Once a bolt is rounded, it becomes much harder to remove.
Not seating the socket fully
If the socket is only partly on the fastener, it can slip under pressure. Always press it on until it sits properly.
Forgetting to change ratchet direction
Many people fight a bolt for several seconds before realizing the ratchet is set the wrong way. Check the switch before turning.
Applying too much force too fast
A slow, steady pull is better than a sudden jerk. Jerk force can damage the fastener and make the tool slip.
Ignoring rust or corrosion
Old bolts often need more than brute strength. Cleaning the area first can make the job much easier.
How to loosen a stuck bolt
Stuck bolts are common in repair work. The key is to be patient and use smart methods instead of forcing the wrench.
- Clean dirt and rust around the bolt head.
- Spray a small amount of penetrating oil and wait a few minutes.
- Use the correct socket and make sure it sits fully on the fastener.
- Apply steady pressure, not quick jerks.
- If needed, tap the wrench lightly with the palm of your hand to start movement.
Sometimes a bolt moves a tiny bit and then locks again. That is normal. Work it slowly back and forth to break the rust bond. Do not rush.
If the bolt still will not move, a better tool or a different method may be necessary. For example, a breaker bar gives more leverage than a standard ratchet. But use it carefully because the extra power can also cause damage.
How to tighten bolts without overdoing it
Tightening seems simple, but this is another place where beginners make mistakes. A bolt that is too loose can fail. A bolt that is too tight can strip or snap.
For normal hand work, tighten until the fastener feels snug, then stop. Do not keep pulling just because you can. If the job is important, such as wheel bolts, engine parts, or safety hardware, use the torque value given by the manufacturer.
That is a non-obvious but very important point: “tight enough” is not the same as “as tight as possible.” Many damaged parts come from overconfidence, not lack of strength.
Maintenance tips for your socket wrench
A good socket wrench can last for years if you care for it properly. After use, wipe off oil, dirt, and moisture. Store sockets in a tray, rail, or case so they do not get lost or mixed up.
Check the ratchet from time to time. If it feels rough or slips, it may need cleaning or replacement. A clean tool works better and makes the job less frustrating.
Also, keep metric and standard sockets separated. Mixing them up wastes time and increases the chance of using the wrong size by mistake.
When a socket wrench is the best tool
A socket wrench is especially useful when the fastener is recessed, tight, or repeated many times. It is common in car repair, bike repair, furniture assembly, home plumbing, and machine maintenance.
It is often a better choice than a plain wrench because:
- It grips the fastener more securely
- It works well in narrow spaces
- It speeds up repeated turning
- It supports many socket sizes with one handle
If you expect to do regular repair work, a socket wrench set is a smart basic investment. You do not need the biggest set right away. A small, good-quality set is often enough for most home tasks.
A simple practice example
Let us say you want to remove a bolt from a shelf bracket. First, choose the correct socket size. Then attach it to the ratchet and make sure the switch is set to loosen.
Fit the socket fully over the bolt. Hold the handle straight. Pull the wrench counterclockwise with steady pressure. If the bolt starts moving, continue until it comes free. If it resists, stop and check whether the socket is slipping or the bolt is rusted.
Now imagine you are tightening the same bolt. Turn it clockwise until it is snug. Stop there unless a tool manual gives you a specific torque value.
This simple example shows the whole process in real life. The tool does not need forceful handling. It needs the right size, the right direction, and steady control.
Credit: vecteezy.com
Conclusion
Once you understand the basics, how to use a socket wrench becomes a simple skill you can use again and again. The most important habits are easy to remember: choose the right size, seat the socket fully, set the correct direction, and use steady pressure.
The tool works best when you respect its limits. Do not force the wrong socket. Do not over-tighten. Do not ignore rust or damage. Small details like these make a big difference in the final result.
With a little practice, a socket wrench can become one of the most useful tools in your home or workshop. It helps you work faster, safer, and with more confidence.
FAQs
1. What is the easiest way to learn how to use a socket wrench?
Start with a simple bolt and a matching socket size. Practice attaching the socket, setting the ratchet direction, and turning with slow, steady pressure. Once that feels normal, move to slightly harder jobs.
2. How do I know if I have the right socket size?
The correct socket fits snugly over the nut or bolt head without wobbling. If it slides loosely or will not go on, try a different size. Never force a socket that does not fit well.
3. Can I use a socket wrench on any bolt?
No. A socket wrench works best on nuts and bolts with a clear head shape. Some damaged, rusted, or special fasteners may need another tool or extra care before turning.
4. Why does my socket keep slipping off?
Most of the time, the socket is the wrong size or not pushed on fully. It may also be worn out. Check the fit, clean the fastener, and make sure the wrench is aligned straight.
5. Should I use a socket wrench to tighten bolts as hard as possible?
No. Over-tightening can damage threads, strip the bolt, or break parts. Tighten until snug unless the job calls for a specific torque value from the manufacturer.
