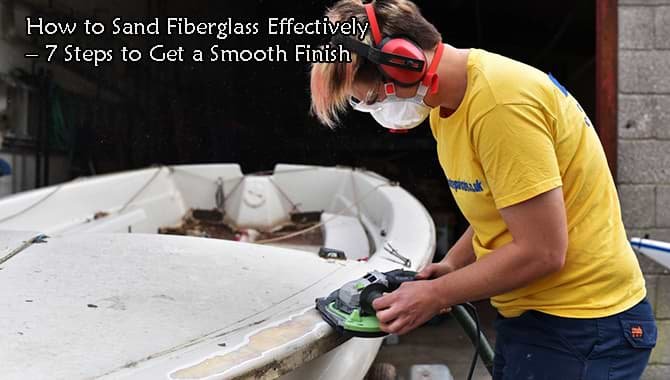
Fiberglass is strong, light, and useful in boats, cars, tubs, shower pans, and many repair projects. But when the surface is rough, scratched, or uneven, the final look depends on one skill: sanding. If you know how to sand fiberglass the right way, you can remove defects, prepare the surface for paint or gel coat, and get a finish that looks clean and professional.
The tricky part is that fiberglass is not like wood or metal. Sand too hard, and you may cut into the fibers. Sand too lightly, and the marks will stay visible under the finish. The good news is that the process is simple once you understand the surface, the tools, and the correct grit progression.
This guide explains the full process in clear steps. You will learn what to use, how to avoid damage, and how to get a smooth result with less work. Whether you are fixing a small repair or preparing a larger fiberglass panel, the same basic method applies.
What You Need Before You Start
Good sanding starts before the first stroke. The right tools save time and reduce mistakes. Fiberglass dust is also unpleasant and harmful, so safety matters just as much as technique.
Tools and materials
- Sandpaper in different grits, usually 80, 120, 180, 220, and 320
- A sanding block for flat areas
- Flexible sanding pads for curved surfaces
- Random orbital sander for larger jobs, if needed
- Tack cloth or microfiber cloth
- Clean water for wet sanding, if you choose that method
- Masking tape for protecting nearby edges
- Body filler or fiberglass filler, if repair work is needed before sanding
- Vacuum or dust extractor
Safety gear
- Respirator with dust protection
- Safety glasses
- Gloves
- Long sleeves
Fiberglass dust can irritate skin, eyes, and lungs. The OSHA guidance on dust control is worth checking if you are doing a larger project or working often with composite materials.
Choose the right sanding method
You can sand fiberglass dry or wet. Dry sanding is easier for shaping, leveling, and seeing defects. Wet sanding reduces dust and can give a finer finish on later grits. For repairs, many people use dry sanding first, then wet sanding near the end.
Important insight: beginners often start with too fine a grit. That sounds safer, but it can waste time and fail to level the surface. If the area has old paint, rough filler, or noticeable ridges, start coarse enough to shape it properly, then move up in steps.
Understand the Surface Before Sanding
Not all fiberglass surfaces are the same. A boat hull, a shower wall, and a car panel do not wear the same way. Before sanding, look closely at the problem area and decide what you are trying to fix.
Common fiberglass surface problems
- Scratches from old sanding or cleaning
- Runs or drips in paint or gel coat
- Uneven repair filler
- Orange peel texture
- Chalky or oxidized surface
- Small pinholes or air bubbles
If the surface is only dull or lightly scratched, you may not need aggressive sanding. If the surface has waves, patches, or repair marks, you must level those areas first. The goal is not just to make it look smoother. The goal is to make the entire surface even so light reflects cleanly across it.
Dry, dull, and damaged? Know the difference
A dull fiberglass finish is often only oxidized. That means the top layer has lost shine, but the shape is still good. In that case, you may start with a fine grit after cleaning. A damaged surface is different. If you can feel ridges with your fingers, sanding must remove those high spots before finishing.
Another detail many beginners miss: a surface can look flat in one light and very uneven in another. Use a bright light held at an angle. This makes scratches, low spots, and texture easier to see before you sand too far.
Prepare the Area the Right Way
Good prep makes the work cleaner and safer. It also helps you sand with more control.
Clean first
Wash the fiberglass with soap and water or a suitable cleaner to remove dirt, oil, wax, and salt. Let it dry fully. If the surface still has wax or polish on it, sandpaper can clog fast and cut poorly.
Mask nearby areas
Use masking tape to protect edges, trim, gaskets, or surfaces you do not want to sand. This is especially helpful around corners, where it is easy to slip.
Inspect for repairs
If there are cracks, deep gouges, or open holes, repair them before final sanding. Sanding alone will not fix structural damage. Fill the damaged area first, let it cure, and then shape it with sandpaper.
Do not rush this stage. A lot of “bad sanding” problems are actually prep problems. If filler is soft, dirty, or not fully cured, the paper will tear it up and leave a rougher surface than before.
Start with the Correct Grit
The correct grit depends on the condition of the fiberglass and the goal of the job. This is one of the most important parts of learning how to sand fiberglass.
| Situation | Typical starting grit | Purpose |
|---|---|---|
| Heavy repair or rough filler | 80 to 120 | Shape and level the area |
| Light scratches or transition areas | 120 to 180 | Smooth edges and blend surfaces |
| Old paint or dull finish | 180 to 220 | Prepare for primer or topcoat |
| Final smoothing before finish | 320 and higher | Create a finer surface for coating |
Start only as coarse as needed. If you begin with 80 grit, move up in small steps. Jumping too quickly from coarse to fine leaves deep scratches under the finish. Those scratches often show up later, after painting or polishing.
A simple rule helps: use the coarsest grit needed to fix the problem, then step up gradually. For most repair jobs, each step should remove the scratches from the previous step.

Credit: reddit.com
Do not skip grit steps
Many beginners try to save time by going from 80 to 220 or from 120 to 400. That is a mistake. Coarse scratches are harder to remove once you skip over them. The surface may feel smooth, but the marks can still appear after paint or gel coat goes on.
Sand in a Controlled, Even Way
Once the surface is ready and the grit is chosen, begin sanding with steady pressure. Let the abrasive do the work. Pressing too hard creates dips, especially on soft repair areas or thin fiberglass panels.
Use the right motion
Move the sanding block or pad in long, even strokes. For hand sanding, use straight or slightly overlapping passes. For a random orbital sander, keep it moving so one spot does not heat up or get overworked.
Keep the surface flat
A sanding block is very useful on flat panels because it keeps the surface level. Without a block, your fingers can make small grooves that become visible later. On curves, use a flexible pad that follows the shape without digging in.
Watch the edges
Edges and corners are the easiest places to sand through. Fiberglass can be thinner there, and high spots disappear fast. Use lighter pressure near edges and check them often. If an edge starts to look thin or fuzzy, stop and switch to a finer grit or a softer pad.
Non-obvious tip: edge damage is often invisible until finishing time. Run your hand gently over the area after each grit. Your fingers can feel a change that your eyes may miss.
Check your progress often
Wipe the area clean after a few passes and look at the surface under angled light. This helps you see whether the scratches are even and whether low spots remain. Sanding is not about doing one long session and hoping for the best. It is about checking, adjusting, and continuing with control.
Use the Right Technique for Different Fiberglass Surfaces
Some projects need a slightly different approach. The basic idea stays the same, but the surface shape changes your method.
Flat panels
Use a sanding block or rigid pad. Flat areas show waves easily, so keep your strokes even. Do not tilt the block at the ends of each pass, or you may create small rounded marks.
Curved surfaces
Curves need a flexible pad or a soft backing. Too much pressure on a curve can flatten the shape. Keep the motion light and smooth. Check the contour often so you do not change the original form.
Repaired spots
Repaired areas often sit higher than the surrounding surface. Start by leveling the filler or patch, then feather the edges into the old surface. Feathering means blending the transition so there is no hard line between old and new material.
How to know when a repair is blended well
Run your fingertips across the repair. If you feel a sharp step, keep sanding. If the edge disappears under touch and light, the blend is better. Do not rely on appearance alone.
Move Through the Grits for a Better Finish
After the first sanding stage, continue with finer grits. Each step removes the scratches from the previous grit and makes the surface smoother.
Simple grit progression
- Shape with 80 or 120 grit if needed.
- Smooth the sanding marks with 180 grit.
- Refine the surface with 220 grit.
- Prepare for paint, gel coat, or polish with 320 grit or finer.
For very smooth finishing, especially before polishing, you may go higher than 320. But do not go too fine too early if you still need coating adhesion. Some finishes need a bit of texture to bond well.
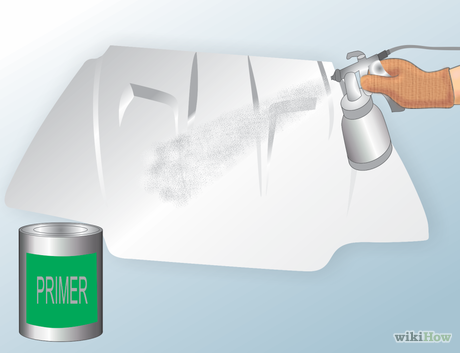
Think about the final coating
The best sanding finish depends on what comes next. Paint, primer, gel coat, and polish all have different needs. If you are preparing for paint, the goal is usually a smooth, even scratch pattern that gives the coating something to grip. If you are polishing a clear top layer, the goal is a very fine scratch pattern that can be buffed out.
This is a place where beginners often make a costly mistake. They sand for visual smoothness only, then discover the finish does not stick well or shows scratches later. Always match the final grit to the next step in the project.
How to Wet Sand Fiberglass Safely
Wet sanding is useful when you want less dust and a finer finish. It works well on later grits, especially on smaller areas or final prep before polishing.
Credit: solvesonic.com
When wet sanding helps
- To reduce airborne dust
- To keep fine paper from clogging
- To improve the final smoothness
- To make scratch patterns easier to control
How to do it
- Use wet-dry sandpaper only.
- Dip the paper in clean water.
- Keep the surface lightly wet, not flooded.
- Sand gently with even pressure.
- Wipe the area often to check progress.
Wet sanding is not ideal for every job. If you are removing a lot of material or leveling a rough patch, dry sanding is usually better at first. Wet sanding is best for refinement, not heavy shaping.
Be careful with water around repairs
If the fiberglass repair is not fully cured, avoid wet sanding. Water can interfere with the surface or hide soft spots. Always check the product instructions before using water.
Avoid These Common Mistakes
Most sanding problems come from a few repeated errors. If you avoid them, your work will look better and take less time.
- Using too much pressure: This can create low spots and uneven lines.
- Starting too fine: Fine paper cannot level damaged or rough surfaces well.
- Skipping grit steps: Deep scratches may remain under the final finish.
- Ignoring dust: Dust clogs paper and reduces control.
- Over-sanding edges: Thin areas can wear through quickly.
- Not checking under angled light: Surface flaws can hide until the finish is on.
One more mistake deserves special attention: people often sand the center well and forget the fade-out around the repair. The eye catches blended edges much more than the patch itself. A smooth transition matters just as much as the center area.
When to Stop Sanding
Knowing when to stop is as important as knowing when to start. Sanding too long can damage the surface, but stopping too early leaves scratches and texture behind.
Stop when the surface is evenly shaped, the scratches from the previous grit are gone, and the area feels smooth to the touch. If the next step is primer or paint, the surface should have a consistent finish with no shiny low spots, no hard ridges, and no obvious sanding lines.
If you are unsure, clean the area and inspect it under bright angled light. Do not rush to the next step until the surface looks uniform. A few extra minutes here can save hours of rework later.
After Sanding: Clean the Surface Properly
Sanding leaves dust, even if you use wet sanding. Before applying primer, paint, gel coat, or polish, the surface must be completely clean.
Clean-up steps
- Vacuum the dust from the work area.
- Wipe the fiberglass with a clean, dry microfiber cloth.
- Use a tack cloth if needed to remove fine dust.
- Check for missed scratches or glossy spots.
Do not touch the surface with greasy hands after cleaning. Skin oils can affect adhesion and final appearance. If you need to handle the piece again, wear clean gloves.
Why the cleaning step matters
Fine dust can ruin an otherwise good finish. It can sit in scratches, create rough texture, or interfere with coating bond. A carefully sanded surface can still look bad if it is not cleaned before the final coating goes on.
Best Practices for a Smooth, Professional Result
If you want the finish to look professional, focus on consistency, not speed. Professional-looking fiberglass work usually comes from small habits done well.
- Use light, even pressure.
- Check your work often under good light.
- Keep the surface clean between grits.
- Use blocks and pads that match the shape.
- Move up through grits in order.
- Protect edges and corners.
Also, keep your work area calm and organized. A cluttered space makes it easier to grab the wrong grit or miss a dusty spot. Good sanding is slow enough to stay controlled, but steady enough to make progress.
If you are working on a large fiberglass surface, divide it into sections. This helps you keep a consistent finish and reduces the chance of missing a spot. It also makes it easier to compare one section to the next.
Credit: wikihow.com
Final Thoughts
Learning how to sand fiberglass is really about control. Use the right grit, the right pressure, and the right tool for the shape. Sand only as much as needed, and check your progress often. When you move carefully from coarse to fine, the final result becomes much easier to finish, paint, or polish.
Patience makes the biggest difference. Fiberglass rewards careful work and punishes rushed work. If you take the time to prep the surface, sand in stages, and clean it well afterward, you can get a smooth finish that looks clean and professional.
FAQs
1. What grit should I use first when sanding fiberglass?
Start with the coarsest grit that matches the problem. For rough repairs, 80 to 120 grit is common. For lighter surface prep, 180 to 220 grit may be enough. The key is to level the surface without removing more material than needed.
2. Can I sand fiberglass by hand?
Yes. Hand sanding works well for small areas, curves, edges, and final smoothing. A sanding block helps keep flat areas even. Power sanders are faster for larger surfaces, but hand sanding gives more control.
3. Is wet sanding better than dry sanding for fiberglass?
Wet sanding is better for reducing dust and refining the surface with fine grits. Dry sanding is better for shaping, leveling, and repair work. Many projects use both methods at different stages.
4. How do I know when to stop sanding fiberglass?
Stop when the surface is evenly smooth, the previous scratches are gone, and the shape looks correct under angled light. If you can still feel ridges or see deep marks, keep sanding with the proper grit.
5. What is the biggest mistake people make when sanding fiberglass?
The biggest mistake is using too much pressure or starting with the wrong grit. This can create uneven spots, thin edges, or deep scratches that show later. Slow, steady sanding usually gives the best finish.
