Drywall can look perfect at first glance, but the real finish happens after the mud dries. If you know how to sand drywall the right way, you can turn rough seams, bumps, and tool marks into a wall that looks clean and professional under paint.
The good news is that sanding drywall is not hard. It does take patience, the right tools, and a careful touch. Many beginners rush this step and create more work for themselves. They sand too hard, use the wrong grit, or miss small flaws that show up later when the wall is painted.
This guide will walk you through the full process in a simple way. You will learn what tools to use, how to prepare the room, how to sand without damaging the paper surface, and how to check your work before painting. If you follow these steps, you can get smooth results that look like they were done by a pro.
What you need before you start
Before you learn how to sand drywall, gather the right tools first. A good setup saves time and helps reduce dust, mistakes, and frustration. Drywall sanding is not about brute force. It is about control.
Here are the basic tools and supplies most jobs need:
- Drywall sanding sponge or sanding pole
- Sanding screens or sanding sheets
- Sandpaper in 120-grit and 150-grit, or 220-grit for final touch-ups
- Dust mask or respirator
- Safety glasses
- Work light or bright lamp
- Vacuum with brush attachment
- Drop cloths or plastic sheeting
- Drywall knife for scraping high spots
- Shop vacuum or microfiber cloth for cleanup
For most walls, a medium grit such as 120 is the best place to start. If the surface is already close to flat, you may only need 150 grit or a sanding sponge. A finer grit is better for the final pass, but do not start too fine or you will waste time removing material.
Choose the right sanding tool for the job
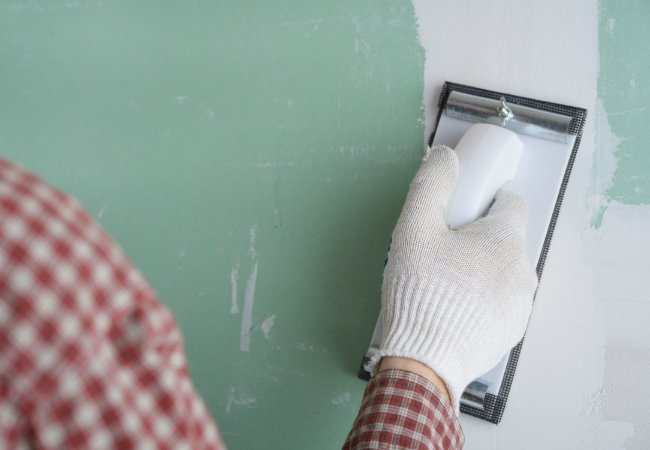
Different tools work better for different parts of the wall. A sanding sponge is useful for corners and small areas. A sanding pole helps with large flat sections and high spots. A hand sander gives you more pressure control, but it can also leave uneven marks if you press too hard.
One detail many beginners miss is that tool shape matters almost as much as grit. A soft sanding sponge can follow curves and edges better than a flat block, while a pole sander can reach ceiling seams without a ladder for every stroke. Use the tool that matches the area, not just the one that feels easiest.
Prepare the room before sanding
Drywall sanding makes a lot of dust. Fine powder gets into vents, trim, outlets, and nearby rooms if you skip prep. A few minutes of setup can save hours of cleanup later.
- Remove furniture from the room if possible.
- Cover floors and large items with drop cloths.
- Seal doorways with plastic if the dust could spread to other rooms.
- Turn off HVAC vents or cover them to reduce dust movement.
- Remove outlet covers and switch plates.
- Set up a bright work light so shadows show the flaws.
Light is a major part of drywall sanding. A wall can look smooth in normal room light and still have ridges, pits, and gouges. A bright side light will show these defects much better. Hold the light low and aim it across the wall, not straight at it. This creates shadows that reveal high and low spots.
Another useful habit is to wear a respirator even for small jobs. Drywall dust is very fine and easy to breathe in. A simple dust mask helps, but a better respirator gives stronger protection, especially if you are sanding a full room.
Inspect the wall before you sand
Do not start sanding blindly. First, look closely at the dried joint compound. You may only need to remove small ridges, not entire layers of mud. This saves time and keeps you from sanding too much.
Check for these common problem areas:
- Raised edges around taped seams
- Knife marks from the mudding process
- Hardened drips or lumps
- Holes, dents, or bubbles
- Overfilled corners
- Feathered edges that blend poorly into the wall
If you find heavy bumps, scrape them first with a drywall knife. Sanding down a tall ridge takes longer and can damage the paper face of the drywall. Scraping is faster and safer for high spots.
Important tip: if the compound is still soft or rubbery, wait longer. Sanding before it is fully dry can clog the paper, leave streaks, and pull material instead of smoothing it. Drywall mud should feel hard and dry all the way through before sanding begins.
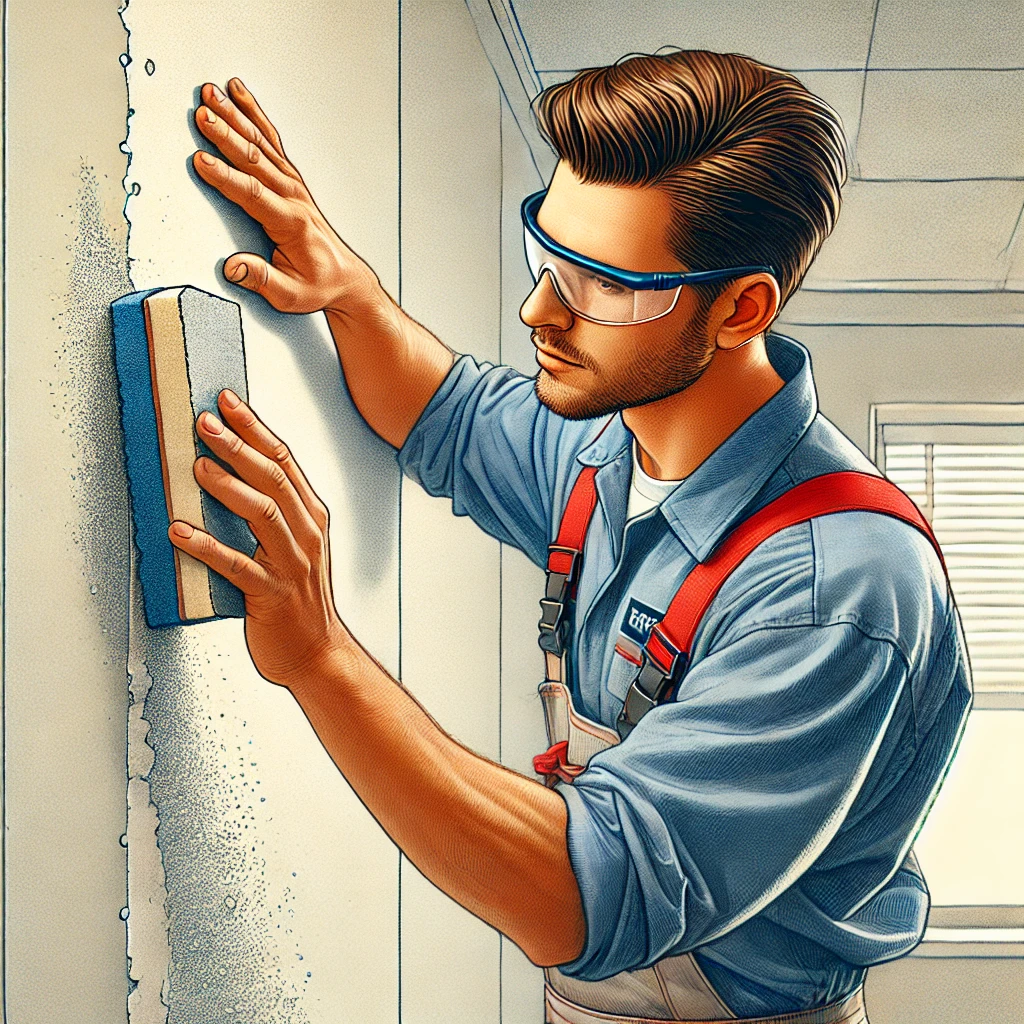
How to sand drywall step by step
Now that the room is ready and the wall is dry, you can start the main work. The goal is simple: smooth the compound without cutting into the drywall paper or creating flat spots around the repair.
Credit: bobvila.com
1. Start with the roughest spots first
Begin by sanding only the highest areas. Do not try to sand the whole wall aggressively at once. Focus on ridges, lines, and obvious flaws. Light pressure is usually enough. Let the sandpaper do the work.
Move in small circles or long gentle strokes, depending on the area. For seams, use light diagonal passes across the joint. This helps blend the compound into the wall instead of forming a trench down the middle.
2. Use a controlled, even motion
The biggest mistake beginners make is pressing too hard in one place. This can leave a dip in the compound or expose the paper on the drywall. Once the paper is damaged, repairs become harder because you may need to patch the area again.
Keep your motion steady and even. If you are using a pole sander, guide it with both hands and apply only moderate pressure. If you are using a sanding sponge, let your fingers control the pressure so you can feel changes in the surface.
3. Check your progress often
Stop every few minutes and look at the wall from the side. Use the work light to catch shadows. This helps you see whether the ridge is gone or whether you need more blending. Wipe or vacuum dust away before inspecting, because dust can hide small flaws.
A useful trick is to mark problem spots lightly with a pencil. That way, you do not keep sanding the wrong areas. The pencil mark will guide your attention without damaging the surface.
4. Move to a finer grit for smoothing
Once the rough shape is corrected, switch to a finer grit. This step removes smaller scratches and softens the sanding marks left by the first pass. For many walls, a move from 120 grit to 150 grit is enough. For final touch-ups, 220 grit can help create a smoother finish.
This is one of the most overlooked parts of how to sand drywall. Many people stop after the coarse pass, but coarse sanding marks can still show through primer if the light hits the wall at an angle. A quick finishing pass makes the wall look more polished.
5. Blend edges, not just the center
Drywall seams should fade gradually into the wall. If you only sand the middle, you may leave a visible edge around the repair. To avoid this, feather the outer area with light pressure and a wide motion.
Feathering means making the edge of the compound thinner as it blends into the drywall. The edge should not feel sharp when you run your hand over it. This is a small detail, but it makes a big difference after painting.
6. Clean the dust and inspect again
After sanding a section, remove dust with a vacuum or dry cloth. Then check the wall again under side light. Dust can hide defects, so this step matters more than many people think.
If you still see a ridge, scratch, or small pit, do not keep sanding forever. It may be better to apply a thin touch-up coat of joint compound, let it dry, and sand again. Trying to force every flaw out with sanding alone can damage the wall.
What grit should you use?
The best grit depends on the stage of the job and how rough the wall is. Starting too coarse can scratch the surface. Starting too fine can waste time and not remove enough material.
| Grit | Best use | What it does well |
|---|---|---|
| 100–120 | First pass on rough seams | Removes ridges and heavy spots quickly |
| 150 | General smoothing | Balances removal and finish quality |
| 180 | Light finish work | Helps reduce visible sanding marks |
| 220 | Final touch-ups | Leaves a softer surface before primer |
For most home projects, 120 grit and 150 grit are the most useful. If your compound is very smooth already, you may only need 180 or 220 for a final pass. The right choice depends on the wall, not on habit.
Non-obvious insight: using only very fine grit can create a false sense of success. The wall may feel smooth, but the high spots remain. Primer and paint often make those flaws more visible, not less. The best finish usually comes from a rough first pass followed by a lighter finishing pass.
How to avoid common sanding mistakes
Good drywall sanding is as much about avoiding damage as it is about making the surface smooth. Many finishing problems come from small mistakes that are easy to prevent.
Credit: chicagohandyman.net
Sanding too hard
Hard pressure can dig into the mud or cut through the paper face. Once the paper is exposed, it may fuzz up and absorb paint differently than the rest of the wall. Light pressure is safer and usually works better.
Using the wrong grit
Very coarse grit can leave deep scratches. Very fine grit may take too long and fail to flatten the area. Match the grit to the job. If you are unsure, start a little finer than you think and test a small spot first.
Ignoring lighting
Drywall flaws are easier to see with side lighting than with overhead light. If you skip this step, you may miss imperfections until after painting. Then the repair becomes much harder to fix.
Not scraping before sanding
Large bumps should be scraped down before sanding. If you try to sand them flat, you will waste effort and may leave a wide, damaged area.
Leaving dust on the wall
Dust can hide scratches, make inspection harder, and interfere with primer adhesion. Clean as you go. A quick vacuum pass is often enough between sanding stages.
Another mistake beginners often miss is overworking the same spot. If an area still looks rough after several passes, it may need another thin coat of compound. Sanding alone has limits.
How to sand corners, edges, and tight spaces
Corners need a softer touch than flat walls. These areas are easier to damage because the compound is often thinner and the angle is harder to control.
Use a sanding sponge for inside corners and around trim. Folded sandpaper can also work in small areas, but it is easier to create uneven pressure. For outside corners, sand carefully along the edge without rounding it too much.
In tight areas near ceiling lines, outlets, and trim, work slowly and keep the sanding motion short. It is better to make several light passes than one aggressive pass. If a corner has a thick buildup, scrape it first before sanding.
Helpful tip: use your fingertips as a guide. Run your hand lightly across the area after each pass. Your hand often feels ridges that your eyes miss. This simple check is one of the fastest ways to judge progress.
Dry sanding or wet sanding?
Most people use dry sanding for standard drywall finishing. It is fast, simple, and widely used for larger areas. Wet sanding uses a damp sponge instead of sandpaper and creates less dust, but it is slower and not ideal for every situation.
Dry sanding is usually the better choice when:
- You are finishing a large room
- You need to flatten seams and joints
- You want faster material removal
- You are comfortable managing dust
Wet sanding can be helpful when:
- You only need light smoothing
- You want less dust in a small area
- You are making final touch-ups near occupied spaces
For most people learning how to sand drywall, dry sanding is the main method to master first. Wet sanding is useful, but it does not replace good surface prep and careful inspection.
How to know when the wall is ready for primer
The wall is ready when it feels smooth to the touch, the seams blend naturally into the surface, and no obvious ridges show under side light. You do not need a mirror-like finish, but you do need an even surface that will look good after paint goes on.
Run your hand across the area in different directions. Then look at it from the side with a bright light. If you can still feel a bump, you will likely see it later. If the repair looks flat and the transitions are soft, you are close.
Primer will reveal small flaws, so this is your last chance to fix them easily. If you see pinholes, scratches, or low spots, patch them now with a thin coat of compound, let it dry, and sand again.
Cleanup after sanding
Cleaning up drywall dust matters almost as much as sanding itself. Fine dust can settle on trim, floors, tools, and electronics if you rush the cleanup.
- Vacuum the wall, floor, and nearby surfaces.
- Wipe trim and ledges with a dry or slightly damp cloth.
- Remove dust from outlets and window sills carefully.
- Check corners and baseboards for hidden powder.
- Fold drop cloths inward so dust stays contained.
Do not use too much water during cleanup on fresh drywall dust. A lightly damp cloth is fine for trim, but heavy moisture can turn dust into paste and spread it around. Vacuuming first is usually the safest choice.

Credit: cozpalace.com
Simple finishing tips for better results
These extra tips can make a big difference, especially if you are new to drywall work.
- Sand in good light and inspect from the side.
- Use light pressure and let the grit do the work.
- Scrape tall bumps before sanding.
- Feather the edges wide enough to blend the repair.
- Clean dust often so you can judge the surface clearly.
- Patch mistakes with a thin coat instead of over-sanding.
One more important point: do not chase perfection in every square inch. On a normal painted wall, the goal is a smooth, even finish that looks good in real lighting. Small invisible marks under extreme close-up inspection are not usually a problem. What matters is the overall appearance after primer and paint.
Final thoughts
Learning how to sand drywall is mostly about patience, light pressure, and careful checking. If you prepare the room, choose the right grit, and work in stages, you can turn rough joint compound into a clean surface that is ready for primer and paint.
The best results come from a simple process: scrape high spots, sand gently, inspect with good light, and fix flaws before moving on. Once you build this habit, drywall finishing becomes much easier and much less stressful.
FAQs
1. What is the best grit for sanding drywall?
For most jobs, start with 120 grit and finish with 150 or 220 grit. Use coarser grit only for rough, raised spots. Fine grit works well for final smoothing.
2. Can I sand drywall without making a lot of dust?
Yes, but some dust is normal with dry sanding. You can reduce it by using a sanding sponge, a vacuum sanding attachment, and good room protection. Wet sanding creates less dust, but it is slower.
3. How do I know if I sanded too much?
If you see the paper face of the drywall, fuzzy areas, or a shallow dip in the joint, you probably sanded too hard. Stop and patch the area with a thin coat of compound if needed.
4. Do I need to sand between coats of joint compound?
Light sanding between coats is often helpful. It removes ridges and high spots so the next coat goes on smoothly. You do not need aggressive sanding after every coat, only enough to level the surface.
5. Is wet sanding better than dry sanding for drywall?
Wet sanding makes less dust, but it is not always better. Dry sanding is faster and better for shaping seams and larger repairs. Many people use dry sanding for the main work and wet sanding only for small touch-ups.
